Need to learn how to fix an underexposed photo in Lightroom? Learn why your photos are dark, how to brighten dark photos and how to fix issues with noise
Perviously, we talked about how to correct an overexposed image in Lightroom, where I showed you the quick and easy methods I use to recover information from overexposure. Today, we are going to visit the other side of the spectrum and talk about underexposure, and how to fix an underexposed photo in Lightroom. As a photographer, missing a great shot because of exposure mistakes is just frustrating. But often there are ways to fix it! I’ll be honest, some images may be too underexposed to be able to recover any detail. But not all of them. If you have a photo you thought was ruined, this tutorial will help you understand how to fix an underexposed photo in Lightroom.
Why Are My Pictures Dark?
It’s important to know why are your photos are coming out dark in the first place. Our goal is always to get as close to perfect with our images in camera. Understanding why your photos are underexposed, or dark, is important for preventing it next time. Incorrect exposure, incorrect use of flash or using the wrong metering mode can all cause dark photos.
Wrong exposure
Incorrect exposure might have been because the lighting changed without you compensating for it with your camera settings. Occasionally, we bump a wheel or touch a button that changes our settings as well and we don’t realize it. And sometimes you just get in a hurry or get distracted and flub your settings.
Incorrect flash settings
Using any flash can make your picture too dark. This can happen with your pop-up flash, an on-camera flash or an off-camera flash. First, your flash might not have fired. Or you might have your shutter speed set too fast for the flash. Most flashes have a maximum sync speed of 1/200 of a second. If your shutter speed is too high for the max sync-speed, it affects your image. You might have a black bar across your image or a very dark photo. The last possibility is that the flash might be set too low. An underpowered flash results in an underexposed subject and image.
If your subject is well lit but your background is too dark, the problem is your flash exposed for your subject but not the background. To fix this, you’ll need to change your settings to let more light into the camera and increase that ambient light. You can slow down your shutter, raise your ISO or open up your aperture. Just know that you may need to compensate with the flash in some way (turn down the power, increase the distance between it and your subject) or your subject will be overexposed.
Metering mode
Sometimes even if we set our exposure correctly, our image might still come out too dark because of the metering mode we’re using. Images with very dark darks or very bright brights can confuse the camera’s sensor and give us an incorrect reading. We discuss using your integrated light meter and metering modes in-depth here. But if you feel like you’ve set a correct exposure but your images are coming out either too light or too dark, you might consider evaluating your metering mode.
Why You Should Shoot in RAW
Before we go much further about how to fix an underexposed photo, keep in mind that by keeping an eye on your camera’s histogram, you can avoid completely missing your exposure. But I’m here to tell you, we ALL botch our settings and make exposure mistakes every now and then! Your best bet for being able to recover as much data as possible is going to be shooting in RAW format. You can learn more about shooting in RAW here.
RAW files contain significantly more data than JPEG files, which allows you to recover more of the details of your image in post-processing. There is no hard and fast “rule” about which one you should use (that link has great pros and cons listed for each one). But the truth is that you have a better chance of correcting an image if you shot it in RAW format. Be sure to weigh the pros and cons of shooting in RAW or JPEG, and make a decision based on what is best for you and your situation.
[ad id=’1′]
Is the image worth saving?
The first question I ask myself before I jump right into editing is, “Is this image worth saving?” You may have other properly exposed images from this session that you can use instead of the underexposed photo. Don’t waste your time editing and tweaking an image if it’s also blurry, the composition is poor or you have similar, better images you can use. And not every underexposed photo needs saved. If the dark and moody vibe adds to the story telling affect, leave it alone. After all, if it’s not broken, why fix it?
How do you fix a picture that is too dark?
There are a few key steps that I take when I am correcting an underexposed image in Lightroom.
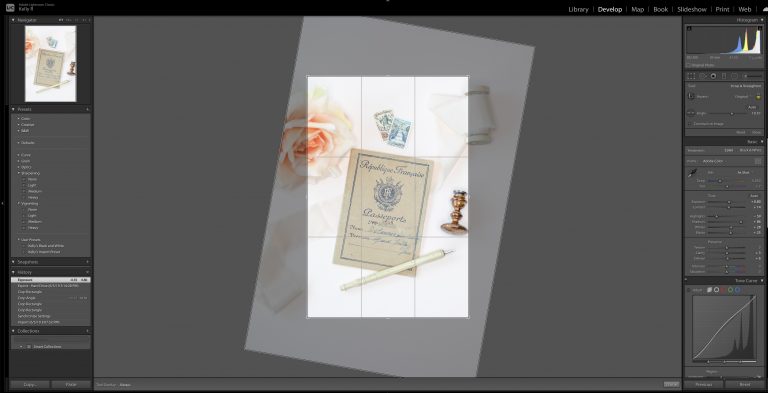
First, I check to see if I have any presets applied to the photo that might be affecting the exposure. Import presets, develop presets or even syncing settings from exisiting photos in your session might work on one image but make another image dark. If your image hasn’t had any settings changed, start in the Basic Panel.
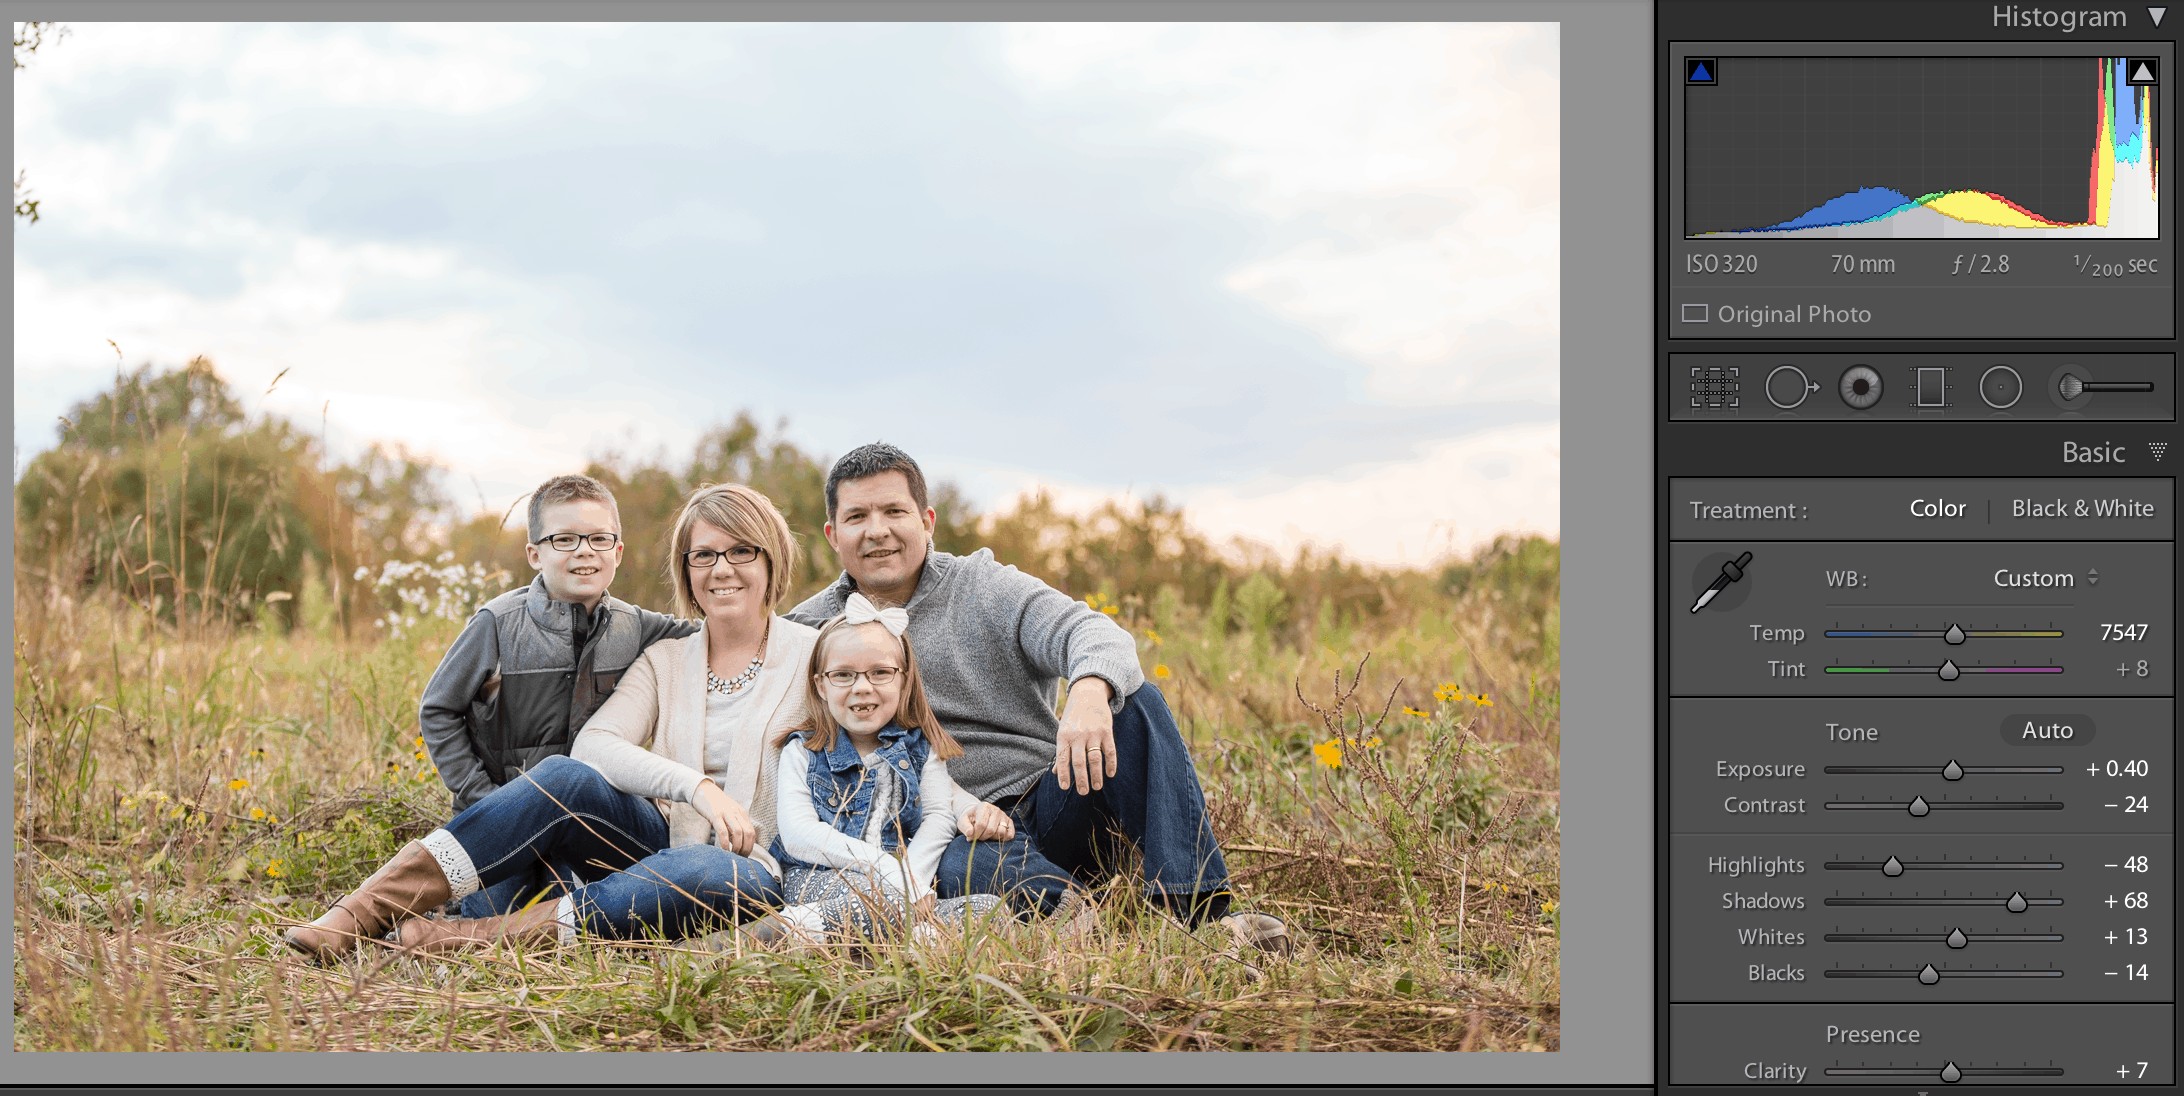
Using the Basic Panel in the Develop module, your primary focus will be on the Exposure slider for brightening your image, and possibly the Shadows slider. When I correct underexposed images, I work my way down the entire Basic Panel, depending on the needs of a particular image. But my initial process deals primarily with the Exposure and Shadows sliders.
You will find that the Exposure slider adjusts the overall brightness of your image. This slider is fairly sensitive to your adjustments, and small adjustments have a pretty significant impact. You can raise the exposure of your image by pulling this slider to the right.
The Shadows slider will affect the darker areas of an image. To bring out detail and raise the shadows in your photo, pull this slider to the right as well.
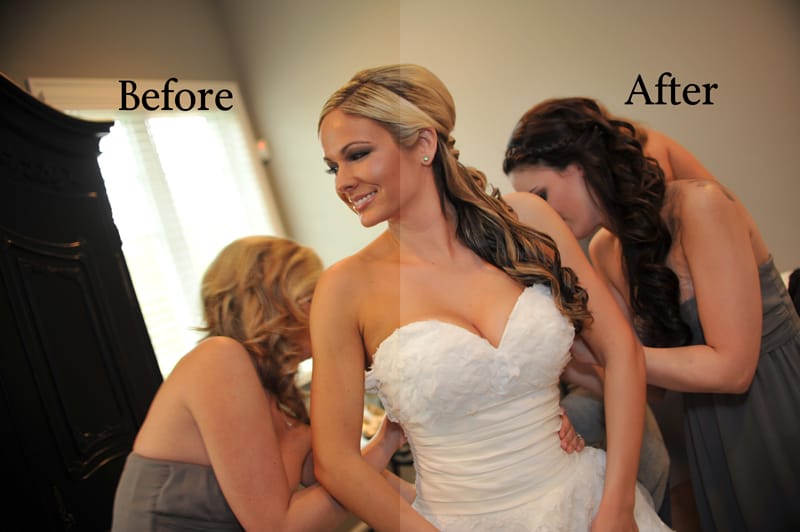
Each of these edits will vary depending on the amount of underexposure in the original photo. Below, you can see a few examples of my exposure correction and screenshots of the adjustments made in my Exposure and Shadows sliders, as well as the rest of the Basic Panel.


How do I brighten an image using gradient filters, radial filters or brushes in Lightroom?
Sometimes part of your image is great but another part is underexposed. If just adjusting exposure, highlights and shadows doesn’t fix the issue, try the other Lightroom tools. A gradient filter, for example, can be applied to brighten a dark foreground without overexposing the sky. Try using a radial filter or brush to brighten your subject without affecting the background. You can also use these tools and universal adjustments together to fix the image to your liking.
Dealing with Noise – How do I fix grainy photos in Lightroom?
When you are dealing with underexposed photos, a very common issue is noise, or grain. High ISOs or long exposures can cause issues with noise. Noise is also introduced into a photo by raising the exposure on an underexposed image. This is one reason why it’s so important to work hard to get your exposure right in camera. But sometimes we just make a mistake. The sun shifts behind the clouds without warning, or we underexpose for a certain artistic purpose. Fortunately, Lightroom has a tool to decrease the appearance of noise in your images: the Luminance slider.
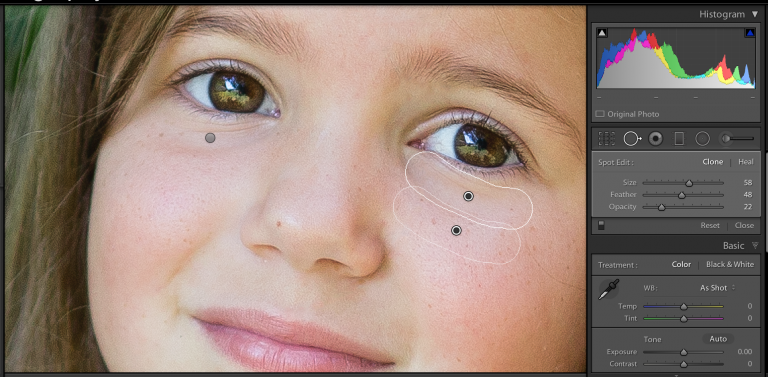
The Luminance slider is found on the Details panel. As you move it to the right, watch how the noise in the image is reduced. Here is a close-up comparison. The image on the left has no noise reduction using the Luminance slider, and the photo on the left has been adjusted by moving the slider to +35.

Be mindful of the details in your image when making adjustments with the Luminance slider. Too much can result in a loss of detail, making your image look unnaturally smooth and “plastic.”
Try the image in black and white
Converting an image to black and white can change the look of the photo so you aren’t bothered by the exposure or the noise. If you’re absolutely in love with the image but can’t completely fix it in color, try black and white.
While we always strive for good exposure in camera, we all know that there are occasionally those “oops” moments! Next time you miss a shot and have an underexposed image, know that there ARE steps you can take to help save it!
If you have wondered how to fix an underexposed photo and you’d like to watch as I do these exposure edits, you can follow along on this quick video!