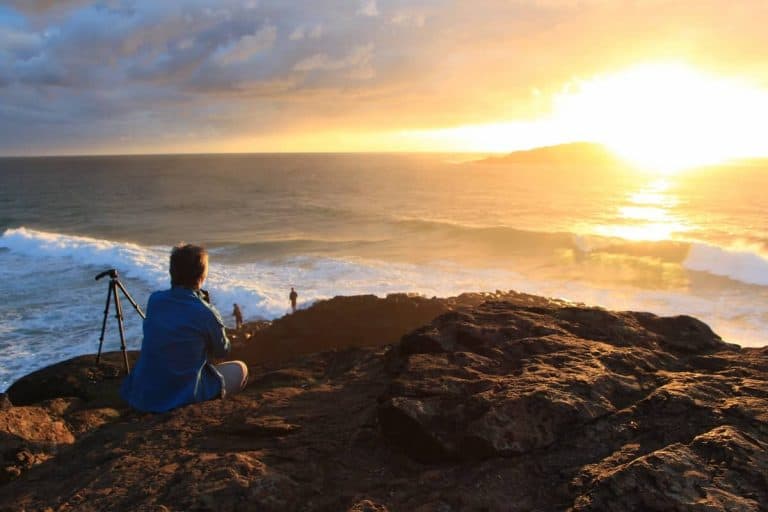
We chatted recently about how to master shooting wide open, and I wanted to follow up that post with more discussion on achieving a nice blurred background, or bokeh, in your photos. Who doesn’t love it? It’s that creamy background that really separates your subject and helps them jump off an image to catch your eye. Especially if you’re new to photography, you may be wondering how to get a blurred background in your photos. Most of the conversation around good background blur in an image revolves around shooting at a wide aperture, but there are times when shooting wide open just isn’t practical. Did you know that you do NOT have to shoot wide open to get amazing bokeh?!? Even a kit lens can blur the background if you know how to use it well! Here are three tricks that you can implement into your photography today to get this background in your photos, without having to shoot wide open!
Use a Longer Lens
The focal length of a lens plays a large role in the amount of background blur your image will have. Longer lenses, or telephoto lenses, are excellent for producing a very shallow depth of field and creating a lot of compression in the background. Here is an example of two images, one taken using a Sigma Art 50mm lens, and one taken with a Canon 135L. Both were taken at f/3.5. Notice the increased quality of the bokeh in the image taken at a longer focal length.
Every lens has a focal length which relates to how zoomed in your photos are. The shorter the focal length, the broader the depth of field regardless of the aperture. The longer the focal length, the narrower the depth of field at any particular aperture.
Depending on the gear, the aperture may change as you adjust the focal length. Some lenses can have a fixed aperture zoom even with a wide range of focal lengths.
The longer the focal length, the more zoomed-in your image will appear. Zooming in compresses the elements of a picture, making everything behind the subject more dramatic.
Opt for Telephoto or Kit Lens
While telephoto lens covers a range of focal lengths, they will create a blurred background even if you are further away from the subject. Hence, it’s better to use a kit lens over prime lens with a fixed focal length, or a wide-angle one that might not result in a shallow depth of field.
For instance, a 100 mm to 200 mm lens provides a lot of blur at a given aperture. Set the aperture to f/5.6 to evenly expose the picture. Increase the ISO and decrease the shutter speed until you can achieve a blurred background.

Distance From the Background
Pulling your subject away from the background will create more blur and bokeh in your image. The further your subject is from that background, the smoother the bokeh will be. In the example below, you can see how close the subject is to the background shrubs and trees in the first image. The greenery shows quite a bit of detail, and less blur. When the subject was pulled away from the background an additional 15-20 feet, you can see the background beginning to smooth out, and the light on the foliage becomes gorgeous bokeh that adds some great dimension to the photo.
Prime Lenses
Consider the distance between you and the background. For prime lenses like 35 mm and 50 mm with an aperture of at least f/1.8, put as much distance between the background and your subject.
If you are taking portrait shots where the subject and the background are distant to each other, a prime lens will be more out of focus, producing a blurry background as well.
Wide Angle Lenses
Generally speaking, wide-angle lenses are not ideal for a blurry background because they tend to have a deep depth of field.
When you have no other choice but to work with, for example, a 14mm wide-angle lens with you, you can put a distance between you and the background. Just make sure to focus close and that the camera is on the lowest f-stop setting.

[ad id =3]
Close to the Subject
How close you are to your subject also plays a role in the quality of bokeh you can achieve in your images. While you want to be far from your background, being close to your subject also amplifies the blur in your images. The three images below show a comparison of how distance from your subject influences your background blur. All three were shot at 135mm at f/3.5. You can see that the closer I moved to my subject, the more blurred the background became. Can you see what a difference this makes in the quality of the bokeh? When you move in closer to your subject, you can really compress that background and achieve great blur!

This is another comparison showing how distance from your subject can impact your background blur and compression. These images were taken with a Canon 85mm 1.8 lens.
Secure a Large Sensor
The sensor’s size plays a crucial role in determining how much background blur you can achieve at any given aperture and focal length setting.
Cameras with small sensors have a wide-angle of view and short focal lengths. Meanwhile, DSLR or mirrorless cameras with large sensors obtain longer focal lengths, and consequently, better background blur.
As the sensor size increases, the depth of field decreases for a given aperture because it will require you to use a longer focal length or get closer to the subject.
Choose a Smaller Aperture
Aperture, also known as the f-stop, is the hole within the lens that enables light to travel into the camera sensor. Adjusting the aperture makes the hole smaller or larger, resulting in less or more light into the camera.
Remember:
- Small f stop number = shutter opens a lot = wide aperture = more shallow depth of field
- Large f stop number = shutter opens a little = small aperture = broader depth of field
A smaller aperture is another way for you to ensure a blurred background. Even if you don’t shoot wide open, you can achieve a greater depth of field and a sharper background.
Mid to professional-grade lenses usually have fixed apertures. Hence, you can optimize a fixed aperture of f/2.8, even if the focal length ranges from 24 mm to 70 mm. Meanwhile, 18-55m lenses with variable apertures that start from f/3.5 can produce a better blur effect as you zoom in.
Optimize Depth of Field
The depth of field relates to the area surrounding the focal plane where the subject appears sharp. The shallower the depth of field, the blurrier the background. However, this would mean shooting wide open.
If you can’t shoot wide open, you may position yourself further away from the focus point, creating a softer and more blurred foreground and background. This is because only a small portion of the photo is in focus, and the rest is blurred out.
A shallow depth of field means only a small portion of the image is in focus. Even if you have a shallow depth of field, the foreground and the background will be out of focus.
Consider these settings:
- Subjects of different distances from the camera + aperture of f/2.8 = different amounts of depth of field
- The subject is very close to the camera + aperture of f/2.8 = background remains significantly more shallow
- Subject further away from the camera + aperture of f/2.8 = more focus on the background
Blur the Background Using Camera Settings
Select Macro Settings
Using macro settings, preselect a wide aperture and a fast shutter speed to create a background blur. For product photography, get close to and zoom in on your subject. Focus on the product to make the background blurry.
Macro also works if you are a food photographer because the magnification values are higher, enabling you to get closer to the subject. In this way, you get a better focusing distance to blur the subjects further back. Macro photos look better when shallow focus blurs the background elements.
When using macro settings, make sure there is ample light to prevent making unintended shadows. Try shooting anywhere between f/3.5 to f/5.6. As much as possible, use a tripod to keep the camera stabilized.
Use Aperture Priority Mode
Aperture Priority Mode is a semi-automatic shooting mode that enables photographers to select aperture while the camera automatically adjusts the shutter speed to get the correct exposure. In addition, you obtain control over the depth of field, not the camera.
Let’s say you want to pull off a portrait shot with a blurred backgrounds. This would mean focusing on the subject and separating it from the background.
If the subject is posing still, you can rely on Aperture Priority Mode to focus on the subject and blur the background by choosing the appropriate shutter speed. For portraits, set the aperture between f/1.4 and f/5.6 to get close-up features sharp with excellent background separation.
How to Create Bokeh and Blur Quality
The type of background also impacts how well you can blur the background. Bokeh, or a good quality blur, happens when the background’s light sections are rounded and softened.
For instance, taking a portrait shot with trees or foliage behind the subject will blur the background, while keeping the subject sharp and focused. As a result, the bokeh highlights and enhances the subject, while creating artistic, blurry lights on the background.
Applying with what we’ve explained earlier, creating a bokeh would also mean minding aperture and distance. Adjust the aperture accordingly and put a distance between you and the subject. You can also try zooming-in your lens to accentuate the effect.
Position Your Subject with Backlighting
Lenses generate beautiful geometric bokeh when it interacts with small, isolated spots of lights. However, this might not work if the light is too bright or the light source is too big. Therefore, you need to find bright spots using broken backlighting.
For example, place your model in front of a bush with the sunlight serving as the background. Since an object breaks the light source, the leaves turn the sunlight into smaller spots of light.
To ensure good bokeh, position your model at least a few feet in front of the light source. In effect, the background becomes even blurrier.
Use Phone Apps to Achieve Blurred Backgrounds
If you don’t have a professional camera, you can still take images with blurred backgrounds using a smartphone. One way is to use an iOS application called Manual, which lets you modify aperture, shutter speed, ISO, focus, exposure, and white balance.
Aside from that, since the iPhone 7, these models feature a Portrait Mode that guides you in adjusting the distance and depth as the camera’s lens focuses on the subject and blurs the background.
For Android users, you can download apps that will make your photos look like a DSLR took them. The most common apps are the After Focus, Blur Image, and Focus Effects.
Edit Images on Photoshop to Add Background Blur
Perhaps shooting with a smaller aperture retains a sharper background. Maybe you did achieve blurred backgrounds but you want to increase it a bit. In such cases, you can always edit your photos to add background blur.
There are several ways you can add blur backgrounds to an image using Adobe Photoshop:
- Use Unsharp Mask: This tool from Photoshop blurs details around the subject.
- Gaussian blur: Make a new layer on Photoshop and use this tool to apply a soft yet even blur through the background.
- Field blur: Choose what areas of a picture to blur by controlling the amount and type of blur.
- Simulated bokeh effect: Simulates the rounded quality of blurred highlights on dark background.

All three of these tips are excellent ways to really increase the quality of bokeh in your images, but the very best results will come when you combine all of these methods! In the image below, I combined all of the above tips for maximum effect, and the background is like pure silk!

Achieving the coveted background blur in your images is more than just shooting wide open. I hope these tips help you to add gorgeous bokeh to your images, even when it’s not practical to shoot wide open! Go give these tips a try and let us know your results! And if you’re wanting to learn more about depth of field in your images, you can read more here!
![Portrait Camera Settings: Getting Great Shots Consistently [2020 Update]](https://colesclassroom.com/wp-content/uploads/2018/01/Port1-1-of-3-768x440.jpg)