
How to Photograph Stars and the Night Sky?
Most people look up at the night sky and ponder alien life, the vastness of the universe or the relative smallness of their own existence. Photographers just want to know what settings to use to capture an amazing night photo.
Photographing the night sky can be a fun and challenging exercise for even the most skilled photographer. I love nocturnal photography for the sheer peacefulness. Often you’re alone on the landscape with only the wild things and a breeze as your background soundtrack.
However, taking great star photography requires some pre-planning and a basic understanding of cameras, lenses and settings. Here are the answers to some of the most frequently asked questions about how to photograph stars.
What Camera and Lens Do I Need?
I’m going to assume you’re an entry-level to intermediate photographer with at least a basic camera/lens setup along with a working knowledge of your device. also going to highlight a basic shot, not deep space astrophotography. That’s a discipline on another plane.
Choose cameras that handles noise well and a fast lens. Most modern DSLR and mirrorless cameras can handle night sky photography with ease. In general, lenses with a wider field of view work better for static star photos.
A wide-angle lens include more of the sky. A wide-angle lens will also help minimize movement of the stars to give you a crisp, clean look.
Telephoto lenses can give you a close up of a particular point in the sky but will magnify the movement of the stars requiring a faster shutter speed. Choose your widest, fastest lens for landscape photos or your fastest telephoto lens for close up dark sky images.
One other necessary piece of equipment is a tripod. Night sky photography requires long exposures which cannot be achieved by shooting handheld. It may be possible to prop your camera up another way to compose your scene, but tripods make it easier and safer for your gear. I also recommend having a remote for your shutter. This also eliminates camera shake and can let you fire your shutter without having to stand next to the camera.
In addition to my camera, lens, and tripod, I always pack a flashlight or headlamp, a coat with pockets and hand warmers. Even in summer. Pack a coat and hand warmers. If you’re venturing out in winter, pack some extra camera batteries as the cold can zap the life out of them more quickly than normal.
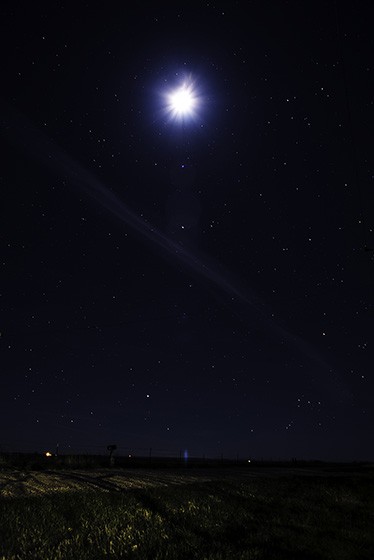
This photo is an example of using stars as points of light. The lines you see are created by planes or even satellites moving across the sky.
How to Photograph Stars Using the Right Exposure Values?
Once you have your lens, your camera on your tripod, and your night sky photography scene composed, it’s FINALLY time to talk about the actual settings for night sky photography.
Shooting in low light situations may put a significant separation between the night sky and the foreground. With the help of the right night sky photography settings, you can get the best results no matter the location you choose.
Shutter Speed
What is the best shutter speed for night sky photography? When you’re trying to photograph the stars as points of light, a great place to start is by using the 500/300 rule. If you own a full frame camera, divide 500 by the size of your lens to find the maximum shutter speed you can use to photograph the stars without getting any blur.
For a crop sensor camera, divide 300 by the size of your lens. So if you’re shooting with a focal length of 24mm, 500/24=20.8, or a 20-second exposure (300/24=12.5 for crop sensor). If you’re shooting a 50mm lens, 500/50=10, so use a 10-second exposure (300/50=6 for crop sensor.
When photographing star trails, start with a 30-second exposure and adjust from there. For a diagonal star trail, you might need an exposure time of 4 minutes. When singular, circular star trails are your goal, you might need a shutter speed anywhere from 32 minutes to 4 hours. Know that any exposure longer than 30 seconds on most cameras will require you to use the bulb setting and time your shots manually when you try to photograph the stars.
Aperture
Once you’ve set your shutter speed using the 500/300 rule for stars as points of light or something longer appropriate for star trails, adjust your aperture. Start by using the widest aperture possible for your focal length.
Most of the best night photography lenses have an f-stop of 1.4, 1.8 or 2.8, which can help for images with little to no foreground imagery. If you are still using the kit lens, that’s okay, too.
Set your aperture as wide as the focal length can go, even if that’s f/4. This is one area where I struggled at first because I thought if I wanted a scene with a greater depth of field I needed to use a smaller aperture like in daytime landscape photography. Not so. Start with your widest, fastest aperture and adjust from there if needed.
Not sure just what an f-stop is? Read more about it here!
ISO
Finally, we come to ISO. There is no “best” ISO for nocturnal photography. But for the greatest reduction in noise, you’ll want to set the ISO as low as possible when you’re photographing stars. With ISO, there’s a tradeoff though because to get tack sharp stars, we want to shoot your photo with faster shutter speed.
Thus, photographing in the dark requires balancing exposure time, ISO, shutter speed, and aperture to achieve the look we want. After you’ve set your exposure time using the 500 rule and selected a wide aperture, adjust your ISO to achieve the exposure time you want. Expect to use an ISO of 800-6400 even with a fast lens.
After you’ve adjusted your ISO, you’ll need to do a bit of experimenting to adjust your settings to your liking. For example, I shoot a full frame with a focal length of 24mm and an aperture of f/1.8.
Even in the absence of a foreground landscape element, I start with a shutter speed of 20 seconds, an aperture of 2.8 and ISO of 800. Then I adjust my settings to achieve the look I’m going for in my shot.
Learn more about ISO and how it can make or break your final image!
I can’t give you exact camera settings for nocturnal photography to achieve your perfect photo. There are just too many variables…location, the phase of the moon, the time of night, how much light, and personal preference. But these are good starting points.
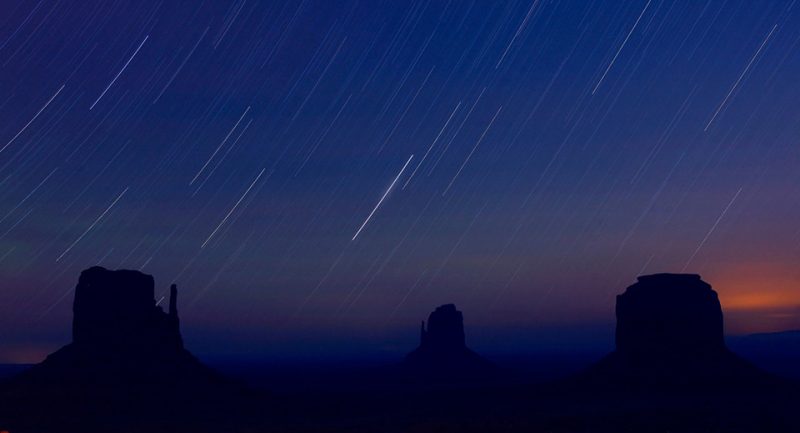
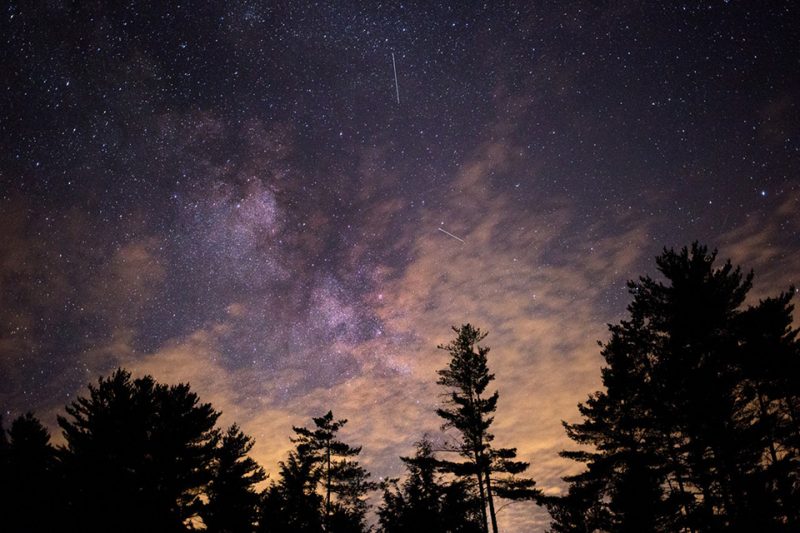
This photo is an example of creating partial star trails using a longer shutter speed.
How to Photograph Stars Using Other Settings
Aside from the exposure settings and shutter speed, there are a number of settings that can help you take the best nighttime photos and photograph the stars.
Focus
The easiest way I’ve found is to focus on the moon. Unless there’s a new moon, it’s usually big and bright enough that the auto-focus can focus on it.
Focus on the moon, then switch to manual focus and leave it alone. If there’s no moon or a new moon, you can set focus during the day for your scene and mark it with a bit of gaffers tape. Alternatively, I use a flashlight to illuminate an object in the distance and focus off it.
Cameras with live-view offer a fourth focusing method. Turn on live view, find the brightest star and zoom in on it. Use manual focus to lock in the star in the shot.
Camera Mode
Begin by putting your camera in manual mode. Auto mode won’t cut it when it comes to photographing the night sky because the device will want to turn on the flash and illuminate the scene. In this case, you’ll want to put your camera in manual mode since it gives you full control over the settings.
You can also use shutter priority mode, which is the semi-auto setting that enables you to control exposure partially. It allows you to pick the appropriate exposure time while some cameras modify the aperture in a shot. When struggling with blur or changing lighting conditions, this mode provides balanced aperture-shutter combinations.
Image Format
As with other types of photography, it would be best to shoot in RAW format, so you’ll have more control when editing an image. Besides, shooting in RAW lets your great photos keep the broadest possible range of colors.
When you opt for JPEG, this file format will compress the image, losing some details and making it hard for you to retrieve those elements.
Metering Mode
Try setting the metering mode to evaluative or matrix metering, so the cameras can take a series of readings in zones that cover the entire frame. In effect, the device calculates the overall average exposure value necessary to photograph stars or the dark sky.
Another option is to use central weighted metering, which focuses on the light concentrated in the frame’s center. If the light from the stars is in a much smaller part of the shot, you can choose the spot or partial metering to measure the exposure based on that reading.
Use one of them consistently until your eyes see how the metering mode measures the light.
Color Temperature
Color temperature serves as the overall hue of a photo. It has a scale that ranges from very yellow tones to very blue hues depending on shooting conditions. Most cameras measure these using the Kelvin scale.
Since cameras see subjects like different colors depending on the lighting, you can correct this by setting the right color temperature. When shooting in moonlight, start around 4000-4200 K to focus on the stars better.
White Balance
White balance refers to the coloration of an image. The right white balance should show its original color as if the light source isn’t affecting it. You need to deal with light when it comes to learning how to photograph stars or other astronomical objects.
While some cameras might initially pick Auto mode, you can still try other modes to get better results. For example, the Daylight setting is suitable when there’s light from the stars and the moon.
If you’re in a location with incandescent lights or too much light pollution, you have to handle mixed lighting and color temperatures. Light pollution or any other man-made lights can wash away light coming from the night sky, so you might want to go with Tungsten to avoid any light pollution. Regularly monitor how the shot looks, so you can change the white balance whenever you take a photo.
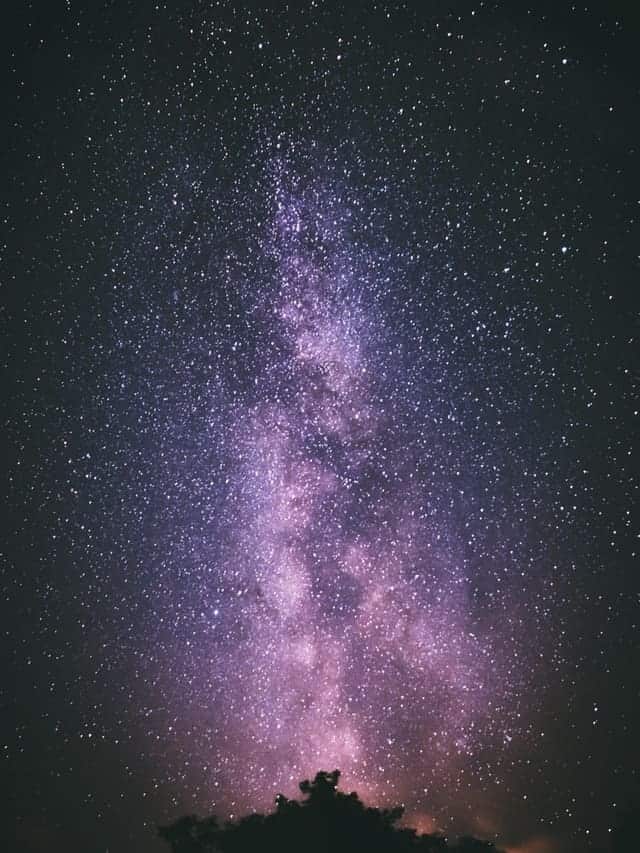
Light pollution is caused by too much light in populated and industrialized areas of the world. Light pollution prevents us from really appreciating the night sky and seeing the stars or even the Milky Way.
LCD Brightness
Turn the brightness of your LCD down to its lowest level to preserve nighttime vision. However, be careful as this may affect how you adjust exposure values on your photo.
When changing the brightness from its original setting, consult the histogram to check the exposure on the image, then turn on highlight and shadow blinkies in the image preview.
In-Camera Noise Reduction
Some cameras are equipped with visual distortion reduction image features in general:
- Turn ON long exposure noise reduction for single exposure star trails. Turn it OFF for stacked star trails.
- Turn OFF high ISO noise reduction. This feature only works on JPG, not RAW image files, and photo editing software on the computer does a better job of reducing high ISO noise than the software does.
- Turn OFF vibration reduction (also called image stabilization or vibration compensation). Otherwise, your device perceives its own movement as shake and tries to compensate for it, wrecking your show.
Be Creative
Once you understand the basic settings on how to photograph stars or dark sky, you will only be limited by your imagination (or tolerance for sleep deprivation).
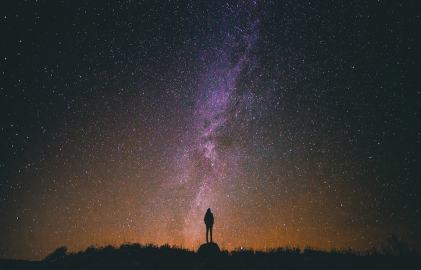
- Get creative by introducing human or animal silhouettes into the photo.
- Experiment with light painting to paint objects.
- Incorporate urban landscapes into your image or photo to present a compelling contrast of subject.
- Use a combination of long exposure and flash to create stunning portraits.
- Take photos of the northern lights instead of stars.
- Make use of your remote, tripod and flashlight to create light trails.
The opportunities are almost as endless as the stars in the night sky.
Conclusion
Remember these basic settings as a place to start, always let someone know where you’re going and when you’ll be back and dress warmly. With a little practice and patience, you’ll soon be over the moon about your images.