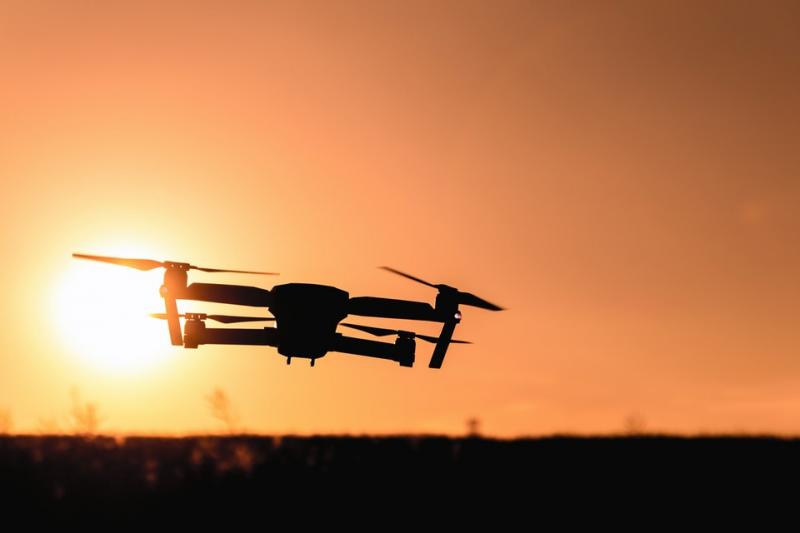
Unmanned air vehicles known as drones first appeared for military use over a century ago. Since then, the use of drones has captured the attention of commercial markets like real estate, construction, search and rescue, law enforcement, agriculture, media, and others.
Aerial Drone Photography Tips: Getting Started
- What Drone Is Right for Me?
- What’s in a Drone?
- What to Look for in a Drone
- Drones Are Not Created Equal
- Drone Cameras
- Drone Camera Settings
- Shooting Modes
- Drone Accessories
- How Much Money Are We Talking?
- Flying Your Drone
- Capturing Unforgettable Photography
- Composition and Framing
- Drone Photography Shots and Angles
- The Law: Know Before You Go
- Prepare for Lift-Off
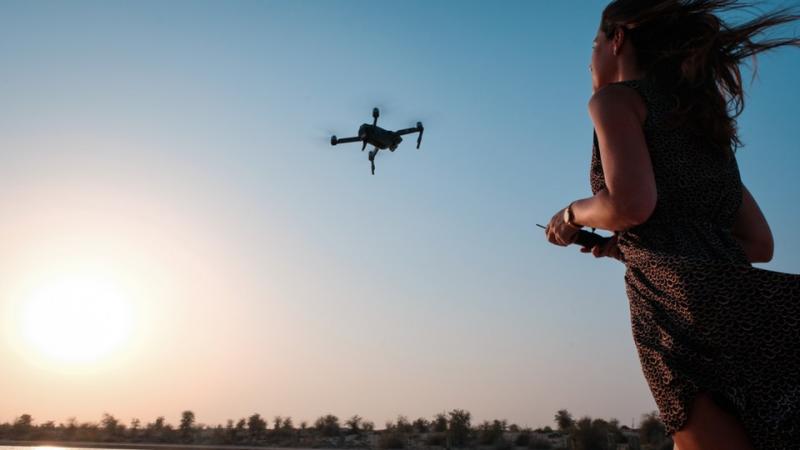
Professionals and hobbyists alike are turning to drones to take their aerial photography and video to a higher level (no pun intended). Although drones can come with a steep price and learning curve, the unique photography produced is worth its height in gold.
Entering the drone realm is an exciting decision! There is a lot of information to take in before you take off for the first time.
In this article we will explore drone basics, how to find a drone that suits you, understanding your drone, setting yourself up with the right gear and accessories, and getting your photos off the ground!
What Drone is Right for Me?
Before purchasing a drone, it’s important to think about the ways you want to use it.
Are you a recreational flyer who wants to see the world from a new perspective? Are you a beginner photographer hoping to try a new technique? Or maybe you’re a freelance photographer and want a drone for estate photography or wedding photos.
Figuring out the purpose of your model will determine the must-have features and price points for your needs. In this article, we will look at drones targeted at amateur and professional photographers.
What’s in a Drone?
Drones are built with a variety of different features. Aside from mechanics like props, motors, batteries, and landing gear, drones are equipped with state-of-the-art technology that can weigh less than a pound.
High tech GPS, 3D mapping sensors, collision avoidance sensors, gimbals, and flight stabilizers are just a few of the advanced technologies found on modern day drones.
These features separate high-end drones from entry-level models and affect the quality of your drone footage and photography. Finding the right balance of features and quality is the first step in choosing a drone.
What to Look for in a Drone
Before we look at models, it’s important to consider the available drone technology that makes a photographer’s life easier.
Compass
The compass contains an inertial measurement unit that lets you know where the device is at all times. It provides information about direction and speed. As a result, you can identify whether the drone is hovering correctly or flying erratically.
GPS
Drones with GPS that can auto-return and land will save you hours of searching for a lost or crashed drone. Some drones will return to a home point once the battery drops below a certain point.
Tracking Mode
Drones with tracking mode allow the user to lock the camera onto a person or object and some models can even fly hands-free. The drone will follow the subject while using sensors to avoid obstacles along the way.
Hovering & Orbit
The ability to hover and orbit a subject is a great feature, especially for photographers. These drones offer a convenient way to capture amazing video and images.
These features turn piloting a breeze while taking stunning aerial photography. Both beginners and professionals can benefit from these user-friendly settings. Now that you’ve considered what additional technology to look for in a drone, it’s time to find the right camera.
Gimbal
When you calibrate the gimbal correctly, the control becomes leveled and stabilized. The gimbal keeps the camera at the same angle, regardless of the drone’s movements.
Drones Are Not Created Equal
When it comes to drone equipment, you will find that not all drones are created equal. Drones boast a variety of features, sizes, and options. Some drones don’t have cameras at all but are designed to mount a GoPro or similar device.
If you already own a GoPro and don’t need a camera built-in to your drone, your price point will be slightly lower. Drones with built-in cameras require an advanced technology and tend to be more expensive. There are plenty of drones that cost under $100, but the quality is poor or missing altogether.
If you are searching for a drone with a good built-in camera, there are some features worth considering. Models with rotating gimbals can cost more but add serious value to your photos.
This pivoting mount rotates on the x, y, and z-axis to provide stabilization. Especially useful for film, a gimbal keeps your photos steady and vibration-free during flight.
Drone Cameras
Understanding the difference in drone cameras can help you narrow your search, and you may realize that a mid-range device will suit your purposes just fine.
From 5MP to 20MP, drone cameras come in all shapes and sizes. Depending on your photography needs, you may find that 12MP is enough to produce those high-quality aerial photos (the iPhone 8+ has a 12MP camera).
Some cameras boast a video resolution of 4k, but most provide 1080p. While 4k has four times as many pixels as 1080p, many professionals argue that 1080p is plenty for achieving quality results. If Ultra High Definition ranks high on your needs in a drone, go with 4k video resolution. For the rest, 1080p is still High Definition and will provide quality footage.
Drone cameras with adjustable ISO, aperture, and shutter speed can make all the difference in quality and customization. A setting to reduce motion blur will keep photographs crisp and stunning while your camera is in flight. Understanding and customizing your settings before taking off removes the need to make adjustments while the drone is in the air.
Once you’ve decided on the right option for you, it’s time to find the gear to complement it.
Drone Camera Settings
Before letting the device take off, make sure to check the following settings so that you can make the most out of every shooting session.
Image Considerations
The same shooting technology that lets you capture still images and high-resolution videos on your smartphone makes installing lightweight cameras on drones possible.
Drone cameras record clips at varying resolutions, with 720p, 1080p HD, and 4K Ultra HD being the most common.
When it comes to image capture rate, some devices can handle shooting 60 frames per second, while others can only manage 30 frames per second. If you are shooting clips for slow-motion playback, you might want to consider more frames per second to retain shooting quality.
File Format
JPEG format generates quality images with small file sizes. Meanwhile, RAW files contain all of the unprocessed data from the camera sensor, providing you more options when post-processing.
Hence, it would be best if shooting using the JPEG+RAW setting. However, new models have built-in RAW formats while the cheapest and older ones may only shooting in JPEG.
Color and Exposure
DJI GO is an app where you can manage color and exposure settings. Since it’s compatible with cameras like the Phantom 3 Series and OSMO Series, you can adjust various color styles and profiles to add contrast and saturation to your images.
There are different color profiles available. The most popular profiles include Normal, TrueColor, B&W, Cool, Film, Art, D-Log, and D-Cinelike. Selecting one means there could be changes in the highlights, shadows, and saturation.
When it comes to exposure, it’s better to use automatic settings. Letting the camera manage the exposure ensures you can expose the subject properly.
White Balance
Setting the white balance on auto enables the camera to adjust a photo’s color temperature automatically.
If you prefer manual white balance, you need to understand that higher numbers, like 10,000, represent warmer colors or temperatures. On the other hand, lower numbers equate to cooler tones.
This is why you need to pay attention to temperatures, especially if you are shooting outdoors. Like in handheld cameras, it’s best to set the white balance to neutral, so it will be easier for you to adjust the temperature if necessary.
HDR
The High Dynamic Range refers to the difference between a photo’s darkest shadow and lightest highlight. Setting the camera to HDR allows you to capture bracketed images and merge them into one HDR picture every time you click the shutter.
In certain clips, you can’t avoid shadows or blown-out highlights. One solution is by taking several images at various exposures and compositing them together to make a single, evenly exposed picture.
Shooting Modes
Shutter Speed
Shutter speed impacts image clarity. When there’s no strong wind to fight against, new drones can manage longer exposures or several seconds.
Some drones have limited apertures ranging from f/2.8 and f/11. Thus, you need to have a faster shutter speed to block too much light. A good aperture and ISO are pointless if you are using slow shutter speeds.
The best way to determine the shutter speed is by doubling the focal length of the lens. For example, if the lens equates to 24 mm, avoid shooting less than 1/50th of a second unless you are operating in tripod mode.
Aperture
Old drones had a fixed f/stop of 2.8, which limits your depth of field while allowing too much light to come through. Fortunately, new models have variable apertures, with some even hitting f/11.
Some cameras offer the option to shoot in Aperture Priority mode. If this isn’t available, prioritize using aperture as a tool of exposure. This means the goal is to hit f/5.6 whenever possible, since you can do image sharpening during post-processing.
ISO
Managing ISO takes a bit of experimentation because drone sensors tend to strain beyond 400. Although typically, you should only boost ISO beyond 200 if the shutter speed and aperture are not enough. Go beyond 400, and you’ll likely see noise in your images.
Drone Accessories
Most drones offer a magical experience all by themselves. They have many smart features to capture wonderful imagery from a variety of perspectives. You could easily work with a stock drone and produce quality work, but there are ways to capitalize on your new investment. Adding a few simple accessories will improve your camera quality, drone flying capabilities, and drone protection.
Filters
Camera filters aren’t just for Snapchat. Investing in some drone filters will bring your photography from good to great! Filters are an affordable way to customize your images. These can be especially helpful with varying landscapes and water photos.
Other filters like ND4, ND8, ND16, or ND32 change the amount of light reaching the camera, allowing for greater freedom in your images. You can find kits with multiple lenses for under $20, which are a very worthwhile investment for both beginners and professionals.
If you are struggling to achieve your desired shot with limited aperture and shutter speed options, you can buy filters to restrict the amount of light that goes into the camera sensor.
- Neutral Density Filters: ND is the most useful filter for people who want to create motion and take long exposures. If your device has a fixed aperture of 2.8, you can use an ND filter to filter light.
- Polarizing Filters: This type of filter enhances the tones and contrast of images. If you need to decrease the glare of light off a reflective surface, you must rotate the filter correctly to match the glare in a scene. Otherwise, you’ll end up boosting the glare.
- UV Filters: A majority of drones contain a single, built-in lens, which means you need to protect it. Instead of spending money on replacing damaged lenses, it’s better to use UV filters to protect camera lenses from elements like dust, moisture, and insects.
Remote Control
Another useful tool is a handheld remote. Most drones can be controlled with an app on your phone. However, a remote makes flying a drone easier so you can focus on taking those breathtaking photos. Most models don’t come with a remote, but it is well worth the investment.
Spare Gear
Having an extra set of propellers on hand will save you from missing out if you crash or lose any pieces. This goes along with batteries as well. Drones can fly on one charge from 7-45 minutes depending on size and model. Having spare batteries will keep you airborne for longer.
Protective Gear
Make sure you have a decent storage bag for your drone. Protecting it while it’s on the ground is just as important as keeping it safe in the air. Propeller guards, a snap-on camera and gimbal cover, and protective case are all worthwhile investments for your drone.
How Much Money Are We Talking?
If you are prepared to take it seriously, you can expect to spend at least a few hundred dollars on a small device and related equipment. Prices are dropping as the market expands, but they are still expensive.
One of the smallest drones on the market with an HD camera is the DJI Spark. With a 16-minute flight time, this drone is smaller than a smartphone and boasts a 12MP camera with 1080p video resolution. It costs about $400 with no added accessories.
The Spark’s big brother, the DJI Phantom 3, can fly for 25 minutes on a single charge, has a 4k camera, and costs upwards of $600. Some drones on the civilian market are well over $10,000! A high-end commercial drone camera will cost even more. Price ultimately comes down to the size of your drone, additional features, and the image quality of your camera.
Flying Your Drone
Now that you’ve found the features you like, a camera that suits your needs, and all the accessories to make life easier, it’s time to fly! Be sure to read the instruction manual first, but no amount of reading can prepare you for the excitement of taking off for the first time.
Make sure your first few flights are in an open space free of obstacles to avoid unnecessary crashes.
Instructional videos found online will help streamline the process of using the many features your drone camera offers. Practice as much as possible! Before landing your first photography gig, get as many flying hours under your belt as possible.
You must know how to use your gear, switch features while in flight, and totally manage your drone before you can capture the perfect shot.
Check the weather forecast before you take flight. Knowing your drones limit in windy conditions can put your mind at ease when unpredicted gusts present themselves. Rain can permanently damage your drone, though waterproof models are on the rise (with price tags to match).
You can never be over-prepared when it comes to professional drone photography. There is much that needs to happen before you take your first shot! Having the right gear, practicing, and planning for weather can make all the difference in the quality of your photography.
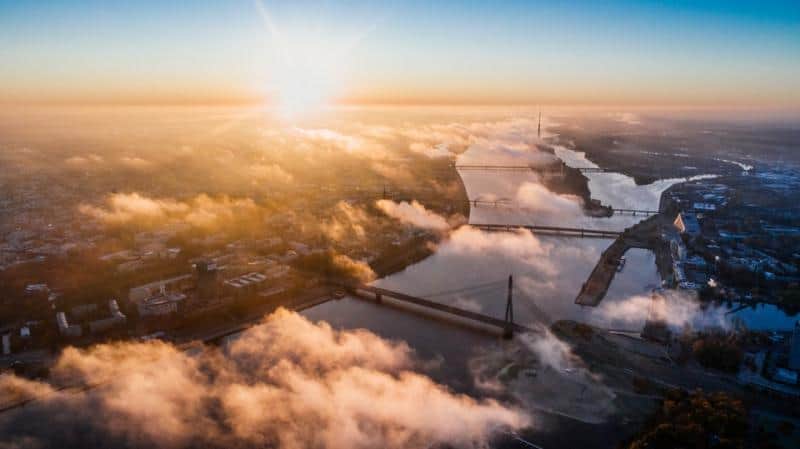
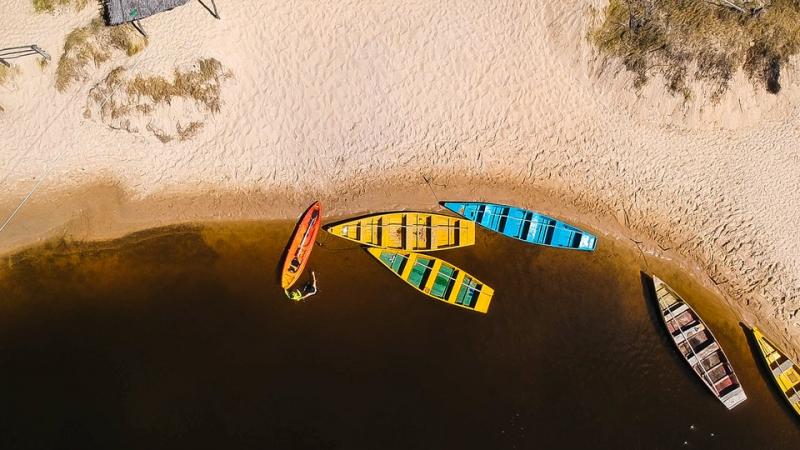
Capturing Unforgettable Photography
The unique vantage point provided by drones has gained particular attention in the real estate and wedding markets. Buying and selling homes is easier with aerial images of the property. Another effective technique is to produce creative fly-throughs of the interior.
Some drone photographers charge a few hundred to a few thousand dollars per session to capture these quality shots. This price reflects the cost of the equipment used, as well as the enormous value provided to estate agents.
Weddings are another industry turning to drones for stunning photos. Changing your vantage point is a great way to frame the bride and groom. Standing out against a vast landscape, your drone photos will be unsurpassed by any shot taken from the land.
It’s hard to put a price on the services of a skilled photographer who has learned to be a drone pilot. Likewise, experienced drone operators can become photographers by understanding basic techniques such as the rule of threes and photography composition. There is plenty of money to be made if you can do both.
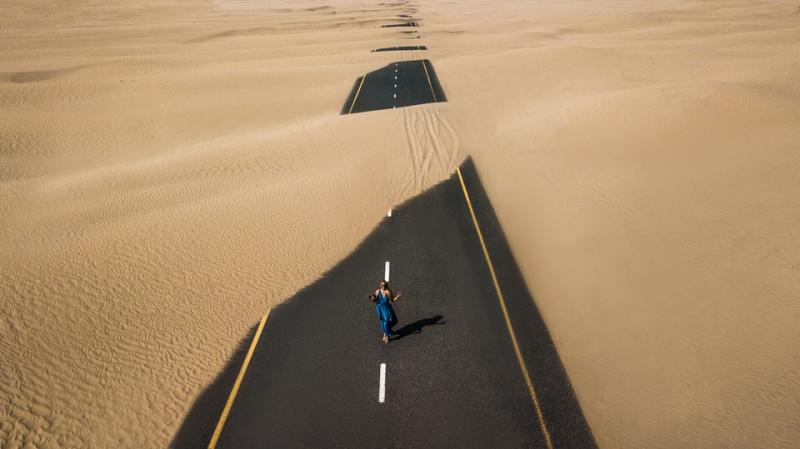
Composition and Framing
Framing depends on your preferences and creativity, yet it will surely help you shoot better images. Here are tips on how you can explore various compositions when flying a drone.
Bird’s Eye View
A majority of new models include a gimbal that sits on a drone’s underside to hold the camera. With the gimbal, you can shoot images from the top without worrying about intentional and unintentional movements. Every change in perspective would still capture a bird’s eye view.
Rule of Thirds
The rule of thirds applies to all kinds of photography. Some people would frame images with a 50/50 composition. For instance, half of the picture is showing water, while the other half is showcasing sand.
When taking clips, it’s better if you will see the sky on one or two-thirds of the photo. Then the remaining part shows land. You can also experiment by placing the most interesting part of the image in one of the four intersections.
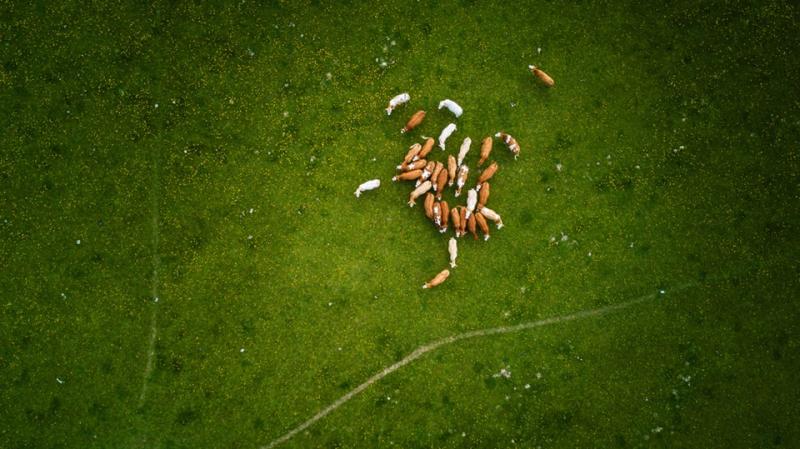
Patterns
Patterns are some of the best ways to showcase landscapes or scenery. The repetition exhibits an eye-pleasing, abstract image. For example, if you need images of tall buildings, include smaller elements such as people or animals to show a sense of scale.
Triangles
Have you ever tried looking at the horizon and saw lines making a triangle pattern? When it comes to photography, triangles are some of the most powerful patterns to locate.
The points of interest should make the illusion of a triangular shape. For instance, a lake in the middle of a forest, with trees leading the viewer’s eyes to a waterfall.
Low Horizon
Low horizon shots involve low-flying altitude to obtain a landscape image. Instead of the usual high-flying, a low angle allows you to get clearer details of the subject.
Remember that a drone acts as an extension of your arm. Even if you only need to get a direct, straight clip, the view is different when positioned on top.
Dynamic Tension
Instead of following paths or lines of the shape together, dynamic tension draws movement out of the picture because of shapes that lead outward. This is an excellent way to depict movement and energy.
One of the best examples is when you’re photographing from a higher angle, and you’re capturing ladders directing your eyes towards the edge of the photo. Manage the drone to locate multiple diagonal lines moving away from each other in various directions or paths that move in opposite directions.
Drone Shots and Angles
Shooting cinematic drone footage can be challenging at times. Here are five simple tips on how to capture beautiful images and videos using a drone:
The Point of Interest Shot
DJI drones feature a POI function, which is an automatic flight mode. This intelligent mode allows you to manage the drone to circle a subject slowly. You can also adjust the camera angle to retain the subject in the frame.
The Pull-Away Shot
This is one of the simplest angles you can make because it only requires your device to hover in front of the subject. Push on the left stick and pull back on the right stick to get the drone moving back and up. Practice slower movements to achieve smoother footages.
The Low-to-Ground Tilt-Up Shot
This shot is one of the best angles to reveal a subject. Control your device to hover it as close as you can to the ground. The closer you are, the faster the drone will appear flying.
Keep the camera facing downwards and set if flying forward. As you continue to control it forward, tilt the camera up to reveal the subject.
The Flyover Tilt-Down Shot
This is one of the greatest techniques to show off a landscape, location, or property by filming footage in reverse. Hover above the subject with the camera facing downwards. Cautiously fly backward while tilting up to keep the subject in the frame.
The Fly-Up Tilt-Down Shot
This involves adjusting the gimbal pitch speed so that you can control how fast the camera tilts up and down. Modifying the speed to around 10 would produce a slower yet cleaner tilt.
Position the device in front of the subject, gradually fly up, and tilt the gimbal downwards as you reach the top of the subject.
Tripod Mode
This is an intelligent flight mode available on the DJI Spark, DJI Phantom 4, Phantom 4 Pro, Phantom Pro 4 Advanced, and DJI Mavic Pro. The Tripod Mode lets you control the device by reducing the braking distance and limiting the maximum speed.
Since you obtain more control of the device, this mode allows the recording of smoother footage and cinematic clips. If you need to shoot indoors and avoid obstacles, the Tripod Mode is going to be a handy function.
What’s more, with devices like the Phantom 4 Pro or Mavic Pro you can create time-lapses by taking multiple images of a subject and scene and turn it into a GIF or a video. You can also produce a hyperlapse, which is a collection of images stitched together to show an extended amount of time in a much shorter interval.
The Law: Know Before You Go
Before you book your first gig as a drone photographer, it’s important to understand the laws and regulations regarding flight with these devices. The Federal Aviation Administration (FAA) requires that all drones weighing more than 0.55 lbs to be registered. It costs only $5 but can result in serious fines if you fail to do so.
Other restrictions include the “line of sight rule” which states that all drones must stay within eyeshot at all times. No-fly zones such as military bases and airports are also illegal to fly over and should be avoided at all costs.
Prepare for Lift-Off
Drones are packed with extremely smart technology that gives your photos a unique edge and selling point. Having a photo drone business can be just as entertaining as it is lucrative! Here’s a great link to learn more about selling and marketing your photography.
Drones are a fantastic way to view the world from another perspective. The film and photography captured in flight are simply breathtaking! Drones are worth their weight in gold when it comes to their practical and artistic uses.
People are paying top dollar for these services to capture weddings, properties, and more! With relatively low overhead, this lucrative industry has huge profit margins. The decision to fly may be your smartest investment yet.
There is so much to see from the skies, so what are you waiting for?