
The Basics Of Flash Photography: 3 Simple Tips
ETTL. Manual Mode. 1/8th firing power. Bouncing the light. Sound familiar yet? Yes my friends, all of these terms are related to the use of flash in photography. More specifically, the proper use of flash. This is one of those subjects that doesn’t get talked about a whole lot, but take it from me, we need to have that conversation. Why? Well, the use of flash can take your photo taking game to a whole new level if you know how, and when to use it. I’m not just talking about taking photos in a dark room and using your flash to get a bright image either. There is a lot we can do to give our photos that edge we are looking for just by understanding flash photography.
If you are reading this, I have some great news for you. Are you ready for it? Here it is: Flash Photography is easy to understand, and you can get started right after you read this article! That’s right. No more red eyed, washed out faces and unflattering shadows.
I’m going to level with you. You’re going to have to put in some work with this. As with anything in photography, it takes dedication and a little trial and error, to really get a handle on our skills. Flash Photography is no different. Just to make this easy for you, here are 3 quick tips in flash photography that will get you on your way to taking some awesome photos, and adding to that skill resume that separates you from the rest.
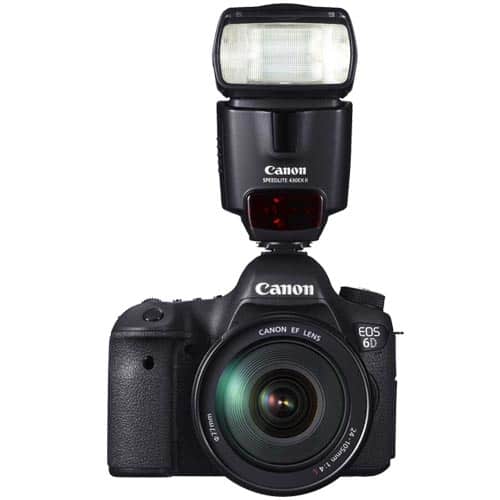
Tip #1. Invest in a Speedlight. Ditch the Pop Up Flash
Here’s something really important to keep in mind: The built in flash that pops up when you press that little lightning button on your camera body is NOT your friend to rely on. In fact, it’s one of the primary reasons that most photographers stray from understanding flash, because they are using a very limited, very harsh method of delivering that auxiliary lighting. The result? Overexposed images, red eyes that make people look possessed, and overall a very poor quality image. You need to look into a compatible Speedlight (or Speedlite in some places) for your camera. The reason I say this is because you need to have as much control on the power, angle and the direction that the flash will be delivered in to really get that photo you’re looking for, and you just aren’t going to get that with the built in pop up flash. The good news about this, is that there is a wide variety of options that you can invest in for a Speedlight.
What is a Speedlight
A Speedlight, is a type of strobe light (flash) that can connect directly to your camera. You can do this manually by physically attaching the strobe to the top of the camera body, or you can use it in an “Off Camera Flash” capability or slave mode, also known as OCF. It is important to note that while most camera’s now days do have the option to set up a wireless connection with your Speedlight built right in to the camera, it may in some cases be necessary to use a receiver, depending on the camera system that you have. Click here if you are thinking about getting a handle on Off Camera Flash Photography?
[ad id=’5′]
Tip #2. Get to Know Your New Friend
Your handy new flash gun has a few settings that you will want to get well acquainted with so that you can determine what you need to do in any given scenario where you are using flash. Let’s keep this one simple so you can get a grasp of how a speedlight works
ETTL and Manual Mode
Let’s just take a moment to understand what these terms mean. “ETTL” or “TTL” for some systems, means Evaluative Through The Lens. What this mode does, is read the scene through the lens with your camera settings to automatically adjust firing power. This mode shares the light sensors in the viewfinder to determine the intensity of the main flash needed for correct exposure. I love the ETTL mode because it is one less thing that you have to worry about when you are out on a shoot. Something to keep in mind however, is that this mode can often burn through battery life a lot quicker, especially if you are firing with flash consistently. I recommend a battery pack, or high end lithium disposables.
In Manual Mode, you have full control on how much firing power your speedlight will give off. I often choose this mode and keep my firing power between 1/4 and 1/8th of the full flash power. Manual mode is great because it forces you to take control of the scene and your shoot to get the shot that you want. Keep in mind that you will have to be conscious of the environment you are shooting in and adjust your flash power accordingly if need be.
Tip #3. Don’t Be Afraid to Get Creative and Practice, Practice, Practice!
Having control over your lighting sets you apart and makes your photo look pro. The great thing about having a speedlight, is that you can adjust the angle and direction of where your flash will go off, essentially changing how your subject is illuminated. It takes some work, but with some patience and practice you can develop the skill of manipulating your light to create and interesting and amazing images. Try this to start out: have your speedlight pointing in the ‘up’ direction. Before you rule me out as crazy, take a look at some examples just by using this method.


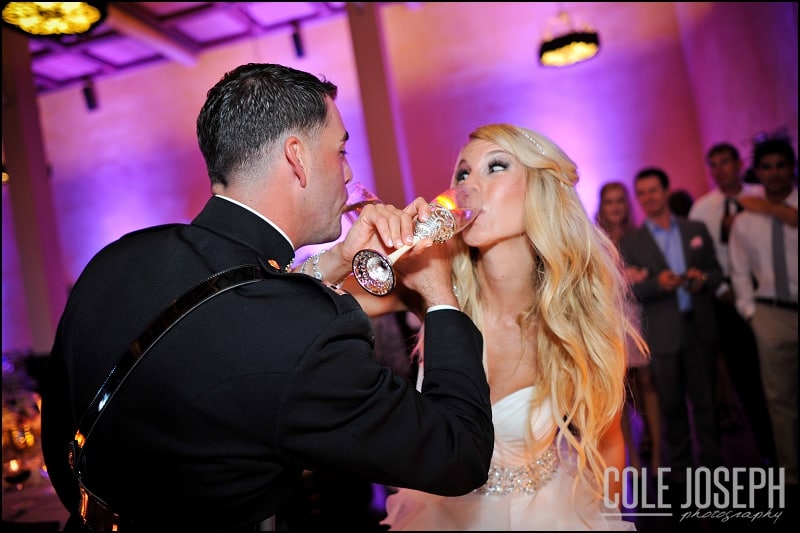
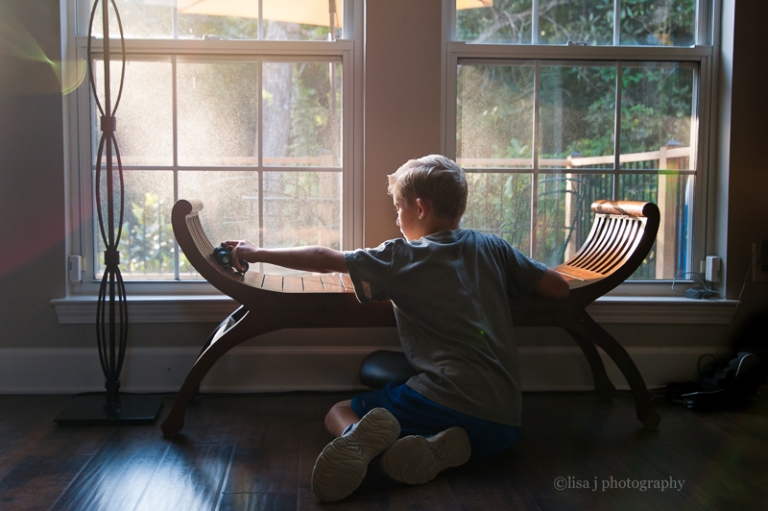
All of these images were taken with the speedlight pointing up. The light then has a chance of ‘showering’ the subject, giving you a little more of a softer light to work with instead of harsh unflattering light, by bouncing off another area of the room.
The first two photos were taken in dark indoor venues limited by house lamps. The use of a speedlight was a major advantage in giving off a dramatic look, and gave the images a clean and well lit look.
The third photo was taken in the clients home and was backlit for this shot. In this case, the pointing up with the flash bounced the light off the ceiling and onto the subject. You can see that there are no unflattering shadows created by harsh lighting, just a nice crisp image.
So there you have it! It takes some tweaking and playing around with, but trust me, once you got it, you will love how your photos turn out.
See you next time.
Jay