
Stay safe and wow your clients with high quality pictures of horses
Few animals capture the hearts and imagination of the public like the horse. And it’s no wonder. A horse is a big, magnificent beast full of character, grace and love.
Whether you want to offer high-end portraits or action pictures, understanding the unique needs and characteristics of photographing horses is crucial for pulling off an equine photo session.
What is Horse or Equine Photography?
Horse or Equine photography is a very broad term describing any photography involving a horse. It can include but is not limited to specialties like:
- A photo of human clients with their horses when the human/horse bond is part of the story. This could include family images, senior images or personal branding images.
- A horse photo is where the horse itself is the subject. Clients might want images of their horse for sentimental reasons or because they are part of their business.
- Volume images featuring horseback riding groups such as a rodeo team, show team or drill team.
- Event photography of horse based events. This includes fairs, festivals, shows, rodeos, and horse racing.
- Product photography featuring horse-related products.
- Equine portraits of domestic or wild horses to sell as prints.
As you can tell, there are a lot of different opportunities for you to combine photography skills with a love of horses.
[ad id=’2′]
Types of Equine Photography
Equine photography is a broad niche, and knowing the different kinds of images you can take can help you prepare for a photo session.
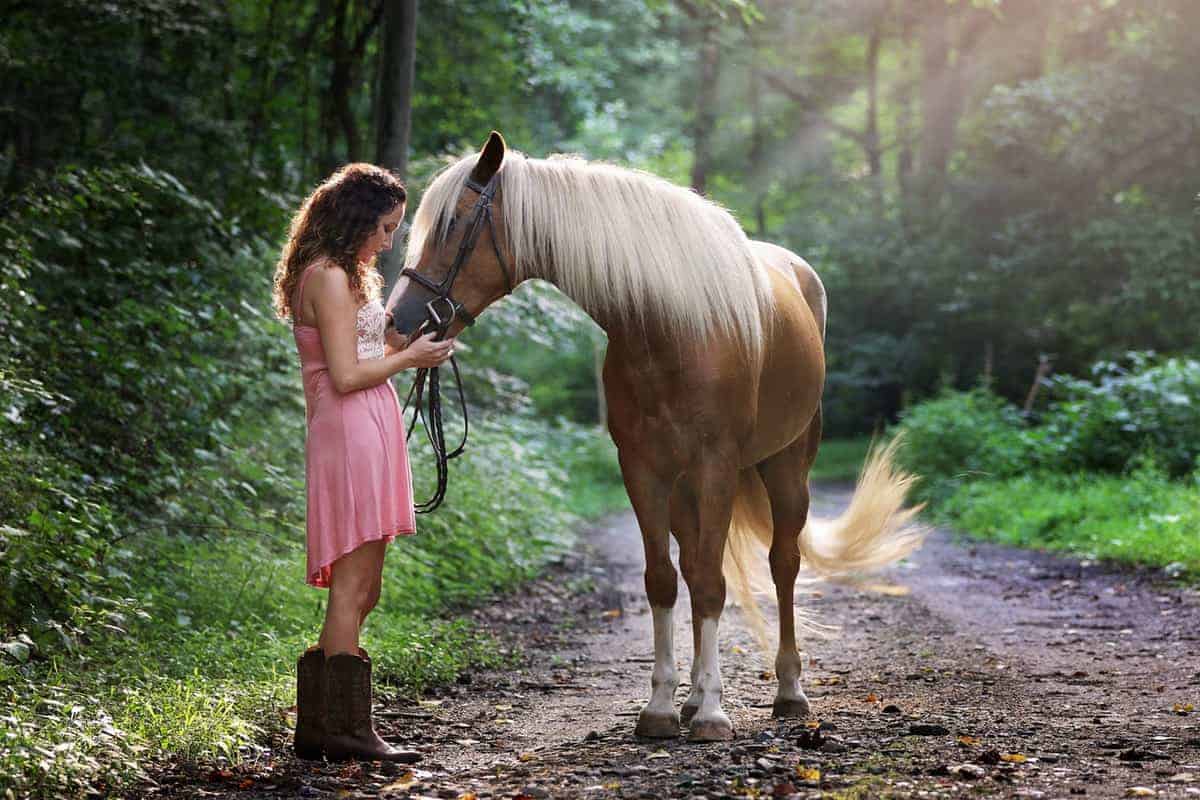
Horse/Human Images
Focus on the bond between the client and the animal. They should be connected in some way in your images. Just like we try to connect families in a session, create opportunities for the subjects to connect.
A hand on the neck, withers or cheek can evoke tenderness or teamwork. Grooming is another great time to establish a connection. If the client is riding the horse, look for the moments the client and horse are working together as partners. The animal will be relaxed, with his ears and eyes pointing forward.
Don’t be afraid to use different environments. Take a photo in an open field or arena or use barn doors for some beautiful framing. Keep the horse and client at the edge of the door where the barn or stable meets the outside.
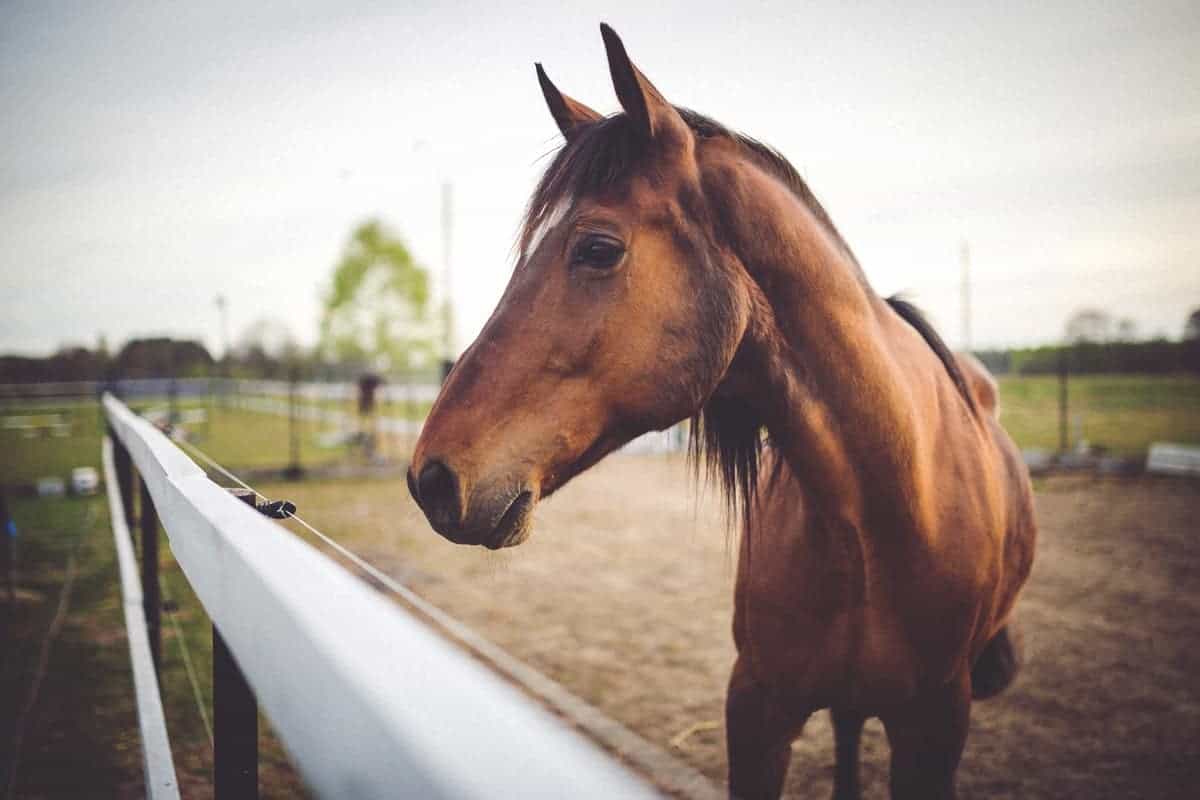
Horse Images
Is the horse itself the star of the show? Like a human client, you’ll need to learn about posing. Clarify with the client how the photo will be used. Are they going to be family heirlooms displayed on a wall or used to advertise the animal for sale?
Keep the horse’s eye as the focal point and in focus. Try photographing from at or below eye level from in front of the horse. Get the horse to extend and bend her neck slightly and point her ears forward. Try different angles and positions. For great examples, visit LynneRoseEquinePhotography.com.
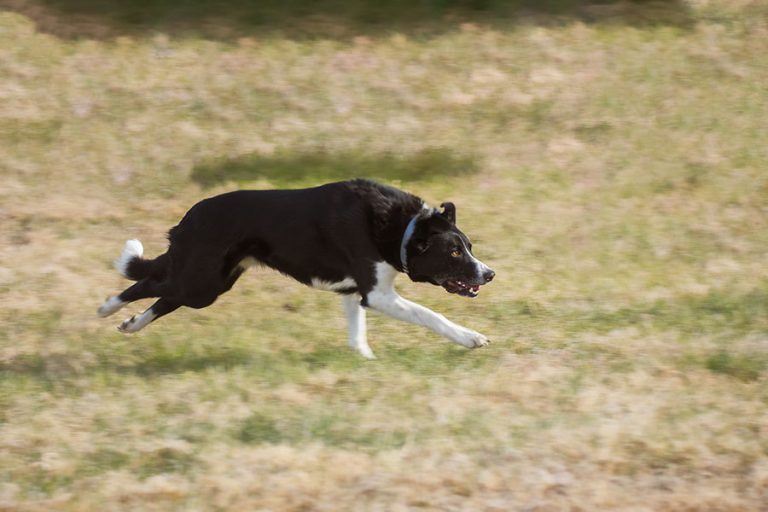
In addition to the classic headshots, try getting the horse moving. Horses have long limbs that create beautiful lines when they are in motion. Ask your client to work the animal in a round-pen or on a longe line.
- Capture motion like a trot or lope (canter for you English riding folks!) At a trot, try to capture the moment where the horse’s leg furthermost away from you is almost touching underneath his belly, while the legs closest to you are fully extended forward and backward.
- When it is cantering or galloping, my favorite photos are when three of his legs are on the ground and the leg closest to the camera is fully extended. This creates beautiful lines and accentuates the horse’s natural beauty.
- Another great timing is when the horse’s legs are all off the ground tucked up underneath him as if he’s flying.

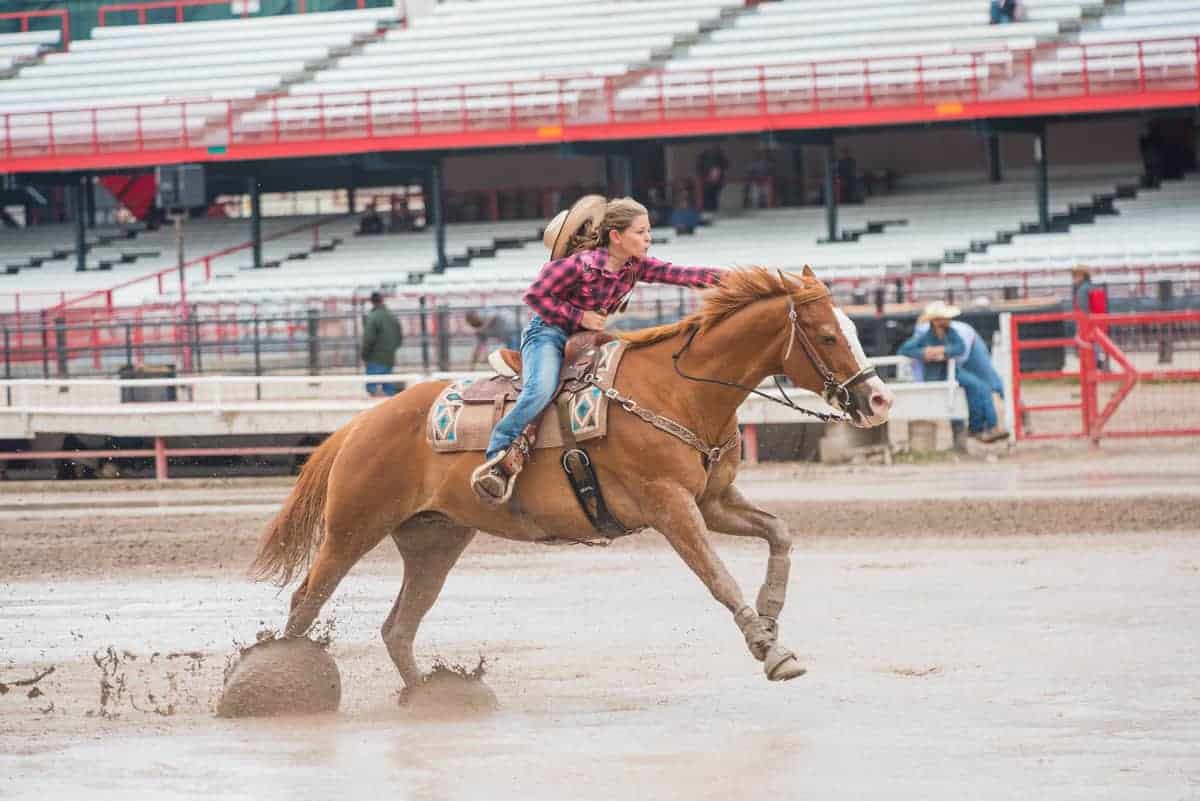
Action Shots
If you are taking action images for a horse event, you’ll need to understand a little about the event itself. You would shoot a western pleasure class very differently than a dressage competition or a barrel race. Do some research on your event and ask your client what kind of images they want.
Cater your shooting position, angle and timing to the discipline. Read the above tips on the right moments to capture when the horse is in motion.
For example, I like to cover a barrel race at the point where the subject comes around one of the first two barrels and on the run back toward the finish line. For a trail class, though, I’d set up to the side and slightly in front of an obstacle like a bridge or pole set.
Don’t forget to leave some space for the animal to move into in your frame. And don’t get so close that you cut off tails or hooves (this is one of my worst habits!).
The best horse photographers understand the event itself and the critical moments of the competition. Ask lots of questions and research the competition online before you begin taking images!
For more tips on using shutter speed to capture sports, click here!
Horses for Sale
Photographing horses for sale is a little different still. Your shots can include class images, but must also include “conformation shots.” Conformation affects performance, so buyers want to see how the horse is built. A few tips on taking conformation shots
- Always take confirmation images first. The horse will be cleaner and look better.
- Find a flat spot and an uncluttered background. The footing should be even and clean.
- Like any portrait, look for soft even lighting across the entire horse.
- Don’t use anything shorter than a 50mm lens to avoid distorting the horse’s proportions. I like to use my 70-200 mm f/2.8 lens zoomed in.
- Start with a profile photo. Position the subject to show all four legs. For stock horses, position the front legs under the horse slightly apart, and the back legs in a natural position slightly apart.
- Hunters are often photographed with their front legs even and their back legs slightly apart. This is called an open stance. Ask your client what the correct conformation stance is for the breed or use.
- Take images at about belly level. Turn the nose slightly toward the camera and fill the frame. Make sure you get the whole body in the frame for profile and front and rear shots.
After side profiles, take some images of the horse from the front and behind. Ask the client what other angles they might require.
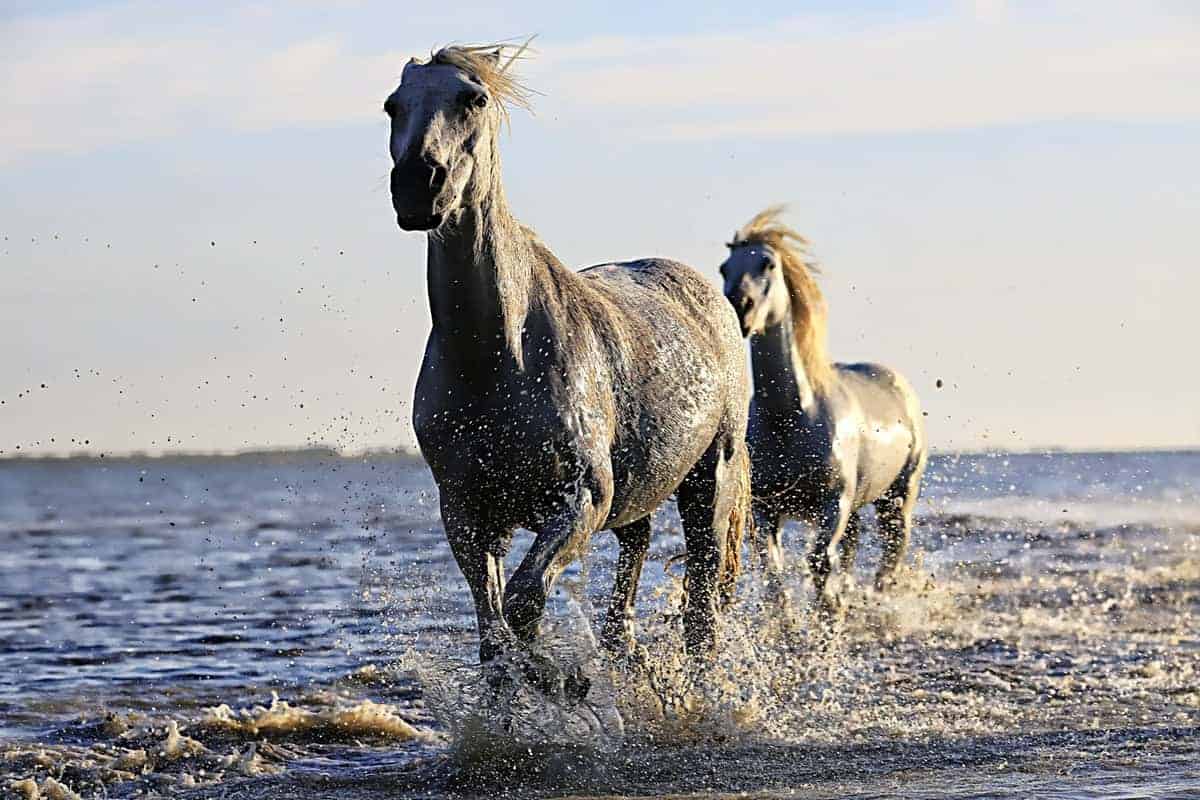
Wild Horse
Across the world, there exist a few pockets of wild horses. Places in the western U.S., like my home state of Wyoming, as well as Nevada, Colorado and Arizona have wild, free-roaming horses.
You can also find small herds on the Outer Banks of North Carolina and Assateague Island off Virginia and Maryland. These areas present wonderful opportunities for photographing wild horses.
Once you’ve found a location with public access, look for a watering hole. Some of these tracts of land are quite vast, and if you can find water, you’re much more likely to find the horses.
- Use a telephoto lens to keep you and the subjects safe.
- Look for pockets of horses that have some separation between them so one horse doesn’t blend into another. And look for herd interaction.
- Mares and foals or two stallions fighting make compelling images.
If you’re in the western U.S., be sure to take lots of water and sunscreen and tell someone where you are going and when you will return. The roads aren’t always well marked, cars overheat or get stuck in mud created by sudden rain showers.
Plan ahead so you don’t have to spend a few nights in the desert alone.
Camera Settings for a Horse Photo Session
Camera settings may vary depending on the type of photo session. To give you a general idea, these are the ideal starting settings for your horse shoots.
Shooting Mode
Horses are big critters that can move fast. You’ll get the best results in manual mode because you will gain total control over the exposure settings.
Exposure (Shutter Speed, Aperture, and ISO)
I like to set my camera at f/2 to f/6./3 to give me a depth of field large enough to get most of the animal in the frame in focus while still rendering the background slightly blurry.
I keep my SP at 1/250 of a second for images but bump that up considerably for fast-moving subjects. Most of my rodeo photos are shot at 1/800 at a minimum, faster if the lighting allows it. I use continuous focus to get 3 or 4 frames at a time.
If you’re taking photos during the day, it’s best to work on a low ISO, like ISO 100, so that you can use a slow shutter speed in bright light. If you’re doing a night photo session, you can test different ISO values or up to ISO 3200.
Metering
I always use spot metering. If I’m taking equine images, I will use a gray card to meter and white balance. If I’m photographing a rodeo or fair, I want to keep my lighting consistent between contestants. Very dark or very light horses can skew your on-camera light meter.
I will instead meter off something in the environment. A bright, blue sky is the same tone as a neutral gray, as is most grass. These reference points are great to meter off unless you are working in backlighting. Click here for a depth-of-field explained!
Tips on Taking Good Pictures of Horses
Aside from the camera settings mentioned above, here are more ways on how to take the best portraits of horses.
Set Expectations
Start by clarifying the expectations of your client. A senior photo session with a girl and her horse will have different goals than if you are taking images of horses for sale or action photos.
Show Intimacy
Observe the bond between the rider and the horse, and take photos showing how they are partners. You can normally see such instances during cleaning or after a riding session.
Much like photographing pets, you can highlight how the rider touches the mane or when the horse nudges the rider playfully.
Coordinate Styles
See if the horse and rider can wear matching clothes or accessories. Make sure that the colors or style of the owner’s clothes match the look of the animal and its gear.
Don’t Forget the Details
As much as a full body photo will make you see the majestic stature of a horse, don’t overlook the little details.
For example, focus on the eyes, ears, bridle, or hooves. In this way, you can show features that would otherwise go unnoticed.
Choose the Right Lens
You need to invest in lenses that complement the horse’s proportions. Likewise, you would want to steer away from distortion lenses as these may not provide you with a wide angle.
Instead, use standard lenses that relatively match what the human eye sees. They also usually have wide-open apertures that are great for low light conditions.
You can start with a 50mm lens for sessions when you need a shallow depth of field. A telephoto lens is another must-have so that you can position yourself far back and not disturb the animal.
Learn How to Pan
One fun technique is panning to convey motion. Instead of stopping the motion with a fast shutter, panning involves slowing your shutter to build motion trails.
Set the camera at 1/50 of a second to begin with. Track a horse as it is moving across your frame.
Follow it with your body and the camera and fire the shutter. The idea is to get part of the subject in focus (like the eyes) but the legs and tail will be blurry, conveying motion. The technique takes practice but can produce some stunning images!
Be Patient in Learning
Watching videos of racing events can help train your eyes and reaction time. For instance, pause the video at the same time when you would most likely hit the shutter button.
Aside from that, observe how a rider approaches and moves around a horse. Watch closely, be patient, and learn more about how the animal moves.
Ways to Stay Safe During an Equine Photo Session
Horses are big, powerful animals. They can hurt you if they become scared or act out. It is critical for your safety and that of your clients to understand and follow a few basic safety rules when working around horses.
Keep the Horse at Ease
Horses are prey animals. Their survival in the wild depended on their instinct to flee or fight. They retain those wild instincts from their ancestors.
When an animal feels threatened, its first reaction is generally flight. It will try to get away from the threat, sometimes by running, backing up, or even bucking. ALWAYS give it a safe escape route.
Don’t stand or pose directly in front of or behind the animal. Don’t work in tight quarters where you or the client stand in the “exit aisle.”
Watch for Flight Signs
If a horse can’t flee, he may fight. Behaviors like biting, kicking and striking often occur in situations where an animal feels threatened but cannot escape.
Watch for signs that it’s uncomfortable, such as laying back the ears, curling an upper lip, showing lots of white in the eyes, snorting and head tossing. These are usually warning signs the horse isn’t happy.
Know the Blind Spots
Horses see differently than people, dogs, cats, etc. They have both monocular and binocular vision. They can see about 195 degrees horizontally with a single eye, but also have three blind spots.
These blind spots are directly in front of it, directly below its nose and directly behind it the width of the head. Don’t stand or position clients or props in these areas.
If you have to work in these areas, keep your hand on the horse and talk to her as you move around. Your tactile and verbal cues will let the animal know where you are so she doesn’t startle or strike.
Work Calmly and Slowly
Horses feed off the energy of the humans around them. Loud noises and sudden movements can startle a horse or make them tense and edgy. Stay calm, work methodically and be patient and relaxed.
Be Careful With Flashes
Flash can be used safely, but you need to allow extra time to acclimate them to both the gear and the emitted light itself.
A horse will often spook at your stands and modifiers but not pay much attention to the emitted light, and vice-versa.
Give it time and space to adjust to the flash before introducing a client or other props into the scene.
Flash at equine events is generally highly regulated, so be sure to ask permission before using flash at these events.
How Much Can You Earn With Equine Shoots?
Like any genre of photography, the income for this niche will depend on your skill, demand, and economics of your market and the difficulty of the photo session.
You may only be able to charge the same as a family photography session in some markets.
In others, high-end equine sessions bring in several thousand dollars. Know your costs of doing business and research your market to determine how much you could potentially charge.
Some don’t take on clients in a traditional sense. Instead, they are staff photographers for different businesses and organizations. Horse-themed magazines, trade organizations, race tracks or breed associations might keep a photographer on staff.
They make around $35,000-$65,000 a year, but the pay varies by organization. These positions are also highly competitive and may require extensive travel.
Conclusion
The best horse photographers in the world are usually horse people first, photographer second. It’s a genre of photography that is unlike most others.
But even if you aren’t a horsewoman or horseman yourself, you can become a great horse photographer.
Learn to understand the animal: their temperament, conformation, lines, and movement. Learn the rules of the competitions you are photographing. The more you know about these beautiful animals and their accomplishments, the better you can bring it to life through your lens.
And don’t worry if you fall in love with these big, gorgeous beasts. It happens to the best of us. As I always say, I wasn’t born in a barn, but I got there as fast as I could.