
If you don’t like the current background of a photo, changing it is the obvious answer. If only it were that easy, right. But what if it is? The Photoshop Quick Selection tool can detect a subject’s edges in an image. This allows you to select the background so you can remove it quickly.
In this tutorial, we’ll show you how to use Quick Selection to achieve the fastest, most seamless background change you’ve ever seen.
Quick Selection vs. Magic Wand
The Magic Wand tool might have the word “magic” in it. However, the name doesn’t quite fit it as much as it does the Quick Selection tool Photoshop. That’s because while the Magic Wand tool highlights pixels based on tone and color, the Quick Selection tool analyzes the chosen area and takes texture into account.
Use the Quick Selection tool to move your cursor over your image seamlessly without missing a beat.
How to Use the Quick Selection Tool
No matter what Photoshop selection tool you’re using, you can select specific parts of an image. But if your image has a background with different textures, colors, and tones, then the Quick Selection tool will be most useful to you. Below is a step-by-step guide to using the Quick Selection tool.
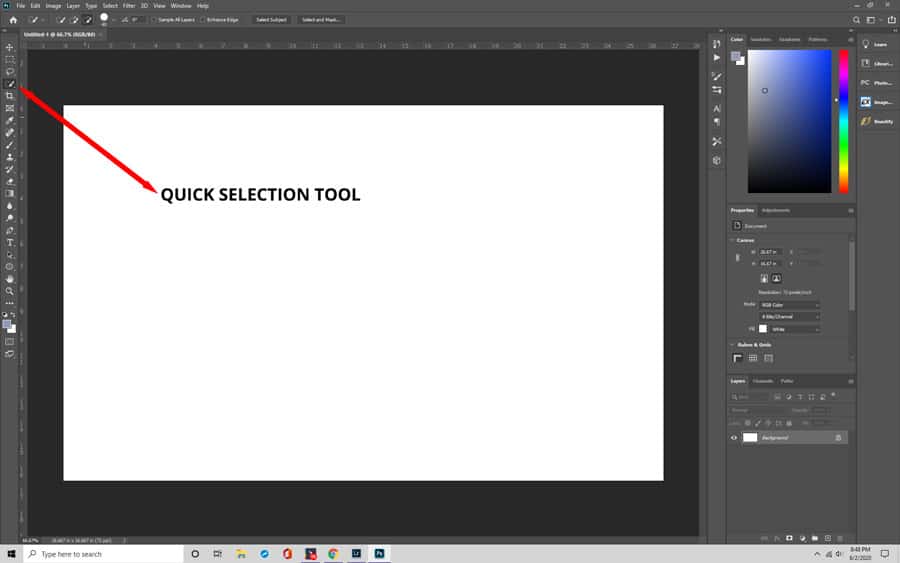
Step 1: Locate the Quick Selection Tool
In the Tools panel, click on the Quick Selection icon. You can go with the corresponding keyboard shortcut by tapping the W key.
Step 2: Cut Out the Area You Want to Keep
Use the Quick Selection tool, select the part of the image you want to keep. At first, you might notice that it’s only selecting one part of the photo. If the object or subject displays multiple textures, colors, and tones, then this is normal.
To include the entire area, you must add to your initial selection. With basic selection tools, you have to press and hold the Shift key to activate the “Add to selection” mode. But by default, Quick Selection is already in this mode.
Drag your mouse over the areas you want to select. Try to do this in the shortest possible drags. This gives you more control and reduces the chances of you mistakenly selecting the background. Increase the size of your cursor if you have a relatively large area to select. Hit the right bracket ( ] ) key to make it bigger, and the left bracket ( [ ) key to make it smaller.

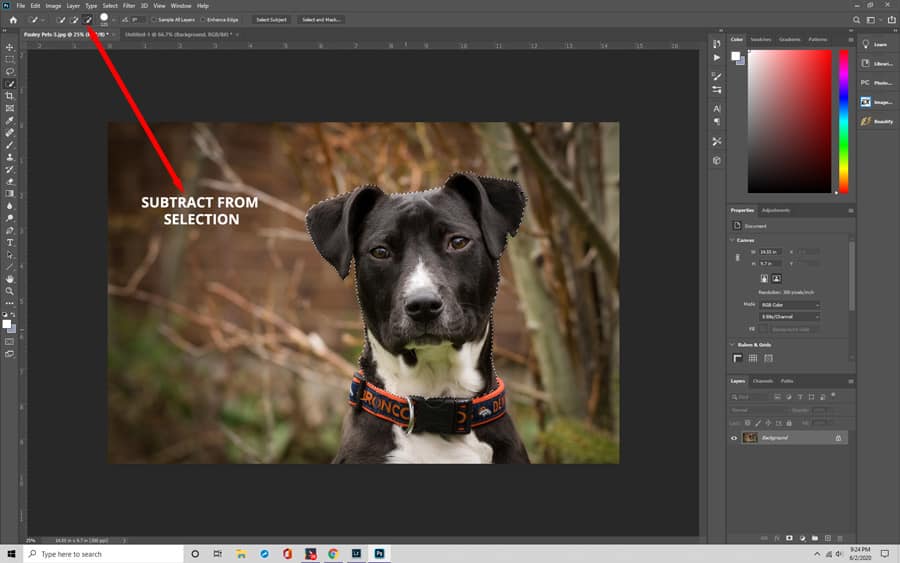
Step 3: Switch Up Modes
Chances are, your selection won’t be perfect. You may have to remove a few areas from the selection. The background may still be showing through gaps, between someone’s shirt and arm, for example.
Hold down the Alt (Option) key to remove an area from a selection. This function will select the Quick Selection tool to “Subtract from selection” mode. You can also go to the Options Bar > Subtract from selection.
Once you have the “Subtract from selection” mode activated, click and drag the part of the photo you want to remove. Using the bracket keys, adjust your cursor size according to the size of the selected area.
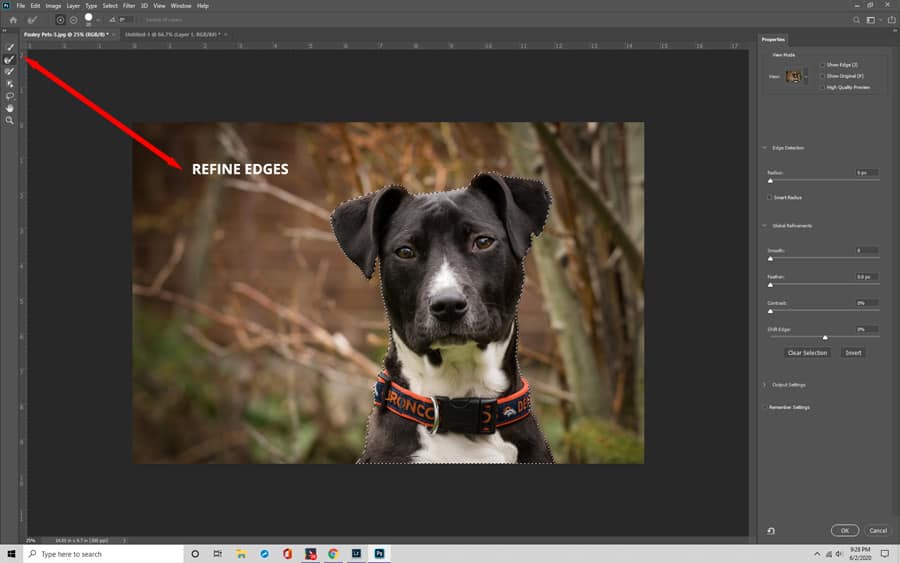
Step 4: Refine the Edges
If you find that your edges are a bit rough, go with the Refine Edge feature. You can find the icon for this at the top of Photoshop. Once the dialog box opens, check the box next to Smart Radius. Then, make sure you select the Refine Radius tool and click OK.
The Refine Radius tool will paint over the edge of your selection and will add back any small details that you selected out, such as hair or fur.
Step 5: Colorize the Background
After you’ve separated your photo from its original background, you can change the background color. Press and hold Shift+Ctrl+I (Shift+Command+I) to invert the selection. This function will deselect your main subject and will, instead, select everything else around it.
Next, go to the bottom of the Layers panel and click on the New Adjustment Layer icon. There are multiple options to choose from: Vibrance, Hue/Saturation, Black & White, etc. For the sake of this example, let’s say you choose Hue/Saturation.
A dialog box will open that displays sliders for color selection option. Adjust the sliders until you’ve reached your chosen hue/saturation. Then, click OK.
After that, change the Blend Mode to Color. This way, the brightness of the image won’t be affected, only the colors.

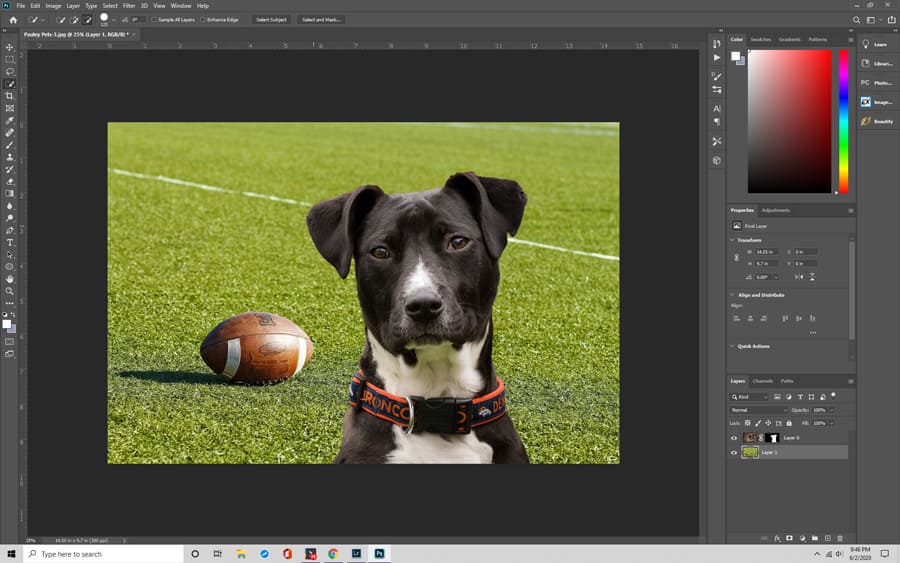
Step 6: Change the Background
If you don’t want to keep the current background, you can find another background. Choose a photo and drag it into your current project.
Then, create a new layer mask to make sure your background and selected subject show up. To do this, right-click on the original layer and click Duplicate Layer.
The photo you want to use as your new background should go under the subject layer and layer mask.
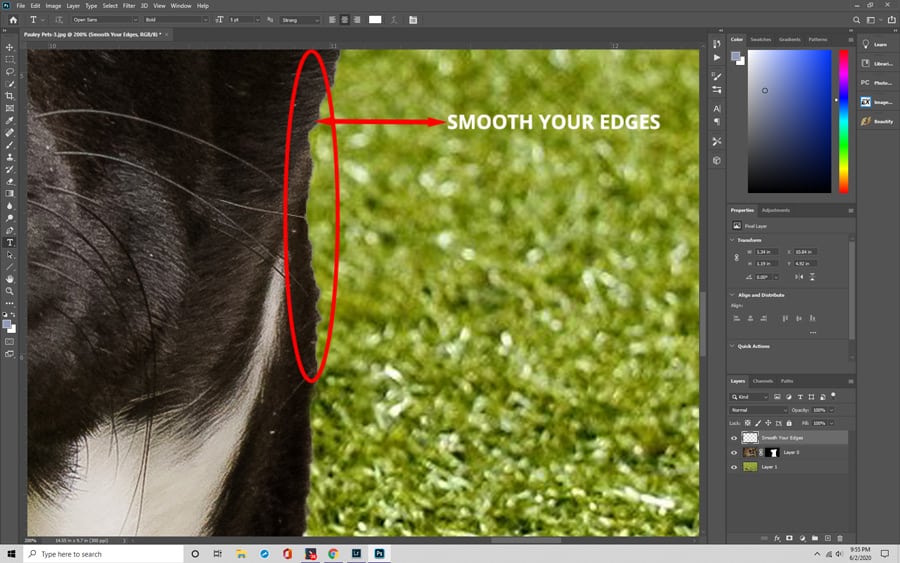
Step 7: Use the Brush Tool for a Smoother Finish
You might find that the edges of your subject aren’t as smooth as they could be. In the Layer Menu, select the Layer Mask. Select the Brush Tool. Zoom in by pressing Alt+ (Command+) to get a clearer view of your photo’s edges. Move the cursor over areas you want to smooth out. After you’re done, add the rights reserved symbol to your photo by holding the Alt (Option) + R keys.
Wrap Up
The next time you come across an image that has an imperfect background, don’t overlook it. You can bring the image to its full potential with the Quick Selection tool. Then, add a background that goes best with it. With your new skills, you can make any dull image a sight to behold.