Edit Like a Pro & Fix Crazy Skin Tones in Lightroom in 3 Clicks!
Have you ever cringed a little bit when you show up to a wedding or photo shoot and realize your clients have “overcooked” themselves a little bit while in the tanning salon??
I sure know that I have as it always makes for an editing nightmare!
One day while editing in Adobe Lightroom I discovered a really awesome and easy way to quickly correct these artificial & radioactive skin tones, and to this day it has been one of my very best editing secrets…

Lets walk through this step by step to show you how easy of a process it is to fix skin tones with this real life example.
The below image is the shot straight from the camera before any editing – definitely too warm and orange for my taste. Lets fix it up…

Step 1 – Do usual exposure and white balance corrections. However in this specific instance take note of these basic edit elements that will help us fix up the skin tones:
- White Balance – Slightly take some warmth away
- Contrast – Reduce contrast to “smooth” out tones
- Clarity – Small reduction in clarity to also aid in “smoothing” of tones and skin.

Get My FREE Lightroom Presets Here!
Step 2 – Skin Tone Color Adjustments
What I find the to be the most consistent which correcting skin tones that are too “orange” is: RAISE the Red, Orange “Hue” sliders, slightly LOWER the Red, Orange “Saturation” sliders & RAISE the Red, Orange “Luminance” sliders. Just be mindful that each photo is different in terms of how much you should move the sliders to get your desired result – a more natural looking skin tone.
KEY TIP: Instead of manual adjusting each slider by hand, click on the “bulls-eye” looking icon & simply click on an area on the photo that you want to adjust (the skin in this example) and then move your mouse up or down – these “target adjustments” will take a sampling of the colors, from where you click, allowing you to in real time adjust while holding the mouse rather than slider by slider. To watch how I perform this step check out the video tutorial below.

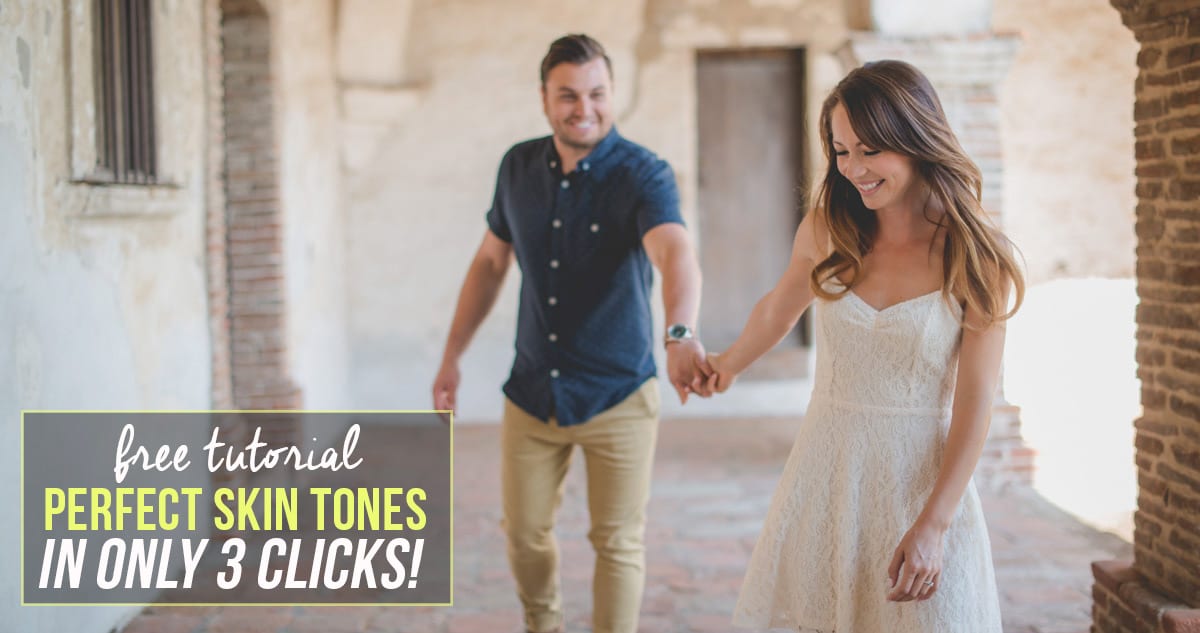
…and the final image:

[ad id=’1′]
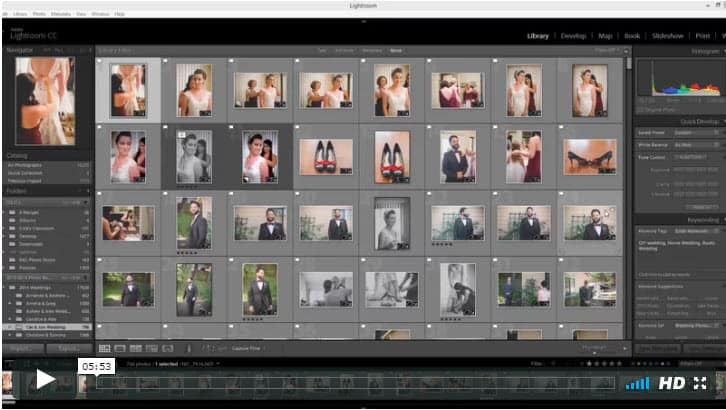
To watch a step by step video tutorial and follow along with each click of my mouse check out the video below!
As always, my goal when editing is to add “wow” factor and give the images a “boost” while still maintaining a natural look to them and to not “over process” the photos. With that said, there will always be times where us photographers come across these situations that where a little bit of adjusting our clients skin tones may make all the difference in the world.
I hope that you have enjoyed this tutorial and can make this one of your awesome Lightroom photo editing tips like I have and improve your workflow and save you some editing time! In fact – if you want to really save on photo editing time, pick up 15 of my favorite Lightroom presets for free right here.
Till next time,
Cole
Infographic