
Improve your consistency and confidence with a photoshoot checklist
Are you looking for ways to improve the flow of your photo sessions, your post-production workflow or your consistency? Consider developing and following your own photoshoot checklist!
Have you ever finished a photography session that felt awesome at the time only to feel disappointed later with the actual images? Maybe your focus was off. Maybe there were crazy shadows you missed on your client. Or maybe you ended up with a really ugly set of trash cans in the background that are taking hours to clone out in Photoshop. For whatever reason, you HATE them.
Friend, I’ve been there. It’s frustrating and can be such a time killer if you end up spending hours in post-production trying to fix it. Those oversights are honest mistakes. But they sure can wreak havoc on our confidence and our time.
The best photographers have one thing in common…a consistent workflow during their sessions. They might not even realize it, but they perform largely the same tasks in the same order for each and every session. This photoshoot checklist, whether physical or mental, helps ensure accuracy and consistency.
In this tutorial, we’ll talk through some elements of a photoshoot checklist, helping you build a consistent workflow for your photography sessions. Feel free to add elements or change components of this around to suit your style and personality and adapt it as you continue to grow your skills. But until then, you can also use this checklist to help you mentally and physically work through your sessions.
Photoshoot Checklist Overview
New photographers often spend the most time thinking about camera settings when it comes to their photoshoot.
Here are the elements you need to think about having on your photoshoot checklist
- Prepare your camera and equipment
- Prepare yourself
- Evaluate the light
- Evaluate the background
- Greet and prepare your subjects (clients, family, objects, etc.)
- Position your clients
- Check the background and light relative to the subjects
- Dial-in your settings
- Confirm your settings
- Pose or prompt your clients
- Start shooting!
- Pause to confirm a few images
- Repeat for different settings or major pose changes
That sounds really simple. And it can be. But I’ll break down each element in detail so you can get an idea of just what a session looks like for me. This is the formula I follow for each photoshoot I have, whether it’s an outdoor or indoor session and whether it’s a family or personal branding session. Having a consistent workflow gives me confidence and improves the client experience because we have a known roadmap to follow throughout our time together!
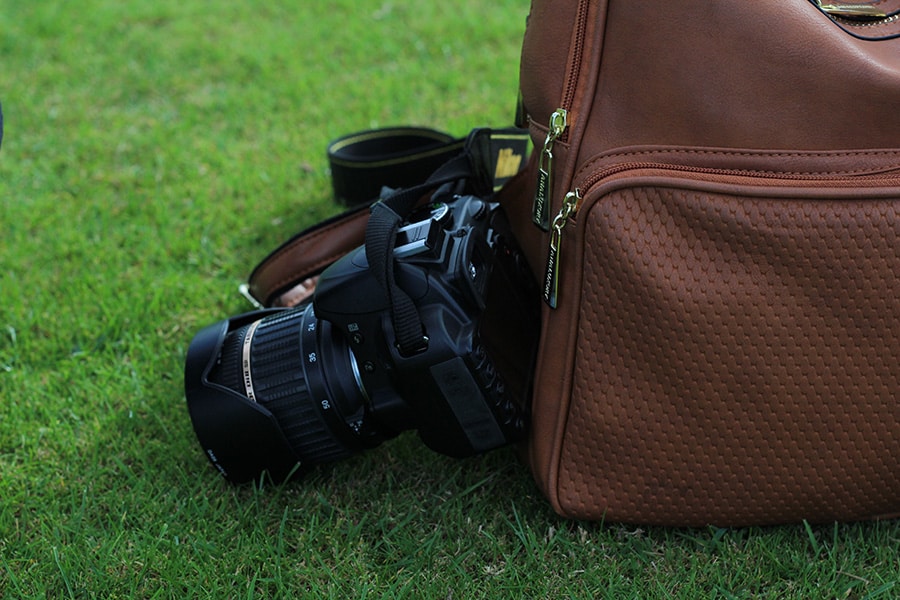
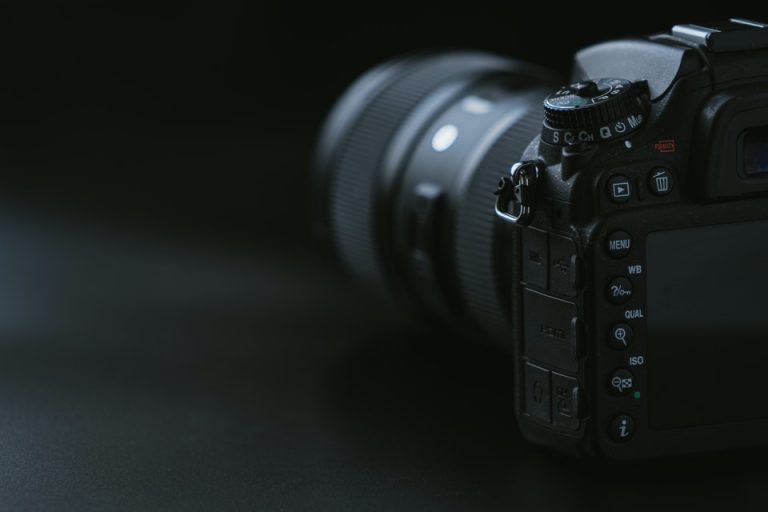
Step #1 – Prep my camera and equipment. What equipment do I need for a photoshoot?
Before I load my gear into the car for a photography session, I do a mental walkthrough of the session and jot down some notes on what I need. What lenses will I want? What props will I take? Should I take external lighting or a reflector? Once I have those items listed, I gather them up and prep my camera.
To prep my camera, I check my battery, put in and format memory cards and double-check that my lenses are clean and in my bag. Then I reset my aperture, shutter speed and ISO to the same settings every time. I use f/5.6, 1/200 of a second and ISO 100.
Why do I do this?
First, I want to make sure I don’t have some goofy settings still on my camera that I forget about at the session. For example, one time I had my ISO on 10000 for some a nighttime session with flash. I didn’t catch it and thought my ISO was at 100 and had about a dozen really grainy family images before I caught it.
Second, I like to have my camera ready to start shooting the minute I pull it out of my bag, just in case. If I need to grab my camera quick, I know immediately if I’ll need to adjust my settings one way or the other. I don’t have to stop to wonder what my settings were and think about how I need to fix them. It’s a trick I learned a long time ago from a professional wildlife photographer that has served me well for some quick captures of a session or candid images of my own family.
I also make sure I have the bracket for my tripod or harness in my bag, along with my gray card and my notes on the client session.
Once my gear is ready, I head to the photo session!
Step 2. Prep yourself!
How should a photographer prepare for a photoshoot?
I use a lot of mental rehearsal to get ready for photoshoots. I read through my questionnaires and notes on the client. My shot list gets a few more read-throughs. Then I do a mental run-through of the first five or ten minutes of our session. I literally talk out loud as if I’m speaking to the client. I practice their names, practice my first setup or two and rehearse how I want the session to go.
This imaginary convo usually happens in the car on my way to a session. It might sound a little crazy but it’s helped me tremendously. I get to a session feeling like I’ve been there before, because in a way, I have! Try it for a session or two and see if it helps you!
Remember to prepare your body for the session, too! Use the restroom. Make sure you are hydrated and fed. Wear professional but functional clothing. Apply sunscreen or bug repellent, if needed. Tuck gloves and a hat in your bag if the weather is cold.
If you aren’t worrying about your physical needs it’s much easier to focus on the session!
Step 3. Evaluate the light
The next item on my photoshoot checklist is to evaluate the light. Light is always my first priority because it’s the key component of a quality image. You can make a crummy location look amazing if you have the right light. But a poorly lit image is a poorly lit image no matter how pretty the backdrop.
So look around. Where is the light coming from? What’s the quality and color of light?
If it’s an overcast day, for example, I might use the area differently than I would on a bright afternoon with no clouds. Where’s the best light in your location at that moment? Is there a location that will give me even lighting from head to toe?
Take note of things like open shade, dappled light or natural reflectors you can use to bounce light back into your scene.
Step 4. Evaluate the background.
After you understand the light you have to work with, then it’s time to evaluate the background. The key is to examine the background as it relates to the places with good light.
Look for elements of the background you want to use, like objects for natural framing, layering, leading lines or bokeh. Next, scope out those areas and make a note of parts of the background you want to avoid. Things like power lines, trash bins, tree branches, etc. can all ruin an otherwise great shot.
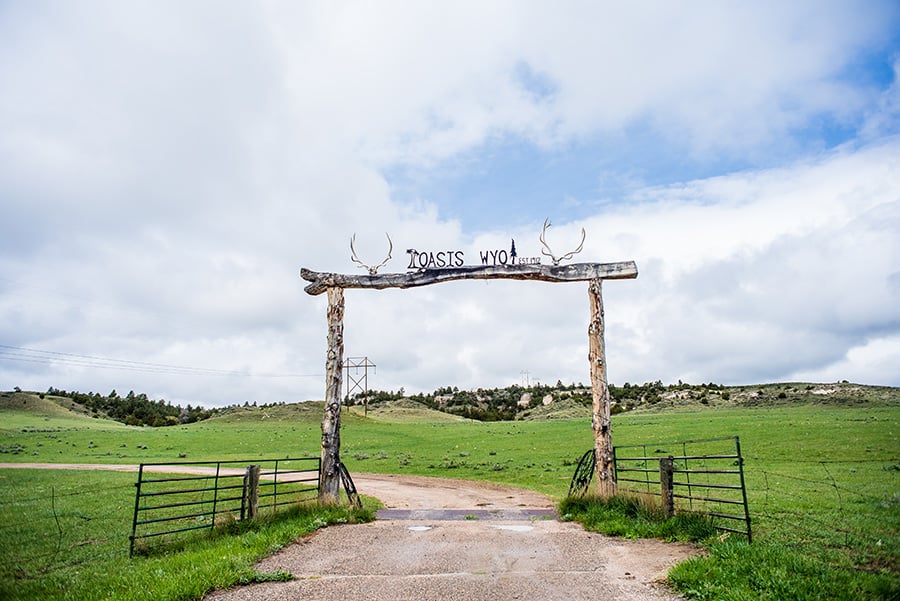
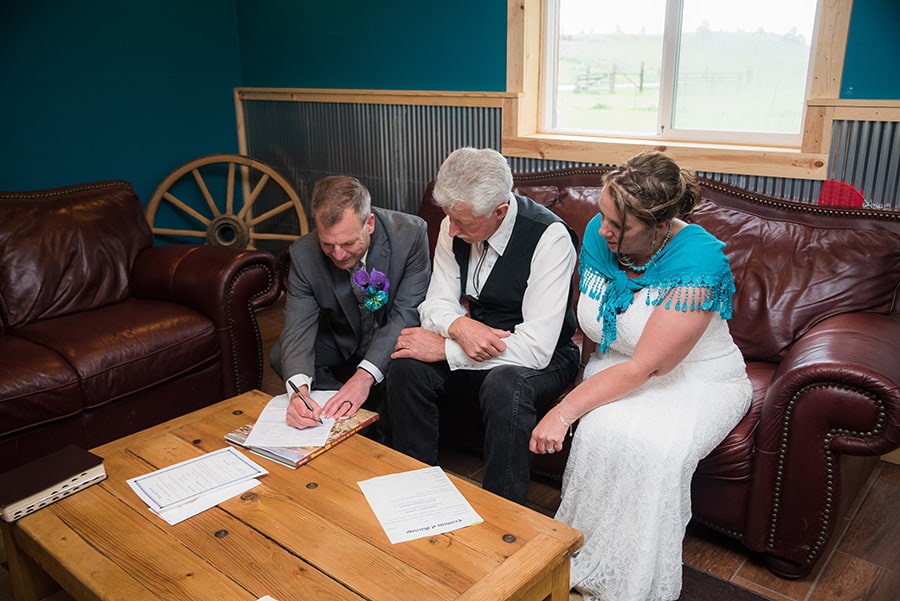
In the image above, my clients had requested a picture by the property’s gate. Immediately upon arrival, I notice the gate is huge and the powerlines in the background. (We did a few shots here but we moved their first look to a different location…see my tips below on accommodating clients AND giving them great images).
Whenever possible, I complete steps 4 and 5 BEFORE my clients arrive. I get to a location early and have a look around before a client gets there so I can work out my plan by myself. If I’m working in clients’ homes, I greet them, ask for a few minutes to scout out the space and then reconnect with the client to start the session.
Step 5. Prep your clients
I like to welcome my clients and then give them a brief rundown of what they can expect during the session. I remind them of how long we will shoot, explain my posing/prompting technique briefly and make sure they don’t have any last-minute requests. We complete a quick wardrobe check (look for cell phones or keys in pockets or hair ties around wrists!) and then start getting ready to take pictures.
If you’re photographing something other than people, this is where you’d gather your subjects. Make sure you have the products or items you want to photograph ready to go as well before you start shooting. If you’re shooting a location or space, like real-estate photography, do a quick walkthrough to prep the home or building.
Step 6. Position your subject
By now you should have a pretty good game plan in your head about how to use your location. So grab your subjects and position them in your scene for your first series of shots. Don’t worry about posing or prompting just yet. Just get your subject about where you want them and take up your shooting position.
Step 7. Bring it all together.
This is the last double-check of lighting, background and subjects on our photoshoot checklist. How does the light look on your subject? Where is the horizon in relation to your subjects? Anything look wonky in the background? Don’t be afraid to reposition your subjects if necessary. Sometimes all it takes is a step or two in either direction and you make a ho-hum image really pop!
Let me illustrate the importance of why this final check is important with a little story.
I’d been shooting some formal wedding portraits just outside the reception hall. I’d scouted the area, found great light and started shooting. When I started editing, I could have kicked myself. There was a stump with an ax handle sticking out of it in the background. It hadn’t been distracting at the time, but the way I’d positioned the bride and groom, it looked like the ax handle was coming out of the groom’s rear end.
So. Not. Cool.
I’d rushed my workflow and hadn’t taken the time to evaluate my subjects in the background. It was fixable in Photoshop with the patch tool. But had I taken my time and looked at the entire scene one more time, I could have saved myself a lot of time in post-production.
If you look closely at the photo below, you’ll see the fly-swatter in the upper right-hand corner. That was a detail I could have easily taken care of if I had done a better job of looking at my clients in the scene. I delivered the image to the clients after some cropping. But it would have been better had I taken three seconds to scan my scene and remove distractions.
Step 8. Dial-in your settings
Now it’s time we talk settings!
See, we’re all the way to step 8 and I haven’t mentioned settings once. That’s because while settings are important, they aren’t the only thing that makes great images. Yes, the wrong settings can wreck your image. But even the perfect settings can’t overcome skunky light, squinty eyes or a tree limb through someone’s head.
But I digress.
Now it’s time to read your light meter and dial in your settings. I usually start with my shutter speed. What is the minimum shutter speed I need to keep any motion blur or camera shake from my images? Then I select the aperture I want based on my subject and focal plane. Then I set ISO as needed.
Don’t forget about setting the focus and white balance. I will generally set a custom white balance or use daylight. Use your preferred setting or set your own custom balance.
When good auto white balance goes bad…Read our white balance tutorial.
Step 9. Review
Go ahead and take a quick look at your camera screen. A quick visual confirmation that everything looks a-okay never hurts. If something if off, better to adjust it now!
I check for blown highlights, shadows with no texture and the balance between the light on my subject and the light on my background. What looks okay to our eyes, even with good settings, doesn’t translate well to the camera.
“Chimping,” or looking at the back of your camera, got a bad rap there for a while with photographers. You don’t need to do it after every shot, but it’s a valuable tool that you can and should be using during your sessions.
Step 10. Pose or prompt your clients
Now that you are ready to go, it’s time to focus on your subjects!
I wait until after I’ve dialed in settings to pose or prompt because it’s less pressure on everyone. The client doesn’t feel pressured to pose or hold a smile while I adjust settings. And I don’t feel like the client is staring at me, silently screaming, “JUST HURRY UP ALREADY!”
This is also helpful if you’re shooting pets or children. They aren’t going to hold a traditional pose for very long. Keep their cooperation for when you are ready!
Give your subject your posing suggestions or prompts if you’re more unstructured. Then start shooting.
Step 11. Complete your session.
Finally, we’ve arrived at the last item on our photoshoot checklist. It’s time to simply move through the workflow of the session you planned in your head earlier. I’ll take whatever photos I want at this location using this lighting. Then I move on to another area I might want to use. At that point, I start over at step seven and again evaluate the subjects in the new background and light and double-check my settings.
Any time I switch the number of subjects I’m shooting, I double-check my aperture. If I was taking pictures of the little sister at f/2.8, then I switch to the whole family in two rows, I adjust my aperture to give me the depth of field I need.
Best Tips for Improved Photography Sessions
Tip #1. Slow down!
My number one tip for improving your photography sessions is simply to slow down. Slow down! Take time to think through what you are doing. Getting things as close to perfect in-camera should always be the goal!
I know how intimidating it feels fiddling with settings while my client waits. But do not rush. It really is better to take an extra 15 seconds now to get things correct than spend hours in post-production trying to fix bad decisions, or worse yet, have completely useless images.
Remember, what feels like an eternity to you is just a few seconds to the client. And they trust you, so the extra time isn’t a big deal to them.
If you feel your clients getting anxious, simply say something like “I’ll take just a few seconds here to make sure I have everything dialed in. I want you to really love these images!”
Seriously, just slow down the whole process and think through your decisions. I’d estimate that 95 percent of my “bad” images are because I was rushing, NOT because I didn’t know what I was doing.
Tip #2. Walk away from bad lighting, backgrounds or poses.
Sometimes I try new things and I don’t love them. Admit that to yourself (and maybe even your client) and then try something else.
If I have a background or lighting scenario I hate, I will tell my client something like “You are rocking it! The light right here just isn’t doing you justice. Let’s walk around the corner and use that area instead.”
If it’s a pose I tried and it isn’t flattering for my client, I keep my mouth shut, snap the picture, then fix the pose. If, after demonstrating and tweaking the pose it still isn’t working, I again snap the picture and move on to another pose. I give my clients lots of praise and find something that works better. You don’t need to tell the client “Oh that doesn’t look good.” Just move on to something more flattering.
Tip #3. You do you.
Shooting at a location where there are lots of other photographers is intimidating as a new professional. You might look around and think “Why are they over there? Should I move? What do they know that I don’t? Her stuff is going to turn out so much better.”
Nope. Don’t even play that game. Focus on executing YOUR plan and flattering YOUR clients, not worrying about the other photographers.
First, everyone has a different style and goals for their images. Her goals and style may not be your goals and style. Your client’s personality might not match her client’s personality!
Second, that other photographer might not even know what in the world he is doing! There are a lot of photographers out there who haven’t put in the time, effort and energy you have to really study photography and light. Copying those photographers isn’t going to help you one bit!
Tip #4. Don’t’ be afraid to take a break to fix something!
If something is wrong with your settings, camera or other equipment, stop and figure it out.
Too many times I think we as new photographers lack the confidence to say “Something’s wonky. Give me a second to figure it out.”
It’s as if saying that out loud confirms our worst fears…that we aren’t good enough to be “real” photographers.
Friend, real photographers have equipment failures. Real photographers have things go wrong. But real photographers also know when to take a break, figure out the problem and fix it.
A stylist isn’t going to keep cutting your hair with dull scissors. Nor will a waitress give you the wrong food and expect you to eat it. Instead, both practice a pause, fix the situation and resume their work. That’s the mark of a professional!
Tip #5. You are the expert. Be accommodating but don’t let the client tell you how to do your job.
My client requested a specific background or pose but it just won’t work. What do I do?
Clients often pick a location that is a gorgeous setting without understanding how important light is to a session. They see a pretty lake or mountain and think it will be a great backdrop for their location. But often, the light in that area just won’t work. Or she REALLY wants to recreate a pose but it’s that is not flattering for her body type. What do you do?
Educate your clients on using great light and posing! This starts during your initial consult, obviously, by talking about why you will shoot when and where you do. But sometimes we get to a session and a client has an idea for a background, pose or setup that is less than ideal. Then what?
I accommodate the client but still work the session my way.
I say things like “Oh I love that idea. Let’s capture a few here where this light is so soft and beautiful, then we will try that one.”
Then, I’ll work in a few shots with the backdrop or pose they’ve requested. I do the best I can with what I’ve got and give them SOMETHING with the specific scene they hand in mind. I give them what they think they want, then go right back to working my way through my photoshoot checklist my way.
Here’s an example…
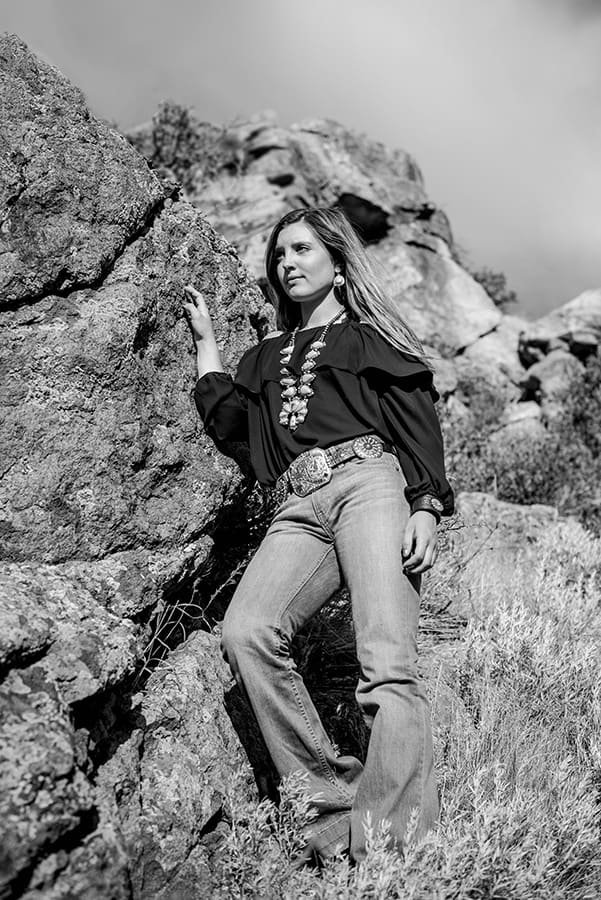
I was taking senior pictures for a local family this summer. We were working on her grandparents’ cattle ranch in the mountains in Wyoming. One of the locations she really wanted was these big beautiful rocks. The problem was, the rocks were on a west-facing hill in full sun and there were exactly clouds in the sky. To shoot them really well, I should have been there at 5 in the morning, not 6:30 at night. And we couldn’t wait to shoot there until the sun was low in the sky because we needed golden hour for pictures with her horses.
But I knew they were important to the client. These rocks were the same pile of rocks that her great, great-grandparents used to build their first homestead back in the early 1900s. They had tremendous personal significance to my client. So we used the rocks.
But instead of shooting tight portraits, I took a more editorial approach. I used a wider lens and incorporated more of the background into the shots. My client got instructions to look down and away from the sun or close her eyes and be a bit more dramatic. For the photo below, I told her to give me her inner pioneer bad-ass. I did do a few close-ups, knowing I was blowing my highlights but demonstrating I heard my clients request. Then I got back on track with my internal photoshoot checklist.
In this situation, the client loved the final (if non-traditional!) images. But just as often, the clients never purchases those images because they like the ones I created using my knowledge of light and photography better.
So be accommodating. Make the most of a bad situation, then move on and rock your plan. You might surprise yourself with your creativity, the client feels heard and you’ll still deliver amazing images in the end.
Here are some more great family photography tips!
Ticking boxes
Having a photoshoot checklist helps improve your consistency which will ultimately give you better images in the end. It also helps your confidence because you have a roadmap to follow during your sessions.
If you are brand new to taking clients, don’t be afraid to have a physical photoshoot checklist for your first few unpaid practice sessions. Keep it in your pocket or taped to the wall in your studio so you can refer to it as needed. Soon, you’ll find you can keep track of where you are and where you need to go without that map. I still ask my family to volunteer when I want to try something new. And I write down a photoshoot checklist to follow the first few times I implement new methods.
And don’t underestimate the power of mental practice and preparation. Visualization exercises aren’t just for athletes. It can work for photographers, too. Does it sound absolutely crazy to treat your daughter’s stuffed animals like a pee-wee basketball team? Probably. Does it work? Yes! Practice handling sessions from start to finish, including what you’ll say to clients, how you’ll say it and how you’ll move through your workflow.
Sessions feel overwhelming and scary right now. But creating your own photoshoot checklist helps alleviate your fear, improves your confidence and ultimately helps you become a better photographer. Give ours a try or create your own. Rock your list, rock your session and rock your business!


![Personal Branding Photography Basics [Complete Guide]](https://colesclassroom.com/wp-content/uploads/2019/06/adorable-adult-beautiful-774095-768x512.jpg)