Struggling with Chromatic Aberration?
Who doesn’t like crisp and lively photographs? Everyone wants to capture their life moments in a perfect photo. But if the picture does not depict the moment in the same way, it is quite disappointing. You go for a tropical vacation and the colors of your picture sometimes make the picture look like you visited a desert. Who would want that?
Actually, shooting a great photo is a process which involves a lot of factors like focal length, lighting, choosing the right settings, and your location. Not to mention your subjects! All these factors interact together to give you the perfect picture. One of the most common errors that can occur in a photograph is chromatic aberration.
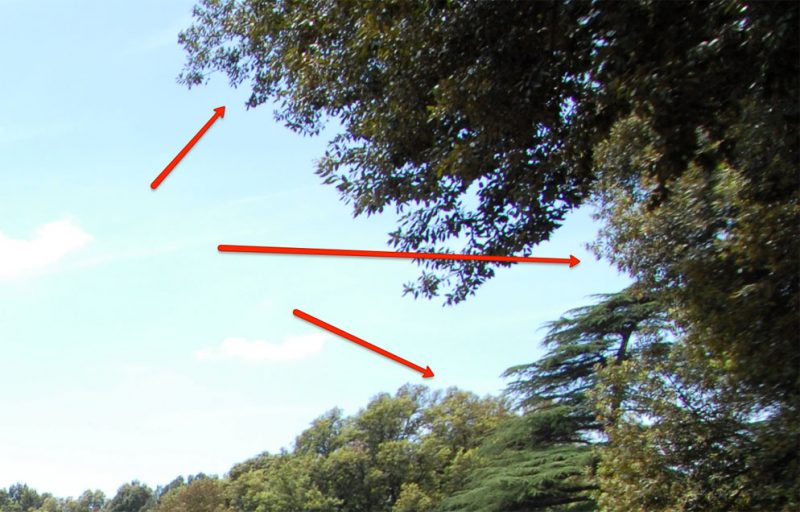
Wondering what this is? Actually, you might have seen it in many of your pictures. It’s just that the term might be new to you. Sometimes when the background is grass green, you may spot lines of pink and yellow in the picture. Have you ever noticed color fringes on one side of your picture or in the background?
These changes are due to chromatic aberration which can be corrected by using Photoshop or Lightroom, but time is always of the essence. Why waste it on the correction of such defects when you can spend that time doing what you love? If you can learn what this error is and how to avoid it then you can save yourself a lot of your time and energy.
What do you mean by chromatic aberration?
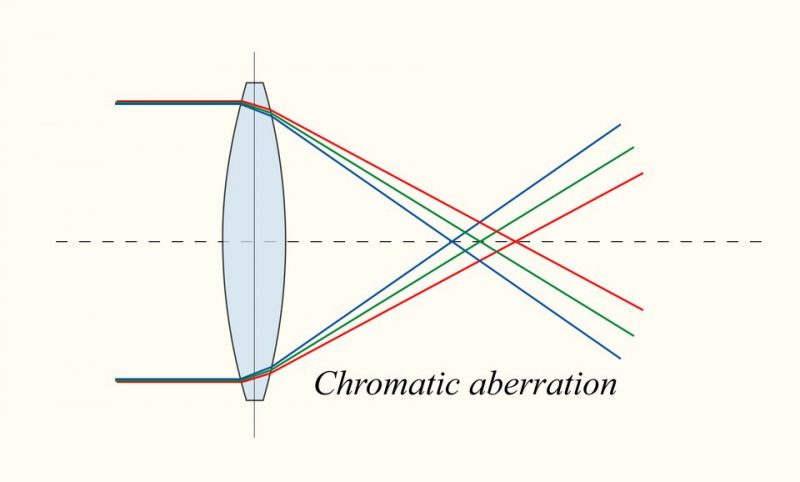
Let’s understand the problem first before you learn how to fix it. It’s important to know how this phenomenon occurs before you can learn how to avoid it. Light gets refracted differently while passing through the lens and it does not coincide with the focal length. This way, it falls behind or before the focal length of the lens and this is how such errors occur. This is when chromatic aberration occurs.
Focal length is the point where all the light wavelengths passing through the lens are supposed to meet but sometimes the “meeting” does not happen. All this depends on the aperture you choose, the construction of your lens and also the light intensity. Light is composed of 7 different wavelengths so after refraction through the lens, if they do not meet at a common point, the color aberration is inevitable.
Why Does Chromatic Aberration Happen?
It’s time to remind you of the 9th standard lesson about the properties of glass. Yes, you need to go down memory lane and get seated in your physics classroom where you learned about the prismatic behavior of the glass. The lens of your camera behaves the same way. Chromatic aberration occurs when the lens shows dispersion properties and the light passing through it gets dispersed into 7 colors, but when coming out from the lens, all the colors do not converge at the same point. All the color wavelengths travel at a different speed and thus do not converge.
This creates a color fringing and the final photograph gets blurred or there’s a presence of noticeable colored edges around objects in red, blue magenta etc. This chromatic distortion occurs because different lenses have varying refractive indices for individual light wavelengths.
Types Of Chromatic Aberration
Depending on the wavelength dispersion in different planes, chromatic aberration can be of 2 types; namely longitudinal or axial and lateral or transverse.
Longitudinal Aberration (or LoCA)
LoCA cccurs when different wavelengths focus at different distances near the focal length. Normally, they should all converge and meet at one point which is the focus of the lens. But many lenses show this aberration due to the dispersion of the wavelengths of different colors, making the 7 components of light refract differently and reach varying distances.
So, let’s understand how this is depicted in the final picture. In the case of LoCA, there’s usually red, green, and blue fringing throughout the image. These are found specifically around the objects.
One part of the image might show a green color fringing and then after a gradual neutral, the other end of the picture might appear blue. This type of error is usually seen with fast aperture prime lens and rarely with slow ones.
There are methods to correct such aberrations with the help of software like Lightroom but the avoidance of such errors should be the main intention while taking a photograph.
[ad id=’4′]
Lateral Chromatic Aberration.
Lateral chromatic aberration occurs when the wavelengths of different light colors focus at the focal plane but at different points in the same vertical plane. They reach the same distance which is the focal distance of the length but are bent in various angles and thus do not meet at the same point in the vertical plane.
Lateral aberration is different from LoCA in its presentation. This type of error is never seen in the center but always occurs on the object’s corners. Blue or purple color fringes are the most common. While longitudinal aberration can be eliminated by stopping down the lens, this type of aberration is usually corrected in the post-processing.
Lateral aberration commonly occurs with wide angle low-quality lenses. The problem arises when both types of aberration occur in some lenses. So, be extra careful while choosing your gear.
How To Avoid Chromatic Aberration
Below we will talk about some of the ways you can use to eliminate or minimize such errors. Knowing these factors will help you avoid aberration from the beginning!
You cannot go and buy a new camera lens when you have already spent a lot on the present one, so let’s understand how to work with it if it’s giving you any problem of chromatic aberration or color fringing.
Actually, lenses made with an array of glasses placed in a particular way to achieve the required lens quality. Chromatic aberration occurs when there’s some problem in the manufacturing or arrangement of this glass, or even if any of the glass is of inferior quality.
Now, you cannot cut open your lens to try and diagnose the problem. Some types of color fringing do occur in all the lenses. It’s just that it isn’t very visible.
There are methods to avoid it, so why not try those rather than handing over your present lens, running to buy an expensive new one, or wasting time in the post-processing efforts.
How do you reduce chromatic aberration when shooting?
Avoid High Contrast Photography.
Color fringing increases to a high level when you are attempting to shoot in high contrast scenes. Try avoiding taking photographs with a white backdrop or photos where you can spot the bright sunshine in the background. If you attempt to take broad daylight landscape pictures, then the chances of finding chromatic aberration will become exponentially high.
You should try and reframe your shot if you are facing such errors in your lens. While you are in an indoor shoot, you may try to change the background to one that is more subtle and close in color to your subject. When you are outdoors, wait for some favorable light conditions before you take your shot.
If you need to take the shot with sunshine at the back, or a shot where you can guess that your photo will definitely have chromatic aberration, then make sure you are shooting in RAW mode, take the photo, and be ready to spend some time correcting in post-processing.
Manage Your Focal Length.
This is a simple fix, and a little knowledge about your lenses focal length will save a lot of time that you would have spent dealing with chromatic aberration. While lenses are available in a wide variety of focal lengths, one in a middle range would be the safest option to show minimal to no chromatic aberration.
Avoid using a zoom lens in wide angles, as those are most likely to bring chromatic aberration into your picture. You can choose a prime wide angle and that does the job, with less risk of aberration. Choose a proper focal length to avoid this error.
Stop Down The Aperture.
It’s fun to use a wide open aperture. But if you are finding color fringes in your images, you need to stop down your aperture to avoid them. It actually depends on the type of lens you are using, but this method can go a long way towards reducing chromatic aberration. Remember, closing down your aperture decreases the amount of light reaching your sensor. You will have to compensate by decreasing your shutter speed and adjusting the ISO to achieve proper exposure.
You can also try using a flash and adjust your other settings accordingly for proper exposure. The secret is to keep trying with different light conditions and settings in your practice sessions before you actually go out for the final shot.
Put Your Subject In The Center.
Color fringing or “purple fringing” is mostly seen when your subject is placed away from the center of the frame. Minimize purple fringing by placing the subject in the center. Because aberration occurs due to the curvature of the lens and as you go to the corners of the lens, the refractivity changes and thus the wavelengths of light that pass through that area start distorting and dispersing to different levels, hence giving color fringes. If you are can’t fix extreme chromatic aberration with these previous techniques, you may need to frame your subject closer to the center and crop the photo to your desired composition in post-processing. By comprehending the science behind the chromatic aberration, you can try to avoid it using a little creativity.
Don’t Use Super Zoom Lenses.
It is tempting to buy superzoom lenses but keep in mind that they can suffer from terrible fringing at the wide focal lengths. If you’re shooting a zoom lens, try backing up physically and shooting with a longer focal length. If you have a prime, or fixed length, lens in your bag, use it. Prime lenses are generally better when it comes to avoiding chromatic aberration.
Though there are many post-processing procedures that can actually get rid of fringing errors, you’ll save time getting things correct in camera to begin with. Post-production takes time and effort. And you need an understanding of the type of aberration first; whether it’s longitudinal or lateral and then using the particular tool in the software to get rid of that error. Do you think that’s easy? It’s not and it’s very time-consuming.

How To Correct Chromatic Aberration Using Lightroom
Using the above methods and making these small adjustments can help you achieve high-end results. Don’t spend hours post-processing your images if it’s not necessary!
Now that you know how to avoid it, a little knowledge about how to correct it will only be a cherry on the top. Here are a few easy steps if you want to correct aberration in Lightroom.
- In the Develop module, got to the Lens Corrections panel
- Under Profile, check the box next to Enable Profile Corrections. These pre-loaded corrections for major lens manufacturers will correct a majority of lens distortion. If Lightroom doesn’t automatically detect your lens model, select it from the drop-down list.
- Under Profile, also check the box next to Remove Chromatic Aberration. This should reduce the amount of fringing or chromatic aberration.

If the chromatic aberration is not fixed by simply checking the box listed above, you will want to move on to the Manual section of the Lens Correction panel. Here, you will have the best luck using the eyedropper tool. Select an area of fringing, and you will see that Lightroom will take that reading and give a proper adjustment.

Are there other kinds of aberrations in photography?
Yes, there are all kinds of other aberrations that affect your images. Those include spherical aberration, transverse chromatic aberration, coma, astigmatism and field curvature. The more common of those are field curvature and coma.
These other aberrations don’t present as fringing like chromatic aberration. But they affect your images nonetheless. It’s important know they are different than chromatic aberration. Using techniques to fix chromatic aberration won’t fix other aberration problems.
Field curvature
Field curvature causes flat objects to look curved. This is more noticeable when shooting macro, or close up, images. Lens reviewers talk about this aberration and usually use the terms pincushioning or barrel distortion. Telephoto lenses can exhibit pincushion distortion. Pincushion distortion causes lines to look like they are curving outward. Wide angle lenses usually exhibit more barrel distortion. Barrel distortion looks as if the lines are curving toward center.
Coma
Coma (said like comma the punctuation, not coma the medical condition) affects points of light. It is caused by light rays passing through the lens at an angle. So points of light in your image look like a comet with a blurred tail, giving it its name. Stars look like they’ve been stretched out instead of small points of light. Coma is more noticeable in night photography. Coma is worse at the corners of your images. It can appear in conjunction with chromatic aberration and can be prevented using many of the same techniques: shooting at a longer focal length or stopping down your aperture.
The good news
Lens manufacturer’s have come a long way in developing lenses that avoid many of these problems. Digital software can also help. In fact, many lenses have these inherent issues, but the software in the camera eliminates them before you ever see the preview on your LCD or computer. Post-production software, as we’ve seen above, can also help. Try using the built in profiles for each of your lenses in Adobe Lightroom, Photoshop and Camera RAW. With a single click, you can eliminate many common distortions right away. Others, like chromatic aberration, take some extra steps.
The bad news
The perfect lens with no type of aberration doesn’t exist. Sometimes correcting one kind of aberration actually creates another. Even the very best lenses made suffer from some kind of aberration under some conditions. Good photographers know the limitations and strengths of their equipment. They’ll employ different techniques to get the very most out of their lenses and avoid problems in others. Don’t rely just on digital software to fix your mistakes. Know your gear and how to overcome problems. That’s what separates the amateurs from the professionals.
Conclusion
To become an expert in any art, you need to understand its limitations and how to circle your way around them. Photography is a passion for some and a profession to many. To that end, you will come across errors with lenses on a regular basis. You cannot go and buy an alternate set of lenses every time there’s a problem. That’s why it’s better to have some knowledge on how to avoid them to begin with.