

Nail exposure and white balance with the inexpensive, practically primitive, gray card
Do you struggle setting white balance during sessions? How about nailing exposure with or without a flash? If I told you that I could solve both your problems for less than $25, would you believe me? It’s true. With the help of the humble gray card, you can nail white balance and exposure on your subjects every time. In an era of electronic wizardry and digital sensors, it can be hard to believe that one of the most helpful pieces of photography gear I own requires no batteries and cost me less than my 7-year old’s allowance.
If you want to know more about the mighty gray card, read on!

What is a gray card?
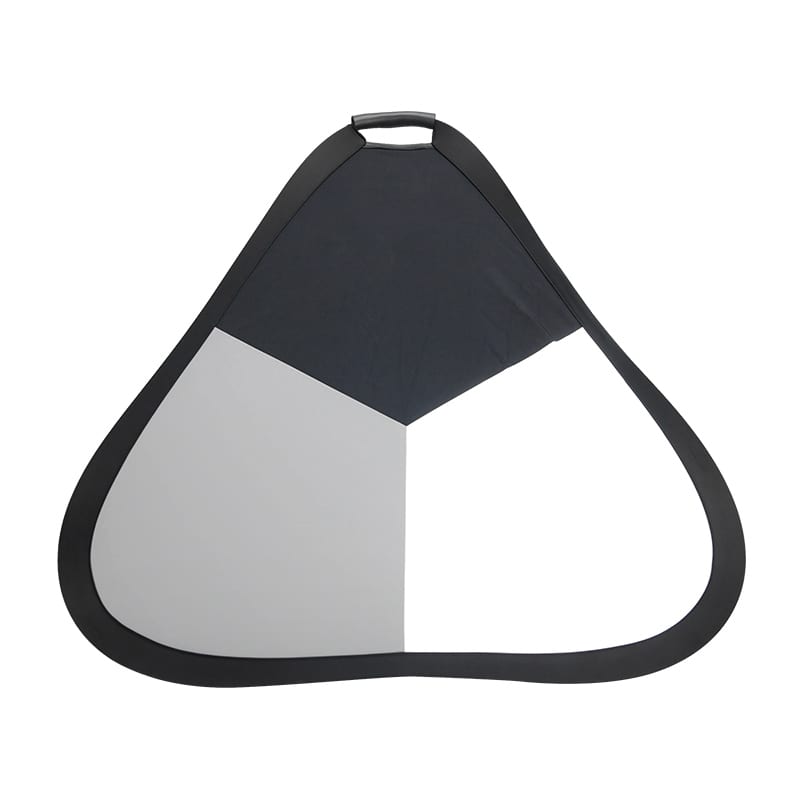
A gray card is a card that is gray. But it’s a specific tone of gray. A gray card is actually 18% gray, or what we call middle gray in photography.
Gray cards come in different forms. Some are small cards, about the size of an index card. Others are the size of a piece of notebook paper but collapse down into a circle just larger than the diameter of a coffee mug. Others are the size of a hub cap and contain middle gray, black and white tones.
The size or format of the card doesn’t matter, other than in personal preference. What is important is that it is middle gray.

You can buy a gray card at your local camera store, or order one online from places like B&H Photo or Amazon. I got my current gray card and other flash equipment at Flashgear.net.
What is a gray card used for?
Gray cards can be used for two functions:
- Setting exposure
- Setting white balance
Most photographers are familiar with the gray card as a white balance tool. But it was primarily designed to be used to set exposure.
How do I use a gray card to set exposure?
Your camera’s internal light meter is trying to calculate and expose to middle gray, or 18% gray. That means if you use spot metering and meter a dark tone and adjust your settings for a middle exposure (also known as zeroing out your meter,) the camera will record that dark tone as a middle tone. Likewise, if you meter a really bright tone, like a white wedding dress, and zero your meter, the camera will record that bright tone as a middle value.
If you’ve ever had your whites come out dull gray or your backs too bright and washed out, that’s what happened. You unknowingly over or underexposed your scene.
But if you use something that is already middle gray, like an 18% gray card and zero out your meter, you will get a correct exposure. Whites will be white, blacks will be black and gray will be middle gray because the scene is now exposed correctly.
How to do it:
- Compose your scene as you’d like.
- Set your camera to spot metering. That way the camera will only meter a small area around your focal point.
- Put the card into your scene where your subject is (or will be).
- Put your focal point over the gray card and adjust your settings (aperture, shutter speed and/or ISO) until you get a zero reading in your camera’s light meter.
- Remove the gray card from your scene and take a picture. You now have an accurately exposed image.
You’ll need to make sure that any highlights in your image aren’t overexposed (blown out). I recommend turning on the highlight indicator on your histogram. That way, areas that are too bright or too dark will blink on your histogram and you can adjust your exposure. Sometimes you need to make a choice between a properly exposed subject with blown highlights or an underexposed subject with good tones that you have to fix in post-production. To get both, you’d need to use flash or combine images in post-production.
As long as the lighting doesn’t change, no matter what colors or subject you put in the scene, your image will be properly exposed.
Gray cards work for setting exposure indoors and outdoors. They are also great at setting exposure when using off-camera flash (more on that in a minute).
Need a refresher on metering modes? Read our tutorial!
How do I use a gray card to set white balance?
You can also use a gray card to set a custom white balance in-camera or in post-production. Because we know the gray card is gray and is a neutral tone, we can use it to color correct for the light temperature in our scene.
Set white balance in camera.
To set a custom white balance in-camera, you’ll need to put the gray card in your scene and fill your frame with the gray card. Make sure the gray card takes up your entire frame it’s in the same light as your subjects will be in. Take a picture. Then use that image to set your white balance in-camera.
Alternately, some cameras will measure the white balance directly. Check your camera’s manual to see which method your camera supports and how to use it, as the exact steps vary by camera brand and model.
Using a gray card helps eliminate color casts you might be encountering from the different color temperatures of lights or color from the environment itself. Shooting a birthday party in a kitchen?
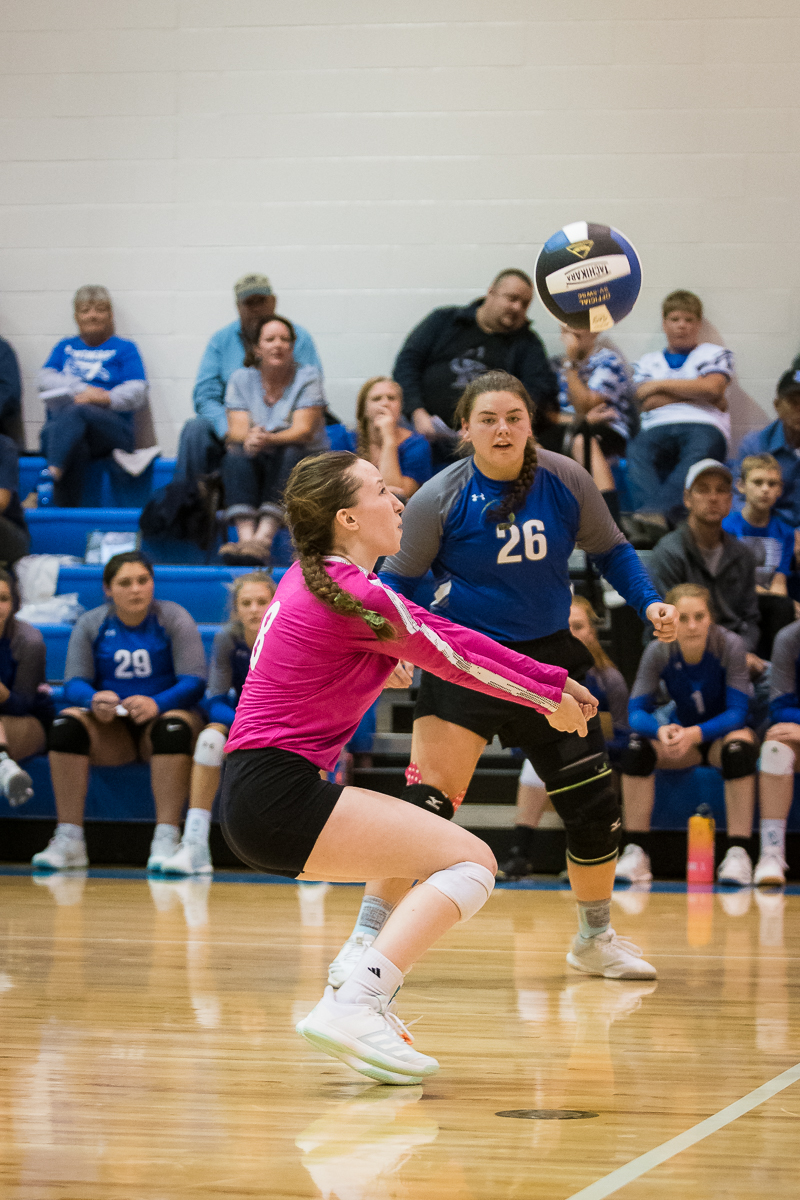
For example, I shoot sports at our local high school gyms. The gym lighting is absolutely horrible. One gym run towards green, while the other has more red in it’s light. Each gym I shoot in has different light color, or temperature. But using my gray card, I can take one photo and have the camera apply the correct white balance to all my subsequent photos. My Nikon D750 also stores that information, so that the next time I shoot in the gym, I don’t even need my gray card. I can simply load that preset in my camera and my custom white balance is ready for the green gym.
For example, the gym shot on auto-white balance.
My card shot that I used as a reference to set a custom white balance.

My action shots in the gym shot with the custom white balance applied in-camera. I still get some weird color casts because some of the lights are a slightly different color and cycle differently. But it’s much more true to life than shooting on auto-white balance or fluorescent.
Set white balance in post-production
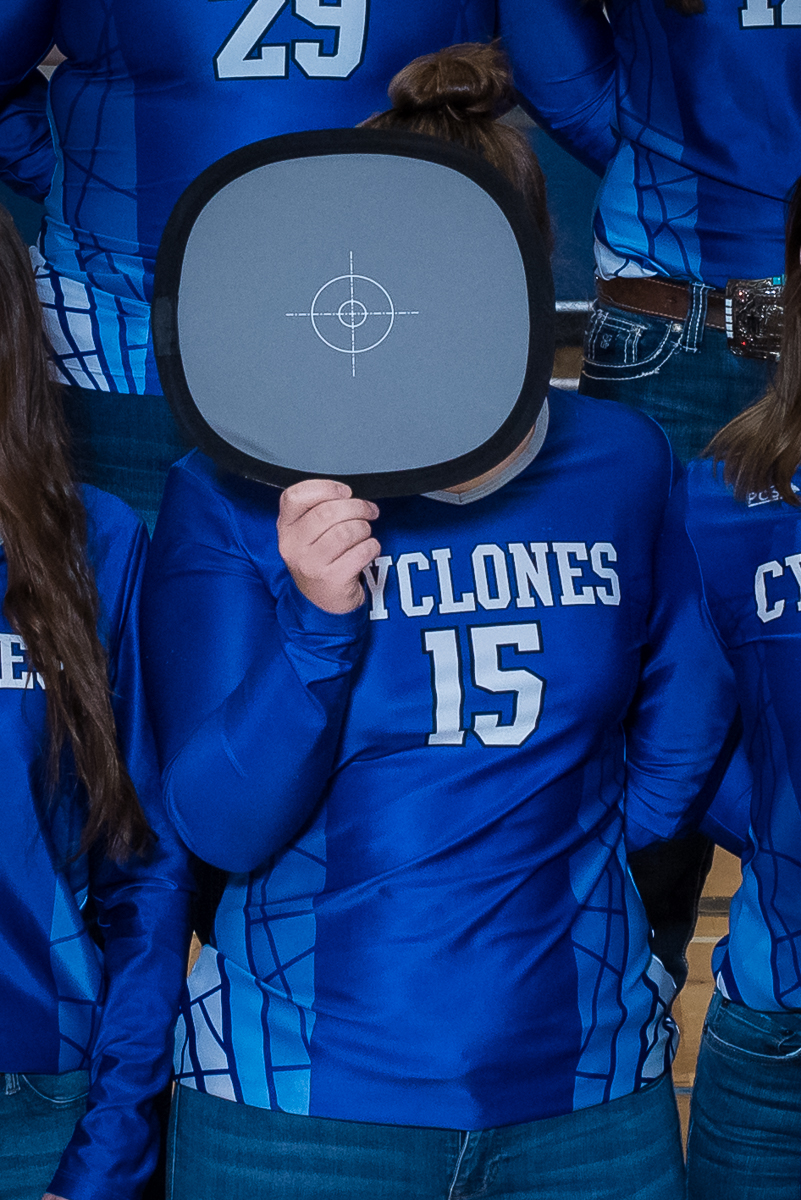
To use the gray card to set the white balance in post-production, make sure you take a picture o the gray card in your scene. I like to have my subject hold it right in front of his face so that I know the light on his face is the same as is hitting the gray card. Then remove the gray card and shoot as normal.
After your session, open Lightroom and navigate to the gray card photo. Use the eye-dropper tool to select a tone from the gray card. You should now have an accurate white balance setting. If it doesn’t look exactly right, you should be close. You can tweak your settings from there. Make note of those settings and apply them to the remaining images you took.
Just remember if you change lighting conditions, you’ll need to take a new gray card image and adjust your settings in-camera or to use in post-production.
I find I get a more accurate white balance setting using the first method of calculating it in-camera than I do in post-production. Your results might be different. Use the method that works best, and most consistently, for you!
Gray card vs. Expodisc
The Expodisc (and similar products) is another tool you can use to set a custom white balance in camera during a session. The Expodisc is slightly larger than a camera filter. It essentially turns your camera into an incident meter, measuring light coming into a scene. You place the Expodisc over your lens and then stand where your subject will be with your camera pointing toward your shooting position. With the Expodisc in place, you set the set the camera’s white balance. Then you put the Expodisc away.
If you’re an Expodisc user and fanatic, by all means, stick with what works for you! The Expodisc does a great job, especially if you have light coming in at different angles.
I’ve found my gray card to be more accurate shooting with off camera flash. The gray card is also less expensive and will fit whatever lens you are using while Expodics need to be large enough to accommodate your lens.
Want more info on the Expodisc? Read this tutorial!
Correct isn’t always right
A gray card will help you set a correct exposure. That isn’t necessarily the best exposure or the right exposure for you, artistically speaking. There may be times that you want to overexpose your background for artistic reasons, such as for a light and airy image. There might be times you want to underexpose your subject, such as if you are going for a dark and sinister look.
Those are both artistic choices that you make intentionally based on your goals for the image. But those choices should be intentional, not accidental. Using a gray card takes the guesswork out of exposure, so that you are getting it correct in camera and aren’t trying to figure out how to “make it work” in post-production.
Gray card and flash
The most valuable use of my gray card is in setting exposure when using flash. Because the camera’s light meter is reflective (it measures light reflecting into the sensor), you can’t use it to measure the light hitting your subject when using a flash.
To use a gray card to set exposure when shooting with a flash, set your lights and then place your gray card in your scene. With all your flashes firing, take a picture of the gray card, filling your camera with only the gray card.
Next, review the histogram of that image on the back of your camera. Because the gray card is a middle tone, if the card is properly exposed, your exposure spike on your histogram will be centered over zero. If your spike is to the left or right of zero on your histogram, you can adjust your settings on your camera or adjust your flash power up or down to either brighten or darken your image. See the video below for a more detailed explanation!
Using the card takes the guesswork out of exposing for your subjects. I can usually get the correct exposure in two or three frames.
The one thing you do need to watch though is your highlights and shadows. Your subject can be properly exposed but you might be blowing out your highlights or underexposing your shadows.
Gray card vs. light meter
Light meters will also help you achieve a correct exposure when shooting off-camera flash. If you own a light meter and are comfortable using one, keep on keepin’ on my friend. They both do an outstanding job of setting proper exposure. But a gray card is considerably less expensive ($15 or $25 for a gray card vs. $400 for a quality light meter.) And gray cards don’t require batteries and don’t have delicate parts that can get damaged.
More about tones and metering
The gray card is a great tool to help set exposure and white balance. But understanding tones and where they should fall on your histogram on a properly exposed photo will help you become a stronger photographer even without the gray card.
Tones, in this context, represent the darkness or lightness in an image. Most colors have a known tonal range. But as I mentioned above, if you use your camera’s internal light meter to adjust your settings to a zero meter reading, you might not be getting a correct exposure. You’re simply getting a middle exposure.
Understanding this concept is critical to getting correct exposures in the camera. Your meter wants to make everything a middle exposure, or 18 percent gray. That isn’t always the correct exposure. Your camera can’t differentiate between colors and place them where they should be on the tonal scale. It just wants to make everything middle gray.
Using tones to nail exposure in-camera
Take this series of images, for example. In the first, I placed my camera’s spot meter over the black part of my dog and dialed in my settings to hit zero in my camera’s meter. The black looks gray and the whites are completely blown out. My camera tried to make his dark fur a middle exposure. This is straight out of camera metering off of his black fur.
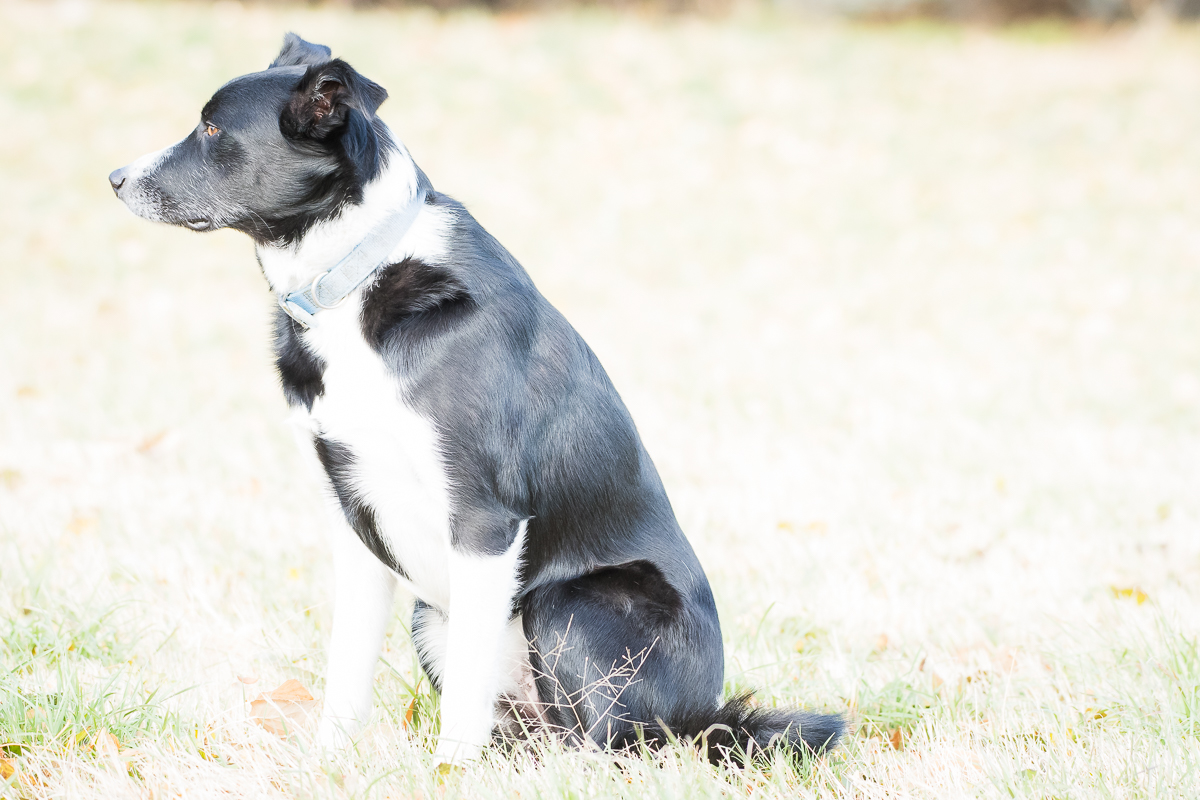
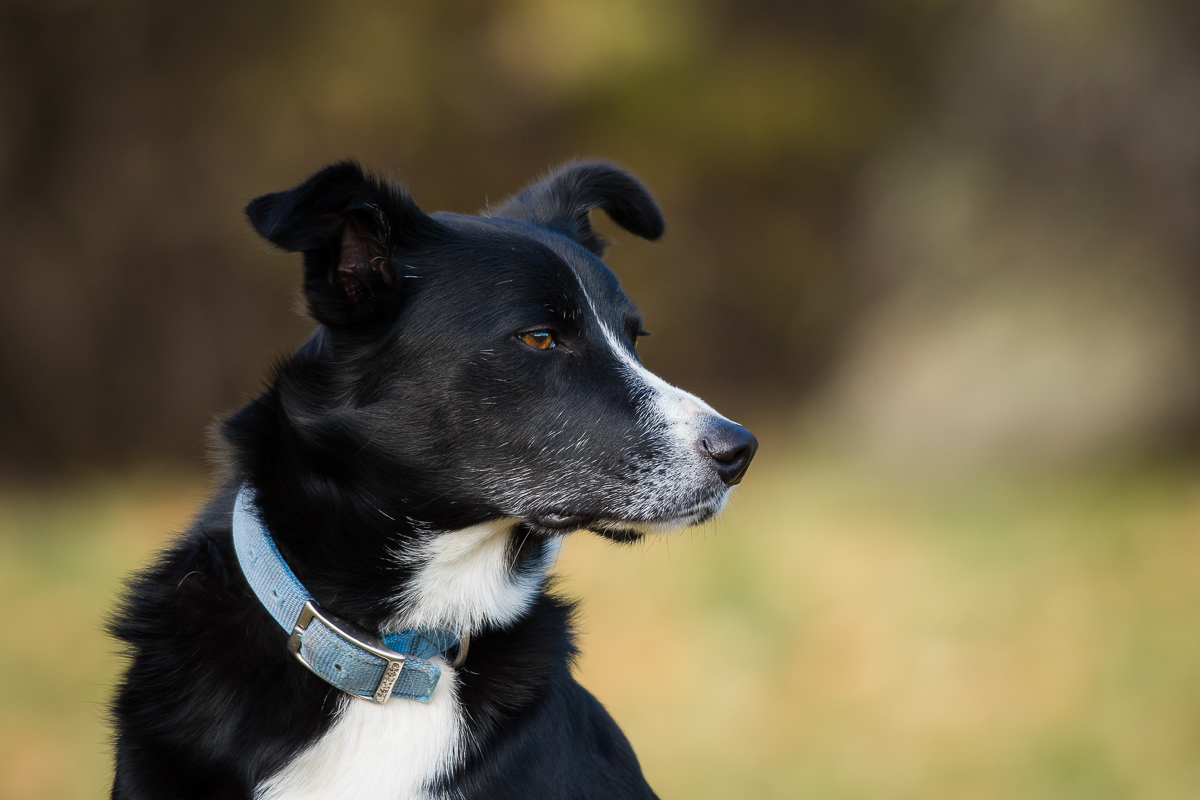
If I meter off his white spots, as shown below, I have the opposite issue. His white fur now looks dull and muddy and the blacks are completely underexposed. You might have noticed the same problem when shooting in snow or shooting dark animals or objects. Your tones aren’t correct and you need to adjust your exposure in post-production.
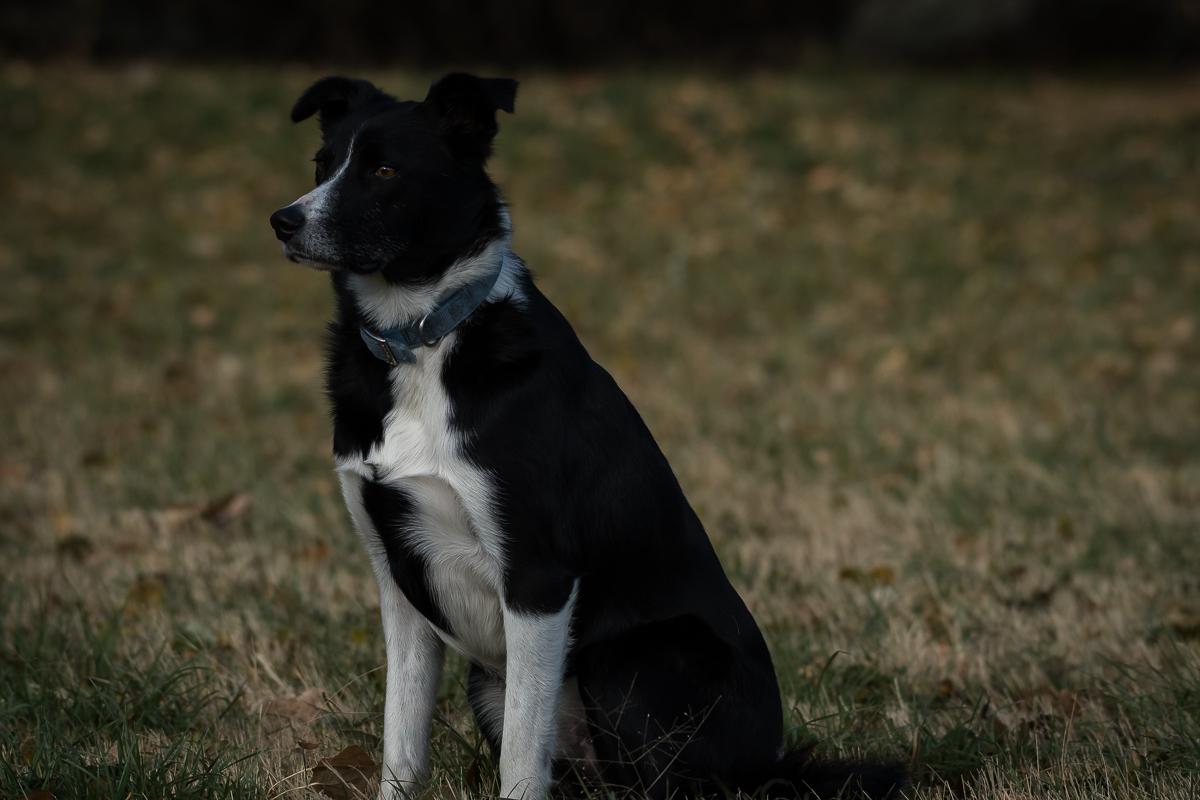
But because I know that black should measure at about -2 on my camera’s light meter and white should measure at +2 to +3 on my light meter, I can use that knowledge to set a correct exposure and get my tones where they need to be. Here I metered his black fur and set my camera to underexpose by 2 stops. My camera’s light meter, in other words, showed my exposure at -2.

But because that’s where a black tone with detail should meter, lights and darks are properly exposed. Never mind that my border collie is a terrible subject and refuses to look at the camera. Looking at this my LCD panel, I noticed I was losing detail in the whites, so I brought my exposure down to -2 1/3 and liked those results.
Once I was confident in my exposure, I could frame my subject how I want and edit to my style in post-production without worrying about if my exposure was correct. Although he still refuses to look at the camera. Border collies. Ugh.
Known tones
Here are some other tones and where they should fall on your light meter in a properly exposed image.
Black or dark tones, with detail: -2
Middle Gray, a bright blue sky, green grass, a medium red, : 0
Average Caucasian skin, most pastel colors, : +1 to +1 2/3
White with detail, like fur or white clothes: +2
Bright snow: +2 to +3
Knowing where tones should fall in a properly exposed image means you can get a more correct exposure in camera by metering those tones and putting them where they should be on the tonal scale. Using a gray card eliminates the guesswork because we know a gray card is a middle tone and should meter at zero on our light meter when properly exposed. But you can put this knowledge to work, even without the gray card.
They mighty gray card
My gray card has a permanent spot in my camera bag, and is one of the best and inexpensive investments I’ve made for my photography. I don’t use it at every session, but I use it any time I’m shooting flash and when I’m in new or weird lighting conditions. It’s made me a more consistent photographer and saved me time and heartache in post-production.
Consider picking one up from your local camera store or putting it in your online cart. For less than the cost of a week of Starbucks, you can nail exposure AND white balance in camera. That’s a pretty mighty tool indeed!

![Prime vs Zoom Lenses – Top 7 Reasons to use Primes Lenses! [UPDATED 2020]](https://colesclassroom.com/wp-content/uploads/2013/02/prime-vs-zoom-lenses_0007.jpg)