
Worried about those clouds rolling in on a session? Don’t stress! Here’s how to use those clouds to your advantage!
There appear to be rumors going around that clouds during a photo session are a terrible thing! Sure, you won’t often get that spectacular glow or that amazingly killer sunburst on these days, but we’re here to help you use those clouds to your advantage with some tips and tricks. Clouds take a LOT of guess work out of the equation! Here’s why!
Looking to improve your photography? Just enter any questions you have about improving your photography below and hit send and get answers & feedback instantly - for FREE! Submit QuestionsTip One: Use Those Clouds to Diffuse Light!
All (well most) photographers hate harsh light! Nothing is worse than meeting a new family when you’re secretly panicking about the light. Been there, done that!
The great thing about cloudy day photography is that clouds act like one BIG soft light diffuser of the sun. It’s mostly a free softbox, guys! This is awesome! Depending on the type of clouds, you’ll get different types of diffused lighting.
If they are intermittent clouds, you may get some bright sunshine peering through in certain areas, or if the cloud cover is heavy, you’ll avoid shadows all together!

Tip Two: Use Clouds to Create EVEN Light
The great thing, above all else when it comes to an overcast sky and cloudy day photography is that it creates soft light! This is what we want, folks. When it comes to taking photos, we typically preach more light over location ALL THE TIME.
Cloudy day photography allows you to have more options to place your clients, whereas, with harsh, directional lighting, you have to be strategic in your subject placement (more on direct lighting here). When you shoot portraits, you ALWAYS want even lighting on your subject AND in the background.
With harsh lighting, many times one part of the photo may be blown out, there are crazy shadows or dark under-eye shadows. This even lighting CAN be your best friend if you know how to use it to your advantage!
BUT, and there’s always a but…did you know that even the most overcast days have a directional light? If you’re like me, you probably didn’t.
Even on those days, there will be brighter areas of the blue sky.
Want to never run out of natural & authentic poses? You need this ⬇️

Click here & get it today for a huge discount.
A quick tip when it comes to portraits in an overcast day is to point your clients TOWARDS that bright spot in the sky to illuminate those faces! (Basically the opposite of harsh light.)
We want to use that bright diffused lighting to our advantage. If you use this light the same as you would harsh light, you’re going to get dark eye sockets and slight shadows on the face.
Tip Three: Set up Your Camera Settings to Work With Clouds
So we need to remember that on a bright sunny day, your ISO setting is probably going to be 100. On a dark weather and with a cloud cover, you may need to bump this up to 400, or 800. A little trick I use on my Canon Mark III is to put my ISO on automatic and see what my camera reads.
Make sure to remember that shutter speed is very important to nail that crisp focus that we all want, so only reduce the shutter speed slightly. Like I mentioned, start with ISO first, as a little bit of grain never killed anyone! Read more on understanding and mastering ISO!
When you focus on your subject, it will tell you on your display, what ISO it calculates. Now, I don’t always use what my camera tells me, but it’s a great reference if you’re unsure! To let enough light into our cameras, we may also need to widen our aperture or decrease our shutter speed (although I don’t love to decrease the shutter speed).
Tip Four: Try to Find Bursts or Pools of Light
If you find that the blue skies are interspersed with more light, try to use it to your advantage! Take a look at the ground and see if there are any “pools” of light on the ground that can create that pretty glow!
Place your clients with the sun on the back of their heads (if it’s direct), and backlight them! That creates a beautiful glow that will illuminate from behind! But…always make sure to find a light source to brighten your subjects in the front!

Tip Five: Brighten Your Subjects on Dark Weather
A great way to brighten up those images during darker days is to find a spot where that minimal diffused light is going to bounce back on your subject. Insteadof using a reflector, use more light colored surfaces in neutral colors! Even though there doesn’t appear to bemore light in the sky, there IS, so use it!

This photo was taken on a cloudy day! The reason her skin is so bright is because she was standing on a white marble walkway that was reflecting the soft light on to her dress and face!
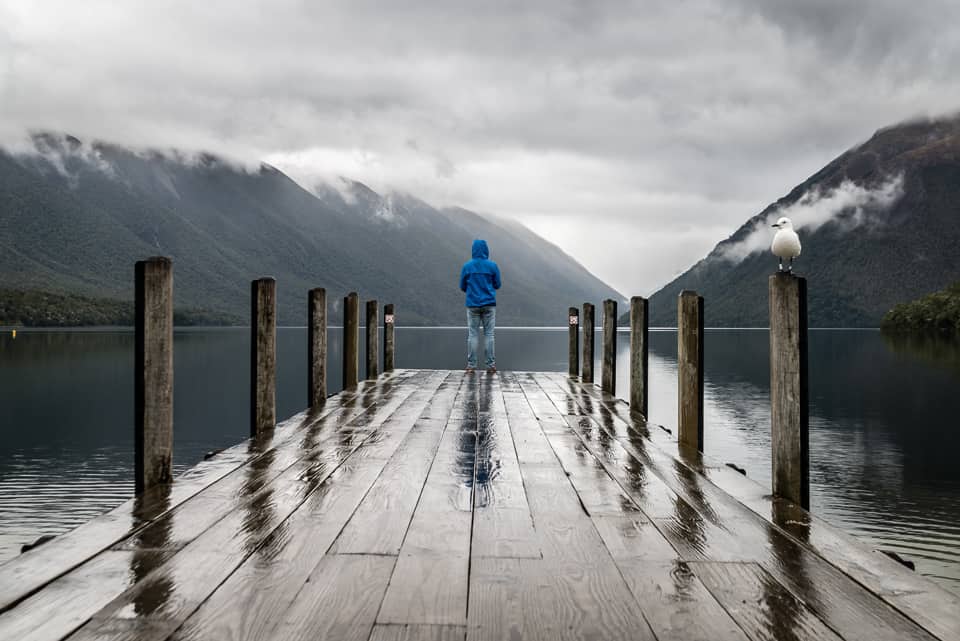
Tip Six: Use Those Stormy Clouds to your Advantage in Your Composition!
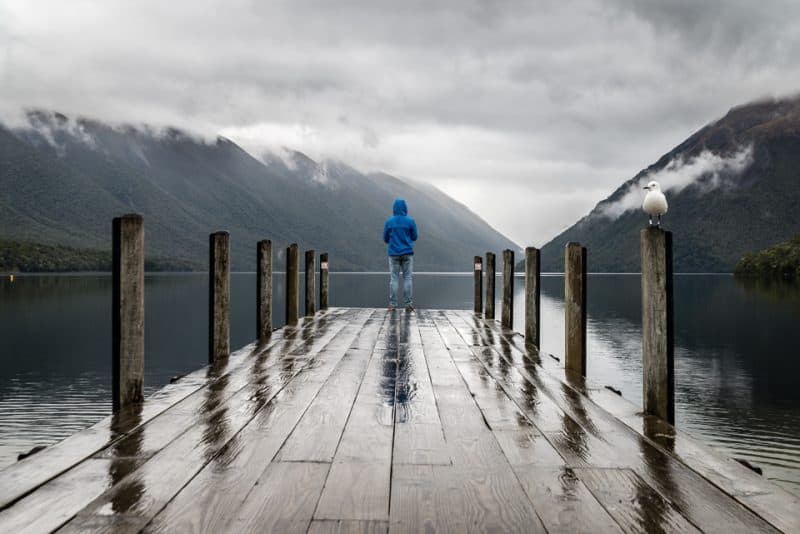
On a cloudy day, use those stormy clouds to your advantage! Having a dramatic sky can add a lot of interest to a photo. You can also play with colors and saturation in post-processing, so you could end up with a very dynamic photo that tells a story! Read more on altering your photo composition!
Tip Seven: Edit Your Cloudy Day Photographs In Black And White
Sometimes we inevitably get home, cull through our images and find that something is missing in our photos or they simple just look flat and boring!
A great way to save these images in post is to change them to black and white! We can also play with the highlights and shadows that can make our pictures more bold and dramatic.
Many times, I’ve taken a photo, and after I’m done editing, I look at it and it’s just not making me feel anything. I might know that it has potential, it just needs a little push. When this happens, I try a black and white conversion to make my photos look stronger and more interesting.
If you’re interested in adding a bit of mood, interest, or impact to your photos, try editing in black and white. I usually recommend doing your regular edit first, and then do a simple black and white conversion. That way you can see if the photo is interesting enough or you should explote other alternatives.
Also, if you didn’t like it in black and white, you can easily revert any changes. However, I bet you will find some new, interesting photos this way, especially on a cloudy day.
Tip Eight: Make A Cloudy Day Less Boring With Color
So how can we make a cloudy day photography session less boring? Add color! If you’re a portrait photographer and live in a perpetually overcast weather like I do, ask your clients to wear a pop of color in their clothing! This can brighten an image and make it more appealing to the eye.
Some bright colors truly pop on a cloudy day, so try to use them often. You can suggest your models to wear brilliant natural colors such as green or blue, as well as brighty and colorful flower motives. Color like these are going to set your photographs in a cloudy day apart.
To summarize:
- Clouds can actually be a free softbox and diffuse natural lighting.
- Clouds create even light and you can use that diffused light to your advantage.
- On a cloudy day, you might want to adjust your camera settings, ISO up to 400, or 800, widen your aperture and slightly reduce your shutter speed.
- Look out for to more light pools and more light sources to brighten your subjects in the front.
- Use light colored surfaces in neutral colors to brighten your subjects on a cloudy day.
- Play with colors and saturation in post-processing to create more interesting photos.
- Try editing your photos in black and white to make them more interesting.
- Use fun colors to brighten your photos and make them more appealing to the eye.
Cloudy day photography may seem like a breeze compared to those harsh lighting situations, but don’t be fooled. There are always little hacks to make your photos even better than you thought, and set you apart from your competition!
Remember these tips and tricks for the next cloudy day!