
If you’ve ever tried taking pictures in the woods, you already probably know how difficult forest photography can be to master. The normal “rules” or procedures that come with nature photography don’t apply, which can make this genre even more challenging. Whether you’re an amateur or an expert, here’s what you should know about forest photography.
Looking to improve your photography? Just enter any questions you have about improving your photography below and hit send and get answers & feedback instantly - for FREE! Submit QuestionsWhat Kind of Gear You’ll Need
Before you start thinking about specifics, it’s important to understand what kind of equipment you’ll need to undergo this type of photography.
Wide-Angle Lens – A wide-angle lens can come in handy with most landscape shoots, and forest photography is not an exception. The woods can be expansive, and a wide-angle lens helps you capture that aspect of your surroundings. One popular technique to employ with a wide-angle lens is to take a picture and look up at the tree canopies. You’ll have plenty of vertical lines, and they’ll look as if they’re converging. Tripod – To keep your camera from shaking, a tripod is almost essential. The last thing any photographer wants is to find the perfect shot or moment, and end up with an image that looks shaky or out of focus. If you aren’t sure what you want to take a picture of yet, you can always place your camera on the tripod while you wait for the right moment.
Camera Body – While the lens might be a crucial part of your camera, having the body is also important too. Without it, you wouldn’t be able to take your pictures in the first place. Telephoto Lens – Forest landscapes can feel vast and intimidating to capture. While a wide-angle lens embraces that fact, a telephoto lens can be helpful if you’re interested in compressing the image. Not only will it keep your verticals straight, but the image will feel tight and straightforward rather than large and messy. Macro Lens – For photographers that enjoy macro photography, a forest offers plenty of opportunities for you to capture the small details you might not notice. Photographers that want to take a picture of forest with a bee on a flower or a tiny animal scurrying in the grass often use a macro lens to do so. Keep in mind that this lens often focuses on one subject, and it’s not the best choice if you want to take a wide shot of your location or a picture of a forest.
Circular Polariser – Depending on the weather, you could be dealing with a lot of damp vegetation with your picture of forests. A circular polariser can reduce the glare from damp plants while making your subject pop even more in forests.
Camera Settings to Best Capture Forests
Like any subject, there are certain camera settings that can help you get the most out of your wooded landscape.
Aperture
A narrow aperture, somewhere between F11 to F14, can sometimes work best with a forest location. While the background might fall out of focus, you can still capture an entire treeline without any trouble. If you’re trying to focus on one subject, a wider aperture might be more helpful.
ISO
Using an ISO that’s a little bit higher than the base ISO can help a lot when it comes to your shutter speed.
Shutter Speed
Using the fastest shutter speed is often to your advantage. Out in the forest, your landscape is constantly shifting. If it isn’t a squirrel scurrying up a tree branch, it’s a slight breeze rattling the trees. If you can, strive to use a shutter speed that’s around or at least 1/100s.
Light Metering
Spot light metering usually isn’t worth the trouble when it comes to forest photography. With natural light, there might not even be the need to worry about overexposure. However, if you’re worried about light metering, try to use the average of your entire picture (rather than one spot). If the sun is filtering through the trees and affecting the focus of your image, you can even try using a little underexposure rather than overexposure.
SPECIAL OFFER – Get Our Photography Fundamentals Guidebook Here for Huge Savings Today – Finally, a VISUAL guide that makes mastering photography as SIMPLE as “A-B-C” so you can confidently shoot in full manual mode, and know which settings to adjust…guaranteed! Click here to learn more.

Finding the Perfect Location
Part of taking great forest images is finding the right location. You might already live in an area with plenty of woods, but if you don’t, you can always utilize tools like Google Maps and Google Earth to find nearby locations.
Really Check Out the Area
To get more comfortable, try putting your camera away and exploring the forest for potential shooting locations. An abandoned cabin or a dirt road could serve as the perfect inspiration. Since forest photoshoots can take a few days to arrange or even wait for the perfect weather, you can even arrange for an entire day to be for exploring.
Spend Some Time in Your Chosen Location
It’s almost impossible for any photographer to walk into a part of the forest or woods and know immediately what to shoot. Before pulling out your camera, don’t be afraid to spend a little time in your location, getting to know how the area reacts to weather changes, wildlife, or even your presence.
Let the Landscape Guide Your Composition
A forest location is all about lines. Whether it’s an individual blade of grass, a group of trees, a road, don’t be shy about using these vertical and horizontal lines in your composition. When you arrive at a location, try to find leading lines that stick out to you, and then use these lines to frame your photo.
Rise and Shine
The perfect shot might only take a second to capture, but the journey to getting that shot can still take hours. Since you have to worry about daylight hours, you’ll want to get up early so that you have plenty of time to take as many pictures as you want. Not to mention, it could take you an hour or more to find the location you want to shoot at.
Don’t Always Rely on Golden Hour to Get the Shot
The “golden hour” in photography refers to the short time after sunrise or sunset when the sun is low in the sky, and the light is softer. Although this is an important and popular time for photographers to shoot, it isn’t the only time.
While photographers sometimes avoid midday conditions since the location feels “flat,” it can work to your advantage in a forest. The trees will diffuse the light, allowing it to “dapple” across the forest floor.
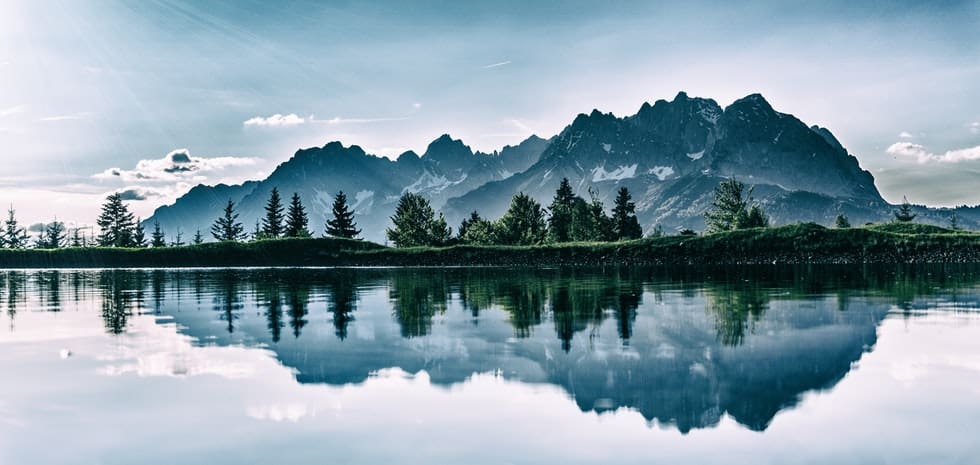
What Are the Best Conditions to Shoot Forest Photography?
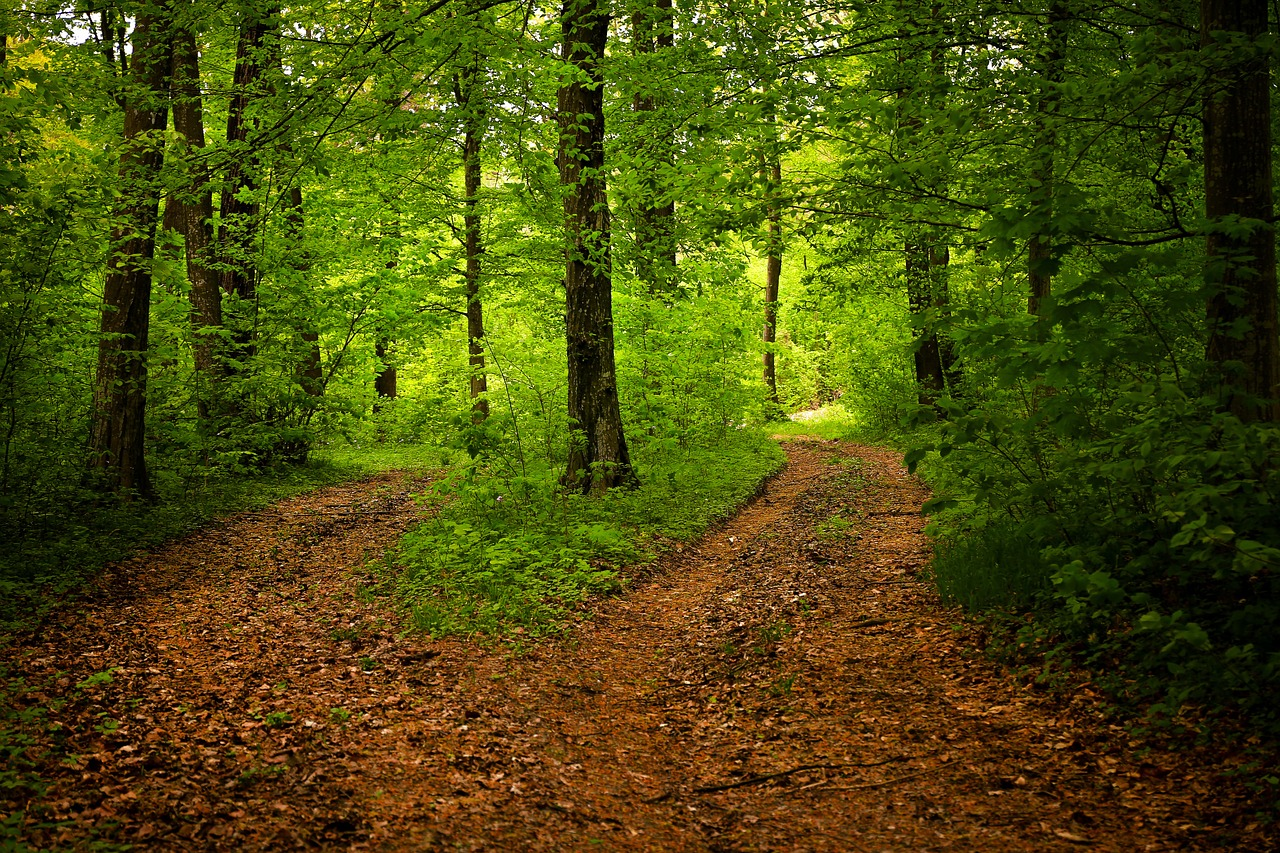
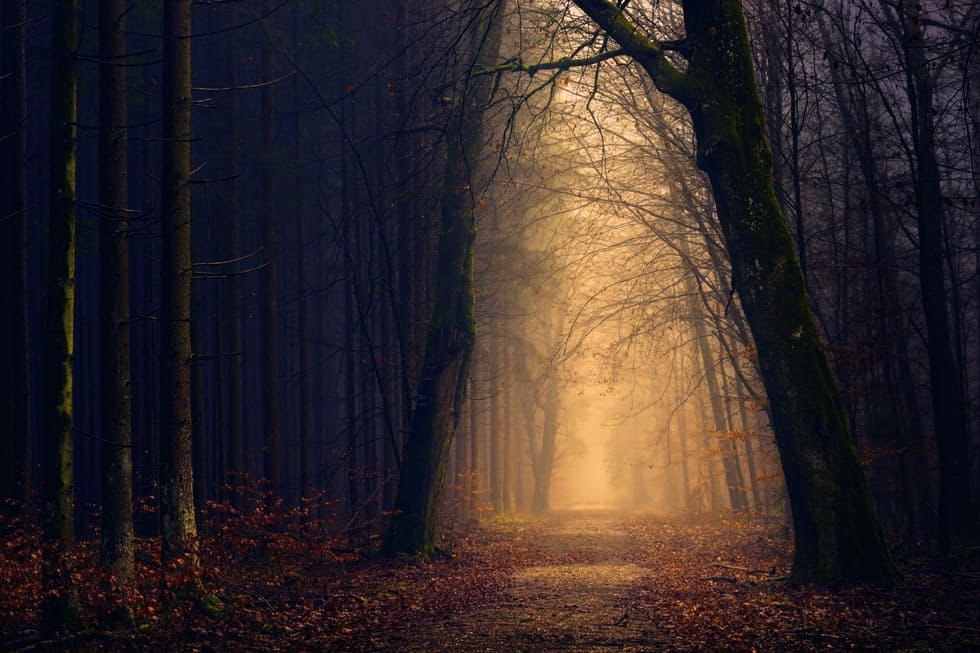
Photo by Valiphotos Licensed Under CC0
One of the biggest advantages of photographing forests is that there are plenty of different conditions that work perfectly to shoot in. Among others, here are the best forests weather conditions to head out in:
- Overcast Skys – While the sight of an overcast day can feel like a disappointment to a lot of photographers, it can be the perfect time to head out into the forest for a shoot. A thick blanket of clouds, combined with a canopy of trees, can soften the location and allow you to notice subtle changes in light and luminosity.
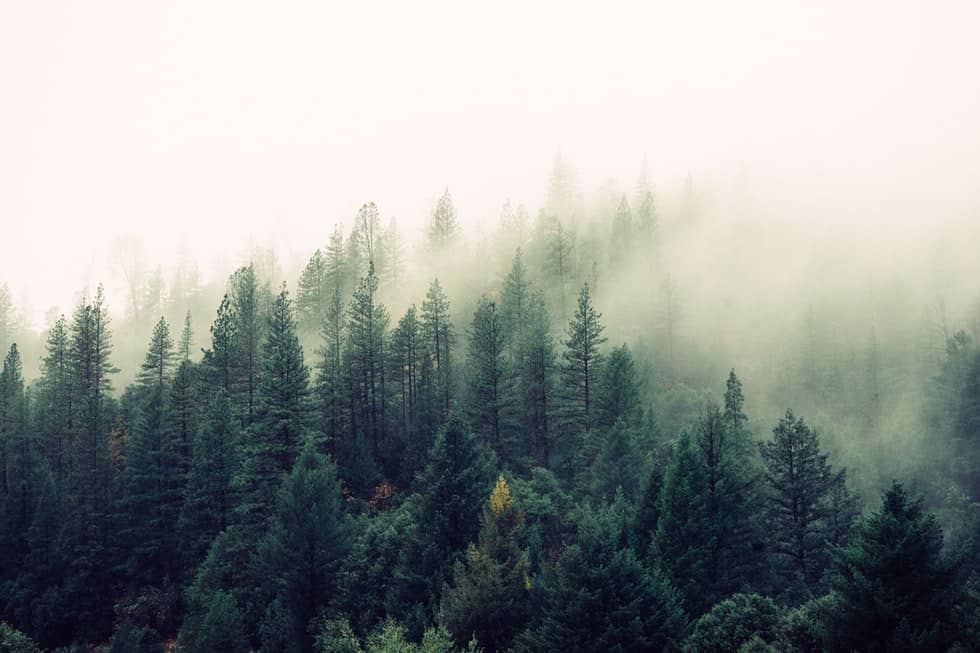
- Foggy and Sunny Weather – While it doesn’t happen all the time, it is possible to experience fog without any cloud coverage. The result can often light up the forest and help your surroundings feel a little more magical. With this weather, it’s easy for the light to peek through the fog and trees and produce vibrant rays. If you pair this weather with certain times during the day (such as the “golden hour”), you could end up with a shot that looks like you’ve photographed a fantasy-land. Some people might assume you used an effect to get this look, so don’t feel shy about correcting them.
- Clear and Sunny Days – For some nature landscapes and forests, trying to shoot on a sunny day without cloud coverage can be almost impossible. However, that isn’t the case with forest photography. During the afternoon or right around noon, the sun is at its highest point in the forests sky, and it might make your surroundings feel flat or dull in comparison. There’s usually a lot of shadows, which can make your image feel “messy” or “unfocused” to most viewers. Getting the contrast you need with a light source is often hard at this time. A much better solution is to head out around sunrise in the forests when the sun is still rising, and the light in the forest is soft. If you can’t get up early, you’ll get the same effect around sunset as well.
- Flat and Cloudy Without Fog – Similar to an overcast day, trying to photograph the forest when the conditions are cloudy and flat can be tricky. Since you won’t have much light to work with, it can be difficult to highlight your surroundings and find contrast. If you have to shoot in these conditions, the best time to be out in the forests might be around sunset. When the sun is low in the sky, it heats the ground and creates humidity in there. There’s a higher chance that sun rays will peek through the clouds and let you capture a few bright spots. Not to mention, the light often feels “softer” when the sun is sinking.
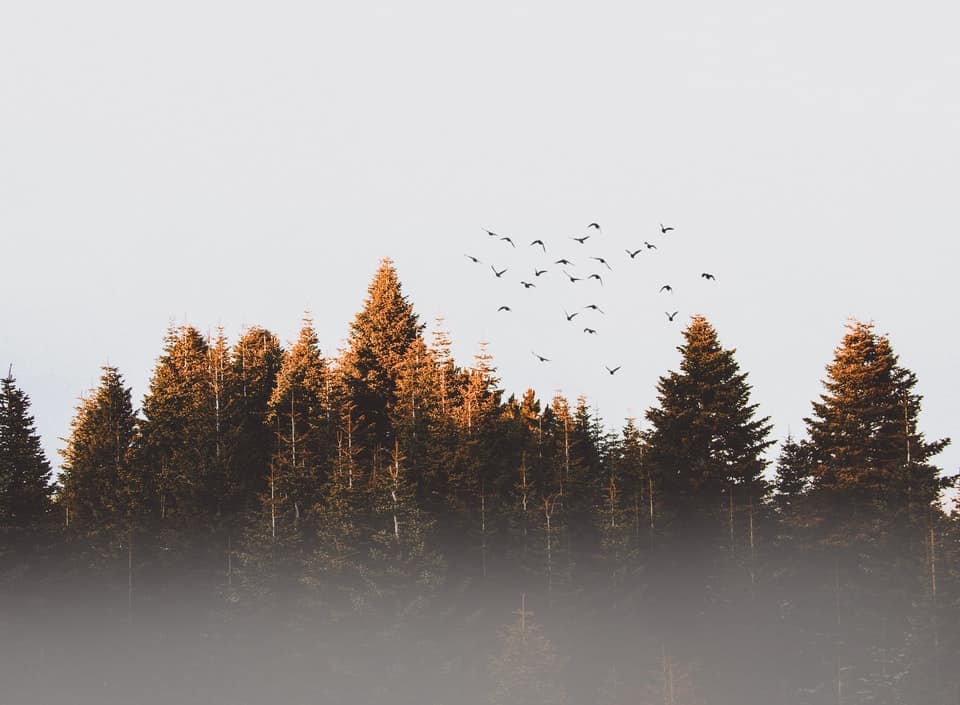
- Clouds and Fog- Speaking of overcast days, fog is another great condition for a forest photoshoot. Even more than an overcast day, the fog in the trees can make forests appear softer, and give the entire landscape an “eerie” feeling. Pairing plenty of fog with bright autumn trees can be an idyllic combination.
- Light Mist – While mist can work well in many different natural landscapes, it can make your forest photography all that more successful. One of the reasons that many people struggle to adequately capture the forest photography is that there’s so much going on. Mist and even fog can be helpful since it “blurs” or “obscures” part of the landscape, and lets you focus on a specific subject easier in the forests.
- Revisiting in Different Seasons – There’s no reason why you have to limit yourself to a season or one time of year with forest photography. Although autumn shows the most dramatic transformations with the trees, the bare bones of winter or the newly-emerging life of spring can offer just as many opportunities for capturing the perfect photo. If you already live near a forest or wooded area, it’s worth seeing how they change throughout the year.
Setting the Scene: Composition Tips
When it comes to creating a composition that stands out, follow these tips to make forest photography feel less overwhelming.
Depth and Distance is Essential
One of the trickiest issues that photographers tend to have with forest photography is creating depth. A good photograph does more than catch a viewer’s attention—it gives them a glimpse into an entirely new world.
With so many different subjects, creating a sense of depth in a forest picture can be more challenging. Without a clear focus, a beautiful image can feel flat. A wide aperture or a long focal length can help blur the background and center your shot.
Find Beauty in the Overgrown Chaos
There’s nothing orderly about a beautiful and chaotic forest. From brimming wildlife and trees that move with the breeze, it can be difficult to find the right shot in all the chaos. It can complicate your photograph, and make it challenging to find what to focus on.
Try simplifying your beautiful forest pictures or finding order in the chaos. Instead of trying to capture the entire scene, look for tiny details that stick out.
Follow The Light
When you’re walking through the woods, it’s always a good idea to head toward the light sources rather than away from them. You’ll probably see that the light looks much different when you walk away.
Since the sun is always moving and filtering through the trees, you’ll see the light hit different spots and areas of the forest. If you do decide to follow the light, don’t forget to carry a map or mark your vehicle with a GPS. It’s all too easy to spend hours following your light source and attempting to get the perfect shot without even realizing it.
Attempt to Use Leading Lines
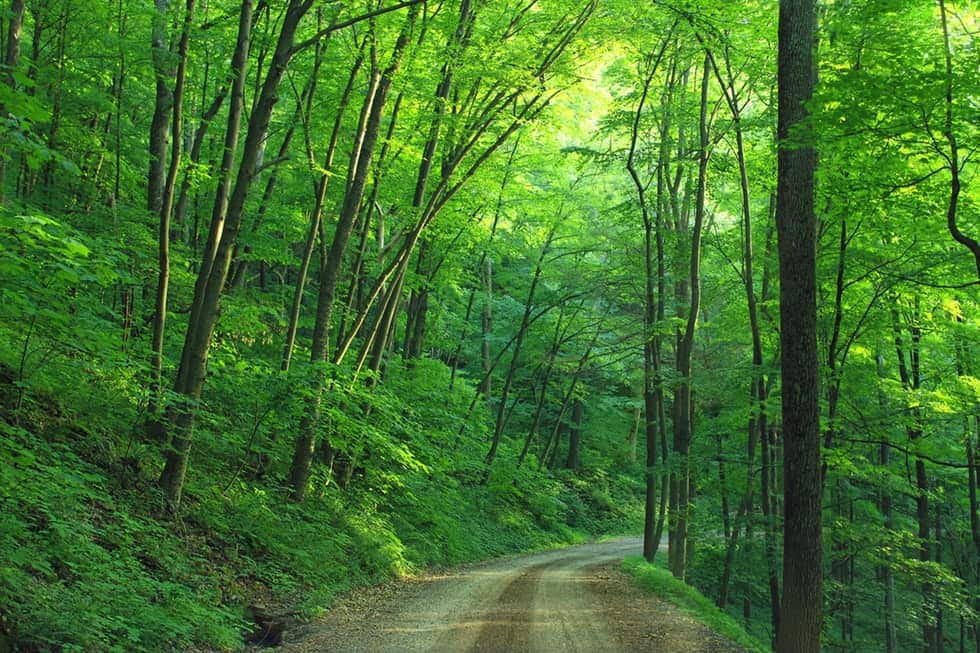
Leading lines are a photographer’s best friend, and the forest is often full of them. While you shouldn’t rely on leading lines as your only compositional tool, they can be helpful. A road or path, for instance, is a notable leading line that can ground your image as well as create depth.
Quit Looking for the Perfect Shot
Unfortunately, amateur photographers or anyone without forest photography experience is likely to have problems finding a great or beautiful composition. Rather than spending hours looking for the “right” composition that fits your formula, just take pictures of details or subjects that catch your eye.
What you capture might not end up being picture-worthy, but it could also end up looking great (or even inspiring something else).
Focus on Color and Contrast
Contrast is another way to focus a beautiful picture and catch the viewer’s eye. Contrasting sun rays or bright spots with the dark woods is one way to engage your audience. Using tools such as complementary colors to contrast certain areas of the shot is another handy technique.
If you aren’t sure which colors pop together (and which ones don’t), make sure you try using a color wheel to pinpoint which colors are complementary.
Take a Stroll in the Rain
An overcast day or a little rainy weather can put a damper on capturing some scenes, but not when it comes to woodland photography. While the canopy of trees will help shelter you from the rain, the water droplets will illuminate the beautiful greenery and add vibrancy to the scene. As long as you can protect your camera, there’s no reason you can’t shoot in the rain.
Photographers often choose to bundle up, make sure they grab their umbrella, and head for the woods because they know they’ll get a shot that they wouldn’t get otherwise. The rain adds more drama to their environment, and makes the forest feel alive.
Keep in mind that, if it’s also storming or thundering out, you should be careful about walking into the woods. If there’s a chance of lightning, you don’t necessarily want to be around a bunch of trees that could easily catch on fire and put you in danger.
If you decide to head out, you’ll want to make sure you protect your camera. Even with the coverage or trees, you’ll need to do more than hide your lens under your jacket. A plastic bag can work well for protecting your lens from water, but a waterproof camera bag is even better. The good news is that a lot of higher-end cameras tend to be watertight, and usually won’t break if a few water droplets hit them. However, foregoing the protective equipment is still not a good idea.
Since you never know whether a sunny day could turn into a rainy one, it’s almost always a good idea to prepare yourself and bring a protective case for your camera along for the day. You never know when you might need it.
The Essential Wardrobe When Photographing Forests
Although photographers might not have a traditional office job with a dress code, that doesn’t mean they won’t need a “uniform” when they head out into the woods for photographing forests. Without the right gear, your outdoor photography shoot could quickly become uncomfortable and even a safety hazard.
Always Consider a Jacket
A coat might not be essential during the summer, but it can keep you warm during a bitter winter or breezy autumn. Not to mention, having the extra layers can also protect your arms and skin from wayward branches. As you navigate the forest, it’s easy to snag your arm on a branch and end up with a scratch or cut. At the very least, a light jacket during the warmer months can prevent you from ending up with a bunch of mosquito bites or scratches.
Pants over Shorts
Even in the summertime, people who go camping or hiking often choose to wear long pants rather than shorts or a dress. With plenty of bugs, branches, or other debris that you might come across, wearing pants is the best way to protect your legs.
Many photographers often find that it’s easier to maneuver the woods when they’re wearing long pants rather than a skirt or dress.
Durable Shoes
It almost goes without saying, but if you intend to explore the forest, shoes are crucial. The last thing any photographer wants is to ruin their shoot by injuring themselves on a rock or a sharp twig. You don’t always see these hazards.
Keep in mind that some shoes are better than others. Sandals or flip flops might be convenient to slip on, but they’re not great for trekking through the woods all day.
Instead, try investing or thinking about a pair of durable sneakers or tennis shoes. If you plan on shooting during the winter, see if a pair of snow boots or hiking boots might not be the better option. These shoes are better-equipped to handle the rough terrain of the forest and protect your feet from potential safety hazards.
Editing Tricks for Forest Photography
Most photographers know that even the best shots might need a little touch-up when it comes time for processing and editing. What you see as a good shot can easily become a great one with the right effects. However, editing forest photos is not the same touching up a portrait or even a landscape photo. You’ll want to carefully consider every effect and technique that you can add.
Look at Micro-Contrast
If your picture has light rays or sunlight that peeks through the trees, you can make these rays pop by adding a little micro-contrast. Keep in mind that you don’t want to add contrast to the whole images, but only the spots where you see the rays. Micro-contrast is a subtle effect, and it’s important not to overdo it. If you add too much, you can end up drawing attention away from the subject and confusing viewers.
Find That Glow
One reason that many people enjoy forest photography is that these images feel magical. That’s rarely an accident—many photographers add a subtle glow effect to their images to help key areas sparkle and catch your eye. See what a little glow adds to your pictures.
If the image or photo feels as if it’s lacking something, don’t be afraid to a little glow to the vegetation, leaves, or the sunlight rays. Like micro-contrasting, adding too much glow can confuse the viewer and make the image feel artificial.
Consider Color Changes
Speaking of color changes, you can also work to adjust the color of certain parts of your photo, like the leaves. While you probably don’t want to do anything drastic that could make your image or photo look fake, you can add a little more of a dramatic look.
For example, if the leaves in your photo are already red or yellow but don’t stand out, you can always add a little more color to help them pop. Even if you aren’t sure what colors you want to change or adjust, don’t hesitate to experiment and play around with different hues. You might end up with a better result than you think.
Durable Shoes
It almost goes without saying, but if you intend to explore the forest, shoes are crucial. The last thing any photographer wants is to ruin their shoot by injuring themselves on a rock or a sharp twig. You don’t always see these hazards.
Keep in mind that some shoes are better than others. Sandals or flip flops might be convenient to slip on, but they’re not great for trekking through the woods all day.
Instead, try investing or thinking about a pair of durable sneakers or tennis shoes. If you plan on shooting during the winter, see if a pair of snow boots or hiking boots might not be the better option. These shoes are better-equipped to handle the rough terrain of the forest and protect your feet from potential safety hazards.
Respecting the Environment
It’s an unspoken rule that, regardless of where you shoot pictures of forests, you always want to be respectful of your surroundings. When you leave the forest, you want to leave it as you’ve found it.
Take whatever for you brought with you, and attempt not to disturb any wildlife or plant life that might be nearby. The forest gave you plenty of great photos, so it’s only fair that you can pick up after yourself and remain ethical.