Amp up the impact by capturing motion in your photos
We spend a lot of time talking about how to avoid blur in our photos. But sometimes blur is exactly what you want! Why? Because inducing blur is one way to convey motion in an otherwise static image. This tutorial will cover five different methods to improve your storytelling and up the wow factor by capturing motion in your photos.
Why would you intentionally make your photo blurry?
Our lives are not stationary. We live in a world of constant motion. People. Machines. Animals. Heck, even the water and the clouds are in constant motion. So why should we settle for static images all the time?
The answer is, you don’t have to! By understanding a few techniques, you can begin capturing motion in your photos and tell a more accurate and interesting story. Motion can create a sense of excitement or convey a sense of calm. It can depict a big moment or a feeling of isolation. Knowing how to convey motion in your images gives you so much more storytelling power!
Looking to improve your photography? Just enter any questions you have about improving your photography below and hit send and get answers & feedback instantly - for FREE! Submit QuestionsTechniques to Convey Motion
When you think of motion, you might automatically think of action shots like sports. But anything that moves can create compelling action in your images…animals, people, cars, trucks, lights, stars, waves or even clouds. There are a few different methods available to portray action. Which one you choose for capturing motion in your images depends on the goals of your image.
• Freeze motion. Your subject is stopped in mid-action.
• Motion blur with long exposure. Use the power of long exposures to create light trails, motion trails or to blur water.
• Panning. Move your camera with your subject to blur the background.
• Stroboscopic flash. Shoot successive movements in a single frame.
• Zoom blur. Zoom in or out while taking the photo to add movement.

Freeze Motion
One of the most basic techniques for capturing motion in your photos is to simply freeze the action. Use a fast shutter speed to stop, or freeze, the motion at a visually appealing moment in time. This is a technique commonly used by sports photographers, but can be used in just about any genre of photography. Examples of freezing motion are sports, animals on the move, birds in flight, explosions, water spray or fireworks.
To stop motion, use a fast shutter speed so your subject is sharp and crisp. The faster the action, the faster your shutter will need to be. Here are some basic guidelines:
- 1/4000 of a second: freezing really fast objects like race cars or humming birds, fast balls, etc.
- 1/2000 of a second: flying birds
- 1/1000 of a second: most fast-paced sports like football, volleyball, or rodeo and fast-moving animals
- 1/500 of a second: slower sports like basketball or soccer
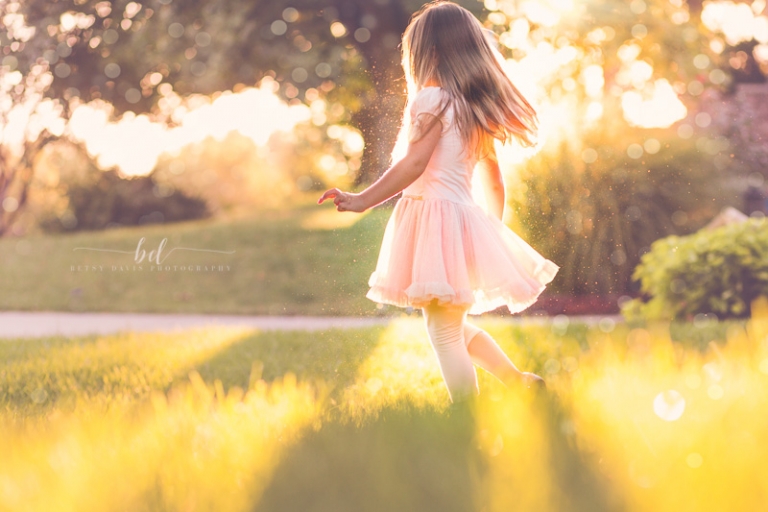
- 1/250: slow-moving animals or kids
The most dynamic stop motion shots capture the subject at the peak of the action. A horse in mid-jump, a baseball bat connecting with the ball, a snowball just starting to explode. Pairing a frozen subject with other frozen elements makes for some really interesting compositions to emphasize a moment stopped in time. Dirt, mud, sweat, water spray, sparks, or even saliva can all help contribute to the aesthetic of frozen action.
[ad id=’2′]
Motion Blur
I’ll use the term motion blur here to describe using a slower shutter speed to let parts of your image blur intentionally. You can keep your subject static and let other elements of the image go blurry. Or keep the background static and let your subject blur. The technique is the same but the results will each tell a different story.
Examples of inducing blur for capturing motion in your images include creamy waterfalls or waves, blurry foliage, smooth clouds, light trails or star trails.
Use a tripod to eliminate camera shake and select a shutter speed long enough to get the blurred effect you like. Here are some settings to start with, but experiment to get the look you want!
- 1/30 of a second: blurring motion
- 1/8 of a second: blurring moving water or fast clouds
- 1 second: fireworks or other explosions
- 1-2 seconds: blurring slow moving clouds
- 5-30 seconds: light trails
If you’re having a hard time reducing the light coming into your camera to balance the longer shutter speeds, a neutral density filter can help. See our tutorial on the ND filter and what it’s used for!
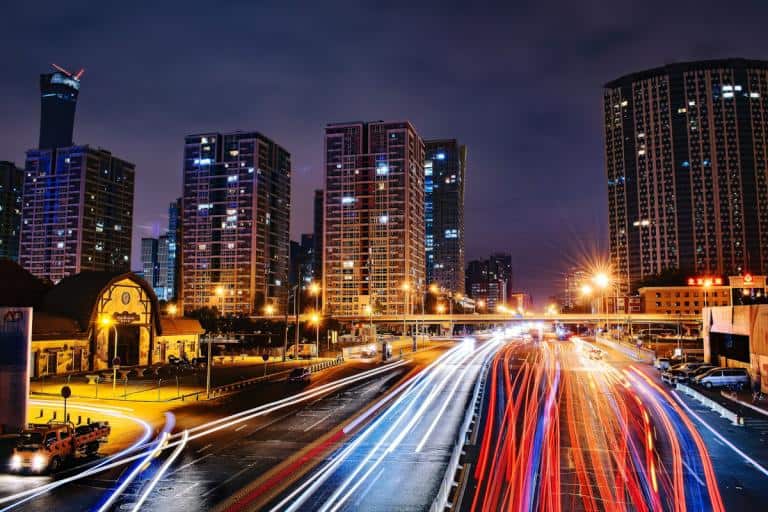
This photo of a roller coaster at night is an example of leaving the background static and letting the subject move to capture motion in your photos. The lights on the roller coaster leave a trail as they zip around the ride.

This image is an example of leaving your subject static and using a long exposure to convey motion. Here, the longer shutter speed blurs the water and the clouds to create a dreamy, peaceful feeling. How different would this image look if the photographer had simply stopped the action as the waves crashed over the rocks? Would it have the same ethereal feel?

See our tutorial on long exposure photography for other great ideas and tips!
Panning
Panning is the technique of moving your camera WITH the subject to blur the background.
This is one of the more difficult techniques to really master, but the results can be spectacular.
The trick is finding the correct shutter speed. Generally, you’ll find the most reliable shutter speeds for panning are 1/30 of a second to 1/125 of a second. But the faster the subject is moving, the faster your shutter speed will need to be.
To create a panning photo, you’ll want a subject that moves across your frame, either from rlight to left or left to right. First, acquire your subject and find focus. Then continue to track the subject in your frame by moving your camera and body at the same speed. Fire your shutter when the subject is parallel to your camera while continuing to follow through with tracking your subject. The faster your subject, the more difficult it can be to pan.
If you’re just getting started panning, try a subject that moves relatively level across your frame, like a car or bike. Subjects that moving horizontally and vertically, like galloping horses or fast-moving dogs, are more challenging.
A great exercise to practice panning is to have someone roll a ball across a floor or have someone ride a bike or run past you. Cars on a highway are also excellent subjects and readily available. Just shoot from a safe and secure location.

Stroboscopic Flash Images
These images use the power of flash and a long exposure for capturing motion in your photos. It sounds sort of crazy but the results are really unique and fun!
It works like this…the flash (either a speedlight or strobe) fires multiple times during a long exposure, lighting the subject at different points in the action. Each lighting of the subject is recorded on a single frame, giving the impression that the subject is moving.
This technique is often used with bouncing balls as shown in the photo below from Wikipedia, dancers and athletes, but any moving subject in low light or dark scene can work.
 You’ll need a flash that offers MULTI mode or stroboscopic mode and a tripod. You’ll use the flash’s menu to set the flash power, total number of flashes and flashes per second. It takes some experimenting to balance that with your overall shutter speed and exposure.
Give yourself time to practice and tweak settings! I’ve practiced this a lot and have yet to come up with an image I just really love. And know you’ll be limited on some settings by the speed and power of your flash. Check with your strobe or speedlight to see if it offers a stroboscopic mode or multi-mode!
Here’s a really great video on how to shoot a stroboscopic image.
Zoom Burst
If stroboscopic flash images are the hardest to set up, accomplishing a zoom burst to capturing motion is the easiest! This fun and simple technique adds motion and a crazy, abstract feel to your image.
The concept is simple. Find a static subject, dial in your settings for a long(er) exposure then move the zoom ring out or in on your camera AFTER you press the shutter and while the exposure is still active. I find this is easiest with a tripod or setting your camera down on something, but you can also do it handheld.
The best subjects and images for this technique involve bright colors or patterns. Lights at night and even stars are especially well suited to this technique. Try zooming in and out and see which you like better! You don’t have to zoom the full focal length of your lens, even just a little blur will help add motion to your shot. You can also pause zooming in or out at one or more points in the exposure, which will bring your subject into partial focus for part of the scene.
Again, if you’re having trouble with too much light, use a neutral density filter to block some of the light.
The image below was taken with a zoom burst.

No zoom lens? No problem!
If you only have prime lenses, you can try a variation on this technique by finding your subject, acquiring focus then rotating the camera in either direction as you expose the subject. This method produces different results than zoom bursts, but it can still be a lot of fun.
Our world is constantly moving and changing. If you learn and master the different ways of capturing motion in your photos, your images will become more dynamic and add a wow factor. Besides, it’s so much fun to be creative and push the boundaries of photography!