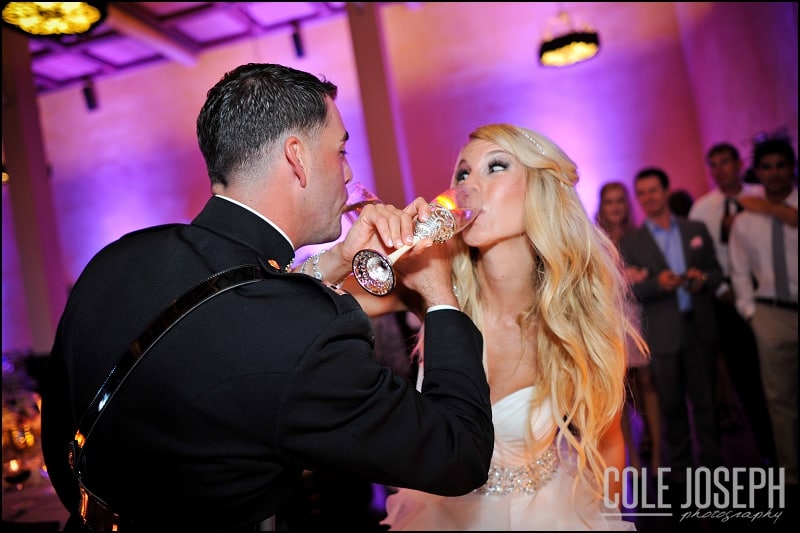

Using a rim light allows you to capture dramatic and mysterious photos. The technique is straighforward, and it’s a great introduction to working with lighting effects if you’re a novice photographer.
Looking to improve your photography? Just enter any questions you have about improving your photography below and hit send and get answers & feedback instantly - for FREE! Submit QuestionsHere is what you need to know about using this type of lighting effect to capture unique photos.
What’s a Rim Light?
Rim light refers to a lighting technique that you can achieve by placing lighting behind your subject. You need to hide lighting behind the model to avoid ending up with an overexposed image.
The result is a dark shot where only the silhouette of your subject is visible while everything else is hidden in deep shadows. This type of lighting effect is an artistic way of playing with highlights and shadows, and the results are very aesthetic.
What’s a Key Light and Fill Light?
There are a few lighting concepts you should know about before you start experimenting with lighting effects.
Three-point lighting is a fundamental concept that you will encounter in photography and cinematography:
- Key lighting is your primary light. It’s usually directed toward your model.
- The purpose of the fill light is to fill the shadows created by key lighting and achieve a result that looks softer and more natural.
- Photographers typically add a backlight to emphasize depth and create a 3D effect.
Another essential concept is the lighting ratio. You can achieve a natural look by having a key-to-fill light ratio of 2:1, but you can increase this ratio to 16:1 to create a dramatic look that you would find in a film noir or horror movie.
What’s Edge Lighting in Photography?
Edge lighting is a lighting technique where you emphasize a subject’s silhouette by placing backlights in the background directly behind your model.
Edge lighting uses light that is typically located in front of the subject. You can achieve a dramatic effect by using a soft and dimmed light as your main lighting and placing sharper backlights in the background behind your subject and higher.
What’s Low Key Lighting Used For in Photography?
Low key lighting refers to a lighting setup in photography where there is a low ratio of key lights per fill lights. The purpose of this technique is to accentuate the contour of your subject, create deep shadows, and work with contrasts.
The result looks very aesthetic, and it’s a look you can achieve with basic photography gear!
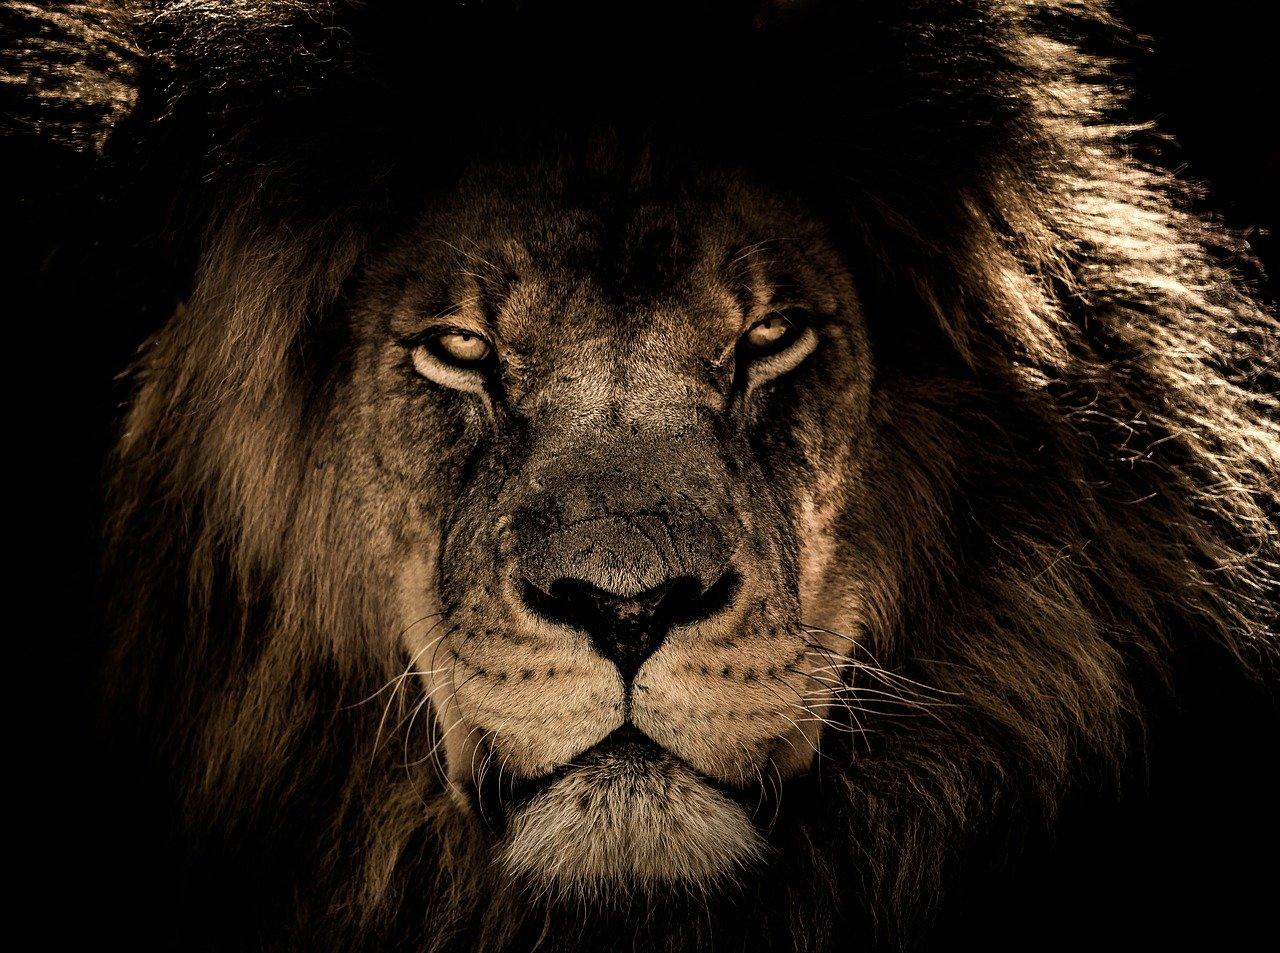
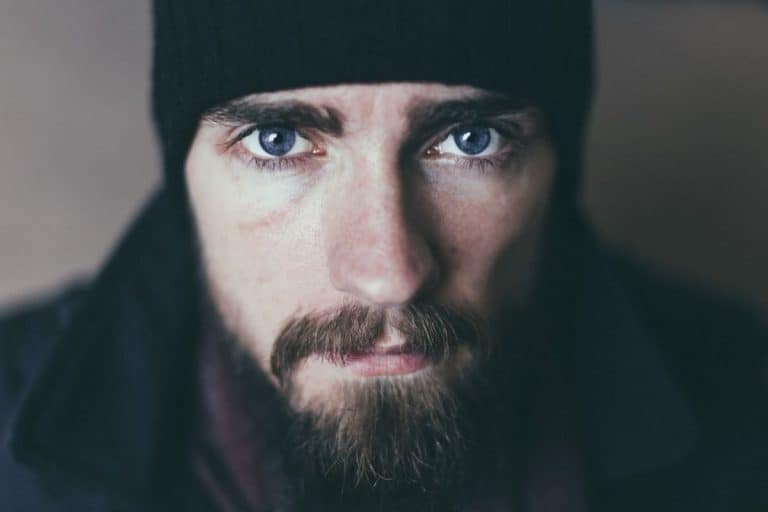
This stunning photograph by IanZA combines muted front lighting with sharper backlighting for a unique effect (Pixabay License).
Rim Light – A Simple Way to Create Powerful Images with a Single Flash
If you’re interested in experimenting with photography effects, we recommend getting started with rim lighting. It’s a simple lighting photography technique that yields dramatic results.
It’s Easier Than You Think
A lot of photographers prefer to work with natural lighting when they get started in photography. Working with artificial light can seem intimidating, but it’s easier than you think.
Start With a Simple Setup
As you gain more experience, you will be able to create complex light setup and explore low key light.
If you’re new to light setups, we recommend experimenting with a rim light since you can learn a lot and develop your style while working with a single type of light.
Rim light is a great starting point because you can do a lot of interesting things with a single type of light.
Getting the Rim Light Effect
You can create a rim lighting effect with a simple flash or softbox. Place your light in the background behind your subject, and position your subject to hide it.
Adjust the output so that highlights fall on the subject’s silhouette without spilling over too far.
Explore Different Effects
Once you have done a few tests with rim lighting, look for ways of creating some noteworthy effects. Here are a few ideas to explore:
- Add color filters over your rim light.
- Mix your rim light with another to explore low key effects.
- Introduce props. Familiar objects will look mysterious under a rim light.
- Explore digital editing options. You can play with highlights and contrast to create a more dramatic effect.
Conveying Emotion with Light
Hiding your subject in shadows means that you can’t capture their facial expression. There are other ways of expressing emotion with your photo.
You can emphasize the element of mystery by adding props to your shot. Familiar objects will look very different with rim lighting, and viewers might not be able to identify props right away.
A rim light makes your subject’s silhouette stand out. You can pose your subject to express different emotions. Have them turn their head to the side to capture their profile.
Focus on your subject’s hands. You can capture gestures and make them the center of your composition by having a rim light behind your subject’s hands.
Hair is another element that looks interesting under a rim light. Flowing hair will create a unique texture and light effect.
Explore Light Diffusion
Working with a rim light allows you to capture diffusion from an unusual angle. You can play with this effect by filling the space behind and next to your subject with things that will reflect and diffuse light.
Your options include:
- Using props made from transparent material like glass.
- Creating water droplets.
- Aerosol cans can create some unique effects.
- Adding a bit of smoke to your image will look amazing.
Which Type of Light Can Be Used for Rim Lighting?
Let’s talk about photography gear. What kind is best to create a rim lighting effect?
Studio Strobes and Off-Camera Flash
You can achieve a rim lighting effect with a simple studio strobe or off-camera flash. These lights are usually compact and easy to hide behind your subject. The downside is that these lights can look harsh.
LED Lights
LED lights are easy to set up and use. The downside of LED lights is that they aren’t as bright as a studio strobe, but working with continuous light makes setup easier if you are new to working with effects.
Natural Light
You can start experimenting with rim lighting by using natural light. You will have to wait until the sun is low on the horizon so that you can place your subject in front of it.
Another way of using natural light is to capture a shot in a dark room and use a window as a light source. You can create a more dramatic effect by covering part of the window with curtains or thick black paper.
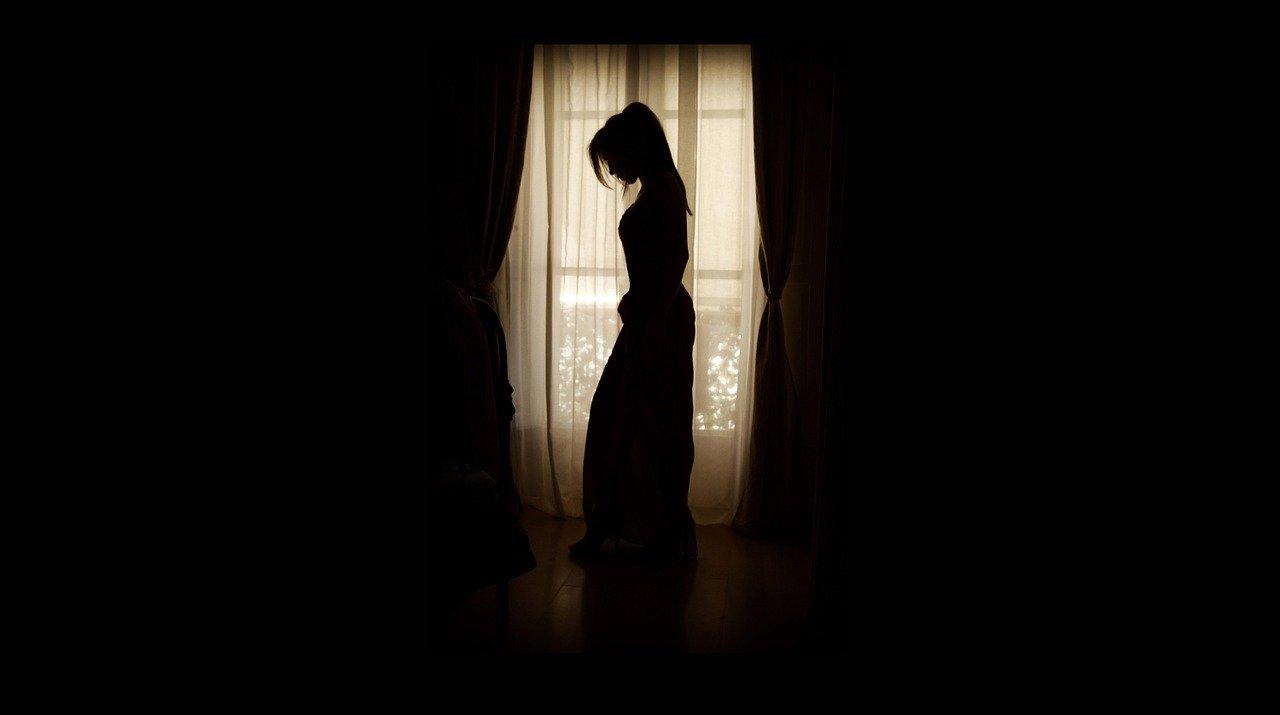
This shot by skeeze (Pixabay License) illustrates how you can use a window to create a soft rim lighting effect.
DIY Rim Light
You can use any type of light to create a rim lighting effect if you have basic DIY skills and a bit of imagination. You can set a simple lamp behind your subject to create a rim light effect. An LED desk lamp with an adjustable neck and different brightness settings is a very inexpensive way of testing that technique!
Set Up for Contrast
You will get better results if you adjust your rim light to achieve optimal contrast. You can enhance contrast by working with a brighter light, or by choosing a black background for your shot.
Don’t worry if you can’t create ideal conditions to capture a strong contrast. It’s one of the things you can adjust with a digital editing program.
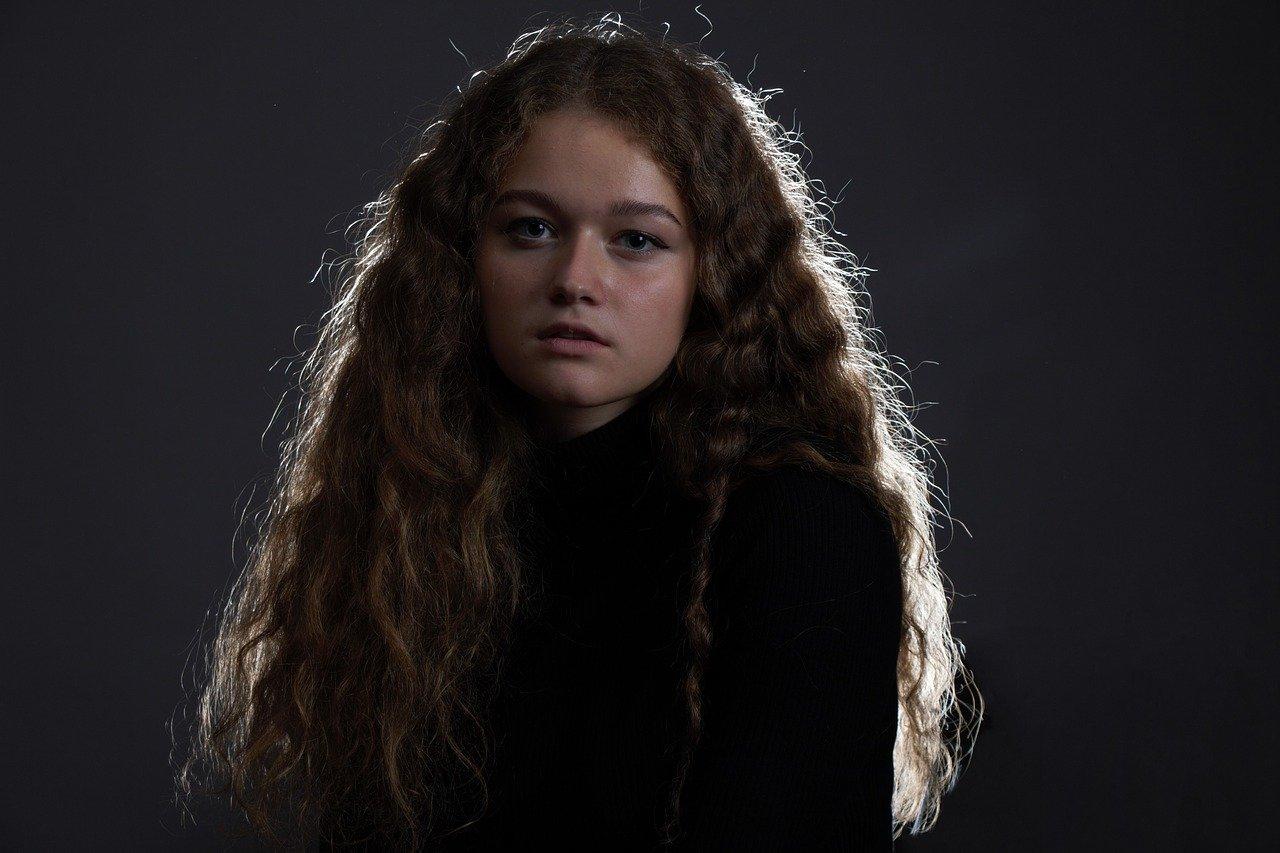
This portrait by Olga1205 uses a gray background to create contrast (Pixabay License).
Rim Light a Portrait with Available Light
You can use this for portrait photography if the sun is low on the horizon or if you have another light source that you can add behind your model. Look for black backgrounds to create contrast.
Rim Light a Portrait with Available Light and Flash
There are two ways of capturing it with available light and a flash. You can create a dramatic effect by using a natural type of light as a fill light and placing your flash behind your model.
You can get a softer and subtler effect by using natural light and positioning your flash to act as your fill light.
Rim Light a Portrait with Studio Strobes or Flash
You can enhance contrast by using a black background and having your model stand far away from the background. If you want a soft lighting effect, lower the output of your studio strobe or flash.
Lower your camera’s ISO to capture details, and adjust your shutter speed to sync it with your flash. Slower shutter speed will capture more highlights and add diffusion around your model while a faster shutter speed will capture an effect that makes your model’s silhouette look crisper.
Luminous Edges Intensify a Rim Light Portrait
A rim light portrait will draw the eyes to the edges of your subject and emphasize their silhouette. You should focus on that area of your composition to infuse emotions into the shot.
You can give a translucent quality to the edges of your subject by capturing hair light around your subject’s head or choosing outfits and accessories that have a frizzy texture.
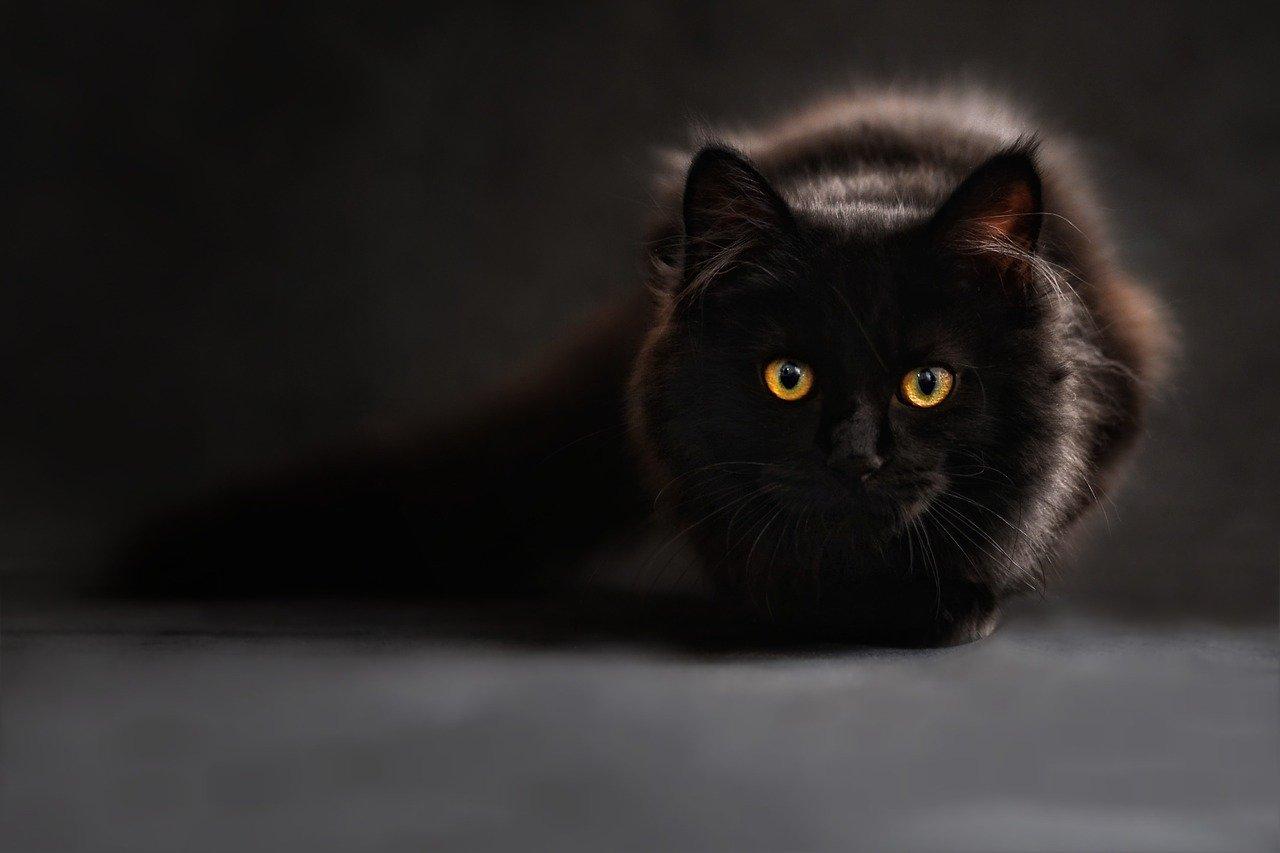
This shot by ClaudiaWollesen captures a cat in a unique manner by emphasizing the fuzzy hair texture (Pixabay License).
Editing Rim Light Portraits
You can enhance your portrait in post-processing. Think about adjusting brightness and contrast to emphasize the effect.
You can use masks to isolate different areas of your shot and create deeper shadows and lighter highlights, or adjust color saturation and contrast to add deep and rich colors to the shot.
How to Make Any Softbox into a Striplight
The downside of using a softbox is it might be too large to capture the effect you are looking for.
Thankfully, you can easily turn your softbox into a striplight and have more control over where the light falls in your shot. All you have to do is cut two pieces of dark cardstock and tape them on both sides of your softbox. You can adjust the position of the cardstock pieces to widen or narrow your homemade striplight.
Basics of Rim Light or Dark Field
Working with this field means that the person or item you’re photographing is standing against a black background.
We already discussed how to create a basic rim light effect with a single light. All you have to do is set your light directly behind your subject, and use the subject to hide the light.
There is another technique you can use to achieve the rim light effect with a dark field. You are going to need two different lights.
You can use two flashes, strobes, softboxes, strip lights, or any other that is available. You can create a rim light effect by placing your two lights on the left and right of your subject. This technique allows you to keep the light outside of your field.
How to Do the Bright Field Lighting
Bright field lighting is a useful technique for product photography. This lighting effect enhances the object you’re capturing and makes its details stand out while the background looks bright and clean.
You can create bright field lighting by placing a single light directly behind your subject. You can use a softbox and cover its sides with pieces of thick and black cardstock paper to block out the light.
You will get better results if the surface on which the object is placed is also black, and add additional black panels on both sides of the product to reduce interference from another possible light source.

This image by Pexels shows what a bright field shoot typically looks like (Pixabay License).
How to Do Rim Light on a Lens
A fun project to get started with product photography is to capture a photo of your favorite camera lens with rim light!
It’s a unique challenge because camera lenses are dark objects, and you will have to use additional fill lights or reflectors to prevent shadows from hiding the details of your lens. Try capturing a shot of your camera lens against a bright field, and capture another shot with a dark field.
Other interesting objects include glassware and other translucent items, items with reflective surfaces, and items with unusual shapes.
Conclusion
Rim light yields stunning results, and this lighting effect will help you gain experience with the different settings of your camera. You can get started with simple photos to explore this effect and work on more complex lighting setups once you gain more experience with that technique.