Some of the most opportune moments in photography happens when you least expect it. For me, this happens a lot when I am hanging out with my friends. There is this thing that happens that the light-bulb goes on and the magic of collaboration and creativity come together. This is what happened to me recently during a night with friends in Mammoth Lakes, CA.
Looking to improve your photography? Just enter any questions you have about improving your photography below and hit send and get answers & feedback instantly - for FREE! Submit QuestionsWith a simple question of, “Hey can I try something?” The motion of collaboration was set to photograph something that I haven’t done before. That was to create a “glow halo” effect on moonlit portraits. The only problem was, I didn’t have enough lights nor did I have any light stands or flash triggers with me, but I knew with some ingenuity and some friendly collaboration I could achieve my vision.
Here is how I did it
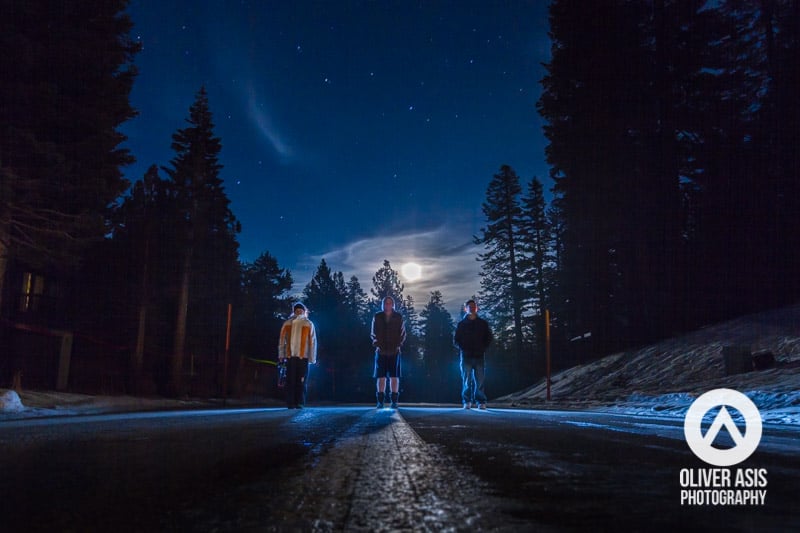
To capture this image. The first step was to pre-focus on my subjects and then put my lens to manual focus since it was an extremely dark night with no ambient lighting. I used the small amount of light from the rising moon to help focus my shot. With my shot in focus, I next set my aperture to 5.6 and set the camera for a 30 second exposure. With my camera settings I tried to achieve hyper focal distance, meaning getting the shot focus from near to far. From past experience I had an idea that with a 10-22mm lens set to f5.6 that I could get most of the shot acceptably focused so I went with that. Being late night, I knew there would be some blur because keeping people still for 30 second is a bit of a challenge but the long exposure was crucial to get the nighttime moonlit sky and also give me time to run through with my flash. And with everything set I took a test shot to see if I was happy with the lighting, composition, and sharpness of the image.

The result is the following:
I was fairly happy with the shot. The key to capturing the shot was making sure that I get the light to light up and spread around my subjects. In order to do with only one light, no triggers, or no light stands, I had to manually set and trigger the flash.
For the shot above, I set the flash to 24mm and set it to 1/8 power. The result was okay. It highlighted the edges however lacked in the glow that I was looking for in the final image.

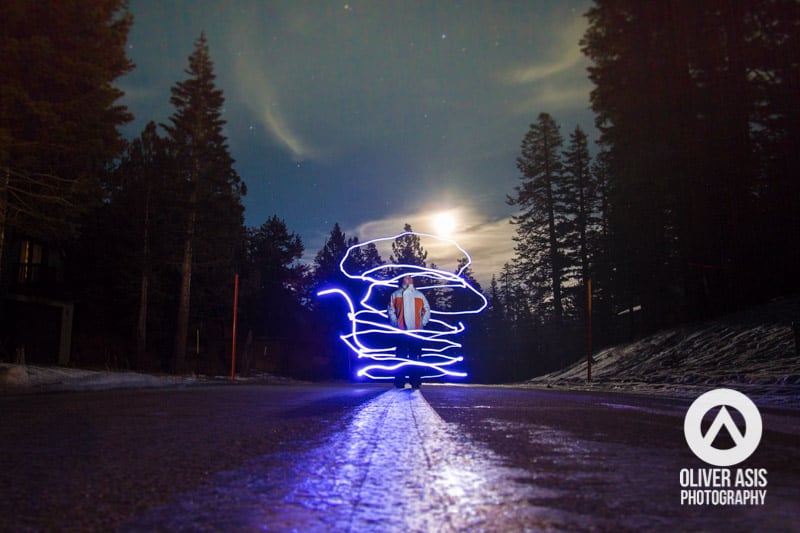
So next I kept the flash set to 24mm and set it to 1/4 power. And there it was. You can see the result below.
With everything set, I now needed to make sure the get the flash just behind my subjects and out of frame, so it would look like the moon was causing the glow.
To make this work, I had to set my camera to a 30 second exposure giving me enough time to trigger the camera, run with the flash behind each subject. And manually trigger the flash using the “test” button in the back of the camera, while aiming for subject’s head and legs, and moving fast enough so that I don’t get exposed in the image, and run back behind the camera before the 30 seconds was over. After a few of these I was winded. But all the effort was worth it. And you see the result below after some editing in Lightroom 5.
Tech information for final image:
Photographed with:
Canon 7D
10-22mm at 16mm
ISO 125
f5.6
30 seconds
Edited:
Lightroom 5
Photographed in:
Mammoth Lakes, CA

Using a similar setup I experimented for fun and captured the following images.
Part of the fun of photography for me is the challenge of creating a truly unique photo that is unique and at times, out of the ordinary. In this specific case, coming up with a creative night portrait idea and then actually trying to get the final result to match what I had in my head.
I hope you enjoyed this post!
Any questions or comments?? I’d love to hear from you in the comments below!
If you’d like to see some more of my work head on over to my Facebook page where I showcase all of my latest work!
-Oliver