

It’s DOF PDQ. Or understanding depth of field quickly.
Browse any photography forum and you’re likely to see the acronym DOF bandied about, along with accompanying discussions of a term called depth of field. Understanding depth of field (DOF) and knowing how to use it correctly is an important skill for every photographer to have. Mastering depth of field will allow you to photograph the scene as you envision it, from crisp, clean landscapes to portraits with that creamy blurry background.
What is the definition of depth of field?
As a young photographer in college, depth of field was one of the hardest concepts for me to grasp. When I finally understood it, years later, was when my skill as a photographer really started to take off. So I’m going to forgo as much of the technical jargon as I can and approach DOF and focus in a way that made sense for me, with the hope that it finally clicks for you too!
The dictionary definition of depth of field is the distance between the nearest and farthers objects that give an imaged judged to be in focus in a camera.
Looking to improve your photography? Just enter any questions you have about improving your photography below and hit send and get answers & feedback instantly - for FREE! Submit QuestionsPut another way, depth of field is how much of your photo is in focus from front to back of the scene.
That’s it. Depth of field = how much of your image is in focus.
When you take a photo, there will be an area in front and behind of your focal point (usually your subject) that is in focus. If that zone is very large, we call that a deep depth of field. If that zone is small, we call that a shallow depth of field.
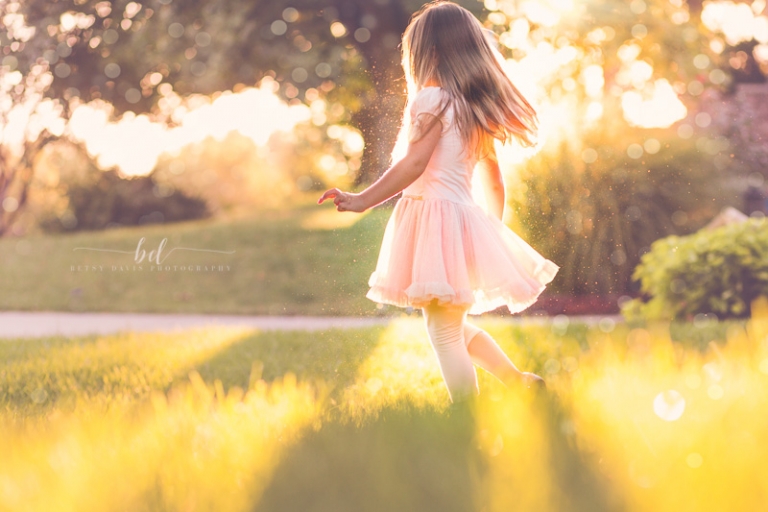
For example, a portrait may have a shallow DOF. There is a very small zone of that is in focus in the scene from front to back.

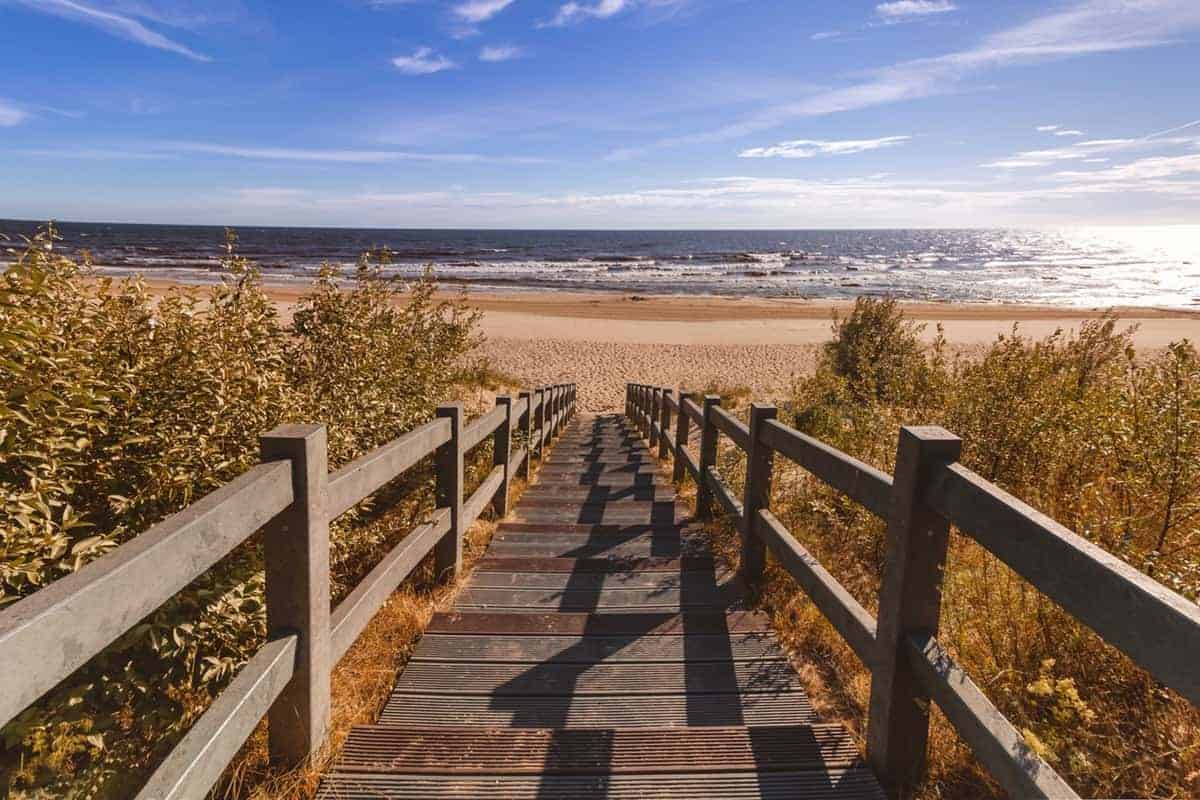
A landscape on the other hand may have a deep DOF. Much of the scene from front to back is in focus, as seen below.
Want to dive deep into understand f-stops? Click here!
What controls depth of field?
DOF is controlled and affected by
- Aperture (expressed as an f-stop like f/2.8 or f/11)
- Focal length of your lens
- Distance between the front of your lens and the subject
- Sensor size
Aperture
The aperture is the opening in your lens that allows light to pass through it to the sensor. It is usually the first setting we determine when shooting an image because it affects our scene greatly. A large aperture has a very wide opening that allows a lot of light in. A small aperture is a smaller opening so less light gets in.
Aperture affects how bright your scene is, but it also controls depth of field. As you make the physical aperture opening smaller, you increase your depth of field. I’m not going to get into a technical discussion of f-stops and how they work. If you’re interested in that and want to geek out a bit, click here for a full explanation. What’s important to remember when it comes to f-stops and depth of field is this:
- The smaller the NUMERICAL f-stop number, the shallower your depth of field
- The larger the NUMERICAL f-stop number, the greater your depth of field.
Think of a large pool with varying levels of water, from 1.4 to 32 feet deep. Think of the numerical f-stop number as the water level in a pool. The smaller that number, the SHALLOWER the water is, right? Conversely, the larger that numerical number, the DEEPER the water.
So an f-stop of 1.4 will give you very shallow DOF. An f-stop of 32 will give you a very deep DOF.
Focal length of your lens
Lenses with a longer focal length have a narrow field of view, so a smaller portion of the background fills the frame. This makes the background look magnified. Photographers call this lens compression. A longer focal length will squash everything together in your scene, making it look like there is physical space from front to back of your scene than there is. Just remember, the longer the focal length, the shallower the depth of field.
Distance from camera to subject
The closer your subject is to your camera, the shallower your depth of field in the image. To visualize this, hold up your index finger at eye level at arm’s length. Then slowly move your finger closer to your eye. As your finger gets closer, the shallower the depth of field is.
Sensor size
The sensor of your camera will also affect the size of depth of field you can get. The smaller the sensor, the larger the depth of field and vice-versa. Smart phone or point-and-shoot digital cameras have very small sensors, so it is hard to create an image with a very shallow depth of field. That’s one of the many reasons professional photographers rely on full-frame DSLR digital cameras – the sensor size helps provide more flexibility of depth-of-field.
What is shallow depth of field photography? When would I use it?
Portrait photographers most often want the focus of the image to be on the person and the background to fall away into creamy oblivion. This look is achieved by creating a shallow depth of field using some combination of aperture, focal length and controlling the distance between the camera, subject and background.
Aside from just portraits in general, you can use a shallow depth-of-field to create greater emphasis on the focal point of your image. A very shallow depth-of-field creates a razor thin zone of focus. So the area around your focal point will be sharp while the rest of the scene is blurry.
You can also use shallow depth of field to reduce distractions in your scene or to create layers in your image.

Get the portraits you want with our guide to camera portrait settings!
But what about bokeh? Shaprness?
Photographers often use the terms bokeh or sharpness to describe depth of field. But they aren’t the same thing. Let’s go back to our original, simple definition:
Depth of field is how much of your photo is in focus from front to back of the scene.
Bokeh, pronounced like with a hard o and a like in a bouquet, is a word photographers love to use.
Bokeh is the way the lens renders out of focus points of light.
It comes from the Japanese word “boke”, meaning blur or fuzziness. Photographers often use it when talking about a background that is out of focus. That’s not exactly true. Bokeh is really defined as the way the lens renders out of focus points of light. So it’s technically about the quality of an out of focus background, not just that the background is out of focus. That may sound like I’m splitting hairs. But bokeh is more about how that out of focus background looks, not just that it’s out of focus.
Sharpness is the crispness of the focus in your image.
An image with shallow depth of field can be very sharp, or crisp, with clearly defined edges. An image with a deep depth of field can be soft, or a little blurry, because proper technique wasn’t use. And an image with beautiful bokeh can also be sharp. Photogrpahers often use these terms interchangeably, but they are all separate concepts and require different techniques to achieve the look in camera.
Click here for everything you need to know about sharp photos!
So how do I get a shallow depth of field?
To create shallow DOF, begin with this process:
- Choose the longest focal length lens you have. (If you only have one focal length, don’t worry. Just skip to step #2.)
- Place your subject as far away from the background as you can. This doesn’t effect depth of field but does help smooth out the quality of what is out of focus.
- Position yourself as close to the subject as you can to achieve the framing you want.
- Use a small numerical f-stop. F-stops from f/1.4 to f/4 will give you a very shallow depth of field. Choose your f-stop first, then adjust your shutter speed and ISO to give you a correct exposure.
- Manually select your focal point to be on the area of the subject you want the sharpest, or most in focus. In portraits, this is generally the eye closest to the camera.
- Fire your shutter.
Getting the precise look you want takes practice and experimentation. Changing any part of steps #1-5 above will result in a different look and feel to your image. I can’t give you a precise formula. You must play with distance, f-stop and even angles to bring your vision to life. Understanding aperture and mastering the use of depth of field will help you create more compelling and visually interesting scenes. Use depth of field to draw views into a scene, draw their eye to your focal point and create those WOW! images that pop off the screen.
https://youtu.be/ks_zsXnw3MA

![Portrait Camera Settings: Getting Great Shots Consistently [2020 Update]](https://colesclassroom.com/wp-content/uploads/2018/01/Port1-1-of-3-768x440.jpg)
![Personal Branding Photography Basics [Complete Guide]](https://colesclassroom.com/wp-content/uploads/2019/06/adorable-adult-beautiful-774095-768x512.jpg)