Have you Ever felt Confused on How To Export Images From Lightroom? You Need to Read This Now!
So you’ve finished your photo gallery and are ready to show off your beautiful images to your client and give them that real WOW factor you know they will feel. But now, you find yourself stuck in how to export images from lightroom. How do you export in high resolution? How do I export for instagram, facebook, or other social media sharing outlets? Or you could be asking, how do I export at all?
We’re going to go into a step by step breakdown of how to export from lightroom for different scenarios so that you NEVER AGAIN have to guess on how to get your photos out of lightroom, and into your clients hands.
[ad id=’5′]
How to Export an Image
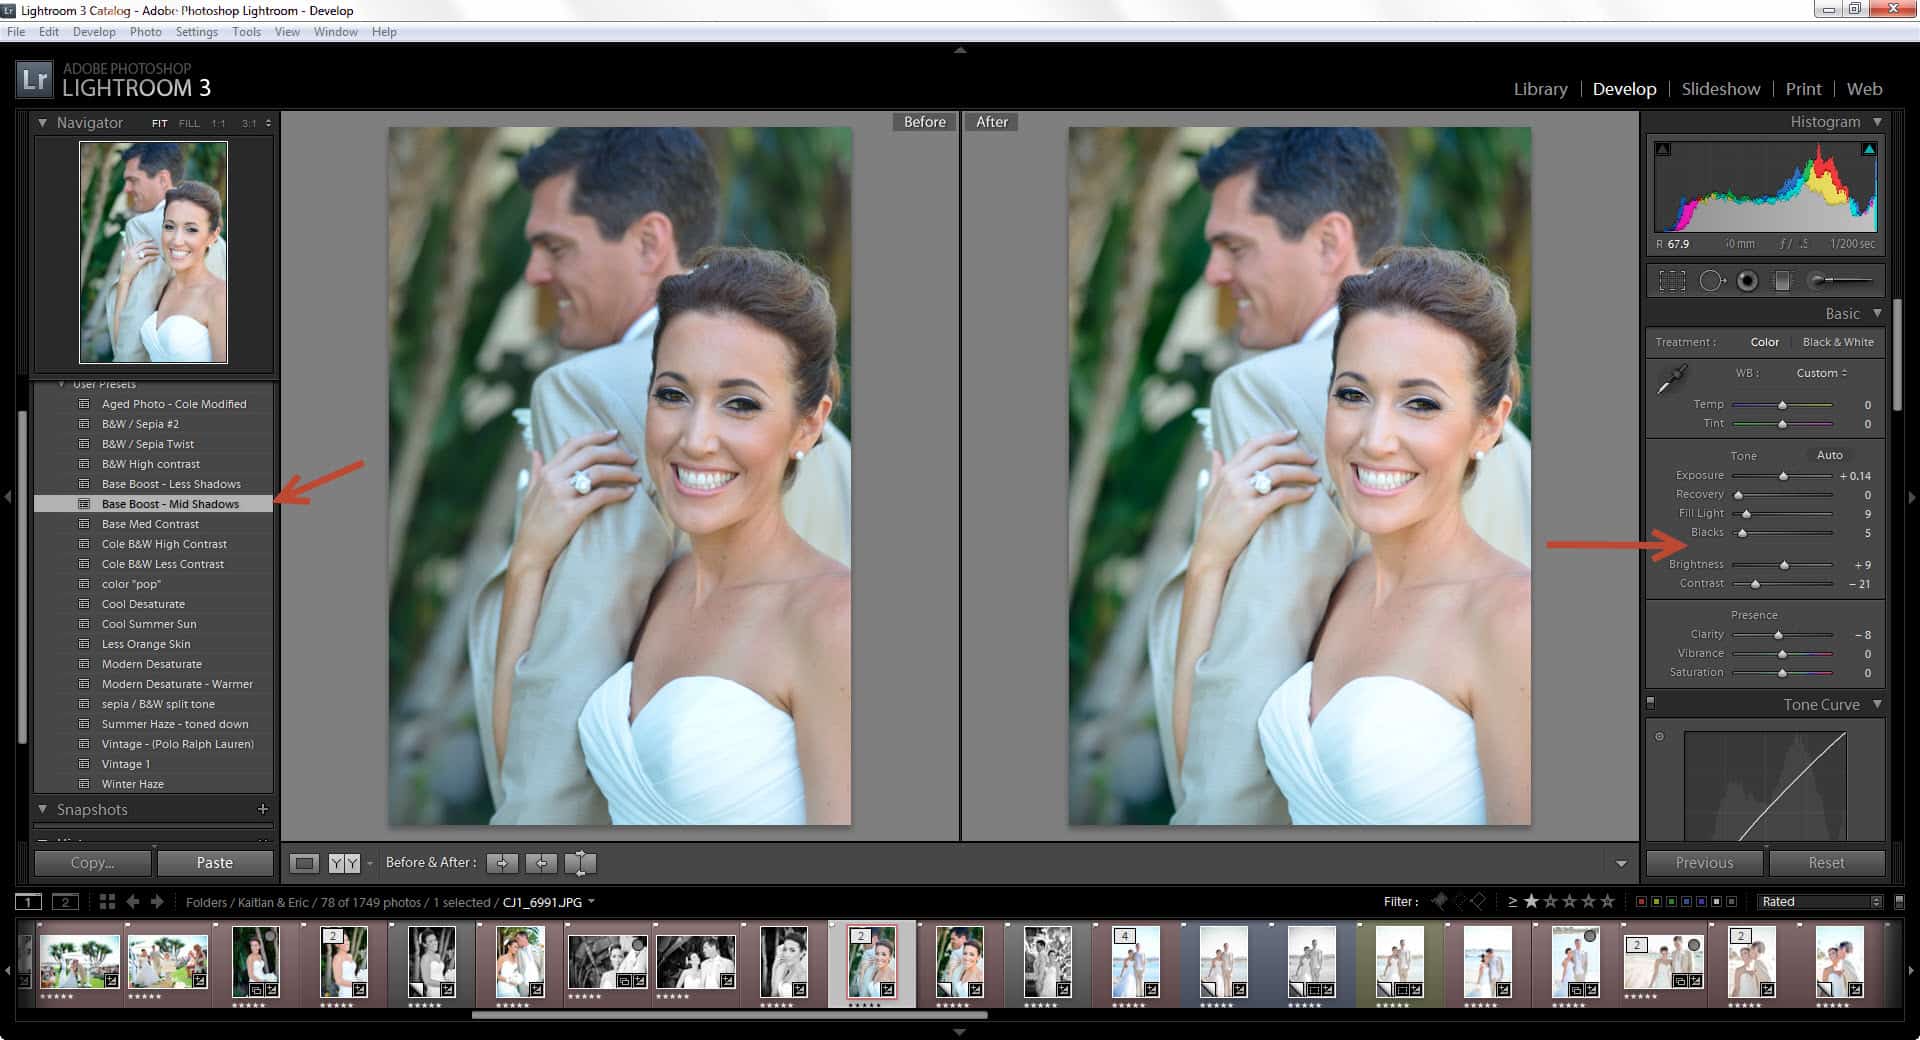
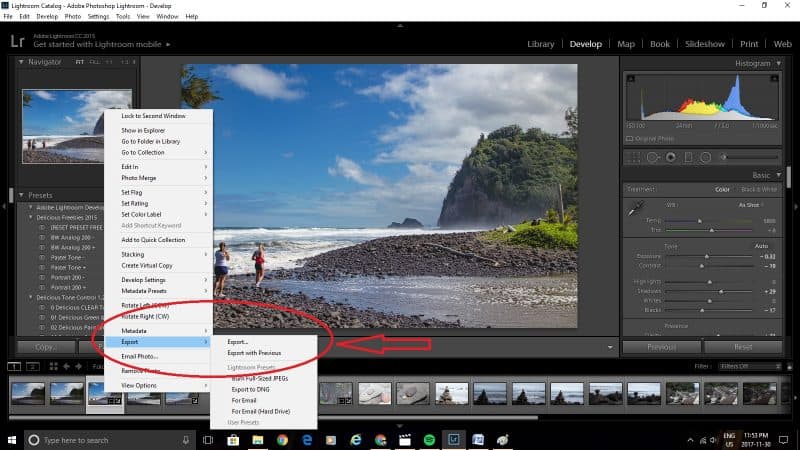
- In lightroom, make sure that you are in the ‘Develop’ tab of your top right menu.
- Select the image (or images) that you want to export. *NOTE: If importing several images at once, hold the CTRL button and select all images to be exported.
- Right click on the selected image. Hover over the ‘Export’ option, and select ‘Export’.
- Choose a specific folder to send the finished image there.

Now that we have that handled, we can move on to understanding how to export images from lightroom for different purposes.
Exporting For the Web and Social Media
Why would you want to export for web and social media platforms specifically? A large part of the reason for this is the size of the image being able to be distributed through these avenues without any issues. For example, if you choose to email a couple of images to your clients for a ‘sneak peak’, chances are pretty good that trying to attach them to an email to do so, won’t allow many (if any) images to go into the body because of the size of the image.
Something else to consider, is that platforms such as Instagram and Facebook, have their own image adjustment when you share an photo. Instagram, when shrinking an image in size, will appear VERY granulated and noisy if you try to share a hi-resolution image. Keep the guesswork out by exporting for web use, and you and your clients can share those images with ease. This especially helps when you are working on your gallery and want to hand over some previews for your clients and their family to see.
Exporting for the Web and Social Media Settings
File Settings
- Make sure you are in the Export window
- Image Format – Make sure it is set to JPEG
- Quality – Set slider anywhere from 85 – 100
- Color Space – Set to sRGB (if not already)
- DO NOT check the ‘Limit File Size’ Box
Image Sizing
- Check the ‘Resize to Fit’ Box, and in the drop down menu choose ‘Long Edge’
- Set ‘Long Edge’ Pixels to 2048
- Resolution box – type in 72 & make sure it says pixels per inch
- Output Sharpening – We recommend that you leave this box unchecked.
However, if sharpening is preferred, select ‘Screen’ and ‘Low’ for the amount


*Make sure to keep this article bookmarked so you can refer to these settings in the future if you ever get stuck.
Exporting for Hi-Resolution and Print
Creating Hi- Resolution images is especially crucial if you are wanting to hand over polished galleries that can go to print. Wedding and Family Portrait photography are two of the most common styles that will call for images to be produced for print. Put simply, a High–resolution JPEG file is used to store large images in a way that prevents too much leaking, or loss, of image details.
In a case where an image would need to be blown up in size, this is important to ensure the highest possible quality to maintain as much of the original image details as possible. Keep in mind, that several print places will require a hi-resolution image, when you export images from Lightroom and send them your work to go to publication, or print.
Exporting for Hi-Resolution and Print Settings
File Settings
- Make sure you are in the Export window
- Image Format – Make sure it is set to JPEG
- Quality – Set slider to 100
- Color Space – Set to sRGB (if not already)
- DO NOT check the ‘Limit File Size’ Box
Image Sizing
- Resize to Fit Box – Leave UNCHECKED
- Resolution box – type in 300 & make sure it says
pixels per inch - Output Sharpening – Select Sharpen for ‘Matte Paper’ and choose ‘Low’ for the amount


**A Note about Output Sharpening**
It is a good practice to keep in mind how you will be getting your photos to print. Are you a one-stop-shop that can print from your home or office? Do your printers have the capability to print your images at an industry standard for quality? If this is the case, the type of paper that you will be using may then need you to be specific, whether or not you are using glossy, or matte paper. Please make sure to fo your due diligence in consulting with the owners manual as to the specifications for the best rendered quality for printed images, as this can vary from one manufacturer to the other.
Perhaps you use a third-party company to render your images to print. In many cases, they will look after the way the image prints to paper based on selection. Refer to the Hi-Resolution image settings above as best practice unless otherwise requested from the print shop.
Renaming Your Images on Export
There are several ways that you could go about this, but we want to focus on keeping your workload simple and efficient. Giving your images customized names keeps you organized, and helps you keep your shoots separate as opposed to seeing IMG 123.jpeg Here are the recommended steps to renaming your images in the export process.
Steps For Renaming Exported Images
- Make sure you are in the Export Window
- ‘Rename To’ Box – Make sure this is checked
- In the drop menu, select ‘Custom Name’
- Write in your Custom Text below (ex. WilsonSmithWedding)
- Leave ‘Extensions’ selection on ‘Lowercase’

** A Note About Custom Naming Your Exported Images **
Once you have selected this option, whether you select your images individually to export, or a batch to export, Lightroom will ask you whether you would like to ‘Overwrite’, ‘Skip’, or ‘Rename’ your file. Select the ‘Use Unique Names’ tab, and Lightroom will automatically create the sequence of images in order to the destination file folder you selected originally. See the image below.

Prefer a Video Tutorial on How to Export Photos from Lightroom?
Until next time Classmates
Jay.