
Learn flash photography one step at a time by getting to know your flash first.
Did the first time you pulled out your flash feel a bit like an awkward first date? There the two of you sat, staring blankly at each other, not really sure about the next move. You tried consulting the flash manual but although it is written in English, it might as well be written in cow because you can’t understand it. That’s where we come in. Keep reading while I introduce you to your flash and get you started on your journey to flash photography success.
Looking to improve your photography? Just enter any questions you have about improving your photography below and hit send and get answers & feedback instantly - for FREE! Submit QuestionsWhat this tutorial is…and isn’t
This tutorial is an introduction to your flash itself. It does not cover technique. If you’re looking for an explanation of how to set up your lights or the difference in modifiers or advanced flash photography techniques, you’ll be disappointed. We are starting even more basic than that.
I also can’t tell you how to run your specific flash. Each unit varies from brand to brand and model to model, so I can’t give you instructions like “Choose X button and press it twice.”
What I will do is explain the flash modes, zoom and power settings as well as some other basic functions some flashes offer.
Disclaimer over, let’s get to the good stuff.
Looking for more on studio lighting? Click here!
Flash Photography Players: Built-in flash, Speedlight vs. Strobe
All strobes are flash and all speedlights are flash, but not all speedlights are strobes. Sounds like one of those questions we had on standardized testing back in high school, doesn’t it?
Flash is an all-encompassing term in flash photography discussions used to describe any intermittent light used to light a scene. Flash comes in three basic forms: your camera’s built-in flash, speedlights and strobes.
Built-in flash
Many cameras, as well as some smartphones and adventure cameras, come with a built-in flash. It’s also known as a pop-up flash. You can pop it up if needed, or if you’re shooting on automatic mode, the flash will pop up when the camera senses your scene is too dark. This is what most people probably think of when they first start learning about flash.
Generally speaking, the built-in flash on your camera isn’t very flattering. It’s a very small light source, it’s light can be really harsh and it’s often eye-level with the subject, causing red-eye. You also can’t control the direction or angle of the light independent of your camera and you have very few options when it comes to modifying that light in any way.
Most professional photographers steer clear of using the built-in flash and instead choose one of our next two kinds of flash. From this point forward, when I use the term flash, I’m referring to speedlights and strobes, not the built-in, pop-up flash on your camera.
Speedlights
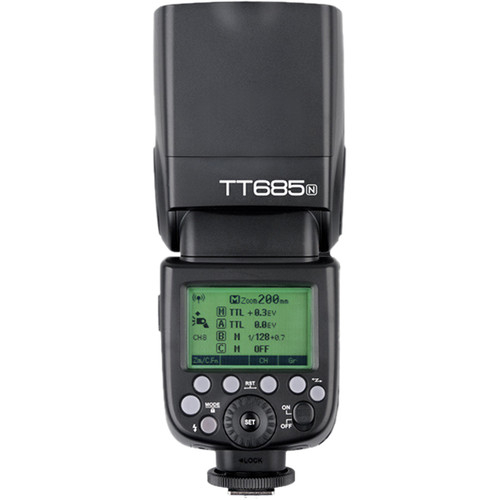
Speedlights, shown above, are small, portable flash units that can connect to your camera via the hot shoe or fired wirelessly off camera in a system we flash nerds call OCF, short for off-camera flash. These lights are also called flashguns.
Speedlights are generally smaller and less powerful than a strobe. Most run on AA batteries or rechargeable battery packs. Because they are relying on batteries, their recycle time is often slower than a strobe.
Examples of common speedlights:
- Godox TT600 or TT685
- Yongnuo 560-IV
- Nikon SB-700
- Canon 600
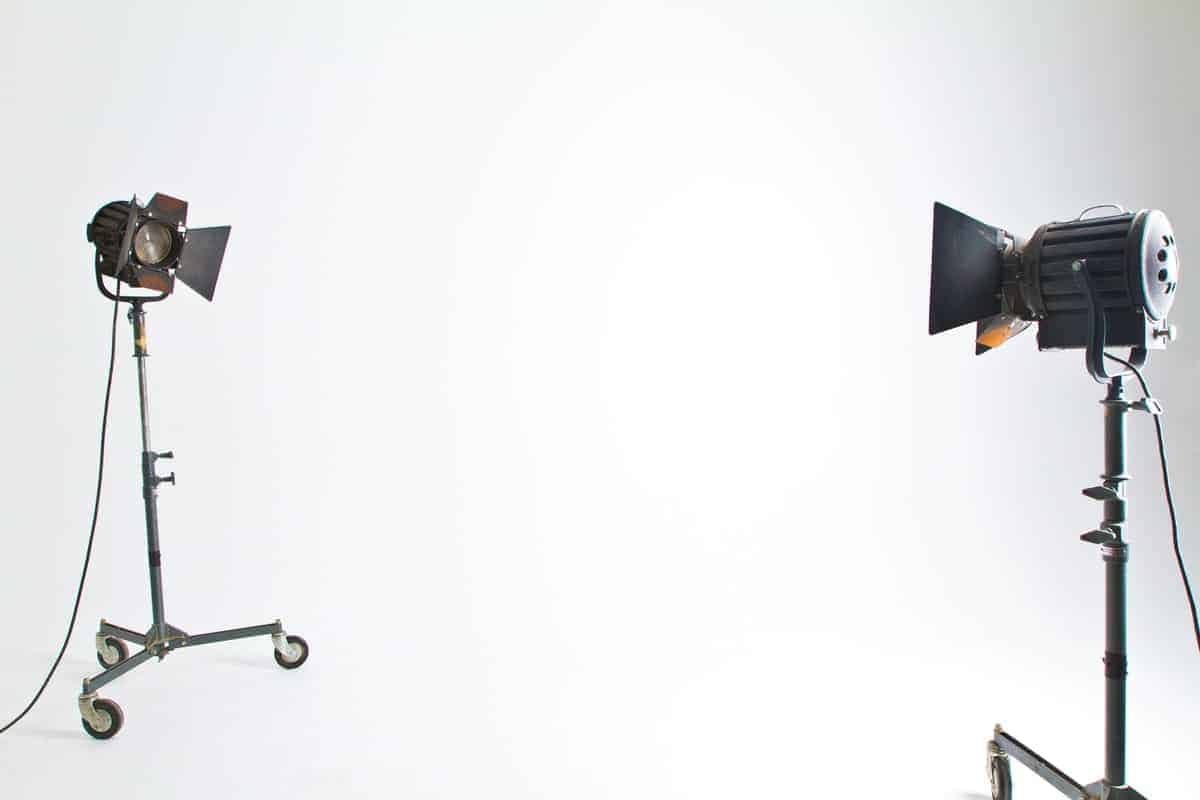
Strobes
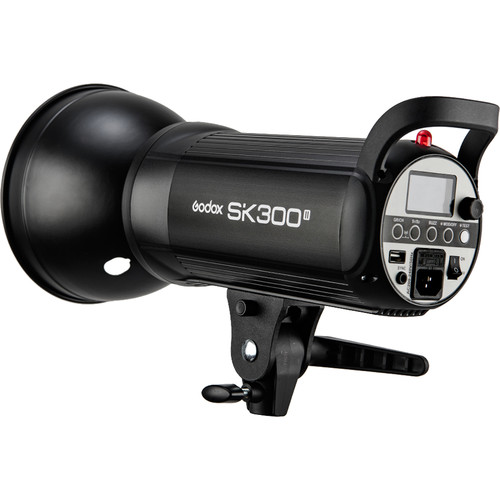
Strobes, like the one displayed above, are larger lights usually designed to be used in the studio. In fact, a lot of photographers refer to them as studio strobes. Others call them monolights. They are larger in size and more powerful in output than a speedlight.
Strobes are designed to plug into the wall or to be powered with a powerful battery pack that can provide AC power. A strobe battery pack is more like a car battery than the AA batteries a speedlight uses. Strobes are bigger, more powerful, more expensive and less convenient than a speedlight.
Some new units coming on the market, like the Godox AD200, have a rechargeable battery. Those are still considered strobes, technically, but are really more of a hybrid.
Examples of common strobes:
- Alienbeen 400 by or Digibee 800 by Paul C. Buff
- Godox AD200 or AD400
- Interfit Honey Badger 320W
- Einstein Monolight by Paul C. Buff
- Broncolor Siros 800 S
Understanding Flash Modes
Like your camera, your flash has different modes. Which mode you put it in effects how it functions. What mode you choose depends on what goals you are tying to accomplish in your image.
Manual Mode (M)
In manual mode, you are controlling the output of the flash by selecting the power level. You are also telling the flash when to fire, either through your camera hot shoe or via a remote trigger. Knowing how to operate your flash in manual mode is a fundamental step to understanding more complex setups in flash photography.
Slave mode (S, S1, S2, etc.)
In slave mode, you set the power for the flash, but it will only fire when it “sees” or detects another flash fire. Another flash must act as the master, or commander, and tell the slave flashes when to fire. This only works if the slave flash can physically see the other flash fire. A flash in slave mode can also be accidentally tripped by someone else’s flash.
Through the Lens (TTL)
TTL mode is like automatic mode for your flash. Canon calls it eTTL, but it’s the same basic concept. Your flash and camera work together to determine how much power is needed for a “proper” exposure. Basically, your flash sends out a small flash of light before the shutter actually fires. Your camera reads how much light is in the scene with the “pre-flash” and adjusts how much power the flash puts out, up to maximum power. TTL is not available on all flashes. If this function is important to you, make sure the flash you are considering purchasing is TTL enabled.
High-Speed Sync (HSS)
In HSS mode, your flash fires several smaller pulses of light instead of one long, big burst. This allows you to shoot the flash at higher shutter speeds, hence the term high-speed sync.
Most cameras have what is known as a maximum sync speed – i.e., a maximum shutter speed that the camera can fire at before the shutter is closing faster than the flash can fully fire. That maximum speed is usually between 1/160 of a second and 1/250 of a second (check your camera’s manual for your max sync speed).
HSS overcomes this problem by firing lots of small, fast pulses of light over the course of the exposure. The camera just records it as a continuous stream of light, though, and your subject is lit correctly at higher shutter speeds.
HSS can allow you to shoot at wider apertures and faster shutter speeds. The drawbacks of HSS are it isn’t available on all flash models, your max power of your flash is reduced and it’s a drain on your batteries.
Stroboscopic Mode or Multi-Mode
With stroboscopic mode or multi-mode, a rapid series of flashes is fired, similar to HSS. But stroboscopic flash is used to capture multiple images of a moving subject in a single photograph. You set the firing frequency (number of flashes per second, expressed as HZ), the number of flashes to fire in total and the flash power. Flashes that have stroboscopic mode may or may not also have HSS. Stroboscopic mode is how images like the one here are accomplished.
What does the Flash Zoom do?
Some flashes come with a zoom. The flash zoom controls how wide your flash will spread light by adjusting the distance between the flash tube (the light itself) and the diffuser (the plastic bit on the front of a flash). In automatic flash zoom mode, the flash detects the focal length of your lens and adjusts itself to match the focal length of your lens.
Zoom is a common option on speedlights, but very few strobes have a zoom option simply because of how they are constructed.
You can also adjust the zoom of your flash manually. For instance, you may be shooting a wide focal length but want your flash zoomed in to illuminate a specific part of the scene. Or you might be shooting close-up portrait with a telephoto lens but want your light to spread out over a larger area. As you begin to delve more into flash technique, you’ll learn when and why to change your zoom. For know, just know it’s possible. And know that different flashes have different zoom ranges.
Understanding Flash Power
Most flashes give you the option of increasing or decreasing the power of your flash. As the photographer, when you put your flash in manual mode, you decide how much power the flash gives off, anywhere from just a little to a lot, meaning the maximum power.
Flash power is measured in fractional increments, from full power (1 or 1/1) down to the lowest setting, sometimes 1/64 or 1/128. Some flash photography shooters refer to these power settings as full power, half-power, quarter power, lowest power, etc.
For instance, my basic Neweer speedlight gives me the following power options:
- 1/1 (Full Power)
- ½ (Half Power)
- ¼ (Quarter Power)
- 1/8
- 1/16
- 1/32
- 1/64
- 1/128
Moving down the power scale one full step, i.e. from full power to half power reduces the amount of light your flash is putting out by half. If you raise the flash one step, then, you are doubling it’s light output.
This is also referred to as a “stop” of light. If you reduce the flash power by one full step, you are effectively reducing the amount of light falling on your scene the same as if you had changed your in-camera settings with shutter speed or aperture one stop. Raising the flash power one full step adds a stop of light to your scene.
Read that paragraph a few times if you need to because it’s a critical concept in flash photography. One “stop” of light produced by your flash is equal to one “stop” of exposure in your camera.
Incremental Power
Some flashes allow you to increase or decrease the power in increments smaller than a full stop of light. This gives you more control over how much light is in your scene. The same basic increments are used, but the flash expresses these baby steps as a plus or minus
For instance, I can decrease the power of my Godox TT600 speedlight in 1/3 increments of 1 full stop. Powering down from full to quarter power of this speedlight gives me the following options:
- (Full Power) 1/1
- 1/1 -0.3
- 1/1 -0.7
- (Half-Power) 1/2
- 1/2 -0.3
- 1/2 -0.7
- (Quarter Power) 1/4
Again, these 1/3 increments correspond to raising or lowering the exposure on your camera by 1/3 increments.
As you increase the power on the flashes, these baby steps are expressed in the positive. As I raise the power of my Godox TT600 speedlight in 1/3 increments from quarter power to full power, it will be expressed on my flash as this:
- (Quarter power)1/4
- 1/4 +0.3
- 1/4 +0.7
- (Half power)1/2
- 1/2 +0.3
- 1/2 +0.7
- (Full power) 1/1
So as you decrease flash power, these baby steps are expressed as negative increments. As you increase the flash power, these baby steps are expressed as positive increments. It just depends on how you are adjusting the power. So know that if your flash is set at 1/1 -0.7, that’s the same power output at 1/2 +.03.
[ad id=’2′]
Flash Power, Compared
Not all flashes are equal in terms of their power. My speedlight at full power doesn’t produce near the amount of light as my strobe at full power.
But a stop of light is a stop of light regardless of the make or model of your flash. This is another one of those concepts that’s important to really latch onto in flash photography. A stop of light is a stop of light. What do I mean by that?
If you increase or decrease your flash by 1 full stop, it has the same effect on the scene regardless of the type, make or model of your flash. It is the universal measurement of light in photography and we use it to overcome the differences in power capabilities of equipment.
Flash Direction
The last handy feature of a flash that I’ll talk about is flash direction. Many speedlights come with an head that can be adjusted horizontally and vertically. You can tilt the flashhead to point the light straight up to bounce it off the ceiling, rotate the head 90 degrees to point it at your subject, or use a combination of tilt swivel to position the head from left to right to aim it in different directions.
Strobes do not have this feature because of their construction. To change the directionality of the light of a strobe, you have to physical change where it is pointing, either by repositioning the strobe or by adjusting the light stand you are using.
Other Flash Features
More advanced flashes have additional options such as channels, groups and even a focus-assist beam or modeling light.
Battery power indicator
Some speedlights are equipped with a light that indicates how much power your battery has. It might start blinking when you are running low on battery power or just not turn on at all if the batteries are low. Be sure to know what the light means so you can be ready with spare batteries if needed. Strobes that rely on an internal battery pack will also have some sort of battery indicator warning. Strobes that plug into the wall don’t need this feature, for obvious reasons.
Channels and groups
Your flash might have some buttons or display things like Group A, Channel 2. These advanced features allow a flash to be controlled by the camera through a wireless radio signal trigger in isolation from other signals. Much like you wouldn’t want your television remote controlling your garage door, you don’t always want your camera controlling every flash in the room. For example, if I’m photographing at an event with another photographer, I want to be able to control my flashes independently of his. We would set our flashes and triggers to a different channel so that we can work independently from one another.
Groups isolate that control one step further, giving you independent control of each flash on that channel. If I’m working with three different flashes, I can set each one to a different group and control them independently of one another. If, for example, you want to be able to adjust the main light independent of your fill light via a trigger on your camera, you set each flash to its own group. That way changes you make to the power setting on the flash on Channel 1 – Group A will not affect the power setting of the flash on Channel 1 – Group B.
You might not need the channel and group features now because you are just jumping into the world of flash photography. But it is important to know if your flash has these features and how to change them should the need arise. Checking your channel and group is also an important step in troubleshooting should your camera trigger and flash quit talking. It is easy to accidentally adjust either, giving you communication problems.
Focus-assist beam
The focus-assist beam or autofocus illuminator on some speedlights is a small red light in the flash that your speedlight emits to help your camera better focus on the subject in low-light conditions. It functions similar to the AF-assist beam you may have in your camera. Some speedlights even let you use the AF-assist beam even if you don’t want to fire the light itself.
Modeling light
Strobes generally come with a modeling light, which is a smaller, softer, continuous light that you can use to see where your strobe will land on your subject. It can also help your camera grab focus in low light situations. Most flashes with this option allow you to turn the modeling light off and on or set it to turn off when the flash fires.
Flash beep
Some flashes beep when they are ready to fire. You can turn the beep or the buzz on or off, according to your preferences.
Ready for the next step? Read Getting Started with Off Camera Flash Photography
Firing Your Flash Off-Camera
If you want to fire your flash off-camera, you have a few options:
- Purchase a flash designed to work seamlessly with your camera make and model
- Use your pop-up flash to trigger the remote flash (see slave mode)
- Purchase external triggers and remotes
Each option has it’s pros and cons. Flashes designed to work with your camera without extra triggers are often more expensive and may not be compatible with future cameras you purchase. A pop-up flash is inexpensive but can put light where you don’t want it, and some cameras don’t have a pop-up flash. External triggers and remotes are reliable and convenient but are an added cost.
Triggers and remotes are a whole other subject in and of themselves, but at a minimum, you should know what options you have with your exisitng flash.
From first date to love affair
As with any good relationship, it pays to get to know your partner. So it is with a flash. Understanding what the different buttons and lights on your flash mean mean, then understanding how to control them is the first step to mastering flash photography. So take some time to get to know your flash. Sit down with this tutorial and your flash manual and learn YOUR flash. Figure out how to change the power settings, how to control the zoom, how to turn the AF-beam off and on. Even if you don’t plan on using some of the features, know how to turn them off and on in case you or someone else accidentally change them (it happens more often than you’d think!)
Once you understand these basic terms and how to control your flash, you can move on to the next step of getting your flash and your camera to talk to each other and begin to light a scene effectively. But don’t skip this step. You wouldn’t take a blind date to a family reunion. Neither should you jump into shooting a client session with a piece of equipment you don’t really understand. So buy yourself a drink, sit down across from your flash and get to working on your relationship!