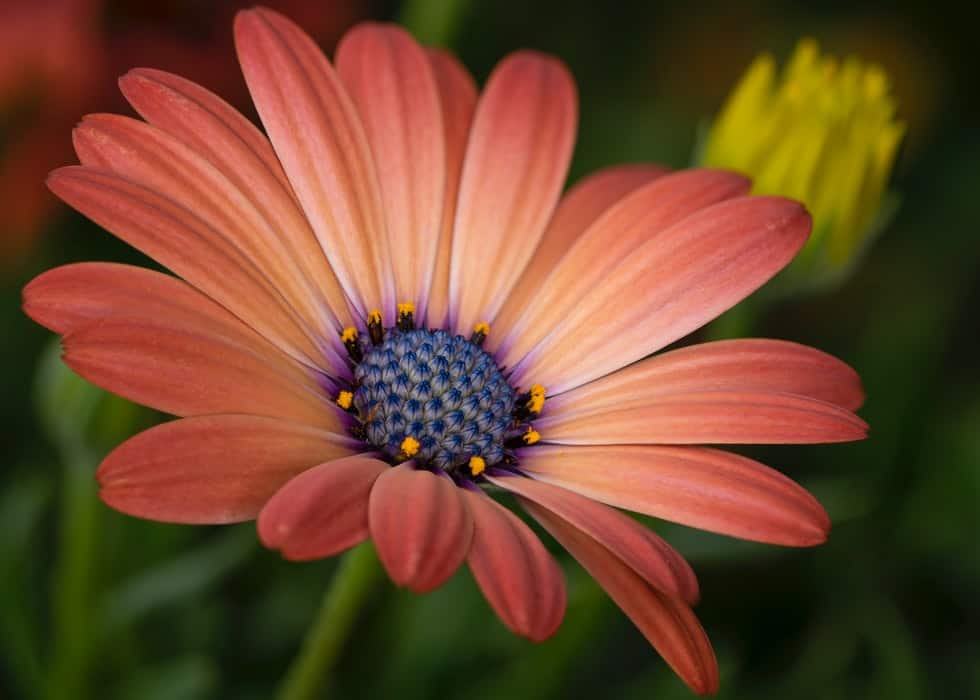

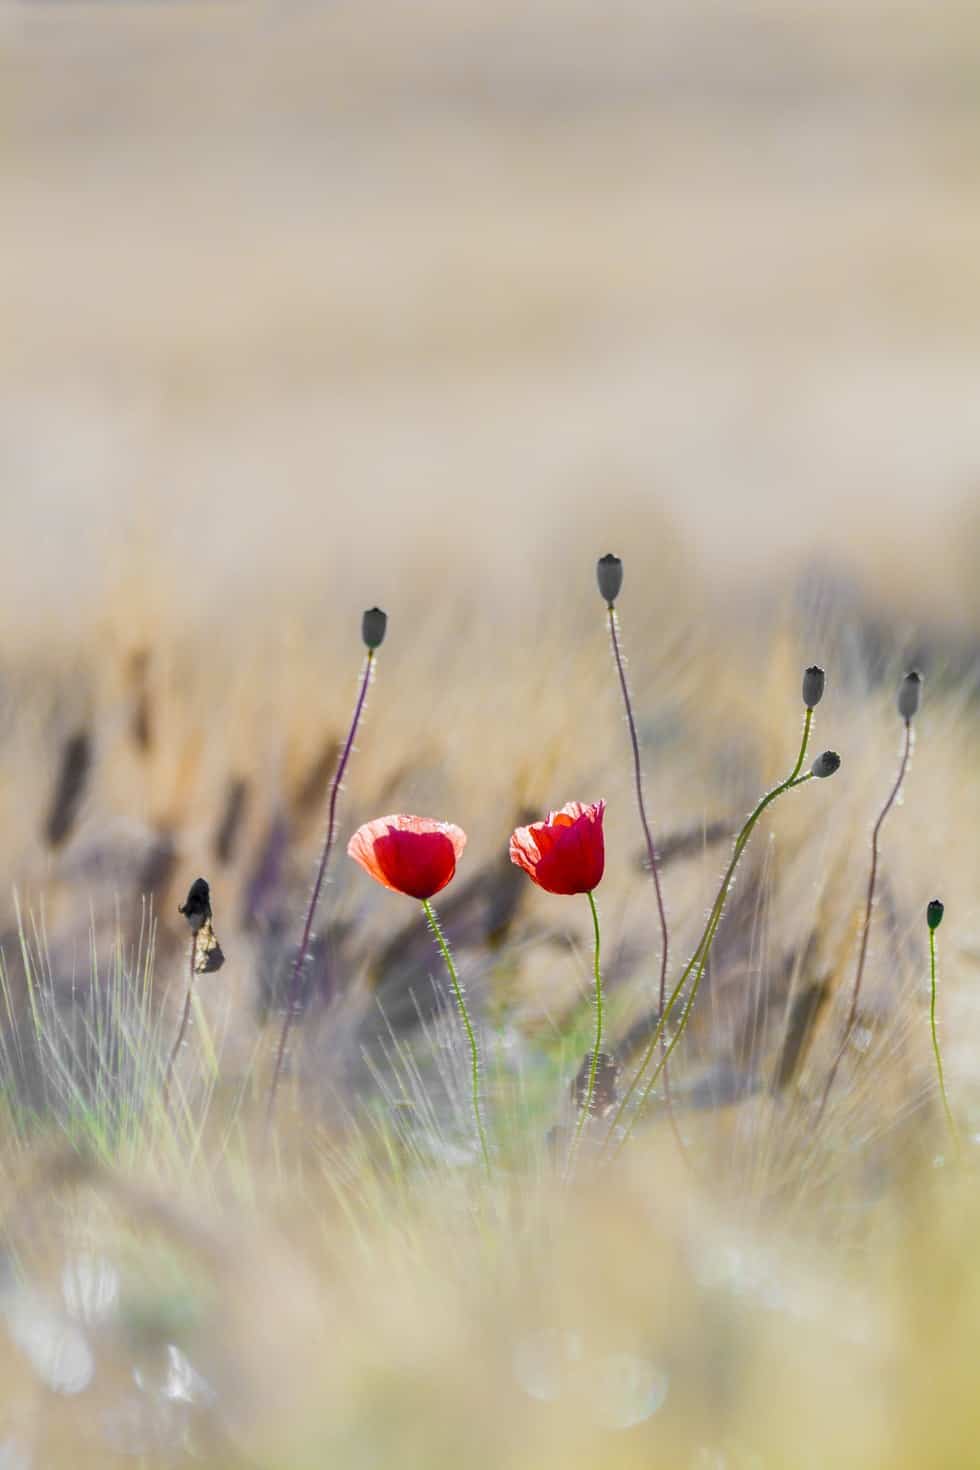
If you’ve ever tried to take a close-up macro photograph of a flower, you know that it’s tough to get your entire subject in focus. While autofocus or auto-blend layers tools can help a lot with macro photography sharpness, they still leave a lot to be desired.
Looking to improve your photography? Just enter any questions you have about improving your photography below and hit send and get answers & feedback instantly - for FREE! Submit QuestionsIn this article, we’ll explain how you can use a technique called focus stacking (or focal plane merging) to generate images that are sufficiently sharp despite shallow depths of field (DOF) that might be difficult to capture with your camera.
What Is Focus Stacking?
So, what is stacking? Focus stacking is the process of taking multiple in-focus shots of your subject with the same composition but different aperture settings such that you create a collage of images. Then, the collage is compressed into one single photo in which your subject is depicted as being entirely in sharp focus.
Focus stacking is key in macro photography because your depth of field options are highly constrained when working with small subjects. In contrast, it’s is also a great way to make stunning panoramas or landscapes with a tremendous amount of detail.
Focus stacking doesn’t increase the resolution of an image, but it can provide the illusion that your image’s subject is in higher resolution than the rest of the photo.
Picking The Right Aperture to Focus Stack
At the core of every focus stack attempt is a group of aperture settings that allow the photographer to take images of their subject in partial focus.
Under ideal conditions, these aperture settings would be precisely those within the lens’ optimal range. However, especially for macro shots, conditions are not perfect. This means that calibrating the aperture size to the depth of field of the subject is critical.
Using wider aperture settings is the first technique for stacking. Unfortunately, refracted light disrupts wider aperture settings very rapidly with most lenses.
Using a narrower aperture is an alternative to this technique, but narrow apertures have issues of their own. The narrower the aperture, the more difficult capturing the depth of the background will be.

What Is The DOF Challenge And How Do I Solve It?
The DOF challenge is inherent to all focus stacked shots. In a nutshell, sometimes, your DOF isn’t enough to make sure the photo is sharp in all of the places where you might want it to be. If you decrease your aperture size, you’ll expand your DOF.
However, changing your aperture size has consequences in photography. The more you alter your aperture size beyond the lens’ optimal range, the more that light refracts off of the lens itself into the final image.
This means that the final image will be less sharp, and it may have artifacts depending on the intensity of ambient light. You will find that in macro photography, this issue is especially problematic.
In general, the way to get around the DOF challenge in photography is to take multiple shots of the features of your subject with different aperture settings. In each shot, some aspects of your subject will be sharp, whereas immediately adjacent elements will be less sharp than you would prefer. Then, you can compile the overlapping in-focus images to make a composite without any refraction.
Setting Up to Focus Stack
Before you create a focus-stacked image, you need to plan your moves ahead of time and make sure that you have the right equipment. The software and hardware that you’ll need to load files for stacking start with your camera.
You’ll need a camera with an adjustable aperture, a focus stacking mode, and a tripod. You’ll also need a subject that you can either photograph many times in succession very rapidly while changing the aperture settings or that doesn’t move.
Once you’re done taking your images, you’ll also need software to compile the images together if your camera doesn’t automatically do so. For this purpose, it’s handy to have Photoshop at the ready so you can go to edit the images immediately.
How To Shoot Focus Stacked Shots
There are a few options for shooting focus stacked shots effectively. The most basic option is to manually shift focus points and aperture size from shot to shot. This is the most effective for landscapes and still life subjects.
A similar approach is to do handheld stacking where you can move the camera slightly in relation to your subject and take multiple shots. Handheld stacking is typically the worst method for high-quality images.
If you want to improve the quality of your handheld or manual stacking shots, you can download a stacking step size calculator to help you understand the jumps in your aperture settings as well as the amount of overlap in your focus areas in each shot.
A slightly more sophisticated approach to focus stacked shots is a manual focus rail. With the manual focus rail, you can recalibrate on the go, meaning that you can shoot more rapidly.
Automated focusing rails are where the real dynamism begins, however. With an automated focusing rail or an automated in-camera stacking solution, you’ll only need to compose your shot and push a button to get the image you want.
The Helicon Tube is the premier solution to focus stack images. Consider the Helicon Tube as the maximum degree of automation that you can achieve with stacking. With Helicon, most of the pain points of creating a focus-stacked image disappear, so it may be worth a purchase.
Once you know which way you want to shoot your focus stacked shot, set up your tripod near your subject to compose your shot. Then, calibrate your aperture to capture the basic depth of field that you want to represent in your final image.
Next, focus on one part of your subject and activate whatever stacking tools you have for as many times as you need to create a composite image.
Focus Stacking With Photoshop
If your camera doesn’t have a stacking option, you can still focus stack in Photoshop. Using Photoshop to create composite focus stacked images is probably the least expensive approach to photo stacking because you don’t need any specialized hardware or camera.
After you have taken your images with your camera, load them into Photoshop as separate layers. Then, use Photoshop’s stacking functionality to designate the subject and the focus regions. In this vein, it’s often helpful to abstract the background and DOF reference elements into different layers to avoid distractions.
Be sure to carefully check the edges of your subject afterward. This is one specific note of caution for stacking in Photoshop. Of course, there’s other focus stacking software like Zerene Stackware, but Photoshop is the most common.

Establishing a Workflow For Focus Stacking
Once you understand the basics of stacking, you can start to get into the workflow at a faster rate.
Your focus stack workflow will probably start with setting up your tripod and composing your shot in Live View. Live View lets you customize the settings; you’ll need to select the focus zones and aperture settings to capture your subject.
Afterward, you can upload the results to Photoshop to create a composite image or modify the composite images that your camera created for you with its focus stacking setting.
When you’re preparing focus stacking images, you should remember that the more material you have to work with, the more complicated your workflow will be because you’ll have to combine more layers and more sharp regions in Photoshop.
On the other hand, if you have a lot of different shots to incorporate into your composite image, there’s a much higher chance that you will be able to assemble enough sharp areas to make your subject be entirely in focus.
Troubleshooting Focus Stacking Issues
The most common focus stacking issue is that the final image has unsharp areas. You can address this by either using the sharpening tool in Photoshop as stacking software or by taking more source images to add to the composite. With other focus stacking software, troubleshooting steps can vary widely.
Dark and light lines are also annoying artifacts that sometimes occur at the edge of one image’s area while stacking. You can remove these pixel by pixel in Photoshop, or take fewer shots of areas with slightly larger or different focus.
Closely related to light lines are focus bands. These bands are stark contrasts between the in-focus area of different shots. To remove these bands, you can gently blur the line between each band.
The opposite issue is called focus breathing. In breathing, individual areas spill over into the background or disrupt the DOF effect by jutting towards the viewer. To solve breathing, reduce the overlap between two of your images in the composite so that only one image’s data is included in the final picture.
In contrast to focus breathing, splodging occurs when an area of your image is irregular and blurred because none of your composite images feature the area in focus. Unfortunately, the only solution to splodging is to take more shots of your subject.