
Exposure is an important concept in photography. It refers to the amount of light that hits your camera sensor and determines how bright your photo will look. There are different ways of playing with exposure to make unique effects.
Looking to improve your photography? Just enter any questions you have about improving your photography below and hit send and get answers & feedback instantly - for FREE! Submit QuestionsDouble exposure photography is an aesthetic technique you can achieve by exposing your sensor to light twice to make a single picture.
What Is Double Exposure Photography?
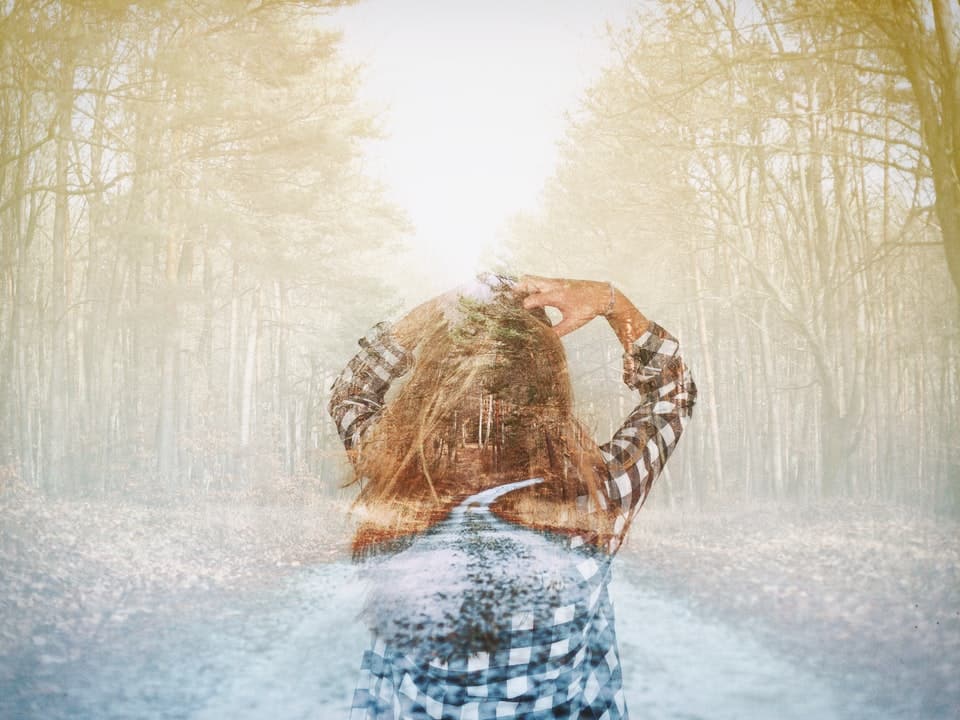
Double exposure is a photography technique that consists of exposing your image to a source of light twice. You will get an image that is superimposed on the other and can play with the opacity to create a unique exposure effect.
It’s an effect you can capture when shooting a pic or something you can make by editing photos together with photo editing software.
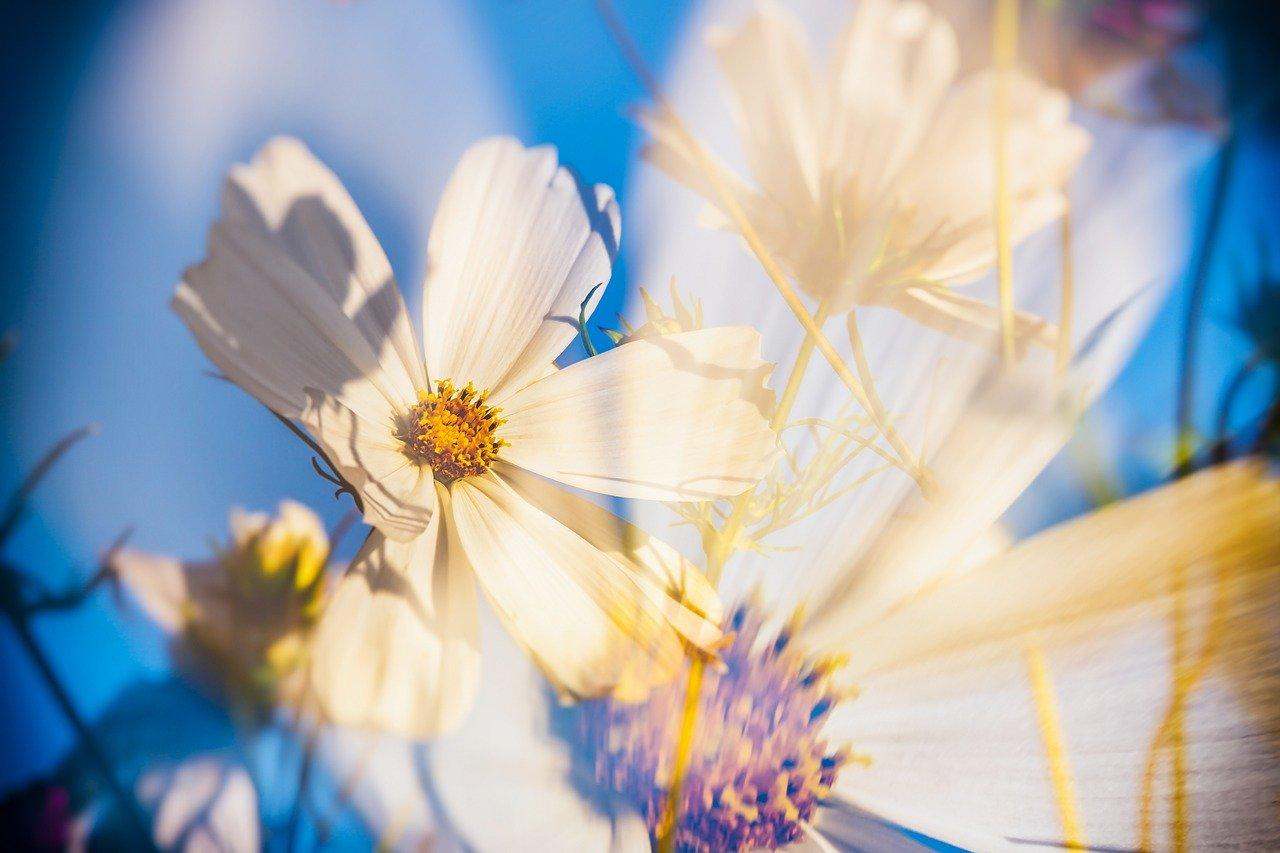
Image by Couleur (Pixabay License)
Double Exposure Photography and Digital Cameras
Some digital cameras have a double exposure feature. It’s a fun option to explore because you can shoot aesthetic pictures if you don’t have access to photo editing software.
Shooting a Double Exposure Image
Most cameras with this feature will let you choose a photo from your memory card once you select this setting.
The photo you select will appear on your LCD screen or in your viewfinder. You can capture a second image that fill in the dark areas of the first photo and get a stunning pic.
Editing Photos
Using photo editing software gives you more control over how you blend the images together. You can achieve this exposure effect with Photoshop, Lightroom, Luminar 3, PicMonkey, Canva, and many others.
These different programs let you use masks and adjust the opacity to blend your pics together.
Double Exposure and Film Photography
As camera ownership became more common in the late 19th century, a unique genre of photography emerged. Ghost photographs were the result of multiple exposure photography. Some photographs achieved the technique by accident, while others deliberately used the technique to create an aesthetic result.
Double exposure is relatively easy to create with film photography. The trick is to control how the shots will align by adjusting the film position. Not all film cameras have this feature.
You can capture a double exposure pic on film by taking a first image that is underexposed. Place the film in the camera again, and take your second pic. The chemicals on the film will capture more light with the second shot.
Double Exposure Portraits Techniques
These photography techniques open up new possibilities for portraits. You can capture unique portraits and create aesthetic effects by exposing your shots twice.
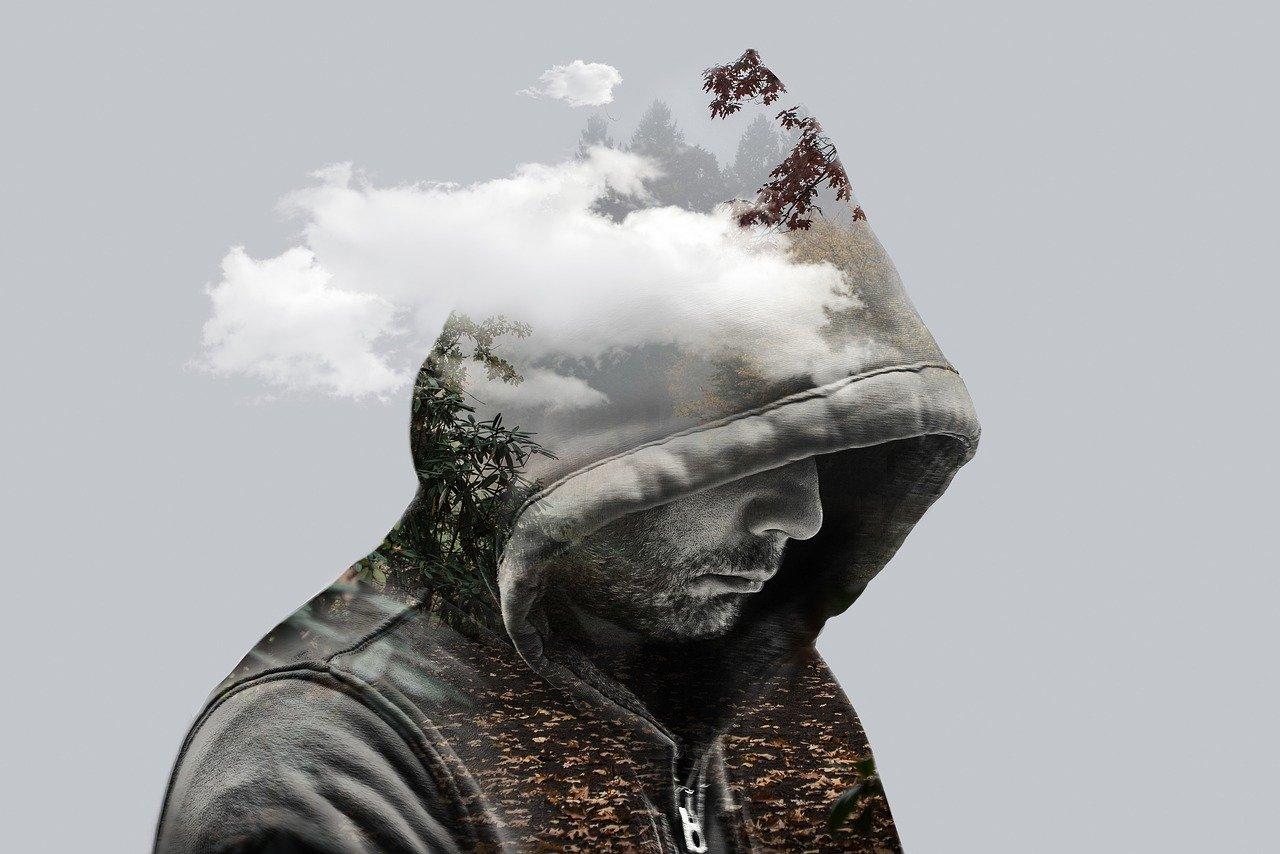
Image by darksouls1 (Pixabay License)
Silhouettes
One of the most common uses of double exposure in portrait photography is the creation of a silhouette effect. You can achieve this result by capturing a black silhouette of your subject and filling it with a second shot.
Start by taking an underexposed photo of your subject. Use lighting to get a sharp silhouette, for instance, by positioning your subject against a white background, or directing a source of light at your background.
You will get better results if you limit the amount of light directed toward your subject, choose a fast shutter speed, and use a low f/stop.
You can use the second shot to fill the dark silhouette and create a blending aesthetic by lowering the opacity of your second shot to have it merge with your white background.
Merging Two Faces
You can use double exposure to capture portraits. It’s best to use photo editing software since you will have more control over how you blend the faces.
You can create an aesthetic image by blending the sides of two different faces to create a new one. It’s an original idea you can use for family portraits. You could, for instance, blend the faces of a child and parent to highlight their resemblance.
Blending Images
You can use double exposure to blend photos and make a surreal image. There are no limits to what you can create with this technique.
You can select two sections of two photos and blend them together. You can use that technique to have a portrait blend into an image of a plant or flower or to have a window blend into a surreal landscape.
Multiple Exposure Effects
If you use photo editing software to create overlay effects, there are no limits to the number of images you can use. It’s best to get started with two photos, but you can work with more images as you get more comfortable with this technique.
You can also mix the different effects mentioned above to create a complex composition.
Additional Ideas for Experimenting With Double Exposure
One of the early uses of double exposure was to show movement. The same shot would show a person in different spots performing different steps of a move, like an action shot or image that tells a story.
You can also play with distance in your compositions. Take a first shot that focuses on a close-up and a second shot that shows an element that is further away. Combine them to make a unique image!
You can do a lot by introducing texture into your photographs. Merging two images through overlay gives you a soft, blending aesthetic. This technique can be used to add texture to an area of your first image.
Think about lights and shadows when you plan your pics. The first shot needs to be underexposed to get better results. You can either fill in the shadows with your second shot or use white space to blend in your second picture.
You can create aesthetic effects with colors. Think about the colors used and how they will look once you juxtapose them. You can create a shot where colors steal the show, like an image with complementary colors between the shots you merge.
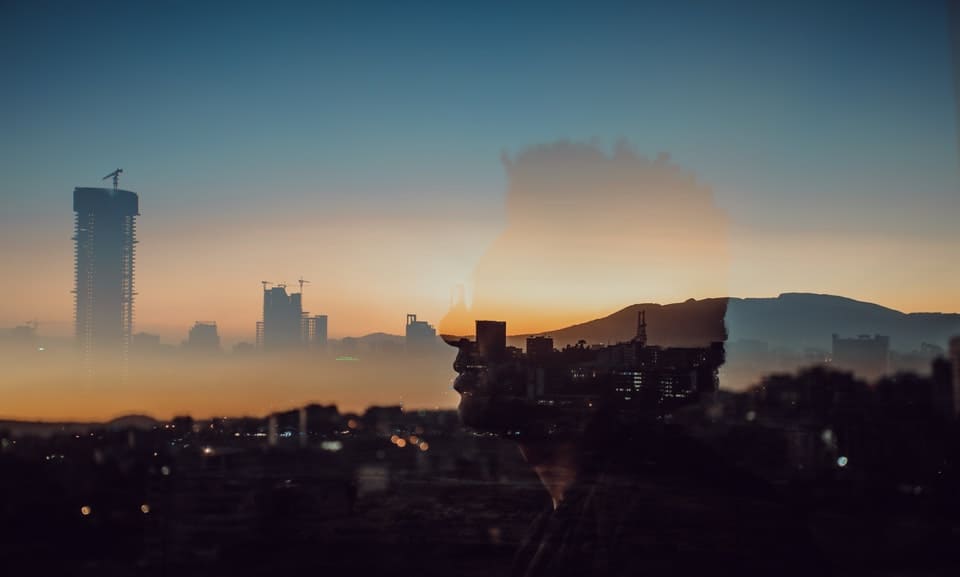
Double exposure allows you to blend things that you wouldn’t find together in a normal context. You can use that idea to tell a story or surprise your viewer. Think about mixing unusual things together, like a cityscape and a shot that focuses on nature.
How to Use the In-Camera Double Exposure Setting
Does your camera has a double exposure mode? You can usually find that setting in your menu under multiple exposure or double exposures. Here is how you can capture unique exposure photos with that feature.
Step One: Shoot an Underexposed Pic
You will get better results if you shoot an underexposed pic with a white background. If you want to shoot outdoors, you will get ideal lighting conditions just before sunset or sunrise. If you’re shooting indoors, you can use a white photography background to achieve the desired double exposures or multiple exposures.
Use a fast shutter speed and low f/stop to get an underexposed image. You can take several pics and choose the best one later.
Step Two: Enable Multiple Exposure Mode
Once you have captured the image that will be used as a base for your photograph, open the menu, and look for the double exposure effect or multiple exposure mode. Depending on the model of your camera, you might be able to choose how many pictures you want to blend.
Enable the double or multiple exposure mode, and your camera will ask you to select your base picture from your memory card.
Step Three: Shoot Your Second Picture
Once you select your base picture, your LCD screen will show a version of that image with low opacity. You can compose your second shot and see in real-time how the images will blend thanks to the LCD screen.
Pay attention to how the details of the second picture will match the dark areas in the first picture. Take the time to align the two shots to create an interesting result.
Once you snap the second picture, your camera will process the double exposure effect picture automatically. If you don’t like the outcome, you can go back to picking a base picture from your memory card and start this process again.
Camera Settings
Camera settings can vary from one model to another. If you have a camera with a built-in double exposure mode, these settings will give you more control over the outcome.
Using an Image from Your Memory Card
This is a feature you will find on Canon and Nikon cameras. It allows you to select an image from your memory card to use as a base for your shot. You can then choose to take one or more images and blend them over the picture you selected.
Auto-Exposure Compensation
The key to a successful overlay shot is to have an underexposed image as your base. If you want to blend more than two photos, you will need to reduce exposure further for each image.
Some cameras have an auto-exposure compensation mode. This feature will adjust exposure automatically to get the best result possible when you blend two or more images.
Incorporate Dynamic Movements
You can use multiple exposures to capture movement and get an amazing action shot if your camera has a continuous shooting mode.
It’s a feature you should find in your menu if your camera has it. Indicate how many exposures you want to capture and adjust the shutter speed to determine the frequency at which your camera will capture multiple exposures.
It’s best to use a tripod and to adjust the focus manually in advance so the focus doesn’t change from one shot to another.
Layered Effects
You can create a unique layered aesthetic if you have a zoom lens and know how to adjust the white balance.
Use your camera’s built-in multiple exposure mode to take three or more photographs and blend them. Start with a wide-angle shot and a white balance in a 3,000K range.
Zoom in for your first overlay, and increase the white balance to 4,000K. Take additional shots, and increase the zoom and white balance to 5,00K and 7,000K. It’s a fantastic technique you can use to create a layered effect for a landscape!
Playing With Focus
You can capture some unique pictures by playing with focus effects. Take the first picture with your subject in focus, and a second one with your subject out of focus.
It’s best to use the Bright blending mode if your camera has one. This mode will preserve the natural highlights in your image and will create a soft glowing aesthetic.
Bright and Dark In-Camera Feature
Digital cameras give you different ways of blending images. Additive or overlay modes will combine the brightness values of different images.
However, some cameras have a bright and dark feature that you can use to give priority to highlights or shadows in your final composition.
Creating Double Exposure Images in Adobe Photoshop And Luminar 3
Using photo editing software gives you more control over how you blend your images.
Double Exposure Photoshop
Start by opening the two images you want to blend and create separate layers for these images.
Select the top layer and click on blend in the layers panel. Choose screen or overlay. You can then adjust the opacity slider of the top layer to create an overlay aesthetic.
Apply a mask to the top layer, and use a brush tool to paint over the areas you want to see through your overlay.
These are the basic steps to follow to create this effect in Photoshop, but you can go further and play with gradients, saturation, and other settings to create a unique photo.
Luminar 3
Open the image you want to use as a base for your shot. Click on add new image layer, and select the second image you want to use.
Adjust the opacity level of the second image, and use brushes to work on details and determine which areas will be more noticeable than others.
Five Photographers Who Work With Double Exposure
Are you looking for inspiration? Here are five double exposure photographers who have created stunning portfolios with that technique. You can follow the links to visit their galleries, but note that their work is under rights reserved:
Additional Questions
Here are a few additional things you should know about overlay photography.
- Double exposure photography app
There are different apps you can use to create this aesthetic with pictures from the camera roll on your phone. We recommend Image Blender, Enlight, BlendMe, and Blend Editor.
- Double exposure Polaroid
You can create an overlay effect with a Polaroid photo! The OneStep Plus Polaroid camera has a double exposure mode that you can enable through the Polaroid Originals app. The app will adjust exposure levels automatically.
![Why Are My Photos Always Grainy + How to Fix [Updated 2023]](https://colesclassroom.com/wp-content/uploads/2014/12/why-are-my-photos-always-grainy-3-of-4.jpg)