Oh no! You load your images into Lightroom after a session and notice they are overexposed! Read on for our tips and tricks to how to fix an overexposed photo in Lightroom!
It can be so frustrating: You snap the “perfect” shot and beam momentarily with pride, and then you look at the back of your camera and you see it. That white glow, the sure sign that the moment you thought you’d captured so perfectly may actually be lost: overexposure. It is definitely disheartening to lose a great shot to overexposure. Fortunately, there are ways to recover some of your overexposed images. I’ll be honest, some images may be too blown out to be able to recover any detail, but not all of them. If you have had a photo that you thought was ruined, this tutorial will help you understand how to fix an overexposed photo in Lightroom.
So WHY are you getting overexposed photos in the first place?
You’ve noticed that your photo(s) are overexposed and you’re not sure why! There is something called the exposure triangle that will dictate how your photo will look after you’ve taken it. It combines three of the main elements in photography, ISO, aperture and shutter speed! If your images are too bright, or overexposed, it’s because one of these three things is not correct. Let’s look at these three components quickly, to see if you can troubleshoot your problem.
ISO
Sometimes when we get an overexposed image, it’s simply that our ISO is set too high. For example, if you’re outdoors on a really sunny day, you’re ISO should be somewhere from ISO 100-200. If you’ve set it to 800, your photo will most likely be overexposed (if your other settings are correct).
Aperture
If you’ve set your ISO correctly, the next thing you should be looking at is your aperture (also known as f-stop). The lower your f-stop (like f/1.8 for example), the more light will be let into your lens. The wider the opening, the more light will be allowed to hit your camera sensor, leaving your photo overexposed. In this case, try closing it down a bit and see what results that will produce.
Shutter Speed
If you’ve set your ISO and decided on your aperture, the last step will be to adjust your shutter speed. If you’re noticing that your image is too bright, simple INCREASE your shutter speed (for example 1/200th to 1/600th). This will vary obviously, depending on your other settings.
Shooting in RAW
Before we go much further about how to recover an image that has been overexposed, I want to mention that your best bet for being able to recover as much data as possible is going to be shooting in RAW format. You can learn more about shooting in RAW vs. JPEG here. In short, RAW files contain significantly more data than JPEG files, which allows you to recover more of the details of your image in post-processing.
There is no hard and fast “rule” about which one you should utilize (and that link has great pros and cons listed for each one), but the truth is that you have a better chance of correcting an image if you shot it in RAW format. Be sure to weigh the pros and cons of shooting in RAW or JPEG, and make a decision based on what is best for you and your situation.
[ad id=’5′]
The Process
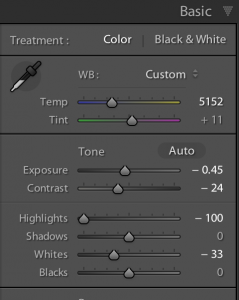
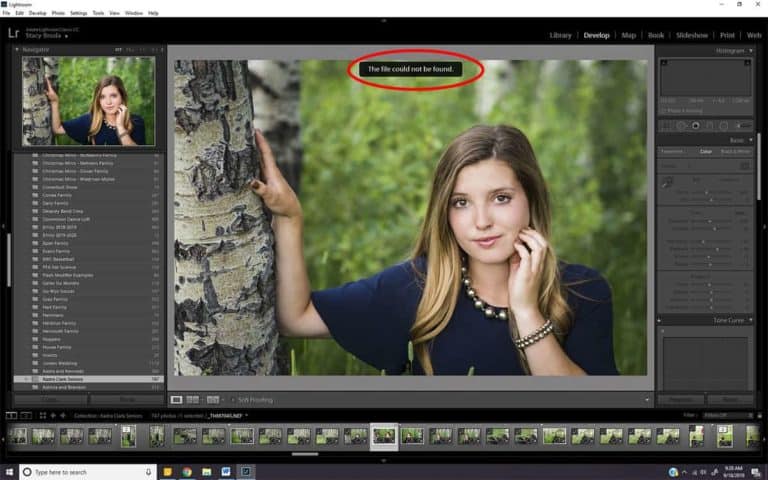
There are a few key steps that I take when I am correcting an overexposed image in Lightroom. Using the “Basic Panel” in the “Develop” module is where you should start. The three sliders I primarily focus on for correcting overexposed images are Exposure, Highlights, and Whites. If you are wondering what the difference is between these three, here is a simple breakdown:
1. Exposure Slider
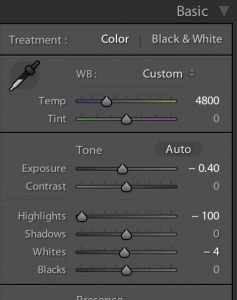
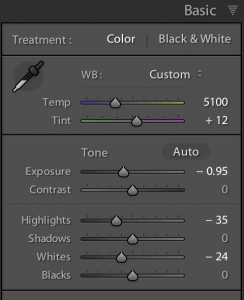
The exposure slider adjusts the overall brightness of your image. This slider is fairly sensitive to your adjustments, and small adjustments have a pretty significant impact. When you have selected your image, the exposure slider will show a value of 0.00. To lower the exposure, you’ll want to slide it to the left, which will cause the value to decrease and show a negative (-) number, like -0.30. Usually, you’ll keep a RAW image between -1.00 and +1.00.
2. Highlights Slider
Highlights will affect the brightest areas of an image, and helps to recover lost detail in the highlights. In fact, in previous versions of Lightroom, this was called the recovery slider. The value of your RAW, unedited image will be 0. To lower the bright areas of your image (the highlights), you’ll move the slider to the left, and therefore will show a negative (-) value. So if you bring your highlights down ALL the way, the value will show -100.
3. Whites Slider
The white slider sets the overall brightness of the image by adjusting the midtones. By pulling this slider to the right, you increase the brightness of the midtones, and when pulling it to the left, you take the brightness of your midtones down.
Putting it all together!
My process for recovering an overexposed image deals primarily with these three sliders, but depending on the amount of detail lost, I may approach them in a different order on each image.
- Try to pull down exposure (pull this slider to the left)
- Attempt to lower highlights (pull slider to the left)
- Pull down whites (pull slider to the left)
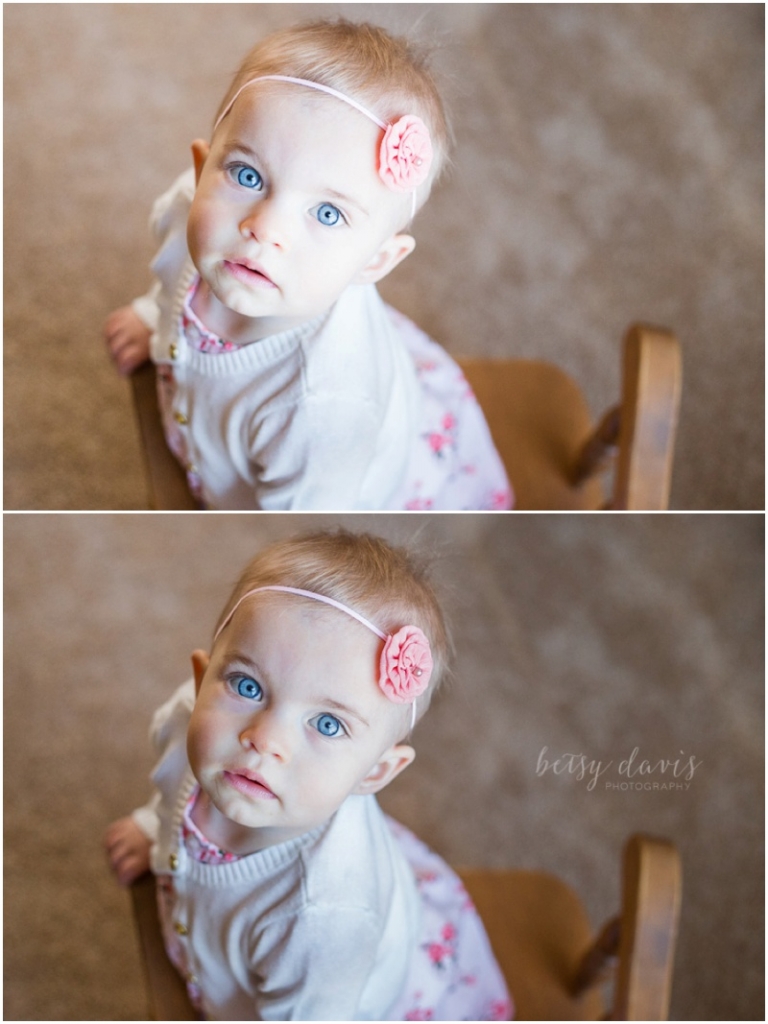
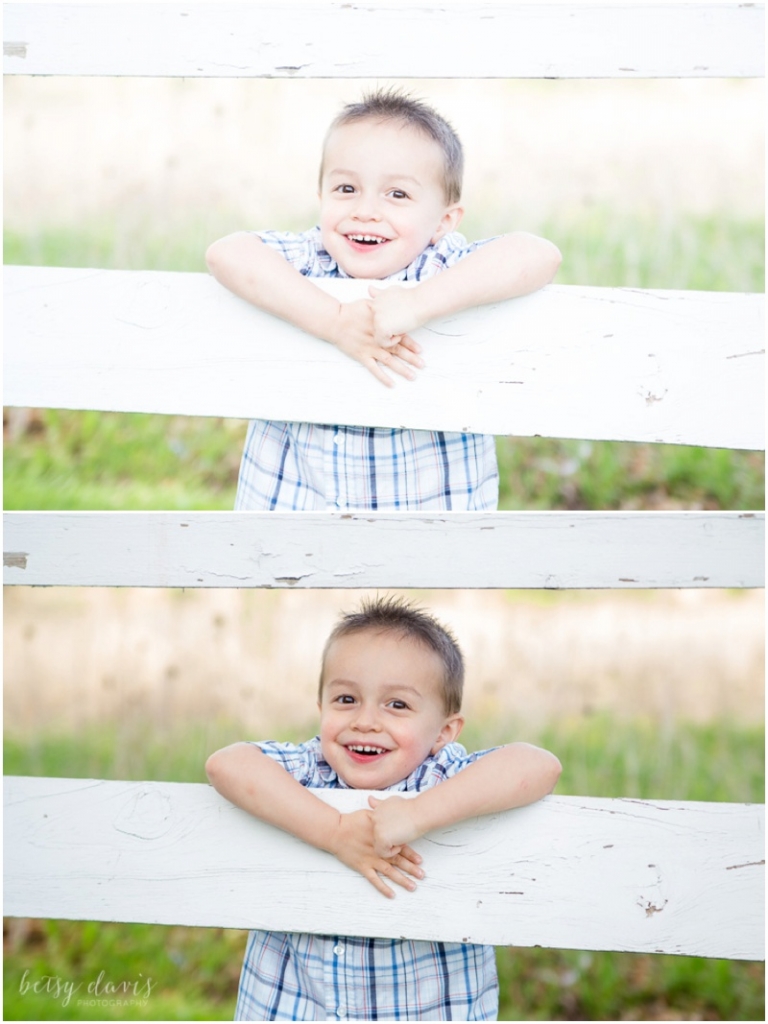
Each of these edits will vary depending on the amount of over exposure in the original photo. Below, you can see a few examples of my exposure correction and screen shots of the adjustments made in my Exposure, Highlights and Whites sliders. Remember that even seasoned professionals still struggle with overexposed images! It takes a lot of practice and patience, so keep pushing forward!
[ad id=’3′]
Overexposed photos can be disappointing, but if you know how to use the tools available to you in Lightroom, it doesn’t have to be a lost cause! If you’ve wondered how to fix an overexposed photo and you’d like to watch as I do these exposure edits, you can follow along on this quick video!


