Photoshop has numerous options available to let you adjust images. One of those features is image flipping, which can allow you to flip an entire image, create mirror effects, or flip a single part of an image to suit your needs.
By doing so, you can help better integrate an element into a larger image or change the focus or energy of a photo. In some cases, flipping an image also lets you check for any potential distractions in an image, even if you flip it back in the end.
Whatever you’ve decided to adjust a photo for, we’ve built a step-by-step guide on how to flip an image using Photoshop—whether it’s the whole canvas or a single piece—for your convenience.
How to Flip an Image Using Photoshop
For starters, let’s look at how to flip an entire canvas at once in Photoshop.
A quick tip: some older versions of Photoshop have slightly different text in the menu options: “Rotate” vs. “Image Rotation,” Overall, the wording is close enough that you should be able to find the options you need.
Step 1: Open the Photo
Before you can adjust the image in any way, you need to open it up in Photoshop. You can do this from within the program by going to the “File” tab and selecting “Open.” From there, you can choose the image from your files. You can also access this feature by using the keyboard command Ctrl/Command + O.
“Photoshop CS3 screenshot6” by swanksalot is licensed under CC BY-NC-SA 2.0
Step 2: How To Flip the Photo Horizontally
Flipping the image horizontally will use the central line of an image running from top to bottom and flip it across this point; objects on the left will be on the right, and vice versa. To do this, you will need to go into the “Image” tab and hover the “Image Rotation” menu. Below the rotation options, select “Flip Canvas Horizontal” to flip the image.
For example your base image would look like this:

“LE” by vastateparksstaff is licensed under CC BY 2.0
While the horizontally flipped image would look like this:

Step 3: Flipped the Photo Vertically
Alternatively, you can flip the image across the vertical access, with the central line running from left to right; when canvas flipped, objects on the bottom of the original image in Photoshop will be on the top, and vice versa. Once again, go into the “Image” tab and go to the Rotation menu. Once there, select “Flip Canvas Vertical.”
The same image in Photoshop as above flipped vertically looks like so:

Flipping a Layer in Photoshop
Sometimes, when working on a project, you only need to flip a single element, rather than the whole canvas. When it comes to flipping a layer instead of a canvas, you can easily use this strategy to better balance a composition.
Step 1: Open Your Project
Under File, select “Open” and choose your chosen project. You can also use the Ctrl/Command + O keys to do so.
Step 2: Adding and Selecting a Layer
If you already have an active Photoshop project with multiple layer, select the one you want to flip in the Layer Panel. If the Layer Panel isn’t currently visible, press F7 to make it viewable.
If you don’t already have the layer that you wish to flip, click the “New Layer” button in the Layer panel. You can also go to the Layer menu and choose “New” then “Layer.” You can then add your image to this new layer by dragging it in or pasting it.
If your layer is currently in “locked” mode, you will need to unlock it to flip it. You can do this by clicking on the lock icon in the Layer Panel.

Step 3: Enter Free Transform Mode
Now that you’ve selected your desired image, you’ll need to enter Free Transform mode to flip it. On the top bar, select “Edit,” then “Free Transform,” enabling the mode.
You can also use the keyboard command Ctrl/Command + T to enable the mode after selecting the right layer, without needing to move through the menus without selecting the edit transform feature.

Step 4: Flipping the Image
After entering Free Transform mode, right-click on the image. From the menu that appears, you can select either “Flip Horizontal” or “Flip Vertical,” depending on which option you wish to choose.
If you wish to flip multiple layers at once, you can start by selecting them before entering Free Transform mode. To do so, hold down the Ctrl/Command key as you click on each desired layer. Once done, you can enter free transform mode and flip the image the same as detailed above. If you want to flip all layers, you can simply flip the entire canvas.

Flipping the Background Layer
In some cases, you may want to flip the background instead of flipping the canvas, leaving the rest of the elements untouched. The steps to do so are similar to flipping individual layers in Photoshop, but you’ll want to take an extra precaution.
Step 1: Unlocking the Background Layer
Your background layer in Photoshop will most often be in a locked state to keep it stable as you edit other options. Thus, you will need to unlock it to enable features like flipping. To do so, find the background in the Layers Panel, then click on the padlock to toggle its status back to unlocked.
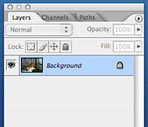
“Photoshop Layers Panel” by Paul Ingles is licensed under CC BY-SA 2.0
Alternatively, you can also copy the background layer into a new one. To do so, select the background layer first, then go to the Layers option on the top menu and select “Duplicate Layer.” You can also use the Ctrl/Command + J keyboard shortcut. This command will copy the background into a new layer.
Step 2: Flipping the Background Layer
With the background layer duplicated or unlocked, you can then flip it using the same process or flipping any other layer:
- Click on the layer in the Layers Panel to select it
- Go to Edit, then Free Transform
- Right-click on the area you wish to flip
- Choose “Flip Image Horizontally” or “Flip Image Vertically”
Common Photoshop Image Flip Issues and Tips
Having issues with successfully flipping your images in Photoshop? Here are some quick solutions and tips to consider.
Having Trouble Finding the Flip Option
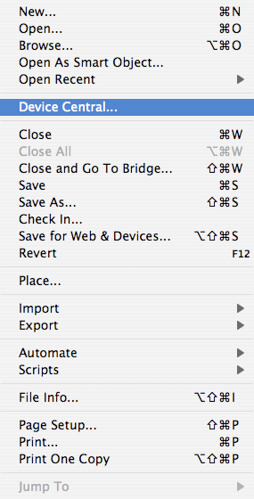
Since the flipping controls aren’t openly visible from Photoshop’s main menus, you’ll need to go to the correct one if you want to flip a photo. First, select the “File” option from the top bar menu, then go to the “Image Rotation” menu. Flip options will appear there.
On some older versions of Photoshop, the tab will simply be the “Rotation” menu, but it has the same flipping and rotation options.
Text or Logos Have Flipped
Some photos will have text or logos that become mirrored whenever you flip an image in Photoshop. Thankfully, you don’t have to give up on using a flipped version of the image.

After settling the image into the flipped mode, make a selection around the logo or text and pull it into a new layer. You can then follow the steps for flipping a specific layer outlined above to put the text back in the right direction. Alternatively, you can copy the text into a new layer before flipping the original image as its own layer. Take care not to flip the whole canvas if this is the case.
Depending on the text’s angle and how it lines up with the original photo, you may need to adjust it to fit back into the image. You can select the logo, then select the edit transform option, allowing you to pull and adjust the text in its new layer.

The Image Has Flipped the Wrong Way
Let’s say you’ve applied a flip in Photoshop, but it’s come out the wrong way. There’s a chance that you’ve accidentally selected the wrong axis to flip over—horizontal instead of vertical or vice versa.
You can fix this issue in one of two ways: First, you can reapply the same flip. An image flipped twice vertically reverts to how it was before, assuming you haven’t made any significant edits.
Alternatively, if you’ve just made the flip, you can simply undo it. In the menus, select “Edit” and then “Undo” or use the Ctrl/Command + Z keys.
Rotating vs. Flipping
Keep in mind that, while similarly changing the layout of a photo, rotating and flipping an image are two different things. Thanks to their similarities, though, they’re often close to each other in the Photoshop menus.
Photoshop rotation options will allow you to adjust a canvas ninety degrees clockwise or counterclockwise, letting you flip an image on its side. Rotating the image one-eighty degrees will turn it on its head. While this does set the image upside down, it will not be a mirrored image, as what happens when flipping it.
Our earlier example image when rotated ninety degrees clockwise appears as so:

You can use a combination of new layers, flipping, and rotating to create a unique effect for the photo in some edits.
Creative Ideas
Now that you’ve learned the basics of how to flip images in Photoshop, it’s time to learn how to best use this technique to create interesting images. Here are some suggestions.
Creating the Mirror Effect
A flipped image will provide a mirrored picture, and you can intentionally use this effect in Photoshop to create an interesting effect with the original and flipped image side by side. To make this happen, you’ll need to do several things:
- Copy the base image you want into a new layer (unlock the later as well)
- Expand the canvas space by going to “View” and selecting “New Guide.”
- Then add a new Vertical Guide down the middle of the image
- Use the “Move” tool to drag the subject to one side of the new guideline
- Select one of the layers, then activate the “Free Transform” tool
- Follow the above steps to flip the layer
Once you’ve completed all of these steps, you should be able to line up the images and then trim off any space leftover from the sides. You can then export your image.
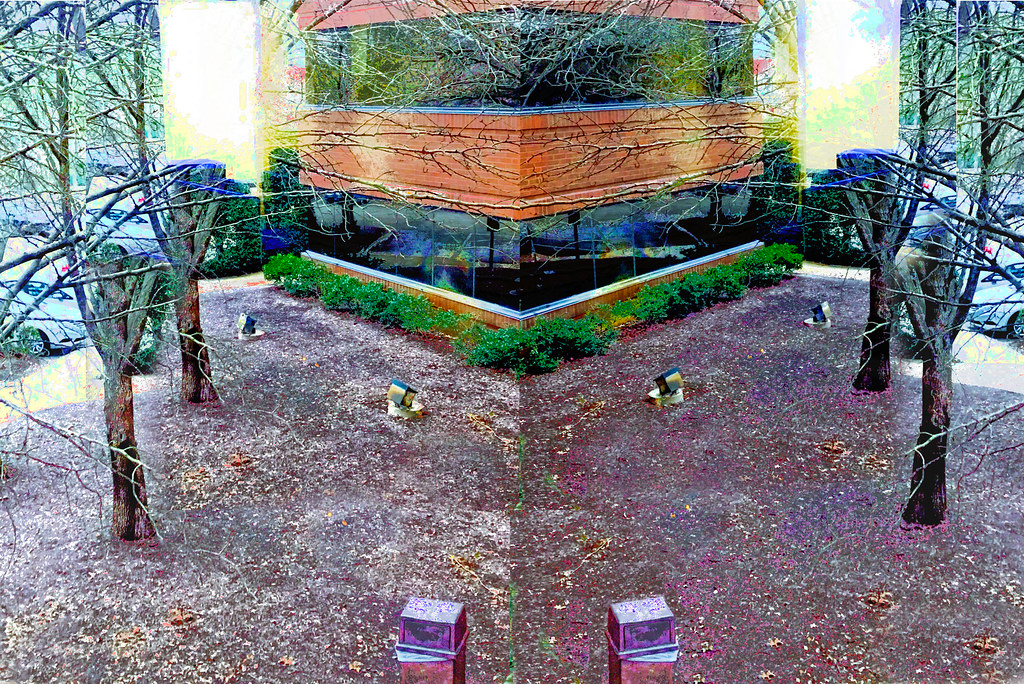
“Corner Lot” by byzantiumbooks is licensed under CC BY 2.0
Flip Multiple Times for Patterns
Like the mirror picture process, you can also flip an image multiple times in Photoshop to create a new pattern setup. First, you’ll follow the steps to create a mirror effect on an image. Then, using the Layers panel, merge the two layers into one.
Your next step is to repeat the mirror process, but instead doing it along the axis you haven’t already done. Note that you will need to create another copied image in a new layer to do this. So if you’ve mirrored the first image over the vertical access, you’ll expand the canvas and flip the image over the horizontal axis.
The result will be a kaleidoscopic image. You can also further rotate or flip this image for an extended effect.

“St James’ Park” by nigeljohnwade is licensed under CC BY-SA 2.0
What is the Keyboard Command to Flip an Image in Photoshop?
By default, there isn’t a keyboard shortcut for flipping an image in Photoshop. You can, however, program on your own to save you time from having to repeatedly navigate through the menus, especially if you see yourself regularly flipping images.
To map your keyboard shortcut, you’ll first need to bring up the Photoshop shortcut dialog. To do so, press Alt + Shift + Ctrl + K.
On the menu, you’ll see various categories you can create shortcuts for. You’ll want first to select “Image,” and then “Flip Vertical.” You can then determine your own chosen keyboard shortcut. Once you’ve input it, click “Accept” and then “Save.” You can repeat the process to set a command for “Flip Horizontal” as well. Afterward, you can use your chosen keyboard command to flip an image in a few keystrokes during any session in Photoshop.
Note that this command will flip the whole canvas, rather than just part of it, so take caution as you work with your images.
Now that you’ve made it through our guide on how to flip image in Photoshop, you should be able to take advantage of this tool whenever you see fit!