Have you ever struggled with putting together advertisements and client resources because you didn’t know how to make a collage in Photoshop? Let’s change that!
Photoshop can be intimidating if you are not familiar with it, but it is also a powerful tool that will allow you to customize marketing materials. Even if you are using templates you have purchased, it is important to know how to work with layers and insert images into collages. You can use this technique for how to make a collage in Photoshop to make collages for print, for social media ads, for blog posts, or just about any other time when you need to put more than one image into a single file.
Looking to improve your photography? Just enter any questions you have about improving your photography below and hit send and get answers & feedback instantly - for FREE! Submit QuestionsFirst, before we learn how to make a collage in Photoshop, let’s learn how to make a template for a collage
We’ll start by making a template to place our images into. Templates are an important step in how to make a collage in photoshop because they allow you to duplicate this work in the future in much less time.
Step 1: Create a new document

To make our template, we will create a new document. We do so by clicking file>new and then setting the dimensions for our file in the dialogue box that opens.
For the purposes of this tutorial, I will be showing you how to make a collage in Photoshop for for a blog post, so I know I want a landscape oriented collage that is 960 pixels on the long edge. I also know that the photos I am working with are uncropped, which means they have a 2 x 3 ratio. This is important because it allows me to figure out how tall to make my template. I’ll be sizing this one at 960 pixels wide and 634 pixels tall. If you are designing a collage for print, this is easier, because you’ll just set it to the paper size you want to use, like 8×10 or 5×7.
I also need to set the dpi before making my document. Again, because this is a blog post. I’ll be sizing the template to 72 ppi. For print, you would want to size it to 300ppi. You can use this same process to make any type of collage you want, so don’t think you are limited to two photo collages.
Step 2: Add black boxes as “frames”
Instead of adding images directly to our template, we will begin by drawing black boxes as place holders.
Begin by selecting the shape tool and making sure it is set to rectangle.

To make the boxes black, change the fill (the color that “fills” the inside of the shape) color to black.
To add a border, select stroke (the border) and change the stroke color to the color of your choice. If you do not want a border around your images, select “no stroke.”

Drag your cursor on the background to add your shape. Repeat until you have the number of shapes you need. If your frames will all be the same size, you may just want to duplicate your layers to keep the shapes consistent. You can do this by right clicking and selecting duplicate layer.
For this example, I am making a two photo collage, so I’ll only be adding two frames. The concept works the same if you want to know how to make a collage in photoshop or how to make a fifty photo collage in photoshop.
Step 3: Resize and evenly space your elements until you are happy with the design.

Here is my completed template with my side by side vertical photos and white border.
You can move the frames using the move tool or using the arrow keys on your keyboard. To resize the frames, you can drag from any of the edges. Or, if you know the size you want the shape, you can type that into the bar above where you set the fill and stroke.

The move tool is the one selected above. It is normally the top tool in the tool bar.
Step 4: Rename your layers.

This doesn’t seem terrible important with my three layer sample template, but trust me, when you have 8 or 10 different shapes you are working with as you learn how to make a collage in Photoshop, you will want them to be named. I name mine in a manner that makes it obvious what shape it is. For example, here I’ve named my layers left and right. This way, I can easily tell which shape gets which image.
Step 5: Save your template
Save your file as a photoshop (.psd) file with an obvious name (file>save). I’m saving mine as blog 2 vertical to make it obvious what this template is for.
This step is important because it will allow you to reuse this template in the future. For example, the template I am making for this tutorial allowed me to make four collages for a single blog post within minutes.
Now that we’ve saved our template, we are ready to start putting together the actual collage.
Now, we are ready to actually learn how to make a collage in Photoshop by adding photos to our template
Step 6: Time to prepare your photos
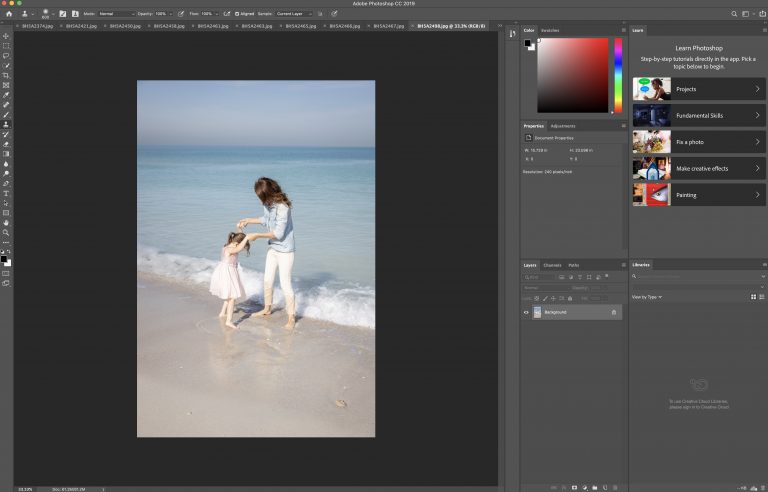
Still using Photoshop, open the photos you want in your collage
To do this, go file>open and then navigate to the photos you want.
Optional: resize your photos before bringing them into your template
In this case, I’m using print resolution photos to place in a web resolution template. That means that when I have successfully added them to the document, they will be giant. I often have to zoom out (cmd – on my mac) substantially to see where the edges of the photo are. Sometimes it is easier to resize before moving the photo into the template. When my photos are already cropped to the correct dimensions, I’ll use this series of steps to avoid the giant photo, tiny template problem: image>image size>whichever choice makes sense for my purposes.
Step 7: Bring the files into your document as new layers
There are multiple ways to do this, but I’m going to use what I think is the easiest way to do this if you are not familiar with photoshop. But just be aware that if you already feel comfortable using copy and paste or drag and drop to add photos as new layers in photoshop, you can still do that. If you don’t, try this process out:
1. In the original photo file that is open in photoshop, locate the “background layer” layer in your layers panel. It should show the thumbnail of the image.
2. Right click
3. Select Duplicate Layer
4. In the dialogue box that opens, locate the “document” drop-down panel
5. Select the name of your template file (“blog two vertical” in my case)

The photo is now a layer in your template
Step 8: Put the photo on the correct layer

Navigate back to the template file. Move the photo to the layer ABOVE the box you want it to fill and give it a name that makes it obvious what photo it is. Notice, in the screenshot above, that it defaults to above whichever layer is active. In this case, I want this photo on the left, so I will move the layer it is on to the layer ABOVE the layer I named Left. To move it, you simply drag and drop.

It is now in the correct spot, but I still want to rename it to make it easy to find. In order to do so, I double click the existing name “Background copy” and then type my new name “Left photo.”
Step 9: Resize and move the photo to the “rough” size and location.
I always error on the too large size first, meaning I’d rather start big and bring it down a little each time instead of making it too small first and then making the size bigger. Make sure you hold shift as you resize from the corner to lock your dimensions and avoid giving someone a squished or stretched face.
Step 10: Get the photo in the template frame
To do this, you will right click on the layer (in the layers panel) that has the photo and select create clipping mask. Like magic, the photo is now “inside” the frame you made for it.


Here, I know I’ve clipped the photo to the shape on the layer below it because of that arrow pointing down from “Left photo” to “Left.”

And here, you can see that it is now “inside” of my frame. Notice the stroke around the outside of the photo.
Step 11:Reposition the photo and resize as needed
Now is the time to reposition and resize to your final dimensions. Again, hold shift as you drag from the corner when resizing.
Step 12: Repeat 7-12 until all of your frames are filled

Here is my final collage that I used to demonstrate the difference photographing from a higher angle can make for this blog post on female poses.
Step 13: Add any text or embellishments
Maybe you need to add your logo or information about a promo you are running. Now is the time to do that. I like to make sure that each element is on its own layer to make editing easier later. Also, name those layers. Later, if you want to remove your logo, it is much easier to do so if you have named the layer “logo.” I’ve wasted far too much time in Photoshop hunting for the right layer and now name everything.
[ad id=’5′]
Step 14: Save (as) Twice!
The first time, you will select save as and then save the file as a new photoshop file. This will allow you to make changes to this file in the future without recreating your work. Make sure you change the name to avoid overwriting your template.
The second time, you will save as a .jpg or .png depending on where you are posting and how you are using the file. If you have transparency you are trying to preserve, choose .png. Otherwise, .jpg is probably what you want.
Summary:
Collages give you versatility to create promotional materials, facebook cover images, blog post images, sneak peeks for mini sessions, and so much more! It is well worth learning the process of how to make collages in photoshop. Doing so will allow you greater flexibility in the materials you create to represent you and your brand.
Now that you know how to make a collage in Photoshop, why not check out the Family Portrait Toolkit or Newborn Client Welcome Guide and develop some great client resources?
You might also enjoy these other Photoshop tutorials:
How to Add a Light Flare Overlay in Photoshop… the Easy Way!
How to Mirror a Background in Photoshop