
How to Move Lightroom Catalog to External Hard Drive
If you’ve ever needed to move your images or change catalogs in Lightroom, it can feel a little scary. That’s like ALL your work…what if something goes wrong?!?
Relax! It’s much less scary and difficult than you’re imagining. With a few steps, you’ll be ready to go. Read on to learn how to move a Lightroom Catalog to a hard drive.

What is a Lightroom Catalog?
Let’s start with some basics before we get to the how-tos. What are catalogs in Lightroom? A catalog is just a database the program Adobe Photoshop Lightroom Classic creates to manage your photos. Instead of making changes to the photo itself, Lightroom records all the information in this database.
The program records keywords, metadata, edits, and more. But the original images themselves remain untouched. Lightroom remains a non-destructive editing program this way.
The important thing to remember, then, is that your catalog file doesn’t actually hold any images.
Why Would I Need to Move My Catalogs in Lightroom Classic?
There are actually several reasons you might need to know how to save your catalog to an external drive.
- You want to store it on an external drive to free up storage space on your internal drive on your computer.
- The external drive storing your catalog file changed.
- You want to export images to edit on another machine.
I don’t recommend moving around in Lightroom just for kicks and grins. But when you NEED create space or transfer from an internal drive, here’s how!

Ready to take your photography to the next level?
Join Cole’s Classroom today! »
How to Move Lightroom Catalogs to a Hard Drive

Step 1: Backup Your Lightroom Catalogue and Images
First…a mini-lecture. You should be backing up your catalog and your images from your internal drive on a regular basis. Don’t lose your work, your time and your sanity. Set Lightroom to regularly backup, and use a smart backup strategy for your images and other documents.
Since that is out of the way, let’s continue on to how to backup your catalog. If you aren’t backing up automatically, take a minute and do it manually.
1. Open Lightroom and the catalog you want saved.
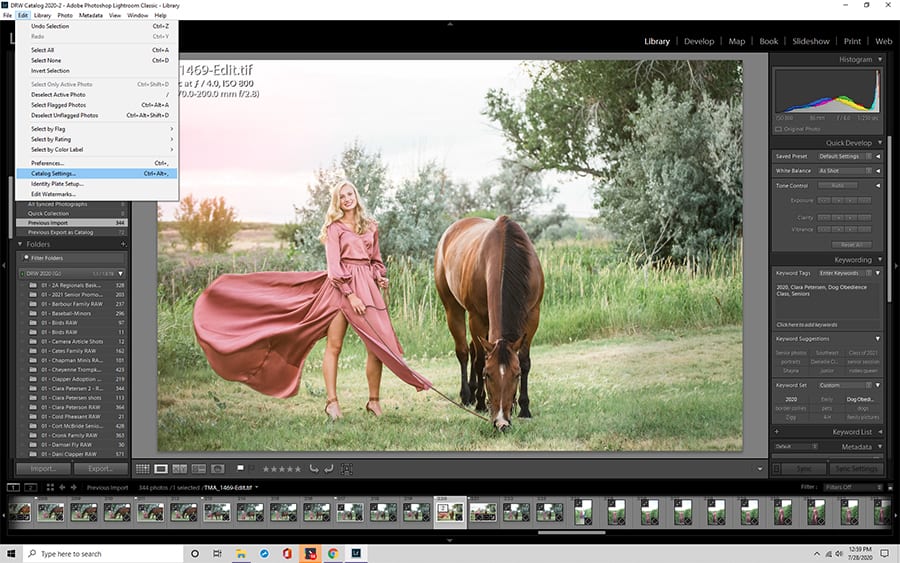
2. Choose Edit->Catalog Settings (Windows) or Lightroom Settings->Catalog Settings (Mac).
3. In the Backup dialog box at the bottom, choose “When Lightroom Next Exits.” Then Double click “Okay.”
Step 2. Locate your catalog and images
Now you’ll need to know where Lightroom stores both of these on your internal drive. If you don’t know where that is, try this.
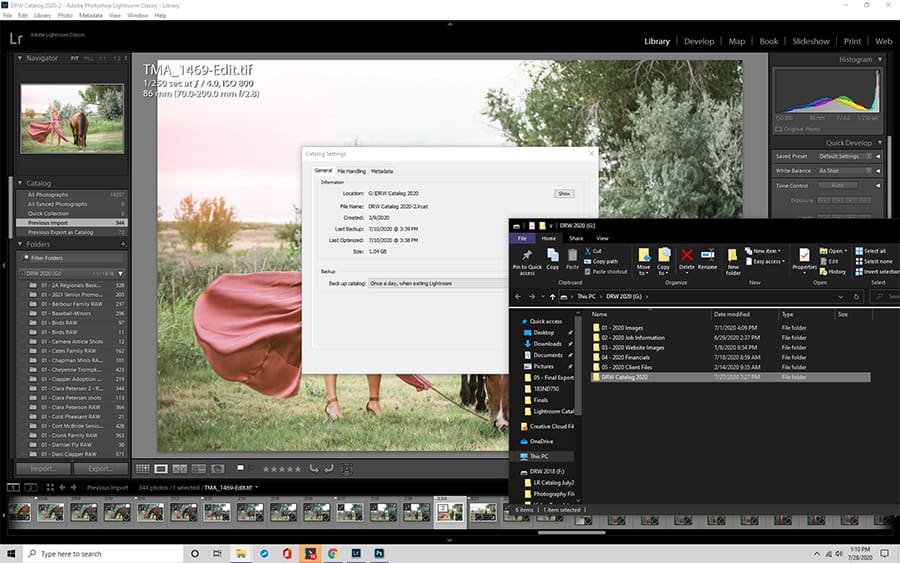
1. Choose Edit->Catalog Settings (Windows) or Lightroom Settings->Catalog Settings (Mac).
2. Check that you’re on the “General” panel. Click “Show” to go to the catalog in Explorer or Finder in Mac OS. This shows you where your computer currently stores your catalog and images. Be sure you remember the new location!
3. Now Quit Lightroom.
Step 3: Plug in your external drive
Make sure you’ve got the drive you want to house your new LR catalog to plugged into your machine and that it’s ready to go. Some experts recommend moving at least a single image into the new drive before moving on to step 4.
Step 4: Copy/Move Your Catalog and Images
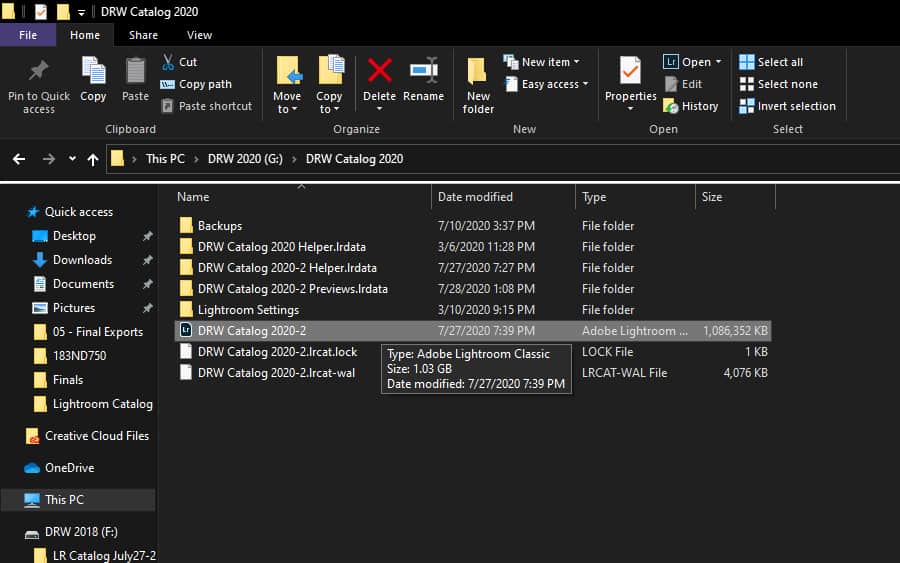
Now open the new location on your computer (hopefully you just left it open from before) where the catalog is stored and associated images are located. Copy the file called catalog.lrcat (or whatever you’ve named it!), Previews.lrdata, and (if present) Smart Previews.lrdata to the external drive.
I usually copy it in case something goes wonky (even though I have a backup. I’m a pessimist like that).
Step 5: Copy your images (Optional)
If you want your external drive to house all of your images as well as your catalog, you’ll need to physically copy those images to your new hard drive using Explorer or Finder. To keep your image files where they are and just move the catalog, skip this step. If you need to know how to do this, skip to the bottom of the article.
Step 6: Open the new catalog in Lightroom
Once the computer and drive have finished talking/moving/copying, it’s time to open Lightroom again. Locate the new catalog.lrcat file on the external drive and double-click it.
Step 7: Reconnect Your Catalog and Images
Don’t worry if Lightroom has a bit of a freak out when you first open it via the external drive. We’ll fix that with this step.
Because Lightroom doesn’t know where to look for your images, it puts a question mark by your folders in the Library module.
Right-click on a new folder with a question mark and choose “Find Missing Folder.”
This will open Explorer or Finder. Locate the folder that’s storing your actual photos and select it. Remember, if you moved all your images to the external drive in Step 4, you’ll want to connect that new folder on your external drive.
Repeat this process with all of your folders until all of the question marks disappear. If you noticed exclamation points by the previews of your images at the bottom filmstrip, those should all be gone as well.
Step 8: Delete the Original Catalog (and files!)
Once you’re confident everything has been copied to the external drive correctly, you can delete the original catalog from the internal drive of your comptuer. You can also delete the photos from the original machine if you’re now storing all of them on your external drive.

Catalog vs. Photos
As we discussed above, your catalog does not house your photos. It’s simply a database that keeps track of the information about your photos. Don’t assume that just because it’s backed up your photos are also backed up or vice versa. They are separate and must be handled separately.
SPECIAL OFFER – Discover the secret to adding “wow factor” & retouching your photos, without having to use Photoshop, in only 3 clicks (…even if you’re brand new to editing your photos – guaranteed!)
Join the 54,000 other photographers using our Polished Lightroom Adjustment Brushes Presets Collection and get them here for 80% off!

External Drive Letters Issue
Every once in a while, your computer gets confused on what letter of the alphabet to use for your external drive. For example, your external drive might be called G:MyPhotos on your main computer, but if you disconnect and reconnect it, the computer might call it H:My Photos.
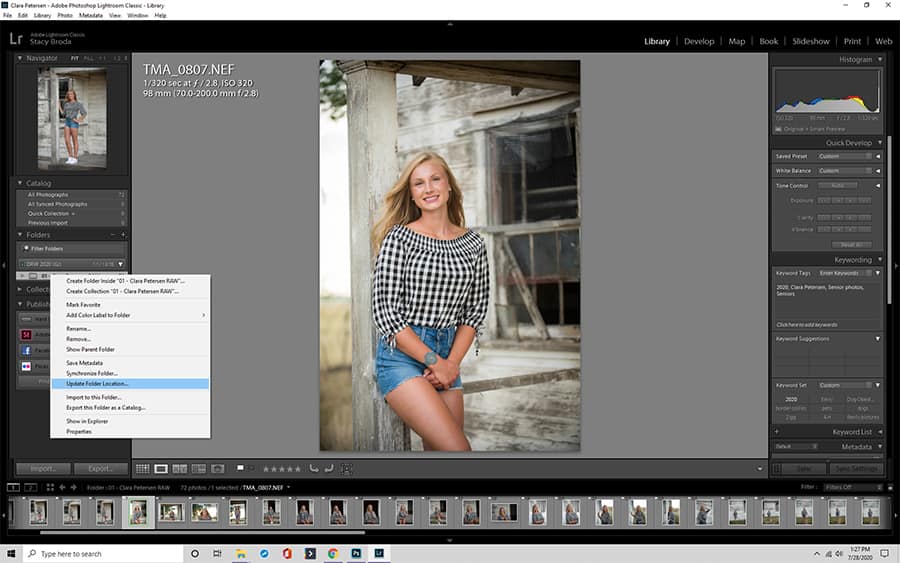
If this happens, you’ll notice Lightroom shows you those dreaded question marks and preview exclamation marks again. The quickest fix is to right click your folders in Lightroom and choose “Update Folder Location. Navigate to the new folder on the external drive and select it. Lightroom will automatically reconnect everything.
If you need to rename the drive, go here for instructions.
How to Backup Your Lightroom Photos to an External Drive
Maybe you don’t want to house your catalog on an external drive, but you would like to house all your images to an external drive. That’s easily accomplished, too!
Option 1 uses lightroom Lightroom for moving your images from your internal drive to a new location.
Option 2 is to use Explorer on Windows or Finder on Mac, then relinking things within Lightroom. I prefer this method because it’s easier for me to visualize and because if something goes wrong, it’s easier to fix. Sometimes if something goes wrong when you use Lightroom to move files around, the whole process gets corrupted and it takes more time to fix and sort out. So let’s look at how to accomplish option 2.
1. Begin by locating your images on your internal drive. If you don’t know where you store them, open Lightroom and make sure you’re in the Library module. Navigate to the panels on the left.
Next, click the right mouse button on the top-most folder in your hierarchy that you want to transfer to an external drive and select “Show in Explorer.” If you’re a Mac user, you’ll choose Finder. This opens a window on your computer. Leave that open but exit out of Lightroom.
2. Using Explorer or Finder, copy (again, this is safer!) that folder to the external drive. If you have a ton of images, be prepared for this to take some time!
3. Once the photos are done copying and you’ve verified they are indeed on the new drive, open Lightroom.
4. In the Library Module in the Folders panel, right click on a folder and choose “Update Folder Location.” This opens a window in Explorer or Finder.
5. Finally, locate the new copy of your folder and choose “Select.”
6. Repeat this for all your folders.
Once you’ve finished updating all your folder to point to new locations, spend a few minutes verifying that you can work with a few images and edit them as per usual.
If you’re comfortable that you’ve updated all the folder new locations correctly, you can delete the original images from your machine. You should now have all your photos available to view and edit through Lightroom on your external drive of choice.
Conclusion
Don’t put off backing up your images or moving your catalog file simply because you are intimidated or afraid. This is a relatively safe and easy process! Make sure you are making LIghtroom and your storage method work for you and your needs, not the other way around!
Ready to Learn More?
Join Cole’s Classroom today to unlock everything you need to become a pro photographer.
Start Free Trial