If you’ve mastered photographing birds and other wildlife at rest, you may feel ready for a new challenge. Photographing birds in flight can present you with lots of opportunities for great action shots. It can also be a lot of fun!
Looking to improve your photography? Just enter any questions you have about improving your photography below and hit send and get answers & feedback instantly - for FREE! Submit QuestionsJoin us as we talk about equipment, technique and composition of photographing birds in flight. I’ll give you a few tips on overcoming some common problems and get you ready to spread your wings and fly.

How to Take Pictures of Birds in Flight
Equipment
You don’t need a ton of new gear to be a supremely awesome photographer of flying birds. Try honing your techniques using the tips below first. We see the greatest gains in our photography when we improve our skills, not when we simply buy more expensive equipment.
But because the equipment is a part of outstanding photography, here’s the gear you’ll need to photograph birds in flight.
Camera
Most modern DSLR or mirrorless cameras can handle photographing birds in flight. Point-and-shoot or cell phone cameras lack the zoom and focusing abilities you’ll need.
Look for a body with at least 24 megapixels in resolution, more if you want to offer really large prints. A camera with a faster frame rate, or how many images it can record per second, allows you to shoot several frames at a time and choose your best image from the set.
Lenses
Birds like their space and will be some distance from your shooting position. Your best lens then is the fastest, longest lens you have. The best lenses for bird photography are a prime 500mm or 600mm super-telephoto with an aperture of f 4 or wider.
But for most of us, that power is cost prohibitive. Use what you’ve got and make the most of it, whether its an f 2.8, f 4 or f 8 or not.
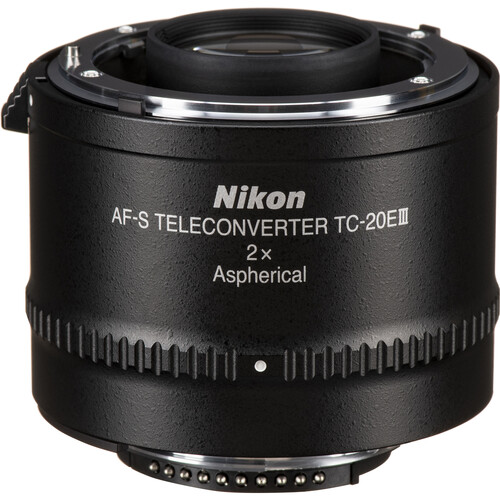
Teleconverter
Teleconverters snap between your lens and camera and give you more reach from your lens (how much depends on the strength of the teleconverter, usually 1.3, 1.7 or 2 times as much). So a 70-200mm f/2.8 lens with a 1.7 teleconverter becomes a 119-340mm lens. The tradeoff is light, usually 1-2 stops. With a teleconverter my f 2.8 lens becomes a f 4 lens
Tripods
Anytime you’re photographing birds in flight with a big heavy lens, a tripod will help. The most important consideration photographing birds in flight is the tripod head. A Gimbal head makes it easier to pan your camera (see our panning discussion below).
A standard pan head also works well and is usually cheaper. Ball heads allow the camera to move from side to side, but I find them hard to hold steady with a larger lens. Pistol grips are darn near impossible, at least for me, to use when panning.
A monopod will also help stabilize your lens and can be used when panning and shooting moving subjects. Monopods work best with subjects moving in a steady line across your frame. They aren’t as effective if your subject is also moving vertically.
Blinds
A blind helps keep you and your equipment hidden from the birds you’re trying to photograph. Blinds come in lots of different styles and sizes or can be made from the materials in the natural environment.
They aren’t a necessity but can help keep you comfortable and hidden and give you the opportunity for some spectacular photos.

Camera Settings and Lens Settings
When choosing camera settings for birds in flight, prioritize your exposure based on your goals for your images. Most of the time, that means setting your shutter speed to stop motion and adjusting aperture and ISO accordingly.
Slow Shutter Speed vs. Fast Shutter Speed
Birds in flight are fast and nimble even at high speed. A pheasant erupts from the ground at speeds of 50 mph. Sparrows top 30 mps in flight and flap their wings 15 beats a second.
Stopping that action is your priority! Start camera settings with a shutter speed of at least 1/1600 of a second, but know a faster shutter speed is better. Generally, the smaller the bird the faster their wings flap. You’ll need a faster shutter speed to stop the action of blue-winged teal ducks than you will a sandhill crane coming in for a landing.
If your creative goal is to convey motion of flight and you want a little motion blur, however, slow your shutter speed. You can slow down your shutter speed to 1/500 of a second and focus on slower take offs or landings to let more light into your scene.
Aperture and Depth of Field
Most bird photography pros strive to get at least the bird’s eye and head in focus. To accomplish that, try starting with a mid-range aperture like f 5.6 or f 8. This is often contrary for portrait photographers who routinely shoot at f 2.8 or f 1.4. But the depth of field such as f 5.6 gives you helps ensure more shots in better focus. Most lenses are also naturally sharper around f 8 which will help improve your images as you develop your technique.
As you improve, try opening up from f 5.6 to wider apertures f 4 or f 2.8. Figure out what works best for your style and technique.
ISO
To shoot fast action at mid-range apertures, higher ISOs often become necessary to nail flight shots. ISOs of 3200 or more shooting first thing in the morning or right before the sun goes down are common. You’ll need to know how your camera handles high ISOs. But most newer cameras perform well at ISOs in this range.
Focus
Set your camera to continuous focus (Nikon) or Al-Servo (Canon). This means that as long as the shutter is depressed halfway, your camera will work to keep the bird in focus. Focus and recompose just doesn’t work in these situations.
Back-Button Focus
Back-button focus is the process of assigning a button on the back of your camera to set and lock focus instead of the top shutter button. I find the separating the act focusing and firing the shutter has helped improve focus, sharpness and keeper shots!
Some photographers have a hard time holding two buttons down while gripping their camera and tracking moving birds in flight. If you have a hard time holding two buttons while gripping your camera and tracking subjects, keep your top button as the focusing button. Use what works for you!

Focus Limiting
If your lens is equipped with a focus limiting switch, turn that on. This tells the lens and camera to ignore subjects that are at the closer to the lens and keep the focus on the subjects that are at the farther away. It helps your autofocus work faster!
Focus Points
For larger birdsin flight, I prefer to use a single focus point and put it exactly where I want to on the bird. Group-Area autofocus (Nikon) or Zone auto focus (Canon). Experiment with the different focus modes your camera offers and see which works the best for you.
Turn off Image Stabilization
If you’re shooting at a fast shutter speed, panning using a tripod, image stabilization isn’t going to do you any good. In some instances, it can negatively affect your images. So turn it off. If you’re not sure, check the manual of your lens for the best settings if it’s equipped with image stabilization.
Manual Mode vs. Aperture Priority Mode
Most professional bird photographers I know switch between these modes as conditions change.
- Use manual mode if you always want complete control of the scene or if your background is changing in tone as brightness. Set exposure so the bird is correctly exposed and the camera doesn’t make the subject lighter or darker as the background changes.
- Try aperture priority if the light is constantly changing on your subject but your background is relatively consistent. Aperture priority can adjust faster than you can spin dials to compensate for fast changes in light.

Technique
Panning and the Flight Path
One of the most important techniques you’ll want to master for photographing birds in flight is panning. This is the act of holding the camera steady on a moving subject and shooting as it moves across your frame.
To pan, spread your feet about shoulder width apart. Track your subject at the edge of your frame, swiveling your body at the hips with the bird moving across your frame.
When you’ve got the composition like you’d like, achieve focus and fire your shutter. Shoot the image as the subject approaches and is even with you. Follow through as the bird flies away from you, but don’t shoot anymore. No birdy booties!
Tripods with a Gimbal or pan head on them can help ensure a smoother swivel but you can also do this hand-held with smaller lenses.
Panning is a great technique to combine with slower shutter intervals to convey motion through motion blur. Try lowering your shutter speed to something like 1/200 or lower and panning and shooting birds.
This creates an image where the eye and body are in focus but the wings are often blurred, conveying motion. Experiment with different slower shutter speeds to find the sweet spot for that particular bird!
This technique takes a while to really nail, so practice with it first before you employ it in a do-or-die situation.
Prefocus Your Lens
Pick a spot in your frame that’s roughly equivalent to the flight path of the birds set your focus on some grass, trees or still birds at that range. This gets your camera close to the right focusing spot so when your subject is in range the autofocus can quickly acquire focus instead of hunting for it throughout the full range.
Intermittent Focusing or Bump Focusing
The best tip I’ve gotten for photographing birds in flight is to use intermittent focusing. This means that you lock focus on the bird, track it through the frame, then refocus on the bird. You focus intermittently until the bird is close enough for the shot you want then fire the shutter.
This helps keep the active focus point from getting off the subject and the camera focusing on something in the background instead of the bird you want. Focus, track, focus, track, focus, fire when ready.

Composition of Birds in Flight Photography
One mistake I made early on was concentrating on nailing focus and stopping action that I ignore the other rules of great bird photography. Don’t be so honed in on the action of a bird in flight to the excursion of other composition techniques like rule of thirds and perspective.
Get the eye
We connect to animals through their eyes. Birds in flight photography should show the eye of the subject and have it be in focus. There are very few exceptions to that rule. “But a branch was in the way” is not a good enough reason. Show the eye and make sure it’s the sharpest part of the image.
Don’t clip their wings
Give your subject enough room in your frame so you aren’t accidentally cutting off wings, feet, or the bottom of their tails. You can crop in a little after the fact but you can’t put their feet back in the frame.
Make use of reflections
Birds flying over water make for spectacular images. Use reflections to your advantage.
Use a good perspective
Shooting from directly under the bird or as it moves away from you isn’t a strong composition. Hold your shot for something better.

Tips for Flight Photography
Study Birds
The more you know about your subject the better bird photographer you’ll be. Learn their habits, preferred places to nest, mate or feed. Learn how they behave and you’ll give yourself the best chance to photo birds and their behavior!
Always Be Ready
Adjust your exposure and other settings the minute you get out of the car. That way, you’re ready for any unexpected surprises. Don’t be fiddling with settings as they birds are approaching.
Location, location, location
Give yourself the best chance at success by choosing good locations. Know where the birds will be and how they’ll fly in and out of an area. Learn where the birds roost or settle down for the night. Know where they nest or come to feed. Then find a spot within that location that gives you great light and some concealment. Arrive early and be ready.
Practice when it doesn’t matter
Professional football players don’t practice in the middle of a game. Don’t sign up for a tour or wait for a once-in-a-lifetime opportunity to start honing your skill. Practice now and hone your skills on birds you can find and photograph every day.
The mallards at your town pond or the sparrows in your tree might not be the most exciting subject in the world, but they will give you lots of practice. Then you’ll be ready for that dream vacation or birder’s dream trip.
Shoot in Beautiful Light
Softer, more diffused light almost always makes for better photos. Shoot during golden hour when the sun is low on the horizon and the light is more dynamic. And position yourself so the sun is at your back and illuminating on your subject.
This runs counterintuitive for most portrait photographers because they want the sun at the back of the subject.
Find a bird that’s farther away and moving toward you
When you have the chance, find a bird that’s farther away and moving toward you. This gives you more time to compose your scene and achieve focus. There will also be less chance of you cutting off wings or feet as they fill more of your frame.
Conclusion
Photographing birds in flight is a joy and challenge for anyone that loves animals or action photography. Even on the days where you don’t get a single shot you love, there is something intrinsically beautiful and calming about just sitting with these amazing creatures.
Use these tips to get you started, but don’t be afraid to adjust your settings or and take creative risks once you have the basic skills down. With some practice and study, you’ll be photographing birds and taking photos that fly high above the rest.