Learn to take pictures of the carnival, fair or amusement park in all its whirly, night-time glory!
You don’t have to be a kid to love the carnival. The lights, the food, the noises and colors…it’s a feast for the senses. It can also be a fantastic place to take a camera and experiment! Join me as we explore how to take pictures of the carnival, including equipment, settings and a little Photoshop magic!
Looking to improve your photography? Just enter any questions you have about improving your photography below and hit send and get answers & feedback instantly - for FREE! Submit QuestionsWhen is the best time to take pictures of the carnival?
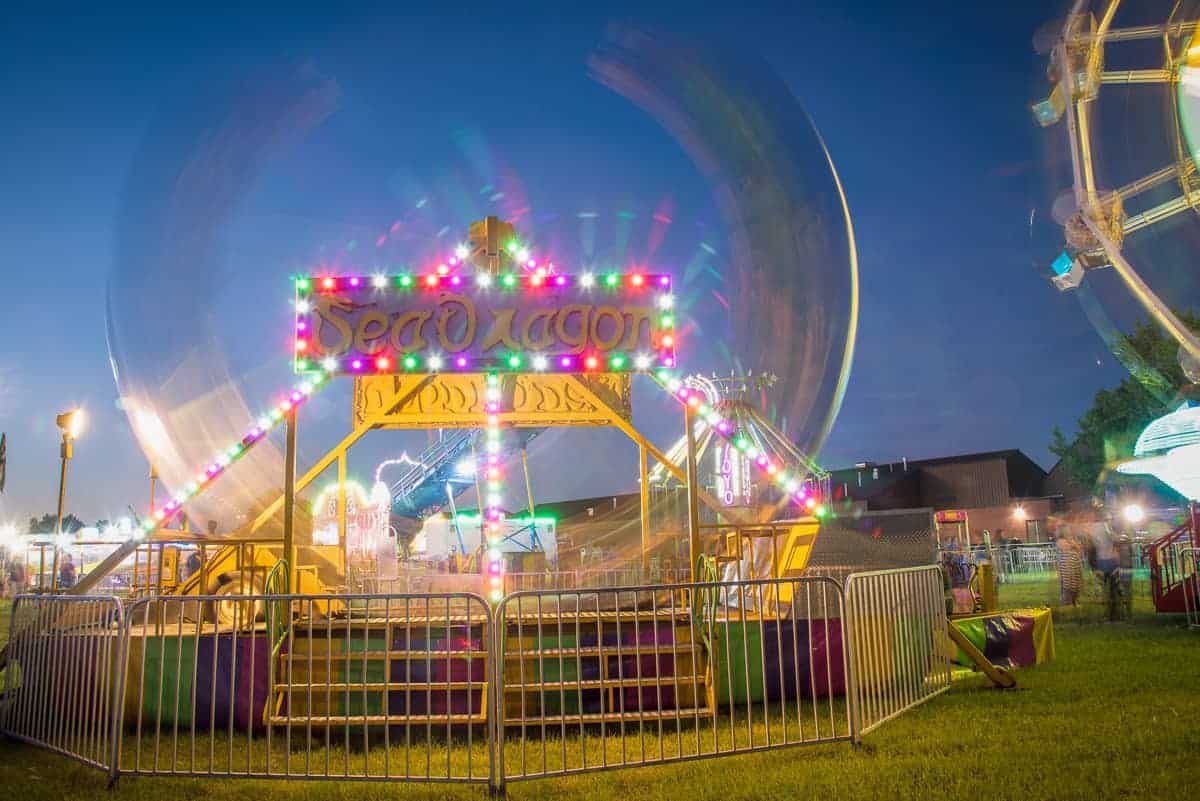
A carnival in the daytime is plenty of fun. But it becomes extra spectacular as the sun goes down.
If the focus of your carnival shots is people, daytime or golden hour is your best bet. But if the rides themselves are the star of your show, plan to take pictures of the carnival during “blue hour.”
Blue hour is the hour after sunset. The sky holds beautiful blue and pink hues for almost an hour after the sun sets. It makes for an awesome backdrop to the bold colors of carnival lights. Of course, you can also shoot after blue hour. I just prefer the color of blue hour to the inky black of full-on night.
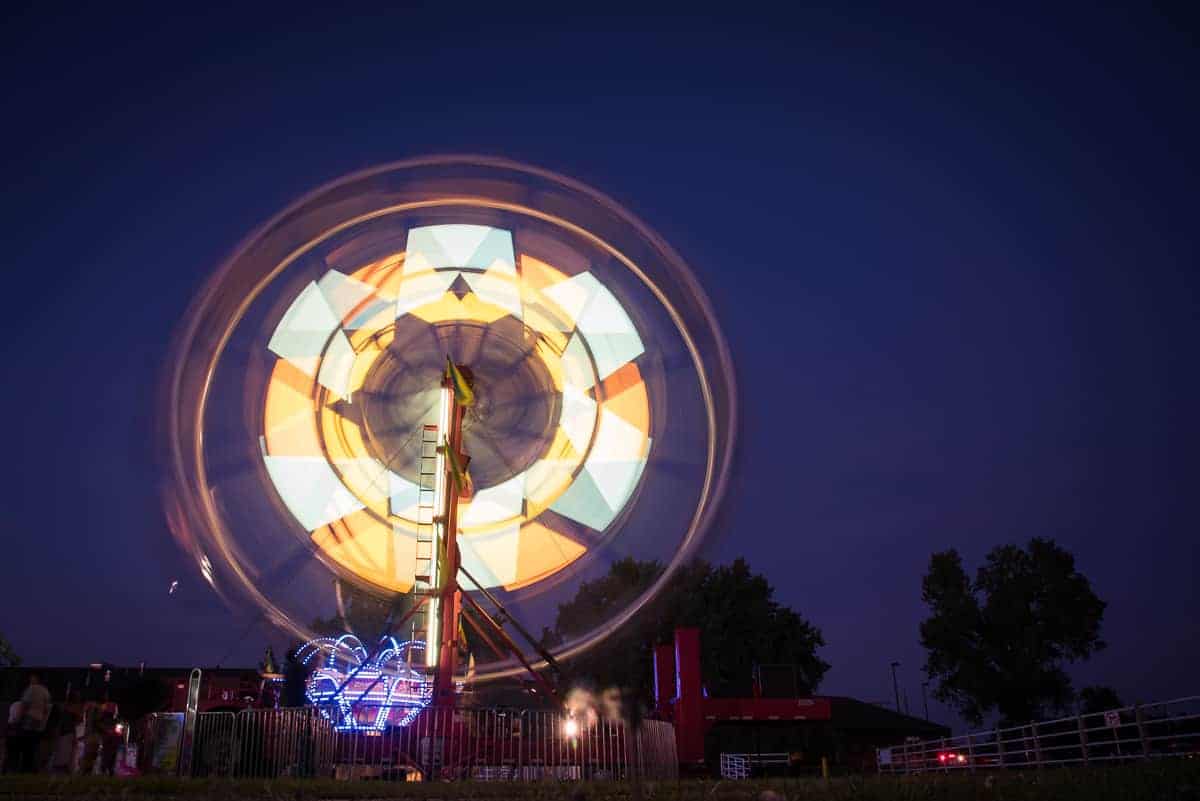
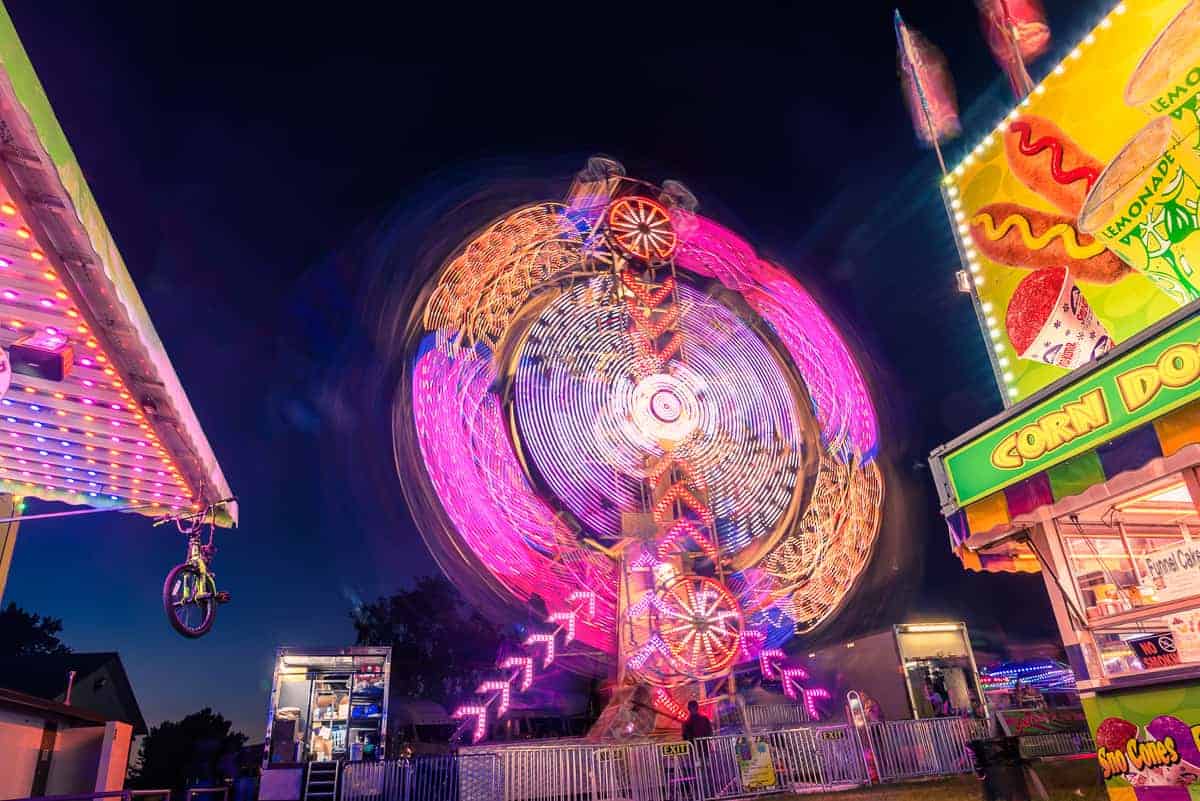
Blue hour and night time also give you the flexibility of shooting long exposures. Because there is no ambient light coming from the sun, we can hold our shutter open longer and experiment with creating motion blur and light trails.
 What equipment do I need to take pictures of the carnival?
The camera
Take a camera capable of shooting in manual mode. You’ll want to control shutter speed, aperture, ISO and focus. You can also shoot in either aperture or shutter priority mode, but full control is better. Full-frame, crop-sensor or mirrorless cameras will all work beautifully at the carnival!
The lens
A wide-angle lens works best for taking pictures at the carnival. Take the widest lens you own and the best lens you own and see how you like it. I used my 24mm for practice. Even on my full-frame DSLR, it was still a little tight capturing some of the rides!
If your goal is to create those motion trails, you’ll be shooting at smaller apertures like f/8 or f/11. So don’t feel like you need a really fast lens. Yes, it’s a low light situation. But we’re going to use the power of longer shutter speeds to create visual interest in our images.
If you don’t have a wide-angle lens, you can still make it work. Use a mid-range telephoto lens and focus on details or make people the subject in your images. Try different focal lengths and see what you enjoy the most.
A tripod
Using long exposures requires a tripod for stability and to avoid camera shake. Be sure to check out the rules of the carnival or amusement park, though. Tripods might not be permitted at your theme park or festival!
If you can’t take a large tripod, throw in a smaller stand like the Joby Gorilla Pod or even a few small bean bags. Make use of benches, railings or the ground and the beanbags to hold your camera still.
If you use a tripod, shut your vibration reduction or image stabilization off on your lens. If not, it will actually introduce shake into your image!
Remote shutter
A remote shutter also helps eliminate camera shake. A remote isn’t necessary, but it is really helpful. If you don’t own a remote or shutter release cable, try using your camera’s self timer mode. That way your camera can settle between the time you press the shutter and the time the shutter actually fires.
Filters
A neutral density filter, or ND filter, is another great tool to keep in your camera bag for pictures of the carnival. An ND filter works like sunglasses for your camera. The filter lets less light pass through the lens, allowing you to keep the shutter open for longer periods of time. ND filters are critical to create motion blur or light trails when shooting during the day. They come in different strengths, with stronger filters letting in less light.
If you’re like me and keep a UV filter on your lens for everyday shooting, this is one place you might want to ditch it. The combination of carnival lights and UV filters sometimes creates some terrible lens flare. Because the lights are brighter than the rest of the scene, they create orbs and polygon artifacts across the image. Filters, especially low quality filters, can exacerbate this problem. Eliminate the problem by simply pulling off the filter when you start to take pictures of the carnival at night.
 What settings should I use to take pictures of the carnival at night?
I can’t give you the EXACT settings you’ll need to capture photographic magic. But below is a good starting place.
Shutter speed
To capture light trails and motion blur, start with a shutter speed of 1 to 2 seconds. If you want to stop motion, start with 1/500 of a second and adjust from there. Some rides are faster than others!
Want more advice on long exposures? Check out our tutorial!
Aperture
I start with a middle of the road aperture, like f/8 or f/11 when focusing on the rides. I like a fairly large depth of field and a narrower aperture helps with long exposures.
ISO
ISO will affect how sensitive your camera is to the light in the scene. The lower your ISO, the less grain, or noise, in your final image. I start at ISO 100, but adjust it up as needed to create the look I want.
Focus
Try to set focus while the ride is stationary. Lock in your focus, then switch your autofocus off. That way your camera won’t try to grab focus somewhere or sometime else.
Image quality
Shoot in RAW whenever possible. This gives you maximum flexibility during post-processing.
White balance
Set your white balance using your preferred method. To take pictures at the carnival, I find it easiest to set a custom white balance using the LCD panel. I start at 5500 K and set a custom temperature until I find one that matches my image to the scene. I know other photographers who really like the fluorescent preset, though, so it’s really personal preference.
See our “Ultimate Guide to Understanding White Balance”
Noise reduction
I turn off the in-camera noise reduction feature when I’m shooting long exposures on a tripod. It speeds up the process buffering the image and saves battery. And because I’m generally shooting at low ISOs, it’s not really necessary.
[ad id=’4′]
Pulling it together
Once you have your beginning settings, adjust them to create the composition you prefer. Longer shutters create more motion blur and longer light trails. Shorter shutters help stop motion but require higher ISOs. Try different combinations to see which you like best.
Daytime shooting
One or two-second exposures won’t be possible in the daylight without an ND filter. Instead, focus on stopping the action with fast shutter speeds, or use the rides as a great backdrop for portraits.
 Other techniques for creative carnival photos!
Long exposures aren’t the only way to take pictures at the carnival. Here are a few other fun ideas!
- Play with different angles and focus points. Use the standard wide view or get underneath the ride and shoot up. Or get high and shoot down.
- Try panning with a rider on the ride. For these kinds of shots, pull your camera off your tripod and handhold. Move your camera in line with the subject during the exposure. The idea is to hold focus on one part of the image and add motion to another. I start with a shutter speed of about 1/60 and adjust up or down. Keep your movement as fluid as possible as you track your subject and hit the shutter.
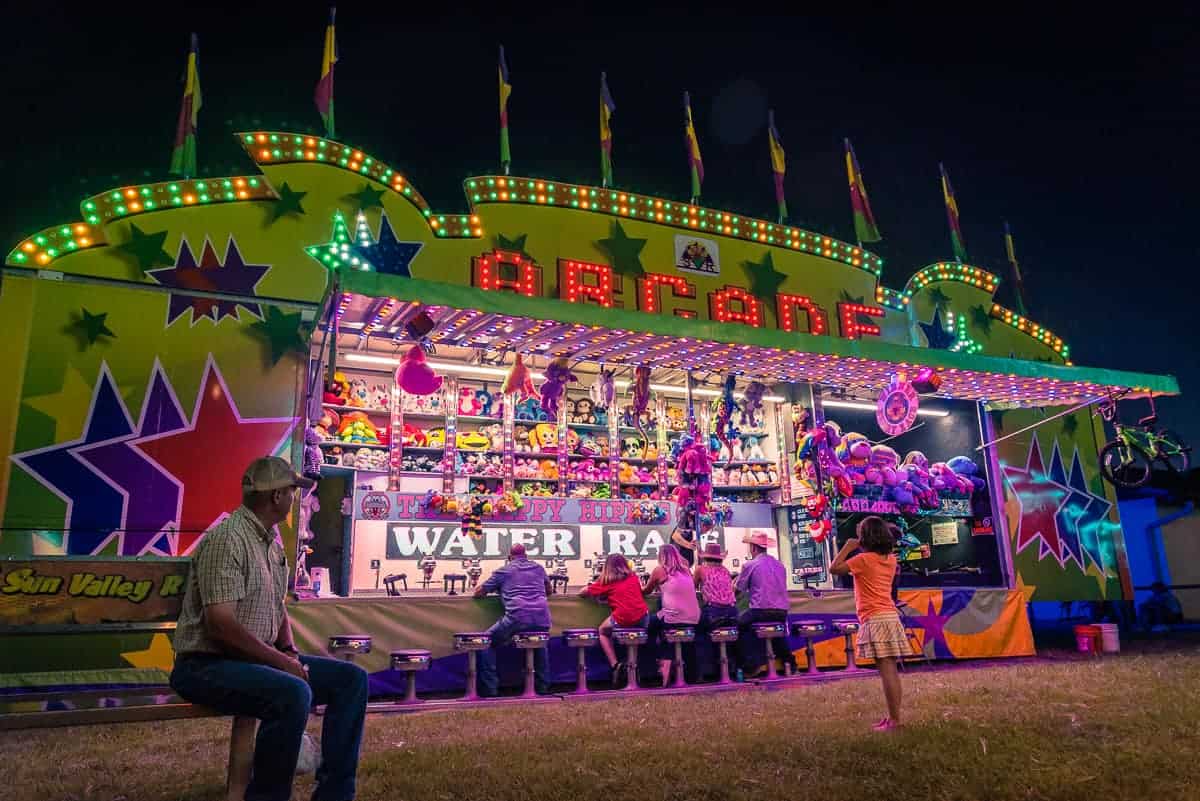
- Don’t forget about the games and food vendors! These colorful (and stationary sights can also be a lot of fun to photograph. Get in close for detail shots. Or close down your aperture to f/22 (adjust as needed for your lens!) and turn all those lights into itty bitty sun stars!
- Try a zoom burst! For this technique, you’ll need a zoom lens. This technique needs a longer exposure, so try it at 1-2 seconds first. Simply start your exposure and manually zoom your lens while the shutter is open. Try zooming in, zooming out, and staggering the zooms. Zoom when the ride is stationary and moving and see which you prefer!
- Shoot a time-lapse series! Take a picture of the carnival every four seconds or for two or three cycles of the ride. That will give you a large variety of shots as the ride progresses. Then compile them into a time-lapse video!
Click here for our time-lapse photography tutorial!
 Take pictures of the carnival and off-camera flash
If you really want to up the wow factor, use a flash at the fair, too. This requires additional equipment but can produce stunning portraits. Try using a wide aperture and create beautiful bokeh orbs from the lights of the carnival in the background. Or use long exposure with a flash set to rear curtain sync for a well-exposed subject and a background full of light trails.
Again, check with the rules of your carnival or theme park before you pack a bunch of lighting gear to take along.
To use a long exposure and off-camera flash, you need to change when the flash fires during your exposure. In this situation, use rear-curtain or 2nd curtain. This ensures the flash fires at the end of the exposure. Why is that important? It puts the motion blur of the image behind your subject.
Once you’re enabled rear-curtain sync on your flash, set your settings to expose for the ambient lighting of the carnival as you’d like it. Then add in your subject and adjust the power on the flash (or the distance from flash to the subject) to properly expose your subject. This works best with off-camera flash because you have more control over where the flash is placed in relation to your subject. Remember, you don’t want the light from your flash hitting much beyond just your subject.
This technique takes a bit of playing around with. You might need a few (dozen) images before you get the technique down. But it’s fun to experiment with!
 Editing Techniques for Carnival Photography
Edit your images in post-production to match your style. I usually pull my highlights down, increase the vibrance a little and apply noise reduction if needed.
Finally, let’s learn how to use a little Photoshop magic! Remember all those images you shot of the ride in its various stages? We’re going to turn them into a composite image!
- Make sure you individual images are edited to your liking and the settings match on each image.
- Choose a base image of the ride when it’s not in motion. This is going to be our background image. Open it in Photoshop.
- Next, load a few other images you like of the ride in its various stages. Add these images as layers to your original image, keeping the stationary shot as the bottom layer.
- In the layers dialog box, set the blending mode of the top layers to “Lighten.” This combines the images into a composite. This mode takes a look at the base color and blending color and keeps whichever of the two is lightest. The lights of the ride in its different stages will show through.
- Try some other blending modes, like “Screen” and “Overlay,” instead and see what look you like best!
- If the image is too busy for your liking, turn off some of the layers. Or use a layer mask to add or remove certain parts of it. You can add color where you want or brush it away where you don’t want it.
With a little tweaking and editing, you can create a very simple, but stunning, composite image of a carnival ride!
You don’t have to ride the vomet-comet-du juor to have a great time at the carnival or fair! Simply grab your camera gear and these tips to light it up and take pictures at the carnival. Get creative, have fun and eat a funnel cake for me!