
If you’re a photographer looking to take your editing capabilities to the next level, a Wacom tablet is a must-have investment. While you might think you’re perfectly fine editing in Photoshop without one. However, most professionals discover that once they’ve had the thrill of editing via tablet, they never go back.
This tool allows you to do your work faster and better — not to mention, it can make the tedious job of editing more fun. The below guide explains how to use a Wacom tablet with Photoshop.
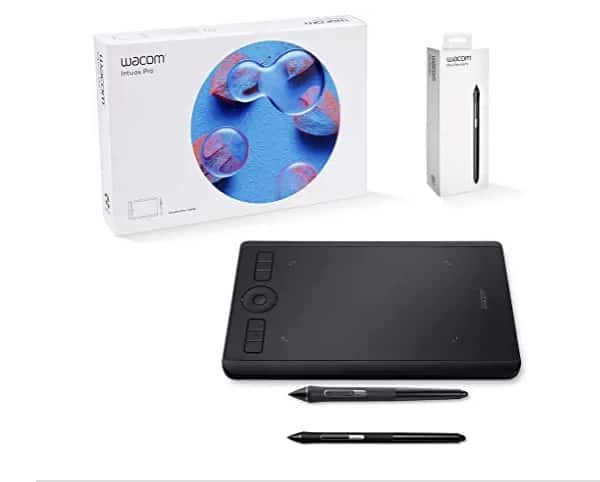
[amazon table=”642491″]
Starter Guide: How to Set Up a Wacom Tablet with Photoshop
When you first start using a Wacom tablet, you might not be so confident. Follow these ten tips, and you’ll soon get your bearings.
Figure Out Your Preferred Tip Feel
Click on the “pen” tab to take a look at the customization options available, and you’ll already be amazed at your options. Select “tip feel” to adjust the pen’s pressure sensitivity when it comes into contact with the tablet.
If you choose a more firm tip feel, you will have to apply more pressure. A softer tip feels more sensitive, requiring less force. How can you know what the right tip sensitivity for you is? Play around with the pen and test it for yourself.
It’s a matter of preference. You may start with the settings at one end of the spectrum, and, as you get more comfortable with your new tool, adjust them to the other of the range.
Set Your Double Click Distance
With a standard mouse, you use the left-side button to double click on the screen, opening or activating whatever the cursor is hovering over. So, how do you get this functionality with a graphics tablet? Simple: Tap on the pad”s screen twice.
However, since it’s unlikely that you’ll manage to hit the same spot perfectly twice in a row, you should adjust your double click distance. This setting lets you decrease the maximum distance the pen nib can move between the two clicks and still activate a double click.
You can also turn the double click functionality off. You may find that Photoshop causes quite a few issues if you enable the double click distance functionality. If you find yourself getting frustrated, switch it off.
Enter Your Pen Button Layout
Wacom pans have various buttons, which you can map to different functions for maximum functionality and efficiency. Program these buttons via the pen button layout for your most-often used commands when editing.
Instead of having to type in an undo command via your keyboard, you can set the control to the button on the Wacom pen and click it when you need it. To set your pen button commands, click on the pen button-specific drop-down menu and choose “Keystroke.” You can then enter whatever keyboard command you want to assign to the button and hit okay.
How to Set the Undo Function
Mistakes are a part of photography — especially when it comes to editing. Photographers are perfectionists, and the “undo function” is likely one of your most-used commands. To set the “undo” function for your pen button layout, follow the steps above and enter these commands: OPTN + CMD + Z for a Mac user or ALT + CTRL + Z for a PC user.
Adjust Your Eraser Preferences
The Wacom pen has a digital “eraser” that you can use by flipping over the pen and rubbing, just as you would a pencil. You can adjust the eraser pressure using the “eraser feel” slider. Odds are you won’t need this function, however, instead preferring the convenience of “undo.”
Update Your Mapping Preferences
The surface of the Wacom tablet driver will cover the entire area of your screen. This is a default setting. It can be inconvenient if you want to move your cursor from one edge of the screen to the other because it requires you to move the pen across the full breadth of the tablet. If you’re doing some slight detail editing, this is especially problematic.
Instead, change your mapping preferences settings. You can reduce the distance you have to travel with your hand holding the pen across the screen. How do you make the change? Click on the “Mapping” tab. You will then be presented with two drop-down menus, one for the screen area and one for the tablet area.
Set the screen area to “full” because you want to move the cursor across the entire screen if necessary. For the tablet area, you can then set precisely how much of the tablet you wish to use to get full-screen coverage.
Photo by Faris Mohammed licensed under Unsplash
Test Out the Touch and Functions
You may or may not find these features useful. If you’re someone who likes to use their keyboard for shortcuts, they probably won’t be relevant to you at all. Don’t write them off immediately, however.
To see what best serves your needs, start by disabling the touch and functions features you know for a fact you don’t need. As you start working, make a note of the shortcuts and tools you use the most frequently. If there is something you want faster access to on a regular basis, try mapping it to a function key on the tablet.
Explore Brush Settings in Photoshop
The pressure sensitivity of the Wacom tablet pen makes a big difference when it comes to your brush settings in Photoshop. Select “brush settings” under “window” in Photoshop to view the full array of brushes and settings.
You can adjust these to respond to different amounts of pressure while you work. The detailed customization allows you to feel like you’re really holding a pen, marker, or brush while you work and apply effects in Photoshop. This tends to result in more natural-looking results. You can even layer and smooth out results in real as you’re doing.
Adap Tilt Sensitivity
You may also want to adjust your tilt sensitivity. This setting is relevant when you’re using some of the Photoshop brushes. It allows you to program how the brush stroke varies depending on the tilt of the pen.
It’s a lot like drawing with a marker. If you hold it perfectly vertical, the line will be thin and even. If you tilt it, the line will be larger and less consistent. You’ll have to adapt tilt sensitivity depending on the types of brushes you use.
Learn How to Back Up Your Tablet settings
Your Wacom tablet is supposed to make your life easier. Once you’ve adapted all the settings to suit your precise needs, the last thing you want is to lose them. Back up your tablet preferences just as you would a smartphone.
You can use the Wacom Tablet Utility.app, which you’ll find on the Wacom Tablet folder. If you use Mac, you’ll find it under your Applications folder. If you use a PC, you’ll find it under All Programs.
How-To Tutorials: Some Quick Tricks for Using a Wacom Tablet With Photoshop
There are a few basic tasks you’ll probably be wondering how to do with your new tool. These step-by-step tutorials cover a few basics.
Dodge and Burn Switching
Use dodge and Burn Switching to bring out the detail in a photo quickly. Here’s how it’s done:
- Head to the “Layers” panel and select the new layer options. You can choose “overlay” for the mode and “fill with overlay-neutral color” to start.
- Next, press the D key to reset the foreground-background color.
- Then, select the brush tool and set your opacity to 30% by hitting the “3” key.
- Return to your tablet preferences and click the Wacom Tablet.
- Under “Tool,” select your pen and the erase option. You can change the eraser to “keystroke” and set the “x” key as the keystroke. You can then swap fore- and background colors using this keystroke.
- Just tap on the tablet with the back of the pen to shift between foreground and background.
- To dodge and burn with the pen, increase the brush size, and turn on the opacity pressure in the toolbar.
- Darken (burn) first, with black as the foreground color. You can create a vignette effect by going along the edges with your pen.
- To darken shadows, make your brush smaller and paint the spots you want darker.
- For dodging, flip the pen and tap on the tablet to change the foreground color to white. You can then paint with the brush.
The Onscreen Radial Menu
The radial menu lets you have keyboard shortcuts at your fingertips. Here’s what to do if you want quick access to the on-screen radial menu:
- Pull the switch on the side of your tablet to turn on touch.
- Use three fingers to tap and bring up the radial menu.
- Click on the gear icon to customize the radial menu.
- You’ll see options for keystrokes, shortcuts, and more.
Draw Rounder Circles
If you have trouble drawing rounder circles, this tutorial is for you:
- Start by drawing a rounded circle using a stencil.
- Next, select “mapping” and click on “check force proportions.”
- Draw the perfect circle again using your pen. It will now be perfectly proportioned. Everything you paint going forward will have the right aspect ratio.
FAQ: Using a Wacom Tablet With Photoshop
After reading the above guide, you may still have some questions about using a Wacom tablet and pen for Photoshop. Here are answers to some of the most frequently asked questions about the topic.
Which Wacom Tablet Is Best for Photoshop?
You’re probably wondering which tablets work with Photoshop. Intuos, Cintiq, and Mobile Studio Pro are all reliable options. Wondering which is best, the Wacom Intuos vs. Intuos Pro vs. Bamboo? It’s mostly a question of preference, for example, depending on the size, desk space, and monitor size.

Photo by Norbert Levajsics licensed under Unsplash
Pen Smoothing, When It’s Good and When It’s Not?
Turn smoothing on if you are sketching or drawing. This makes it easier to draw curves. If you’re doing photographic work, however, like dodging and burning, turn it off. Precise pen strokes aren’t crucial in this instance and will slow the brush responsiveness.
How Can You Fix the Annoying Ring That Appears Around Your Pen In Windows 10?
If you use your tablet with Windows, you will notice that a ring appears when you touch the pen to the screen. To get rid of it, you need to turn off visual pen effects. Additionally, you have to turn off the setting to enable press-and-hold for right-clicking.
The Final Word
If you’ve been confused as to how to use a Wacom tablet with Photoshop, hopefully, this guide provides some clarity. While it does take some getting used to, once you master the use of a Wacom tablet for photo editing, you’ll be happy you did.
This tech-savvy tool will save you time, allowing for more streamlined and stress-free editing. Best of all, you’ll be able to craft even more stunning images.