
Recent studies show that almost 80 percent of American consumers do at least some online shopping, while 88 percent of customers research products online before purchasing through a brick-and-mortar store. Part of their online shopping and research experience is photos. And it’s not just online merchants. All kinds of businesses, including restaurants, clothing retailers and jewelry boutiques need high quality photography. That’s where you come in. Your knowledge of photography can help a business sell more merchandise, which can improve both your bottom lines. Join me today and explore the growing demand for product photography.
What is product photography?
Product photography is taking images of products for sale (or for rent, in some cases). Product photography is important for online sales, but is also needed for brochures, advertisements, billboards, websites and catalogs. Just about every business that makes a product or sells a service will need some product photography at some point in time.
High-quality product photography can
- Provide a visual on a product
- Support the company brand
- Increase sales
- Enhance marketing efforts

What kinds of product photography are there?
Product photography falls into three major categories:
- Product only images
- Lifestyle images
- Stock images
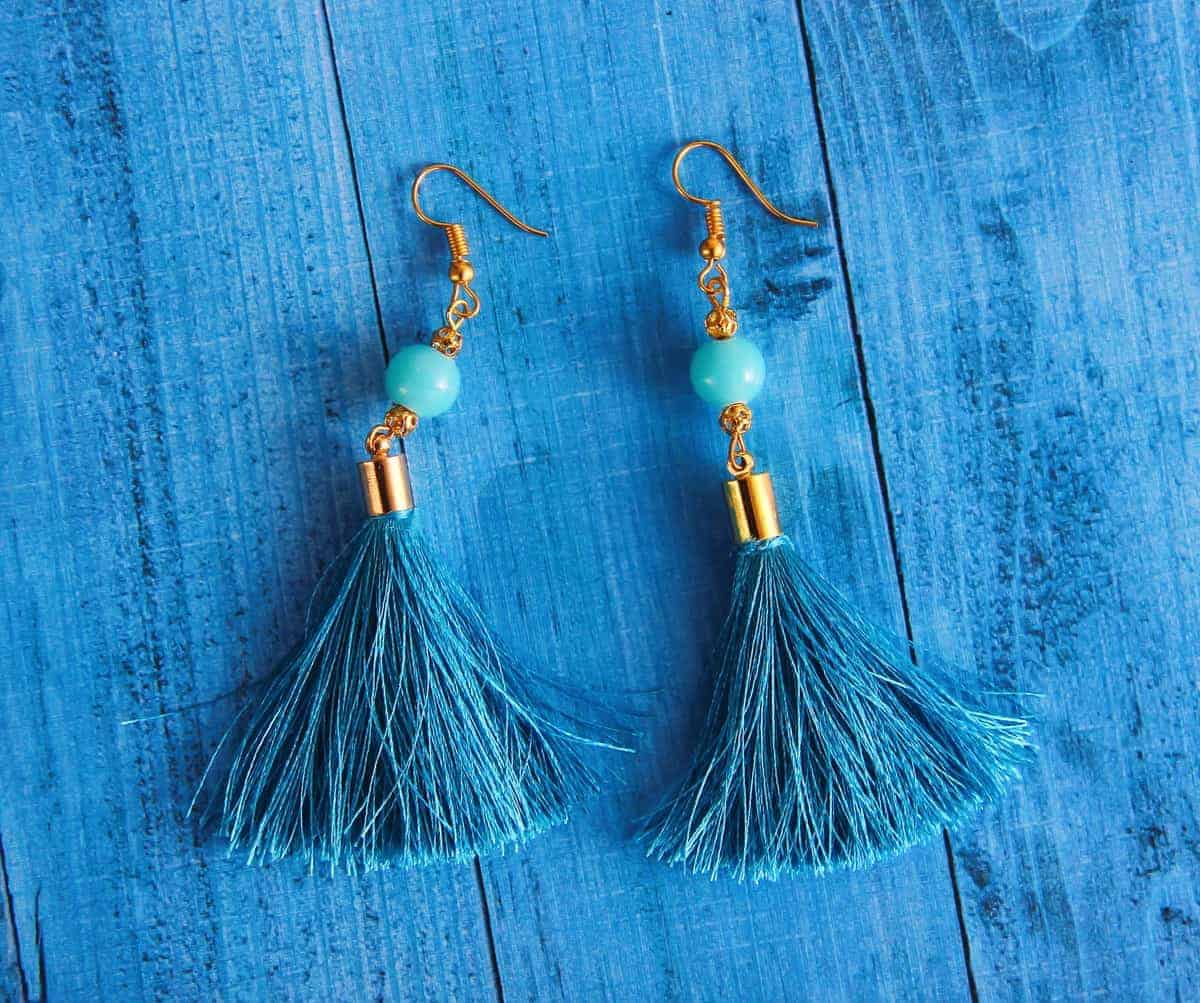
Product only images are images of just the product. If you’ve ever priced a camera at B&H Photo and seen their photos of a camera on a white background shown from many different angles, you’ve seen product-only images. Many online retailers prefer a clean, seamless white background for product only shots. Other clients may like a more environmental shot for their products to give more visual interest and depth. Regardless of the set, your images should show the quality and features of a product in detail.
Lifestyle images show the product at work in real life, often being worn or used by people. For example, if the product is farm boots, lifestyle product images might show those boots being used by a woman feeding a horse, a farmer tending to cattle or a little boy splashing in a puddle. Lifestyle product images aim to evoke emotion and boost engagement with the product.
Stock images don’t feature a specific product, but instead are generic images that a company uses to support their brand in advertising and marketing.
Check out our Complete Guide to Getting Started with Stock Photography
Product photography pricing
I can’t tell you how much to charge for your services. It all depends on your skill, experience, market, the product, the business the type of images being produced and your business model.
For example, you can choose to charge by the job, the hour, by the product, by use of the image or by the number of final images you provide. You can also choose to have some combination of these methods.
One common pricing strategy is to charge on a per image basis for product photography. This places the value on the final product and not on your time. You can require a minimum number of images be purchased to cover your time and expense of the job or ask for a deposit like you would a traditional portrait session. The license to use the image is typically included in the price of a per-image pricing structure. You may also want to consider having different rates for local, regional and national use.
Don’t be afraid to ask a potential client what their budget is for product photography and other questions about their intended use to help you build a more competitive quote.
Need some more pricing advice? Learn more about setting your freelance photography rates here!
What if my client wants copyrights to the images?
First, make sure your client does indeed want copyrights and not just printing or use rights. There is a difference.
If you are comfortable selling the copyrights to your images, understand the client then owns those images and can do with the images what they want…sell them, edit them, etc. Copyrights are usually more expensive than print/licensed use rights.

Product photography lighting
What is the best lighting to use for product photography? That depends on your photographic style and your client. Ask your client what type of look and feel they are going for…is it a crisp, clean look on a plain white background or a more moody, environmental shot?
Product photography images can be shot with natural light, continuous light or off-camera flash.
Natural light
Natural light can be used for product photography. A table placed by a window, along with a tripod, may be all you need to light your scene. Lifestyle shots are often easily accomplished with natural light. The drawbacks of natural light are that you are limited in where, when and how you shoot your products. Getting a crisp, white background may be difficult, requiring more time in post-production than you’d like. You also don’t have as much control over natural light. You can’t just move the sun to the other side of your product to get even rim lighting. It also doesn’t allow for the consistency from image to image like artificial lighting.
Continuous lights
Continuous lights allow product photographers to see how and where the light is falling because they are always on. They are a constant source of nice, even light and can produce beautiful product images, and can be positioned where you want them. Continuous lights are available as LEDs or incandescent lights. Continuous lights are less expensive than flash units and are easier for beginning product photographers because what you see is what you get in the image. The drawbacks of continuous light are that they are often not powerful enough for what you want, non-LED versions can overheat and most do now have the ability to adjust the power, or brightness, of their output. If you are shooting action shots, continuous lights might not allow you to shoot with high enough shutter speeds to freeze the action.
Flash
Flash is an ideal solution for product photography. Speedlights and strobes offer more flexibility, control and power. You can move the lights, power them up or down or use the power of the flash to freeze action. There are also literally thousands of modifiers available for speedlights and strobes that can help you get the exact quantity and quality of light you need. The drawbacks of flash are that the equipment can be expensive to purchase and it takes time to learn how to use it properly.
[ad id=’4′]
Product Photography Backgrounds
Two great product photography setups for clean backgrounds are a sweep or a light tent. Either can help you achieve a crisp, clean background.
Shooting tables
Shooting tables are tables designed specifically for product photography. They have a plastic top that provides a seamless white background.
Sweeps
A sweep is essentially a seamless white (or any color really) background, but on a smaller scale. It is a large piece of paper that serves as both the backdrop and floor drop so you produce a seamless image. The sweep itself can be paper or cloth. Some photography stores offer seamless background paper in a variety of colors. Bulletin board paper, large pieces of poster board and even butcher paper can also make a sweep!
Sweeps work great with natural light and off camera flash.
Light tents
A light tent is a translucent, 5-sided box that acts as a light diffuser and background all in one. Most are made to collapse down to a small size for storage, then pop up when needed for shooting. The white panels act as light diffusers, much like an umbrella or the panel on a softbox would. Some light tents come with their own fabric sweeps that fasten to the inside of the tent for a seamless background. Light tents work best with off camera flash or continuous light as the diffuser panels often make the inside of the box a little too shaded for just natural light.
You can purchase light tents or boxes or you can build your own using plans off the Internet. One great DIY hack is to use the inside of a white molded cooler as your light tent!
Other backgrounds
If you don’t need a seamless white background, the options are unlimited when it comes to product photography backgrounds. Anything can make a great background. And unless you are shooting very large products like cars or machinery, you often don’t need a very large area to work with. Scrapbook paper, small swaths of fabric, wrapping paper or traditional portrait backgrounds work as inexpensive and readily available backdrops.
And don’t be afraid to use the natural environment of a product as well! Kitchen utensils shot in a kitchen or a tent shot set up outdoors gives the item context. Just be sure that the product matches the environment in a meaningful way. A pair of red high heels shot in a creek bed could look aesthetically pleasing but might leave your audience scratching their heads over the connection.

What camera do I need for product photography?
If you understand light and have an artistic eye, any camera will work for product photography. Etsy, Amazon and E-bay are filled with product images shot on phones, crop-sensor cameras and full-frame cameras. I have a friend who uses her iPhone to shoot her hand-crafted jewelry and her pictures on Instagram are quite lovely.
But if you’re bidding on high-end jobs, you’ll want a quality camera in your hand. Not only does a quality camera give you more control over your images as you shoot them, but it will also offer better quality images in terms of resolution and information for editing in post-production. And like it or not, if a business owner is paying you $150 an image, she’s likely expecting more than a cell-phone pic.
Look for a camera that has manual mode and removable lenses. It should also connect to an off-camera flash system and perform well in low light if you do a lot of lifestyle shots and rely exclusively on natural light. If you are producing images that will eventually wind up in print, especially large prints, you’ll want a camera with a good number of megapixels for resolution (20ish megapixels will be more than enough for standard prints).
There are dozens of cameras out to use in product photography, and I can’t possibly cover them all. But here are a few favorites.
- Nikon D7200
- Nikon D750 or Nikon D850
- Canon EOS Rebel T7i
- Canon EOS 5D Mark IV
- Sony Alpha A7R III
What lens do I need for product photography?
A quality lens is also important for product photography. You’ll want a lens that is sharp at mid-range apertures like f/8 or f/11 and renders color well. You’ll also need a lens that will offer a flattering focal length for your subject.
Lenses like the Nikon 24-120 mm f/4 or the Sigma 24-105 mm f/4 DG OS HSM Art lens can be used for product photography. They are versatile and many portrait photographers looking to break into product photography already have a lens like this in their kit.
Budget level macro lenses are another great choice. The Tokina 105 mm f/2.8 mm, the Tamron SP 90 mm f/2.8 Di Macro or the Canon EF 100 mm f/2.8 L Macro IS USM lenses offer macro capabilities on for a smaller price tag. A macro lens can actually magnify small details and provides great sharpness.
If you find yourself building a business on product photography, it’s probably smart to invest in a higher-end macro lens like the Nikon 200 mm f/4 AF-D or the Canon EF 180mm f/3.5 L Macro USM lens.
Until you know product photography is going to be your bread-and-butter however, I recommend using the lens and camera you already own. Practice with your nifty-fifty or your 85mm f/1.8 lens. Hone your staging, lighting and compositing techniques. If we are honest with ourselves as photographers, most of the time our work can be dramatically improved just by increasing our skill level first. Time and money spent on product photography education will probably go a lot further than money invested in a new lens, especially if you are just entering into the genre. After a time, you’ll know when your camera or lens is what is really holding you back, not your skill.
Check out our tutorial on still life photography!
Product Photography Tips
#1. Plan your shot around your product.
Take some time to really think about your product. What are its features? How can you highlight them best? If you are shooting for a client, ask them the same questions. Do customers need to see the color, texture and small details of a product or is it more important to show the product in use?
#2. Don’t be afraid of narrower apertures.
If you started as portrait photographer, you might be used to shooting very wide open. Portrait photographers love the bokeh created with apertures like f/1.4 or f/2.8. But in product photography, sharpness across the product is more important than bokeh. Don’t be afraid of that f/8-f/11 range. You can offer which offers great depth-of-field on the product itself and that is where many lenses are at their sharpest.
#3. Use a tripod.
Using a tripod allows you to shoot at longer shutter speeds in natural light and provides consistency for compositing and other post-production techniques.
#4. Plan to learn post-production techniques as well.
Yes, you want to get images as close to perfect in camera. But high-end product photography requires skill in the editing room as well. If you don’t already know how, plan to learn techniques like dodging, burning, compositing and sharpening for starters.
#5. Shoot different images for the same product.
Play with angles and focal lengths. Highlight different features of the product, emphasize different textures or use the product in different ways for lifestyle shots. Change up your props or background to create an entirely different feel for a product. Rearrange the features of your product to give it a different look (tie laces differently, arrange a strap differently, turn the screen on or off). Your images should always meet the needs of the client, but you can also help your client see their product in a new way.

#6. Use multiple products.
Don’t be afraid to use several of the same products in a shot to make it more compelling. If you’re shooting a brand of shoes, for example, you might find it more visually interesting to have several pairs of shoes in your shot instead of just a single shoe and its mate.
#7. Study existing product photography.
Start paying attention to ads and product images online. What do you like about them? What resonates? Take notes of the things you like or don’t like and try to use them in your shoots. Don’t copy another photographer’s work. But you can use them for inspiration and ideas on what makes great product photography.
#8. Use a color checker.
Your images should represent the true color of any product. A color checker ensures colors are accurate and can correct for differences in lighting and even editing.
#9. Practice with your own stuff first.
Product photography, done well, takes a great deal of time and skill. There are lots of entrepreneurs out there shooting their own products with a camera phone and a few IG filters, true. But the really great product shots take skill, practice and patience.
Start by practicing with objects in your own home. Pick some objects you own and act like you’ve been hired to photograph them. Practice on white seamless backgrounds and lifestyle shots. Shoot food, batteries, shoes, camera equipment, office supplies…anything you have lying around in your house. Not only will you build some images for your portfolio, you’ll learn new skills and determine if product photography is something you really enjoy doing.
Product photography can be incredibly rewarding, both creatively and financially. But it’s not for everyone. The masters of product photography are creative, patient and meticulous when it comes to the details. But if you enjoy working independently and stretching your artistic muscle when it comes to inanimate objects, product photography might be the right product for you!