
Low key photography can produce some impactful photos, but taking a great image requires special techniques and composition skills. Here’s what you should know to take your low key photography to the next level.
Looking to improve your photography? Just enter any questions you have about improving your photography below and hit send and get answers & feedback instantly - for FREE! Submit QuestionsUnderstanding Low Key Photography
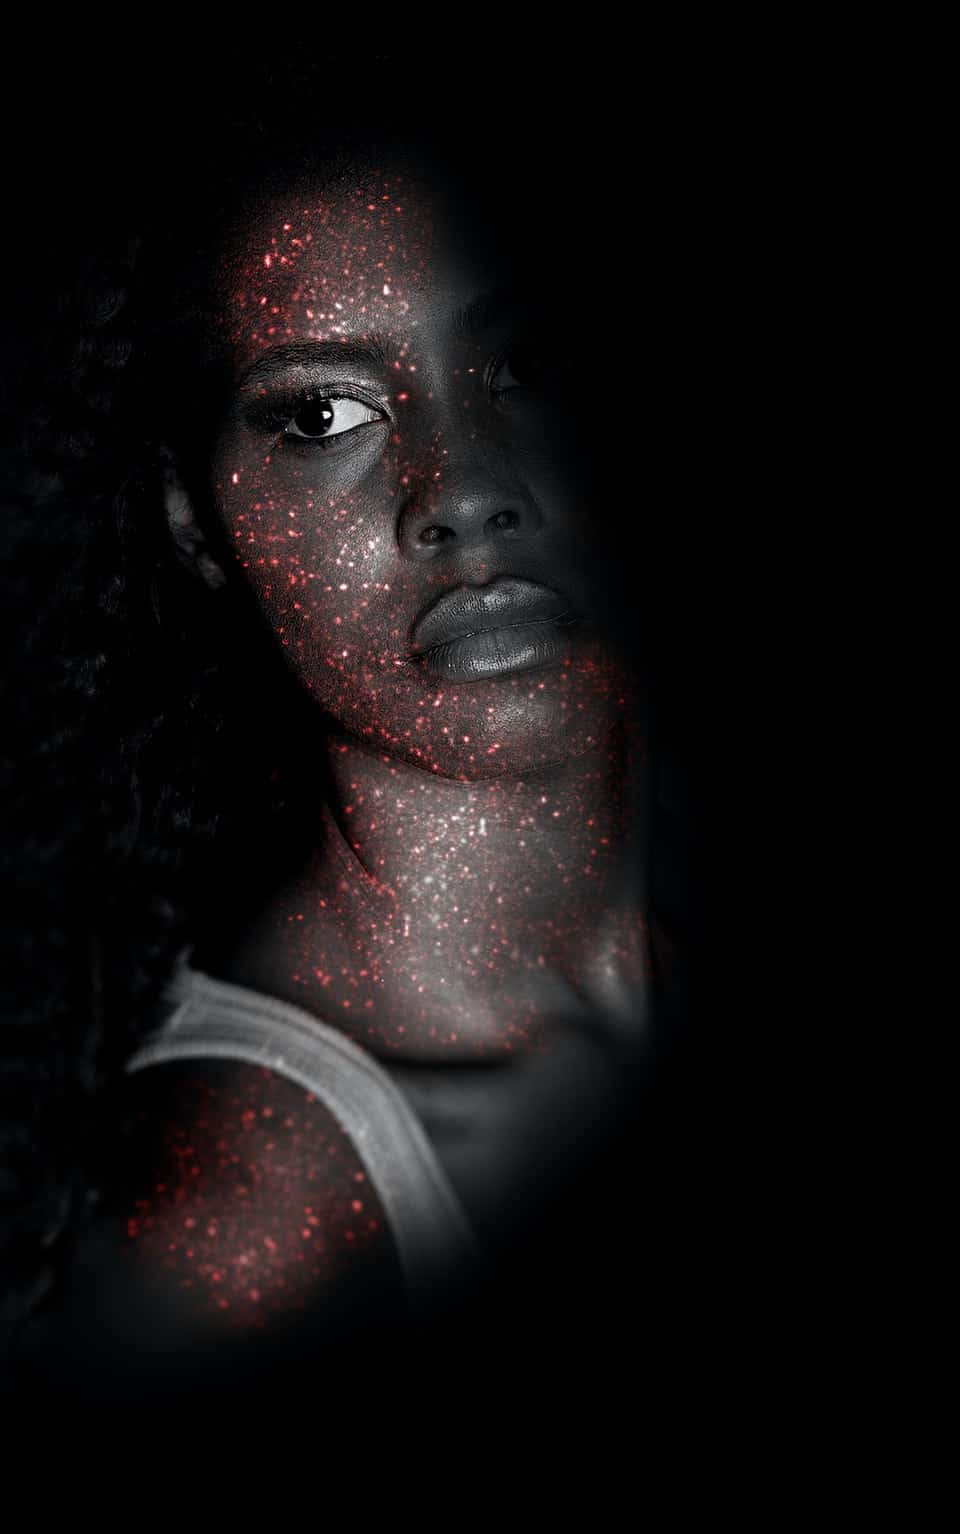
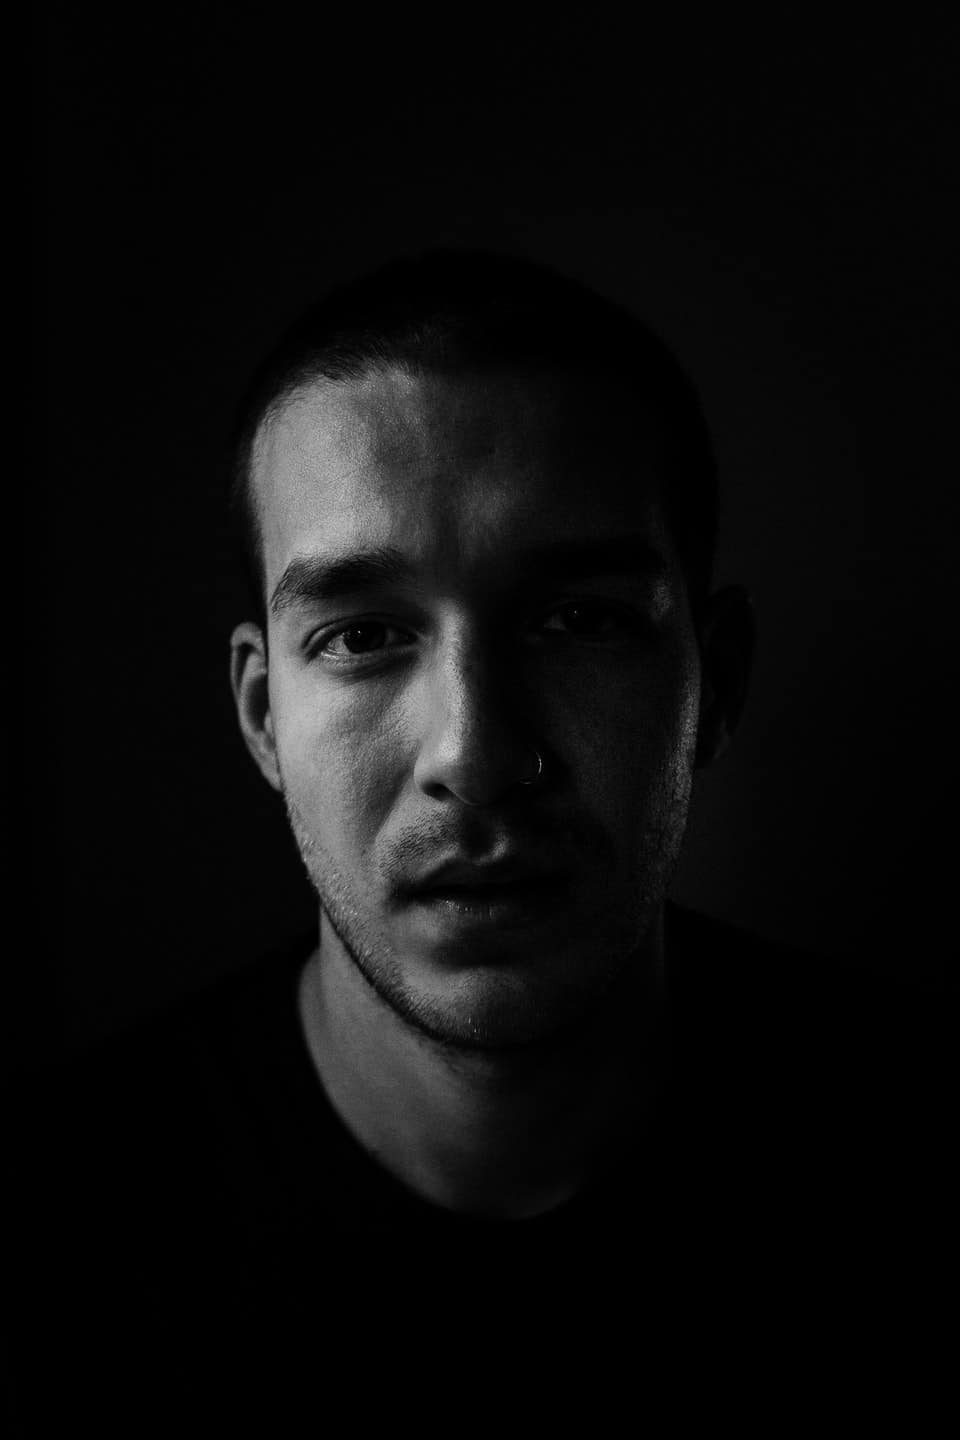
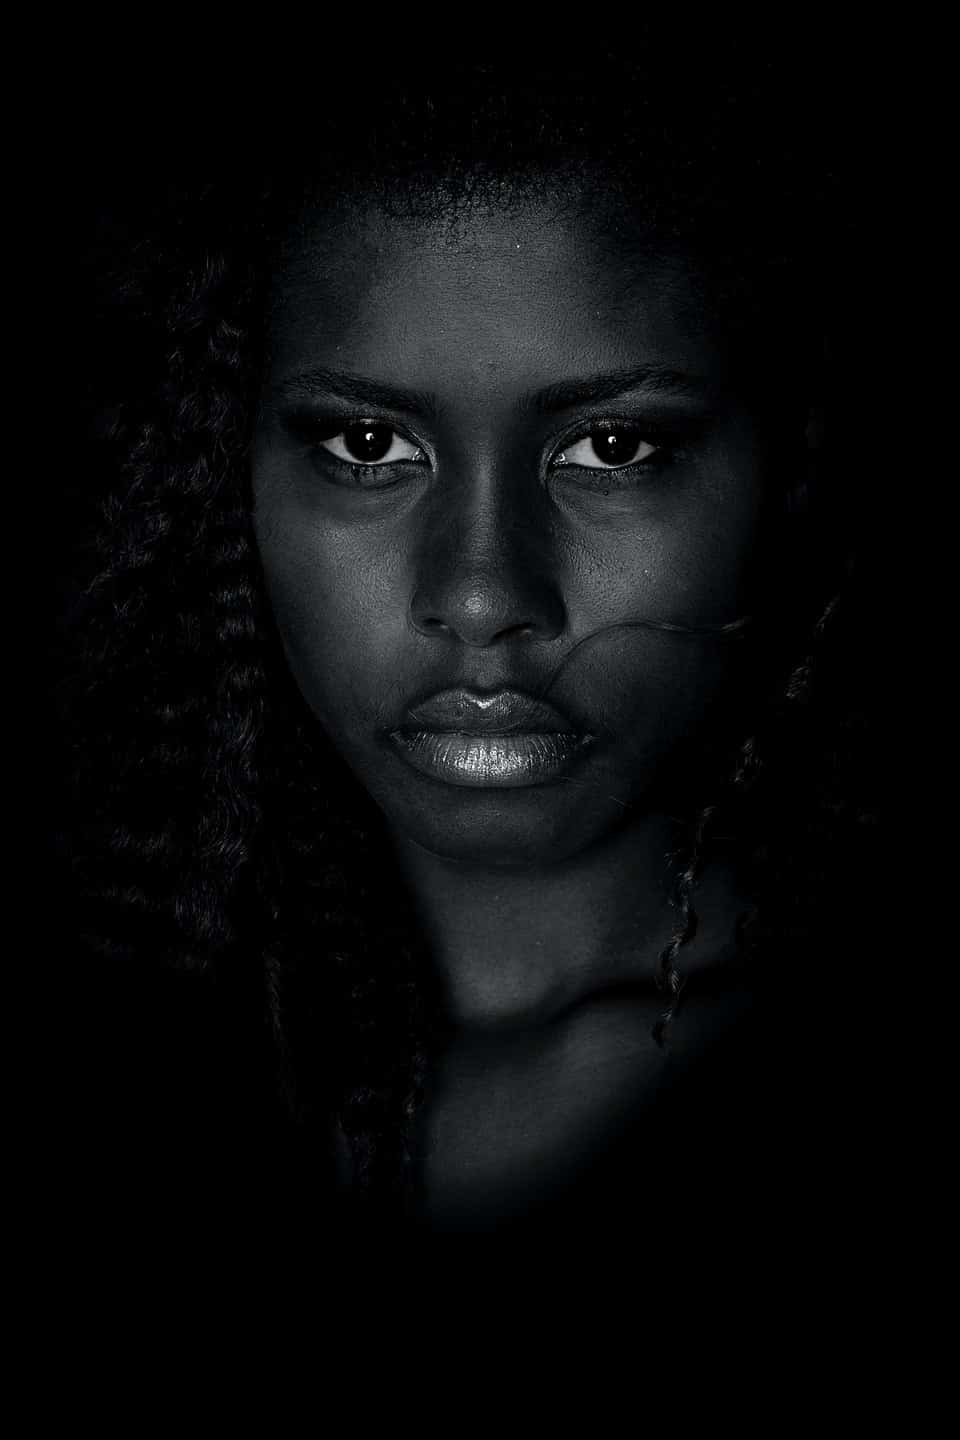
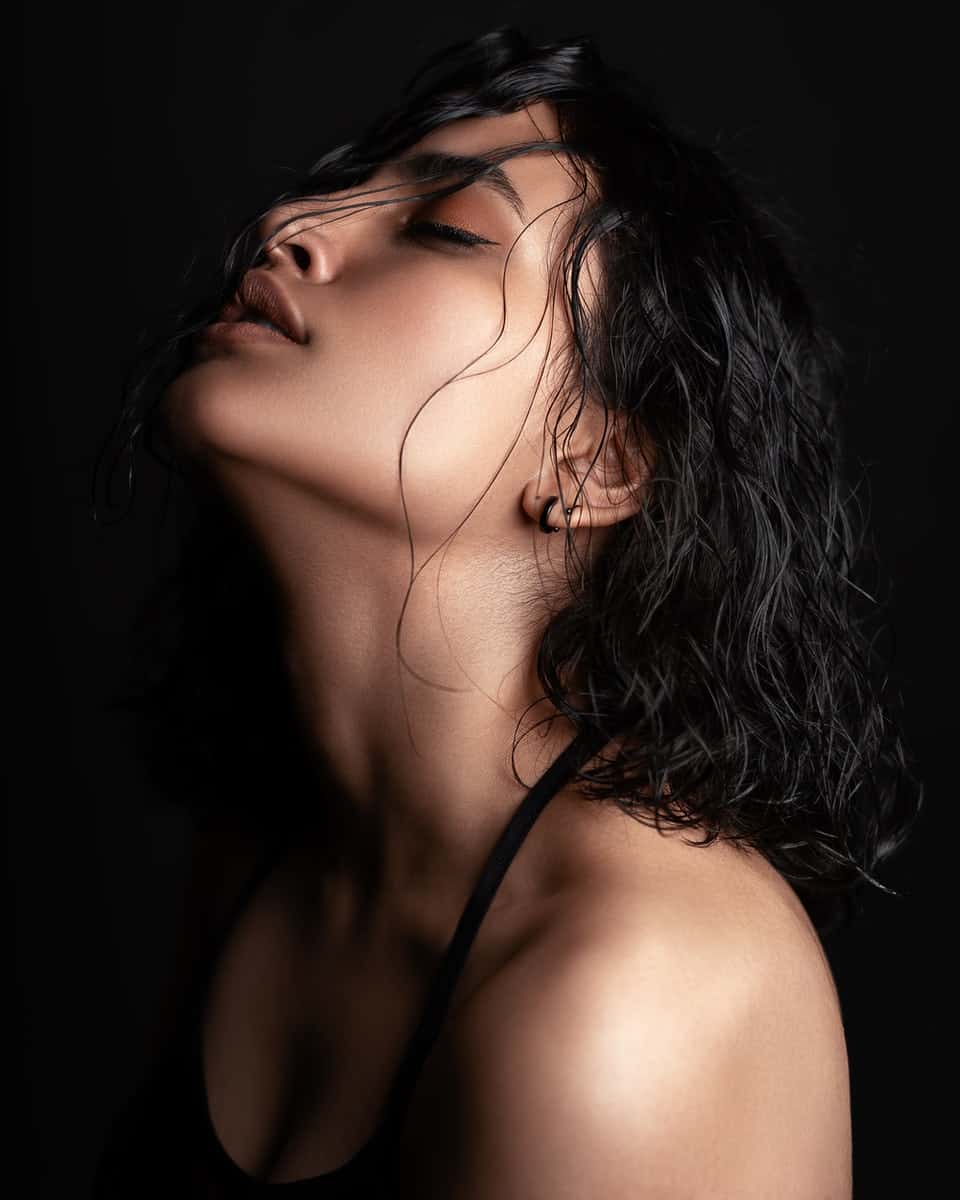
This type of photography is a picture-taking style that heavily features dark tones and colors. It may be entirely black and white or contain skin and hair tones, but rarely more color than that. Most of this photography features a single subject set against a dark background, with lighting coming from a single direction.
The Main Differences Between Low Key and High Key Photography
High key photography is the fundamental opposite of low key photography in that it focuses on extremely bright images with little to no shadows. High key photography can be just as black and white as this type of photography but uses different camera settings and low light source options. Some photographers take both high key and these photos of one subject to contrast it.
Some people refer to this as “hi key” instead of high key, but most photographers prefer the latter term. High key light sources often include the sun, but may make use of other bright sources of light based on the location of the shoot.
Natural Lighting in Outdoor Low Key Photography
Low key outdoor photography makes use of these light source options to provide sufficient illumination. Photographers may also add extra walls to prevent exterior light sources from impacting the result too much. Changing lighting conditions can profoundly affect the final image, so this type of photography requires extra practice to do well.
Macro Low Key Photography is Rare
This type of photography is relatively unusual, but some photographers do it indoors as practice. Low key lighting is easier to control when you only need to work with a small area, and key lighting tools can make macro photography surprisingly easy. Make sure you choose the right subject for low key macro photography since it may be difficult to tell what the subject is.
Using Low Key Photography in Product Images
This type of photography is usually part of a focused marketing strategy (towards men, more than women) and typically emphasizes a single attribute of the product in question. Some marketers use photo editing software to saturate a single part of the image with color after taking it.
Low key photography is also used for some product reveals, teasing audiences with the product’s shape and colors before revealing what it looks like under normal lighting conditions.
Creating Texture in Low Key Photos
Texture is challenging to work within low key photographs. Unlike regular images, the heavy shadows can obscure many lighter textures. The most effective way of dealing with this is using an intense light source, which can cast deeper shadows and make textures significantly easier to see.
Photographing Nudes with Low Key Photography
Low key photography is also a popular choice for artistic nudes. This type of photography typically emphasizes forms and shapes more than color, so it usually requires a different kind of composition than regular nude photographs. You can take these in larger quantities, but most low key nude photos are displayed as single images.
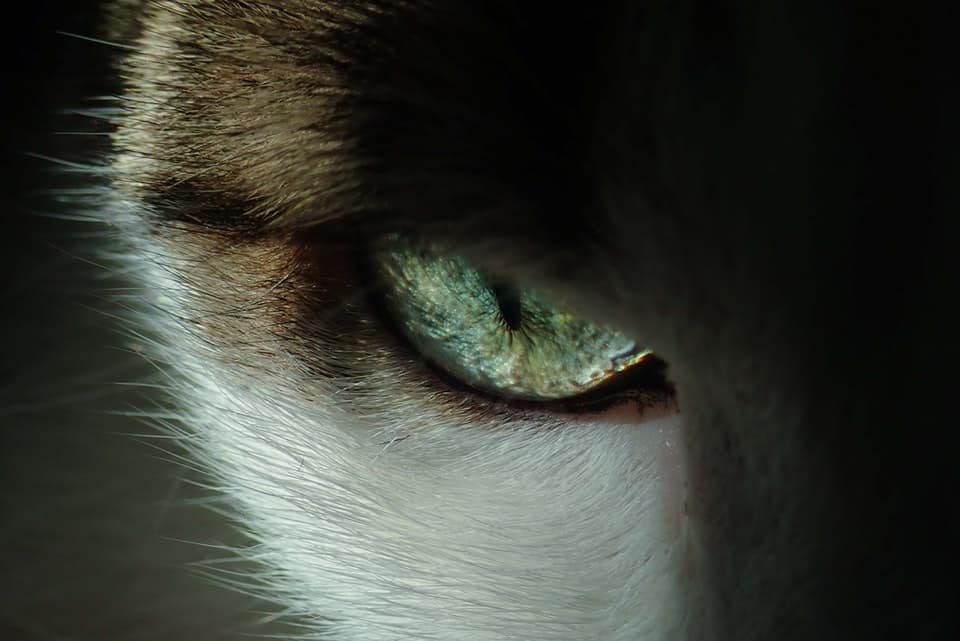
Low Key is Popular in Pet Photos
Low key is also an effective way to take photos of pets. In these cases, using the lighting low key environments require can produce a bold, intense image of the pet that sharply defines their fur and eyes. The challenge, of course, is getting a pet to hold still for the picture! They may not like intense lights, so proper training or smart use of flash photography is a must.
Working in a Controlled Environment with Gig Photography
To an extent, gig photography usually makes low key portraits easier because you’re working in a controlled environment. However, it’s tough to get spontaneous low key photographs, so discuss the requirements of this style with your client to be sure they’re on board. If they have your plan ahead of time, taking the photos they want will be significantly easier.
Your Low Key Photography Lighting Setup
Managing the lighting of your set is by far the most crucial part of taking low key photographs. Setting up low key lighting requires the right gear, camera settings, and the ability to control your subject. It is possible to take low key images from a distance, but most photographers prefer close-ups because they’re significantly easier.
Getting the Right Gear
The primary pieces of gear you need for taking low key images are a full-frame camera, a fast lens, and a light source (typically a flash device). Most photographers also need either a dark background (if indoors) or a light modifier (such as a softbox) to control the lighting further. Tripods are optional for this type of photography but useful to have.
Adjusting Your Camera Settings
The best camera settings for low key photography vary by the environment. Usually, they involve setting your ISO to an extremely low setting and your aperture as wide as it can be. Low key lighting conditions can change, so you may need to adjust your camera’s settings throughout your shoot to produce the best low key images.
Keeping Your ISO Low
The correct ISO depends on your environment, so there’s no universal setting that will work in all circumstances. However, most low key photography starts with an ISO around 100, or as low as the camera can reach if it can’t get to that level. Most cameras can take photos at this ISO, but make sure your camera does before you start your photo sessions.
Low F/stop and Fast Shutter Speed
One of the keys to success with low key photography is using a fast shutter speed. Getting to f/1.8 is ideal for low key images, so make sure your camera is capable of that if you want to take many photos of this type. f/3.5 is possible, but not as good, and I recommend avoiding that setting if you can.
No Flash Available? Use Natural Light in Low Key Photography
If you don’t have a flash device (or, more likely, you’re in an area where you can’t use it), you’ll need to get creative—managing your lighting setup to let in a lot of light can allow you to take low key photographs even without flash. Using natural light and fill light to their full effect can help you take a low key portrait even when you can’t control the lighting entirely.
Capturing Images Outside with Low Key Photography
If you want to take a low key portrait or landscape image outdoors, the best thing to do is practice taking photos in different conditions. Once you experience it for yourself, you’ll be able to adjust your settings faster and take photos before the lighting conditions change again. I suggest starting with a low key portrait of a house, a street sign, or a tree.
Remember that many street signs have a reflective coating on them to make them easier to see at night. Learning how to work around this is good for developing your skills, so I recommend starting with that as your first outdoor low key portrait.
Utilize Side Lighting
Side lighting is extremely useful when making a low key portrait because it focuses light away from your background and towards your subject. This can produce bolder and more interesting portraits than regular lighting, and some photographers use this exclusively. Getting good side lighting usually requires a flash since you can’t always control the direction light comes from.
Learn How to Use Rembrandt Lighting
Rembrandt lighting is a popular choice in studios and other controlled environments. Having the main light source at about a 45-degree angle to the subject isn’t quite side lighting, but it can provide a similar effect when you add in the reflector to softly illuminate the other side of the subject’s face.
Essential Tips for Low Key Photos
Here are some quick tips for making your photographs better. Note that some of these require the cooperation of the subject, which can make them difficult to use outdoors or with animals such as pets.
Dark Backgrounds are Best
Keeping your background as dark as possible is the easiest way to improve your low key portraits. If the background is dark, to begin with and less light points towards the subject instead of the background, the area behind the subject usually appears dark and indistinct. Since this is the goal of low key photography, it works out quite well.
In some environments, you may need to carry a dark background around and set it up for the shoot. These are significantly easier to get in studios.
Light Your Subject with Candelight
Using torches or candles to illuminate your subject can provide an interesting and more natural-looking appearance. Fire tends to give off softer, faintly irregular light compared to traditional sources, but you may need to move it close to the subject to get the right effect. Try to avoid moving it too close, though, or they’ll start sweating.
Give Rim and Broad Lighting a Try
Broad and rim lighting are challenging when you’re trying to do low key photographs, but it can produce some exceptionally interesting pictures. The key to getting good broad or rim lighting is to have it coming from multiple sides but angled away from the center of the subject.
This is particularly useful when the subject of your photographs has something they want to hide or blend into the background, such as a scar or a birthmark.
Adjusting Angles and Lights
A common alternative to traditional broad and rim lighting is adjusting the angle of the subject and the lights. Rather than looking directly at the camera, the subject could be as much as 90 degrees to the side, with the lighting adjusted appropriately. In these cases, lights may be pointed directly at the subject’s face, so try to keep them comfortable.
It is possible to take low key photographs of the rear of subjects, but this is an uncommon technique and prevents you from using Rembrandt lighting.
Harsh Light Results in Hard Shadows
In most photos, avoiding hard shadows is an essential part of taking a good, natural-looking image. The simple truth is that in nature, hard shadows are quite rare outside of a few specific environments.
That said, low key photography is a time to break that principle and use hard light to create hard shadows. It’s acceptable and even encouraged to use bright lights to illuminate only one side of the subject.
However, depending on the type of picture you want to make, you may need to diffuse a little light through the background.
Play Around with Different Techniques
Finally, the title of this section says it all. Experimentation is key to success, and even relatively small changes in your camera settings and environment can have a major impact on the final image you create. I can teach you any number of techniques, but ultimately, nothing is more effective than getting hands-on experience through experimentation.
Elements of a Low Key Portrait
You don’t need a high-quality studio environment to create a low key portrait photography. Here’s how you can do it from scratch.
Always Make the Background Dark
Start by making the background darker. You can hang dark materials, adjust shades, or turn lights on and off to change the levels of illumination.
Side Lighting is Ideal
If possible, move the lighting to the side, preferably at least 45 degrees. Alternatively, rotate your subject, so the lighting is effectively to the side. Moving the light itself is preferable when possible.
Incorporate a Grid to Your Light Source
Adding a grid to your light source focuses the light and prevents it from diffusing throughout your scene. This is easiest with professional photography equipment, but you can also create a makeshift grid for other lighting sources.
Highlight the Hair
Low key photos of people tend to look better when the hair has at least some illumination. Focusing light onto the hair, or adding extra light there if needed, can help retain the distinctive high contrast of this technique while producing a better end result.
Editing Tips
Finally, here are some tricks for editing your photographs after you take them.
1. Make Your Subject Bright
Contrast is key in this type of photography, so turning up the brightness can throw the picture into starker detail. This is especially useful if you can’t get your environment quite right.
2. Adjusting the White Balance
Tweaking the white balance can help the photo look more or less natural than before. Most photographers prefer having the images look as real and natural as possible, but you can create some interesting effects with this, so try experimenting a little here, too.
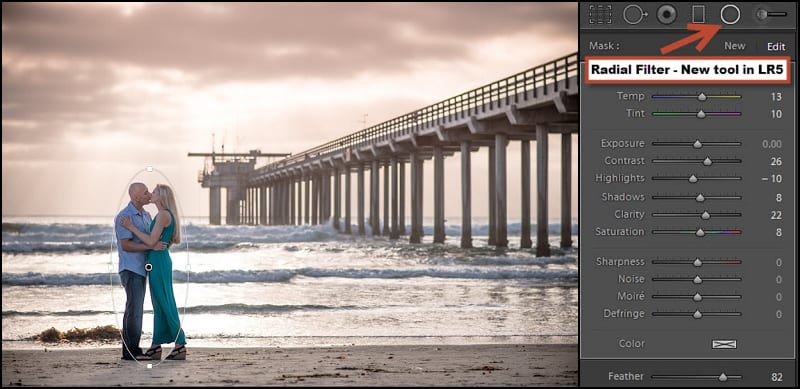
Here’s a handy guide for adjusting white balance in several types of software.
3. Reduce and Eliminate Digital Noise
Reducing noise is particularly important for these photographs. The high contrast is high for a reason. Pay particularly close attention to the background here and remove any objects that could distract from the subject. Photoshop makes this easy, but many other image editors are also capable of reducing or eliminating digital noise in your photos.
4. Get Creative with Colors
In cases where you want colors to be in the final image, you can make the colors a little brighter and more visible. On the other hand, if you don’t want the colors to distract, try toning them down so they generally match the low key lighting.
5. Consider Adding a Vignette
Adding a vignette can help further focus the image on your subject (and these key photographs usually have just one subject). This is particularly useful if the edges of your picture are too bright or too large.
6. Edit a Backdrop
Finally, if your background has any visible wrinkles or pleats, try and edit those out unless they’re a deliberate part of your composition. The harsh lighting of these photos can make them extremely visible and distracting, and it’s better to avoid that when possible.

![Getting Started with Light Painting [Beginners Guide]](https://colesclassroom.com/wp-content/uploads/2020/05/asphalt-blur-car-city-290470-768x512.jpg)