Interested in exploring new worlds with macro photography? Check out our guide to getting those details!
There is something inherently magical about macro photography for me. I love making the small big, seeing the previously unnoticed. I can lose myself completely in the minutiae, wandering among lines and shapes and textures of even the most ordinary subjects.
Looking to improve your photography? Just enter any questions you have about improving your photography below and hit send and get answers & feedback instantly - for FREE! Submit QuestionsIf you have an eye for details, some patience and enjoy flexing your creativity from time to time, macro photography may be a type of photography you’ll enjoy.
What is macro photography?
Macro photography is merely producing images of small items in larger than life-size. Essentially you are using the camera and lens to magnify very small objects.
Anything can be the subject of macro photography. My common choices include flowers, insects, feathers, snowflakes, and fruit. But that’s one of my favorite characteristics of macro work—subject matter is endless if you just use a bit of imagination. Look around you – what small items do you have handy whose depths it would be interesting to plumb?
In case you’re wondering, macro and micro photography is the same thing. Nikon refers to their macro lenses as microlenses. But for this article, I’ll refer to it all as macro.

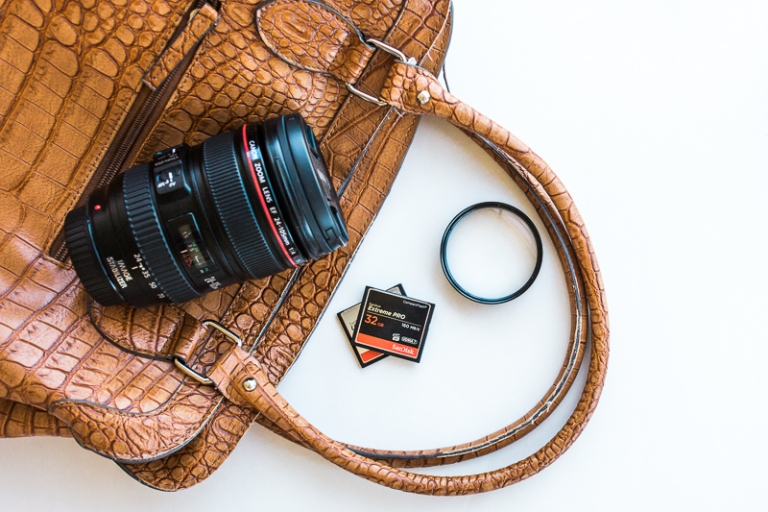
What equipment do I need for macro photography?
Camera
Because you are essentially “blowing up” a subject’s size, to begin with, you’ll need a camera with good resolution. Some point-and-shoot cameras offer a macro mode, but for maximum control of your depth-of-field and focus point, more advanced cameras work better. DSLRs or higher-end mirrorless cameras are an excellent choice for macro work.
Lenses
For the best results, you’ll want to shoot with a lens designed for macro photography. See more on that in the next section.
Tripod
Macro work often requires long exposures to allow enough light into your scene. A tripod is a critical piece of equipment in macro photography.
External lighting
Continuous light, speedlights and ring lights all can be helpful in macro photography. Don’t run out and buy new lighting gear, however. Use what you have first and experiment to find a look and technique that works for you.
Remote shutter
Macro shooting hinges on very precise focus and sharp images. Using a remote shutter helps eliminate blur caused by moving the camera when manually firing the shutter.
Focusing rail
Focusing in macro is a game of millimeters. A focusing rail fits between your tripod and your camera and lets you make teeny, tiny adjustments in how close your camera is to the subject, ensuring precise focus without the hassle of moving your tripod or subject every time. Not a crucial piece of equipment, especially if you are a macro shooter only for events (think ring shots at weddings) but ridiculously helpful if you do a lot of up close work.
[ad id=’1′]
Best Lenses for macro photography
Every lens has a minimum focusing distance. That is, each lens must be a certain distance from the subject to focus correctly. So just using any old lens and getting closer to make the subject bigger doesn’t always work.
That’s where a macro lens becomes useful. A macro lens has a ratio of 1:1, which means you are depicting a subject on your digital sensor in its actual size. So if you printed an image the same size as it appears on your digital sensor, your subject seems life-size. It’s this 1:1 ration that makes a lens a true macro lens.
Other characteristics of quality macro lenses are closer minimum focusing distances, very small apertures, and excellent sharpness. Macro lenses come in a variety of focal lengths, but I wouldn’t consider a lens shorter than 100 mm if you’re passionate about macro shooting. Shorter focal lengths require you to get VERY close to your subject to bring out those tiny details. Sometimes less than 2 inches kind of close. That’s not a big deal if you’re shooting flowers or fruit. Insects and small animals, however, tend to get nervous if you’re all “up in their business” as my 6-year old says. Being too close to your subject can also block your light, making it difficult to get a proper exposure.
Macro Lenses to Consider
- Tokina 100 mm f/2.8 (read our full review of this budget dynamo here)
- Nikon, Canon or Sigma 105 mm f/2.8 (read our review of the Nikon 105 here)
- Canon EF 100mm f/2.8
- Sigma 150mm f/2.8 for Nikon and for Canon
- Canon or Nikon 180 mm f/3.5
- Nikon 200 mm f/4
- Canon MP-E 65 mm f/2.8 1-5x macro. Remember what I said about choosing a focal length longer than 100mm? Yeah, ignore that when it comes to this lens. It offers up to 5 times the magnification of most macro lenses, providing you serious, stunning detail.
***Please make sure you triple check the mount for YOUR camera! And remember crop sensor cameras will act differently, so be sure to research what lens you need.***
The bonus is that many macro lenses also make stunning portrait lenses. My own Tokina 100mm f/2.8 is my go-to lens for senior portraits and headshots. The fact that these lenses can play two roles in your camera bag is a bonus for me.

Learn how to rock those macro wedding ring shots!
Macro Photography without a Macro Lens
If a new macro lens isn’t in your budget but you still want to try your hand at macro, these alternatives might just fit the bill. Each has their limitations but allows you to explore macro photography before making a large financial investment.
Macro Extension Tubes
Macro extension tubes are hollow cylinders that snap between your camera and your lens. That’s it…no glass involved. Just air. They work because the bigger space between your camera and lens allows you to focus closer to your subject. Most extension tubes come as a set of three (12 mm, 20 mm and 36mm for example) that you can use independently or stacked together for maximum closeness. Macro tubes can also be attached with macro lenses, making your full-on macro lens even that much power.
The cheaper sets are manual focus only and don’t allow you to control your aperture. They also don’t provide accurate EXIF data on your images. The higher end macro extension tubes are fully compatible with your camera, though. They are more expensive but are still cheaper than a full-on macro lens. Look for extension tubes at your local camera store or online.
The other drawbacks of macro tubes are that you must get REALLY close (see our previous discussion of shorter focal length lenses above) and lose light when you use them. The more magnification you are trying to achieve, the more light you will lose. I could get all geeky and explain the math and physics here but that would just make your eyes roll into the back of your head. So trust me, extension tubes mean you lose light. My set is all but useless on my kit lenses because of this. Extension tubes also don’t work well on really wide lenses or really long lenses. But throw them on a 35, 50 or 85 mm lens and you have a pretty great macro set up on the cheap.
Macro Bellows
Macro bellows work the exact same way as an extension tube – by creating space between your camera and your lens. It’s just a little bit different design. Instead of a tube, there’s an expandable bellow or folded bag that connects the two. Think of the bellows of an accordion and you’ll have the idea. Bellows let you get your lens even farther from the camera than extension tubes can, but require the use of a tripod to hold the mounting rail correctly. Macro bellows must be manually focused. There are inexpensive macro bellows setups and there are some that cost $2,000 or more.
Reversing the Lens
Remove the lens from your DSLR and look through it. What do you see? A magnifying glass! You can use this function of a lens to take macro shots. This is called reversing the lens. Basically, you are using the properties of your lens in reverse to magnify the details of your shot. You can do this freehand simply by removing your lens from the camera, turning the lens around and taking a photo. No, it’s not really that simple. It takes some skill and practice. But the concept is simple. The advantage of this? You can, in theory, do this a lens you already own. The drawbacks are it takes a steady hand, you can’t always control the aperture and it’s sort of a pain to hold your camera and the lens and take a picture at the same time. Enter the next few handy gadgets…
Reversal rings let you mount the backward lens to the camera, freeing up your other hand to hold your camera, fire your shutter or wave to friends and neighbors passing by wondering what in the world it is you are doing.
Macro couplers let you connect two lenses to your camera, one mounted correctly, the other reversed. The wider lens should always be the one that’s reversed. This can make for a powerful, if odd-looking, macro setup. To figure out its actual power, divide the focal length of the longer lens by the focal length of the reversed lens. So a 50mm lens divided by a reversed 24 mm lens would be 2, or a 2:1 macro ratio, just a little over double life-sized.
The drawback is that’s a lot of glass between your camera and your subject, so image quality suffers. And if you aren’t starting with high-end glass, to begin with, the quality of your images degrades faster. The coupler must also match your lenses specifically. For example, a lens designed to couple with a 50mm lens and 24mm lens won’t also couple an 85mm lens with a 50 mm lens. Okay, I’ll stop saying couple now.
Love shooting macro and want to sell your work as stock photography? Read our tips!

Macro Photography Tips
Tip #1 -Shoot with a narrower aperture
Portrait shooters love shooting wide open and discussing bokeh. Macro shooters often need to shoot with closed down apertures to ensure sharpness across the image. Don’t be afraid to ditch the bokeh and shoot at f/16, f/22 or even f/32 to maximize your depth of field.
Tip #2 – Blend sharpness with bokeh
You can still achieve a razor sharp macro image and some beautiful bokeh. You just need to be much more deliberate in your composition. Help eliminate distractions by simplifying your background or moving your subject as far away from the background as possible.
Tip #3 – Be finicky about focus
Your depth of field in macro photography is minute. We’re talking millimeters, here. So make sure your focus is really dialed in. Take your time, use manual focus and ensure it’s spot on using the LCD on your camera. Shooting tethered is another great option. If you can’t achieve focus across your entire subject (or don’t want to for artistic purposes!) make sure the most important part of the subject is in focus at least. For insects and animals, that’s usually the eye. For books or other things with text, it may be certain words or phrases you want to emphasize.
Tip #4 – Learn about focus stacking
Focus stacking is taking images using different focal points and combine those images with post-processing software. Focus stacking ensures you get maximum sharpness across your entire image. The technique can’t overcome low-quality photos, to begin with, though, so make sure what the stacked images are as good as possible first.
Tip #5 – Use a light and get it off camera
Shooting at narrower apertures means not much light may be hitting your sensor. You’ll need to compensate for this by raising your ISO, decreasing your shutter speed or adding artificial light to your subject. Using artificial light, like a speedlight, can create drama and add a creative element to macro photography. Don’t rely on your pop-up flash, however. With your subject so close to your camera, the chance is the light won’t hit it correctly or will completely blow out your scene. Off camera flash lets you position the light anywhere you want. Using speedlights can also help stop motion, such as with water droplets or other cast-off.
Macro photography is one of my favorite types of photography because it lets me stretch my legs, creatively, and can be accomplished anytime, anywhere. I don’t clients, a studio or perfect weather. I can build a macro setup on my kitchen table and enjoy an entire afternoon shooting colored pencils or soap bubbles. Give it a try! You might discover a great big world of really tiny things just waiting to be discovered!