
Whether you’re a professional photography shutterbug or an aspiring photography amateur, the art and science of photography can quickly feel confusing. There are so many different photography techniques, terms, and tidbits to keep track of, it’s easy to occasionally forget some of the basics.
Photographers of every skill level benefit from photography cheat sheets, and we’ve created a cheat sheet just for you. A photography cheat sheet is a quick and handy reference guide packed with definitions to common terms, explanations of popular techniques, and more.
Refer back to this photography cheat sheet article whenever you need a quick refresher or are faced with a photography task you’re not familiar with. (Note that our cheat sheet applies to both film and digital photography).
Looking to improve your photography? Just enter any questions you have about improving your photography below and hit send and get answers & feedback instantly - for FREE! Submit QuestionsReady to read the cheat sheet? Let’s get started!
How Do Cameras Work?
For the first item on our photography cheat sheet article, let’s start with the cheat sheet basics. How does a DSLR camera capture an image?
Cameras are either film or digital. Regardless of photography type, all cameras work in the same basic way: They record incoming light to capture an image. The amount of light that reaches the camera’s image sensor is known as exposure.
Most cheat sheets will tell you exposure is determined by three settings:
- Shutter Speed
- Aperture
- ISO
They make up what’s called the exposure triangle. Let’s take a closer look at each element in the exposure triangle in this cheat sheet:
Shutter Speed: How Long it Takes to Capture an Image
First, let’s take a look at a cheat sheet for shutter speed, the first element of the exposure triangle.
Shutter speed is the length of time that the camera’s shutter stays open. The longer it’s open, the more light is exposed to the sensor. In simpler terms, it’s the length of time used to take a photo.
Shutter speed affects two aspects of your photo:
- 1. Overall brightness
- 2. Dramatic effects such as motion and frozen images
A long shutter speed creates a motion blur effect for any moving subjects. For example, the effect is commonly found on photos of cars. Additionally, slow shutter speed is useful when photographing landscapes, the night sky, and low-light environments.
Fast shutter speed has the opposite effect. It removes motion from photos. If you’ve ever seen a photo of a hummingbird frozen in mid-air, or a drop of water falling to the ground, they were taken using fast shutter speed.
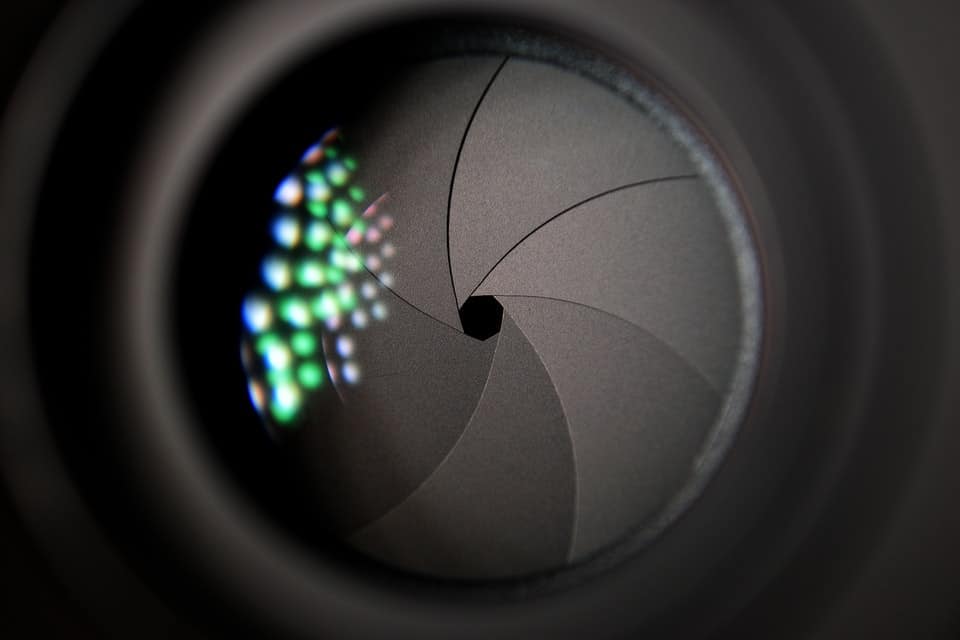
Aperture: Opening the Lens
Next on our cheat sheet is the aperture, the second element of the exposure triangle. The aperture is the opening in the lens that lets light in. It’s measured in f/stops. The most common f/stops are the following:
- 1.4
- 2
- 2.8
- 4
- 5.6
- 8
- 11
- 16
Lower numbers represent wider apertures, while higher numbers indicate narrow apertures. The wider the aperture, the more light is exposed to the camera’s light sensor (in a digital camera) or film (in a traditional camera).
ISO: Measuring Light Sensitivity
Finally, we’ll cover ISO on our cheat sheet, the third element of the exposure triangle. The last one of the three most important camera settings on our cheat sheet is ISO, a photography term that stands for International Standards Organization. It’s an industry-wide standard for measuring light sensitivity. As the ISO number increases, the photos brighten.
If you have a digital camera, you can set the settings for the exposure triangle either automatically or in manual mode. While automatic camera settings work for general shots, you’ll want to use manual mode for the best results.
Understanding a Histogram
For the next item on our photography cheat sheet, let’s take a closer look at a common tool called a histogram. A histogram is a chart found in a digital camera settings. It displays the exposure of each shot. Typically, the histogram is divided into three sections:
- Far left – Shades of black
- Middle – Mid-gray shades
- Far right – Shades of white
A histogram determines these color values by measuring the brightness of individual pixels in the image. It displays these results in a horizontal row of image bars, so you can quickly spot overexposure and underexposure.
You’ll find histograms on almost all digital cameras. Don’t worry; you don’t have to master their use to take great pictures. However, the histogram is an effective tool for preventing overexposure and underexposed images.
As we’ll detail below, a histogram is useful in certain types of photography, such as landscape photography and nature photography.
Dividing Your Composition into Thirds
Ready to read a cheat sheet on image composition? No matter what you’re shooting, the right image composition makes all the difference. Frame your images according to the rule of thirds.
When framing your image, picture two lines drawn across it vertically and another two drawn across it horizontally. The image will have nine squares.
Place focal points of your subject on any of the intersections of the lines. Subject focal points could be a tall building in a cityscape, a person’s eyes in a portrait, or anything else especially notable about the image in manual mode.
You can use imaginary lines and make an educated guess about where they intersect. However, many digital cameras and photo editing software create an overlay you can use in your photography.
Tips for Shooting in Low Light
Both beginners and professional photographers can run into trouble when shooting in low light. Here’s a cheat sheet for what to remember:
- Use a wide aperture. That’s a low numbered f/stop. You want to let in as much light as possible.
- Use a slow shutter speed. Keeping the shutter open longer allows more light to enter.
Increase the exposure on the camera. Digital cameras allow you to adjust the exposure compensation from negative three to positive three. Set it as a positive number. You want to slightly overexposure the photo.
If you need a flash, our cheat sheet advises using an off-camera one. That’s a flash that doesn’t directly hit the subject. Instead, you want to deflect the light to soften it. Indirect, soft light creates a far more natural appearance than the direct type.
A Photography Cheat Sheet for Specific Types of Photography
Now that our photography cheat sheet has covered the basics regarding camera operation let’s take a closer look at tips and techniques for photographing specific types of scenes. Refer back to this section of our photography cheat sheet article whenever you’re not sure how to properly shoot something.
Photographing Fireworks
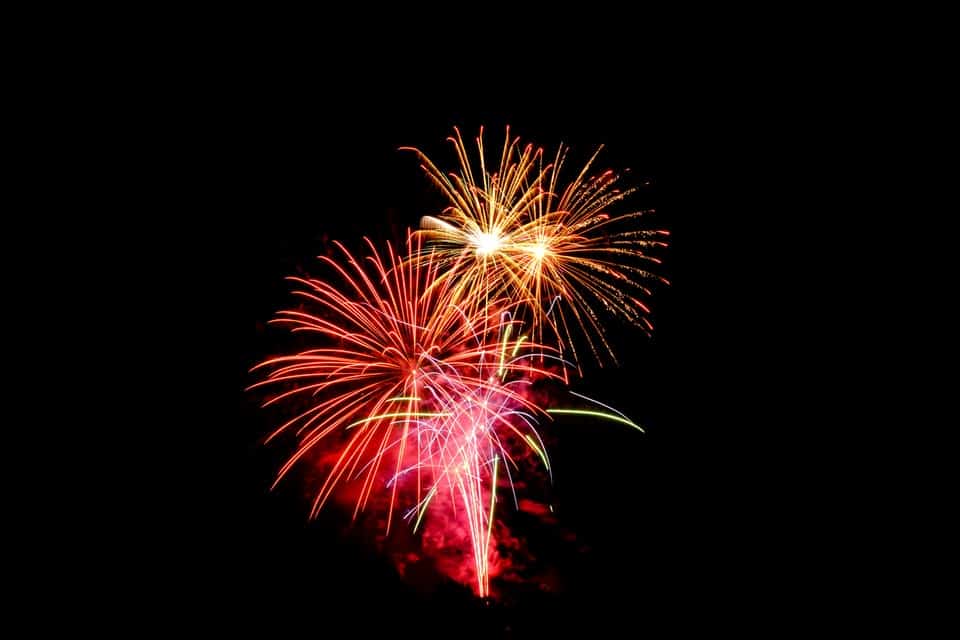
The first scenario on our cheat sheet features tips for photographing fireworks.
Photographing fireworks isn’t as easy as many people think. The contrast between the bright lights against the dark background, plus the fast action, make capturing great shots often difficult for amateurs. Here’s a quick breakdown on how to take great pics of a fireworks show.
Frame your shot in advance. You can’t track moving fireworks. Instead, anticipate where they’ll appear.
Shoot from as close to a 45-degree angle as possible. Setting up on a high spot located in an open area often produces the best results.
Use a tripod and a remote. That’s the easiest way to avoid moving the camera accidentally.
Include familiar landmarks such as buildings and skylines in your fireworks photography. Recognizable landmarks help add context to the size of the fireworks.
Avoid other light sources such as streetlights. They’ll likely overexpose the shot.
Landscape Photography Tips
Are you looking for photography tips for shooting landscapes? Our photography cheat sheet has you covered.
Landscapes have a few different elements that can complicate picture taking. Here are the top cheat tips for photographing forests, mountains, beaches, city skylines, and other vistas.
First, ignore the sky. Instead, concentrate on the brightness of the landscape. Does it look too bright or too dark?
If it’s too dark, decrease the shutter speed in increments up to a full stop. If it’s too bright, increase the shutter speed, also in increments up to a full stop.
Next, turn your attention to the sky. If it’s the same tones as the landscape, you’re in good shape. You can expose the entire image.
However, most likely, the sky is brighter than the landscape. You have a few cheat options. If your camera has graduated neutral density filters, try using them to adjust the balance.
Use the horizon line as your guide. Another option is to take two exposures and combine them in photo editing software.
Shooting Memorable Wedding Images
Wedding photography is the financial bread-and-butter for many photographers. Even if you’re not primarily a wedding photographer, the opportunity will likely present itself from time to time. Here’s a closer look at cheat sheet tips for shooting weddings with style.
First in our cheat sheet, you want a relatively equal mix of two different styles:
- Traditional
- Photojournalistic
Traditional images involve formal poses, such as the bride and groom, different sides of the family, and so on. Sometimes wrangling all the family members together is a challenge, so you’ll need to stay organized, use this cheat sheet, and have excellent people skills.
Photojournalistic images capture unscripted moments. They’re photos of candid, behind-the-scenes emotions and events. As a photographer, staying unobtrusive is the cheat code, or secret, to capturing these authentic moments.
Keep in mind ownership over wedding photos can get tricky. If you want to use the images in a portfolio or for display, make sure you have all rights reserved. If you don’t have your rights reserved on the photo, they can end up the property of the client instead of you.
Mastering Food Photography
Next on our cheat sheet is a look at food photography.
Photographing food is a bit different than photographing any other subject. On the plus side, the food typically stays still without a problem. However, lighting takes on increased importance. Bad lighting can make a delicious dish look downright appealing!
Avoid indoor kitchen lighting as much as possible in your white balance. Generally, the indoor lighting in your kitchen casts a yellow glow, which adds an unappetizing sheen to food. To combat the effects of indoor lighting, set the white balance on your camera to Tungsten. The added blue helps of this white balance counteract the yellow.
Next in our cheat sheet, you need to shoot the food from the correct angle. These three angles often work well for food photography:
- 45 degree Angle – Emphasizes the food’s texture.
- Top Down – Show’s the entire dish
- Straight On – Emphasizes the food’s height. Ideal for cakes, sandwiches, etc.

Photography Cheat Sheet Final Thoughts
Using a photography cheat sheet for photography tips doesn’t mean you’re a bad photographer – not at all! Even the best photographers in the world use photography cheat sheets because they don’t remember how everything works and how to shoot all types of scenes, especially in manual mode. Photography is complicated, so a trusted cheat sheet acts as a valuable resource.
This photography cheat sheet acts as a handy reference guide you can always rely on when you’re in manual mode. Bookmark this photography cheat sheet and check back on this cheat sheet article whenever you need help taking your photography to the next level.