So you’re finally getting out of the easy, automatic mode and experimenting with your creative side. Learning shutter speed basics and how to control the shutter speed settings is one of the most important things you can do to improve your photography skills.
Understanding Shutter Speed (A quick overview)
The shutter speed definition is the amount of time the shutter is open inside your camera when snapping a photo. This is measured in seconds and it greatly affects the outcome of your photos.
You will see numbers like 1/2, 1/250, 1/50, 1/60, 1/500, 2”, or bulb (on certain cameras) on your display screen telling you how fast or for how long the shutter is open and then closed. These “fractions” indicated fractions of a second. The shutter speed 1/60 means 1/60th of a second.
Usually, a well-exposed photo will have a faster shutter speed for clarity and sharpness, whereas a low-light or night photo will have a slow shutter speed to allow more light into the camera.
Shutter speed is part of the exposure triangle. The exposure triangle settings include ISO, aperture, and shutter speed. If you have just recently ventured out of automatic mode on your DSLR, you need to understand the exposure triangle elements on your camera.
This shutter speed guide will help you know how these elements work when you leave your shutter open, both individually and together, to change your shutter speed settings and take creative, artistic photos.
How to Change the Shutter Speed Settings on Your Camera
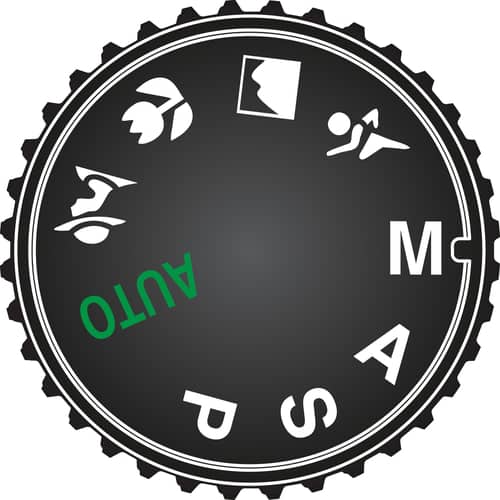
- Put your camera into manual mode to change the shutter speed. If you have a Canon, you can also put it on TV (Time Value) mode. If you have a Nikon or Sony, S (shutter speed priority mode) will also work.
- There should be a dial or arrows somewhere on your camera. Move the dial left or right/ arrows up or down depending on the shutter speeds you want.
- The shutter speed format is usually in 1/1000, 1/250, 1/30, 1/2, 1/4, etc. The higher the bottom number, the faster the shutter speed is.
- Shutter speeds are measured in fractions of a second. A shutter speed of 1/1000 means “the shutter is open for one one-thousandth fraction of a second.”
- With higher shutter speed, the less time you leave your shutter open and the less is exposed to light. In general, higher shutter speeds are better for daytime photography, whereas lower shutter speeds are better for nighttime photos.
- With slower shutter speed, your shutter is open longer. This allows you to smooth out water or clouds, or intentionally blur motion of your subject. Slow shutter speed is subjective, but generally anything less than 1/100 falls into the slow shutter speed area.
What is ISO?
ISO is the setting that refers to the light sensitivity of the image sensor in your DSLR. The lower the setting (for example ISO 100) the more sensitive your camera is to light and the sharper the image will turn out. When you are shooting in darker environments, it is recommended to raise the ISO (ISO 2800 for example) and set the other two elements of the exposure triangle in accordance.
All DSLR cameras and some point-and-shoot cameras use the same basic technology when it comes to taking photographs; aperture, shutter speed, and ISO. The settings may not all be in the same area on each digital camera body, even within the same brand.
You will have to be in manual or one of the semi-automatic modes in order to change the camera’s shutter speed. The semi-automatic mode that allows you to only adjust the shutter speed is called shutter priority mode (TV or S depending on the camera brand).
Explaining the F-Stop
The aperture is also referred to as the f-stop. This is the most important element to master on your DSLR because knowing how the aperture works will give you the power to control the depth of field of your photos. Read this informative article explaining the f-stop and how you can get creative with it.
Many photographers shoot in a semi-automatic mode called aperture priority. This means that the camera lets you choose the f-stop and then decides the shutter speed and ISO.
SPECIAL OFFER – Get Our Photography Fundamentals Guidebook Here for Huge Savings Today – Finally, a VISUAL guide that makes mastering photography as SIMPLE as “A-B-C” so you can confidently shoot in full manual mode, and know which settings to adjust…guaranteed! Click here to learn more.

When your camera is in automatic mode, it will try its best to take the sharpest photo in the best exposure possible for the situation you are shooting in. You must get into manual mode and understand how to tell your DSLR exactly what you want it to do in order to achieve this level of photography yourself.
How to Change Shutter Speed Settings on a Canon
The Canon Rebel series is a great entry-level camera that provides access to professional-level photography. Canon has TV mode (Time Value) which lets you adjust only the shutter speed. The camera will automatically choose the aperture and ISO depending on the shutter speed you decide.
- Turn the dial to M (manual), or TV (Time Value) mode.
- Turn the black dial below the shutter button until you reach your desired shutter speed.
How to Change Shutter Speed Settings on a Nikon
Nikon also has some great entry-level models that allow you to get creative while providing professional features. The semi-automatic mode that lets you change the shutter speed is “S” (shutter priority).
Let’s take a look at where do you find the shutter speed on the Nikon D7000.
- Turn the mode dial to M (Manual) or S (Shutter priority)
- Turn the dial on the right-hand side left or right, depending on the shutter speed you’re wanting.
How to Change Shutter Speed Settings on a Sony
Sony has risen to professional-level grade with mirrorless cameras that give you all the professional settings you need to take amazing photos. These are now popular with travel photographers because of the smaller sized camera body and general low weight.
The Sony A6000 is a great starter camera to get you started in your photography hobby.
- Turn the mode dial to M (Manual) or S (Shutter priority)
- Turn the main dial left or right depending on the shutter speed you’re wanting.
When to Change Your Shutter Speed
Shutter speed differences allows you to control how fast the camera absorbs light and images. Have you seen those action shots where there are a fast-moving object and a still object in the same photo? This is achieved by using a shutter speed like 1/500.
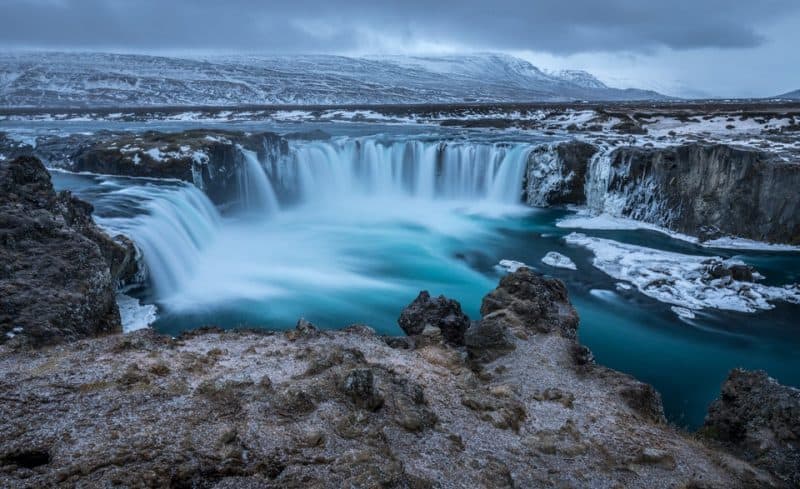
Those photos of soft, flowing water are also achieved with similar shutter speed. If you want crisp, sharp photos of a moving object frozen in action, you will need a very fast shutter speed. This is the shutter speed meaning in a nutshell.
So basically, when you see a blurry photo (that obviously wasn’t planned that way) you will immediately recognize that the shutter speed was possibly wrong for that photo. There are other reasons why a photo may be blurry, it could be out of focus or have a shallow depth of field, but many of the times the shutter speed is the culprit.
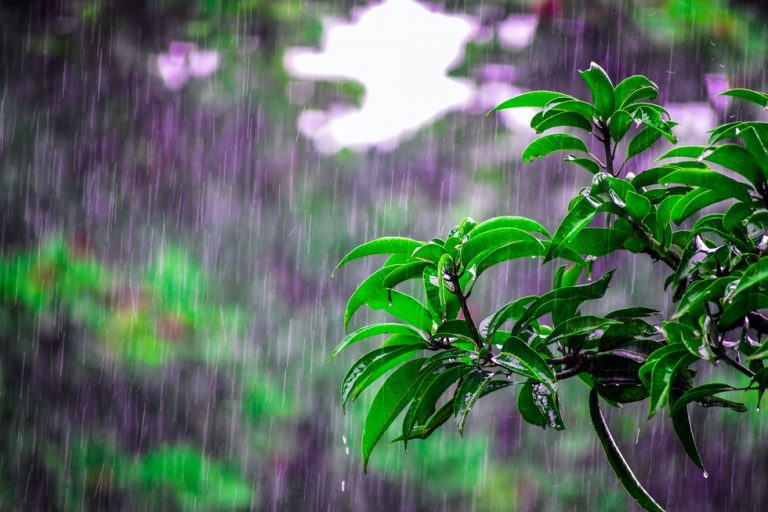
This is why we try to use fast shutter speed in our immediate situation. But some situations or projects don’t need a fast shutter speed but rather require other shutter speeds; like low light environments or motion blur photography.
To use slow shutter speeds (anything slower than 1/60 like 1/2 or 1/4) you’ll need a tripod to avoid camera shake. Camera shake is when unsteady hands or an unstable stand results in blurry images. A general rule of thumb to avoid camera shake is that any shutter speed under 1/30 or 1/60 will require a very steady hand or a tripod. The slowest shutter speed is achieved by using the “bulb” setting, where the shutter is open until you press the shutter manually to stop the exposure.
Remember that when you change one setting in the exposure triangle, the other two settings are invariably affected. For example, when you have high shutter speed, you will need to compensate for the amount of light you’re letting in by raising the ISO. A high ISO adds grain to your photos, so achieving a good balance is key to successful images.
The main rule of thumb about achieving sharp photos is to use a higher shutter speed than your lens focal length. Meaning if you are shooting with a 200mm lens focal length, your shutter speed needs to be above 1/200, maybe 1/250.
Choosing the Right Setting
Sports
Photographing live sports is a sport in itself! Obviously, there are a lot of action and moving objects, and you will want to freeze that action in your images. The key here is to have the highest fast shutter speed possible.
A shutter speed of 1/1000 is usually a good place to start to freeze motion. This is easily achievable if you are outside during the day. Nighttime or inside sports photography may require you to raise the ISO because the fast shutter speed does not allow enough light in.
Panning and Groups
Panning photography means following a moving object with your camera and clicking the shot while you, the photographer, is moving along with the object. The shutter speed does not necessarily need to be low and there is no golden rule here to accomplish good images. What you want to achieve is the frozen moving object and have the background blurred out.
When taking portraits or group photos, remember people move, especially kids. So it’s wise to use higher shutter speed in these situations.
Adjust the shutter speed higher than the focal length of the lens that you are using. Example: If you are using an 80mm lens focal length, your shutter speed will have to be above 1/80.
Motion Blur & Action
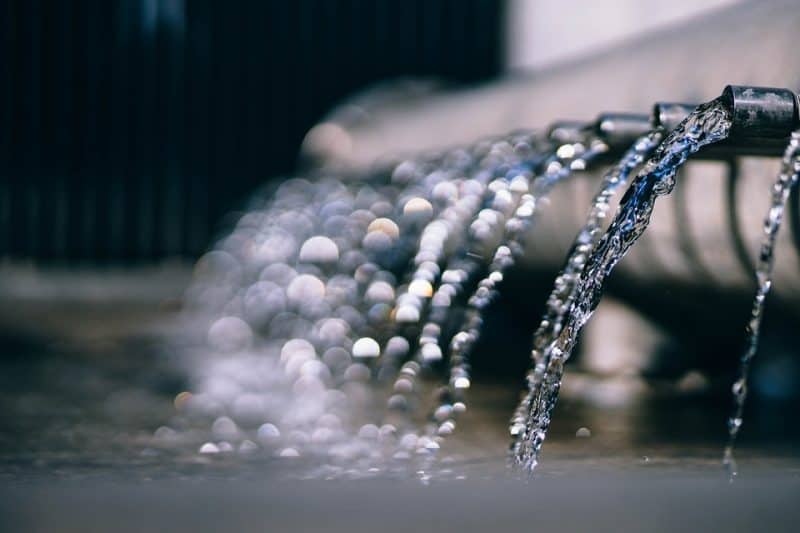
The main rule for motion blur photography is to use slow shutter speeds. Usually, shutter speeds like 1/500 mean that a tripod is required to avoid camera shake, a remote shutter, and possibly some lens filters.
Use a long shutter speed for as long as 30 seconds to a few minutes to achieve the blurry, soft waves that make a photo look creative and unique. This may mean that you will have to limit the amount of light intake with a filter on your lens.
With motion blur, the look you want to achieve will determine your shutter speed. Just remember to keep your ISO as low as possible, experiment, and have fun!
Assuming you are outside, use a long shutter speed without having to raise the ISO too much.
Using the shutter priority mode in this situation is recommended because you need to be quick on your feet. Having your camera decide the ISO and the aperture depending on the shutter speed will help you spend less time fiddling with the controls.
Night/Long Exposure
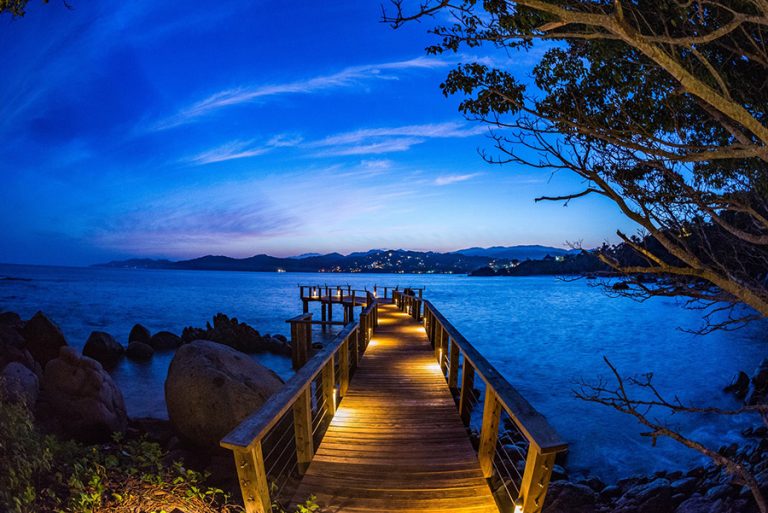
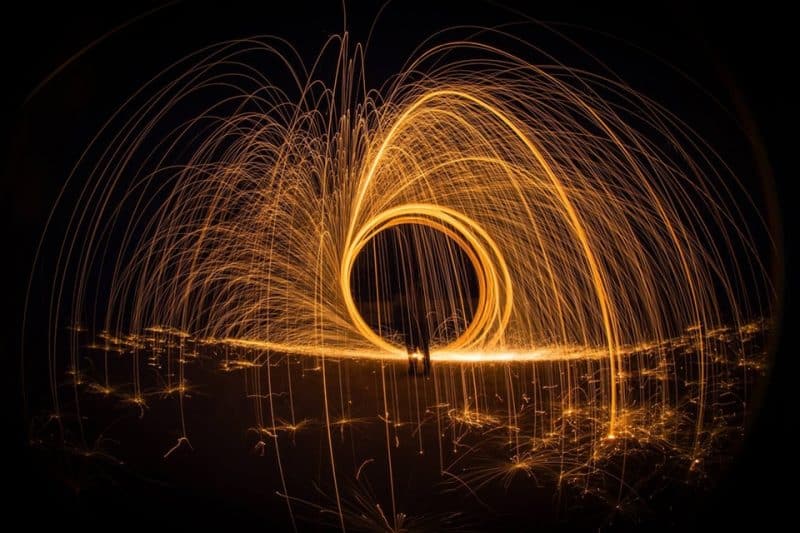
Low light and nighttime photography require longer shutter speeds and higher ISOs. There are plenty of nighttime photography projects that are fun but require you to have complete control of the exposure time.
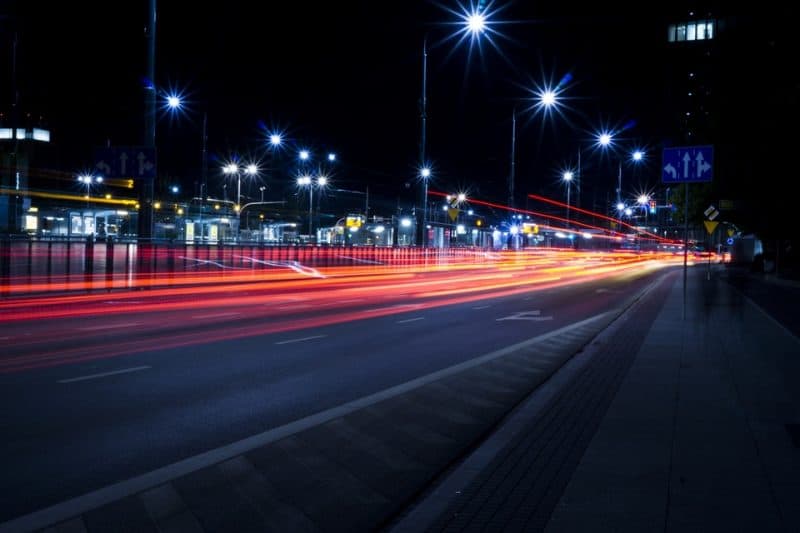
Have you seen those fun nighttime photos with the light trails of cars? This is achieved by using long shutter speed. Start with an f/8 f-stop and a 10-second shutter speed and take it from there.
SPECIAL OFFER – Get Our Photography Fundamentals Guidebook Here for Huge Savings Today – Finally, a VISUAL guide that makes mastering photography as SIMPLE as “A-B-C” so you can confidently shoot in full manual mode, and know which settings to adjust…guaranteed! Click here to learn more.
Low light and nighttime photography require longer shutter speeds and higher ISOs. There are plenty of nighttime photography projects that are fun but require you to have complete control of the exposure time.
Have you seen those fun nighttime photos with the light trails of cars? This is achieved by using long shutter speed. Start with an f/8 f-stop and a 10-second shutter speed and take it from there.
Go outside and pick a setting that has moving objects. Stand in the same spot and take several photos, changing your shutter speed as you take your shots. You can try putting your camera into shutter speed priority (TV on the Canon or S on the other brands). This way the camera will automatically adjust the ISO and the aperture in accordance with the environment. See what happens to the photos when you change the shutter speed?
Using exposure compensation and shutter speed
Exposure compensation is a camera setting that allows you to adjust the exposure value (EV) of your photo. It’s used to brighten or darken an image when you’re shooting in automatic mode. When you use exposure compensation, the camera will adjust aperture, shutter speed, or ISO settings to brighten or darken the image.
For example, if you are shooting in aperture priority mode (having a specific aperture is the most important thing) and you want to darken the image, you can use exposure compensation to underexpose the photo. This will cause the camera to adjust either the shutter speed or ISO settings to decrease the amount of light that enters the camera and create a darker exposure. If having the correct shutter speed is critical to your image, make sure you aren’t outsmarting yourself using exposure compensation.
Final Thoughts
Make sure to watch the settings change on your screen. Take notes and learn what happens to the final images. Remember that a long shutter speed may create blur or cause camera shake. This is also a great place to practice panning, nighttime, and long-exposure photography.
Get out there and practice! Learn from your mistakes and keep trying new things. This is how great photographers are made.
Ready to Learn More?
Join Cole’s Classroom today to unlock everything you need to become a pro photographer.