[textad]Inside this tutorial you’re going to learn how to use the Lightroom Adjustment Brush tool. If you are looking for an editing shortcut – you’ll love our Cole’s Classroom adjustment brush presets! Click here right now to check em out, they are on sale today![/textad]
Looking to improve your photography? Just enter any questions you have about improving your photography below and hit send and get answers & feedback instantly - for FREE! Submit QuestionsHave you ever had a photo that needed some adjusting or editing in certain areas, but not in others? This is exactly what the Lightroom Adjustment Brush tool is for. If you aren’t familiar with how to use this popular and powerful tool, just wait until you see everything it can do! The adjustment brush tool is a great way to enhance your photos!
What is the Adjustment Brush Tool?
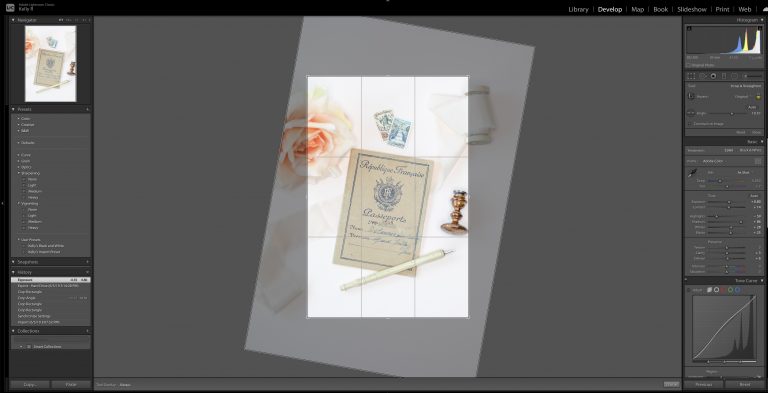
The Lightroom brush tool allows you to make adjustment to only certain areas of an image by “painting” the adjustment on where you want it. As you know, in the Develop module, you adjust the sliders in the Right-hand panel to make adjustments to the image. However, by using the Adjustment Brush tool, you can make selective adjustments to only the areas of your chosen image.
![]()
To see your brush strokes, the Adjustment Brush icon can be found in the Develop module below the Histogram, and above the Basic panel on the far right. To use it, either use keyboard shortcut ‘K’ or simply click on the icon in the Develop module, and your brush option will be revealed. You can select from any of these sliders to make adjustments to your image. Once you select what adjustments you would like to make, simply take your brush (indicated by a circle with a + in the center) and brush over the areas of your image that you would like to edit. When you are finished, click “Done” in the lower right hand corner of the preview window.
Adjustment Brush Presets
Lightroom presets are pre-saved settings that allow you to quickly and easily make certain adjustments to your image. You can access these adjustment brush presets and local adjustment presets by using the drop-down menu in the adjustment panel (note that these are different than the Presets in your left panel that effect your entire image).

SPECIAL OFFER – Discover the secret to adding “wow factor” & retouching your photos, without having to use Photoshop, in only 3 clicks (…even if you’re brand new to editing your photos – guaranteed!)
Join the 54,000 other photographers using our Polished Lightroom Adjustment Brushes Presets Collection and get them here for 80% off!

Brush Options
One option often overlooked with the adjustment brush tool is that Lightroom Classic allows you to use two separate brushes and radial filters. You can see these A Brush and a B Brush indicated by the “A” and “B” near the bottom of the brush effects panel.
So, what are these? Much like there are separate sizes and types of paintbrushes for different kinds of painting jobs, there may be times when you want a large, softer brush with a low opacity (Lightroom calls this “flow”), and times when you want a brush that is smaller, has a harder edge or more opacity, etc. For this reason, you are given two different brushes, Brush A and Brush B, that you can set to your liking to use as you see fit.
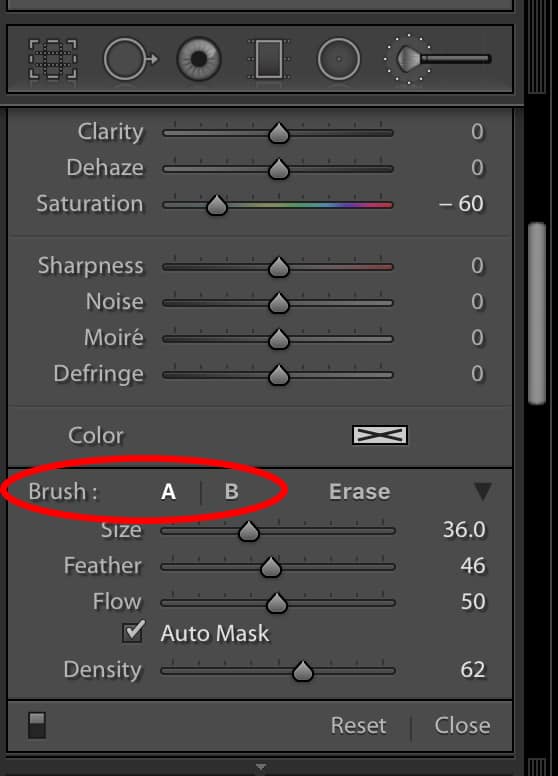
You have the ability to set two separate “types” of brushes by selecting the size, feather (how soft or hard the “edges” of your brush are), and brush flow (or opacity) of each brush. While you are using the Lightroom Adjustment Brush tool too, you can easily switch between the two brushes if you wish by using the “/” key.
Using the Lightroom Adjustment Brush
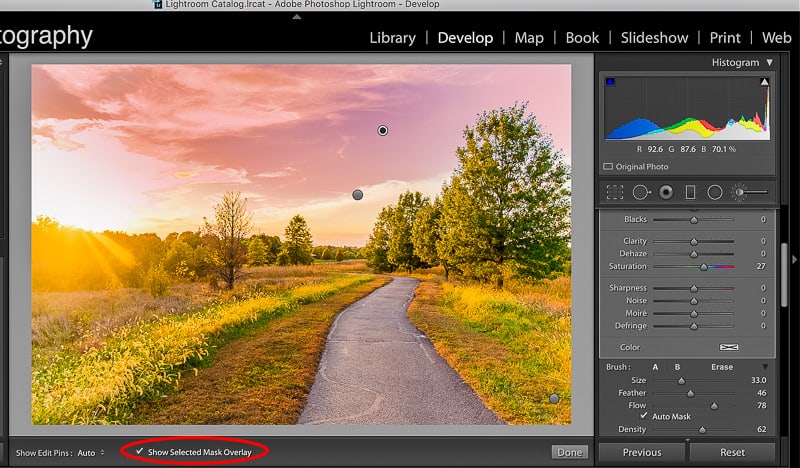
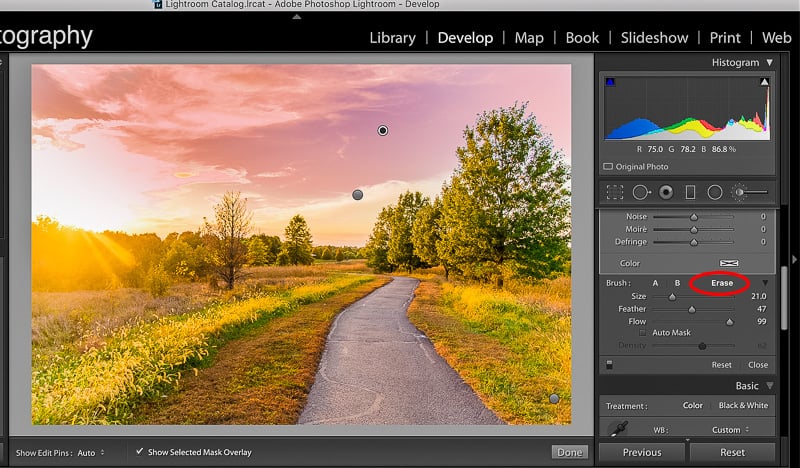
Seeing Where You’ve Brushed: If you would like to see where you have brushed your adjustments on your photo, make sure that the Lightroom adjustment brush tool that you wish to view is selected (the pin for that brush has a black center), and check the box under your photo that says “Show Selected Mask Overlay.” This will show you in red all of the areas of the photo that have been adjusted with the same brush.
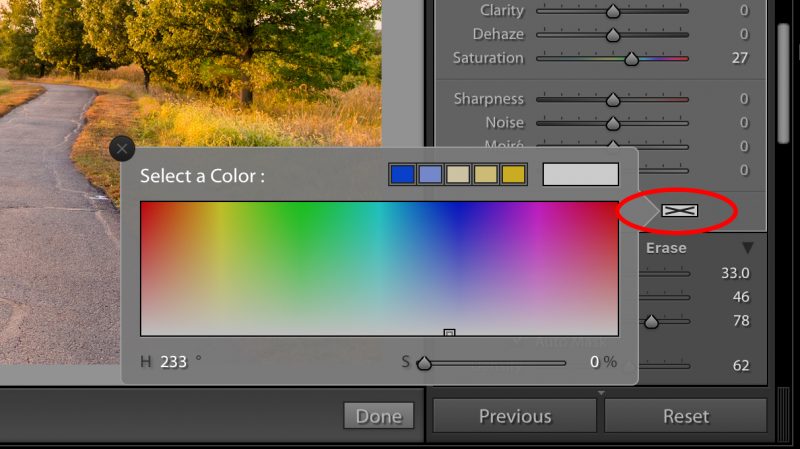
Brush with Color: If you’re looking to enhance a specific color on your image, you can select a color at the bottom of the brush panel to use within your adjustment brush tool. This is a great way to add some extra color to enhance eyes, a landscape or even certain colors within a photo!
Changing Brush Size: There are several ways to change the size of your brush:
- Use the slider under the brush settings
- Scroll up/down with 2 fingers on track pad
- Scroll the wheel on your mouse up or down
- Use the left and right bracket keys
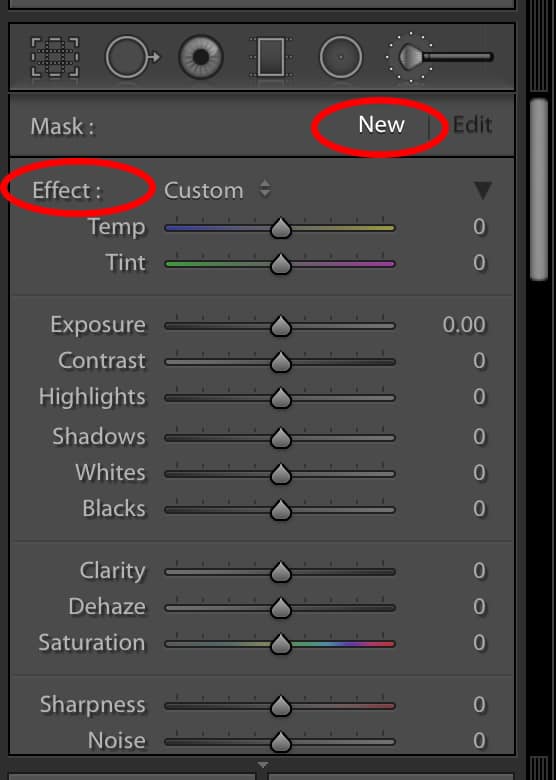
Using a New Brush: Each time you want to start a new brush (a different adjustment), you will need to “pick up” a new brush. To do so, select “New” at the top of the Adjustment Brush panel. You will notice that all of the adjustment sliders remain in place from previous brush. To reset them, double click “Effect” to reset all sliders, or select a new brush preset from the drop down menu.
How to Erase: If you accidentally brush over an area where you don’t want your adjustment to be back, there is an easy way to correct it. Simply click Erase, OR click Option (Mac) or Alt (PC) and you will see that your brush now contains a minus sign, and will erase from any area you brush it over. To delete a brush you’ve added to your image entirely, make sure that Brush is highlighted (pin has black center) and hit Delete.
SPECIAL OFFER – Discover the secret to adding “wow factor” & retouching your photos, without having to use Photoshop, in only 3 clicks (…even if you’re brand new to editing your photos – guaranteed!)
Join the 54,000 other photographers using our Polished Lightroom Adjustment Brushes Presets Collection and get them here for 80% off!