
Using TTL flash but disappointed with the results? Check out our beginner’s guide on TTL…how to use it and how to make it work better for you!
Learning flash is one of the hardest skills in photography for many people. Between all the gear and the lighting and terminology, it feels really intimidating and complicated. Some photographers try to shortcut their flash education and try using TTL flash. But TTL flash, like most of the gear in photography, is only as good as the operator. Without understanding TTL flash properly, you can’t use it correctly.
Looking to improve your photography? Just enter any questions you have about improving your photography below and hit send and get answers & feedback instantly - for FREE! Submit QuestionsLet’s figure it out together! I’ll explain what the TTL meaning, how it works and how to use it to get properly exposed images when shooting with it at an event or session.
What is TTL flash?
TTL stands for “through the lens.” It’s how your camera’s onboard light meter works and how your camera’s auto and semi-auto modes work (aperture priority, shutter priority, program, etc.). TTL flash is a system of calculating the correct amount of light from your flash using the information from your camera via “through the lens” metering. Some folks consider it an “automatic” mode for flash. It is that, sort of, which we will cover below.
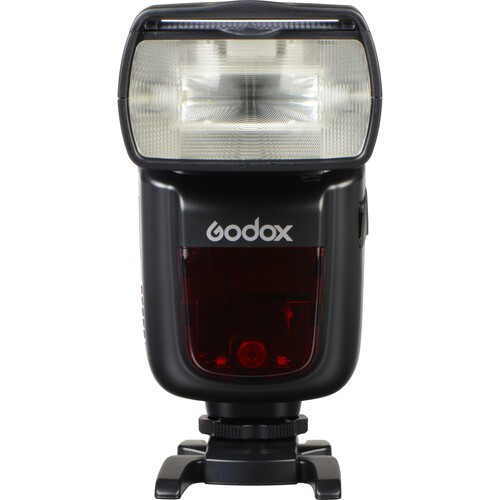
Not every flash is equipped with TTL technology. If you plan to purchase a flash and want TTL as an option, check the specs of your equipment. This Godox speedlight for Nikon is an example of a TTL capable flash.
New to flash and don’t know what all those buttons and dials mean? We’ve got you covered with our “Meet Your Flash” tutorial!
How does TTL flash work?
Before you learn how to use TTL flash, you need to understand TTL flash, i.e. how it works in a basic sense. So let me describe what’s happening when you use TTL flash.
When you have a TTL flash on your camera and you press the shutter halfway down, your camera focuses and triggers the flash to work. The flash sends out a 1/32 power preflash that hits your subject and reflects back to your camera through the lens (TTL!). The camera then says “Oh hey, I saw that preflash! Now here’s how much light the subject needs based on that preflash!” The camera turns the power of the flash up or down to expose your subject based on what it read through the lens. Then the shutter opens, the flash fires at the level the camera determined earlier and your image gets recorded.
Types of through-the-lens flashes
These flashes come in a few different types. There are TTL flashes, A-TTL (automatic-TTL), and E-TTL (evaluative-TTL flashes). Each type works off the same principle but functions differently.
For example, Canon calls their technology ETTL meaning Evaluative TTL. They also call one version of it E-TTL ii. Nikon refers to their technology as i-TTL. But they all work about the same.
TTL flashes fire a pre-flash right before the actual flash fires to do the same job. The flash then compares that pre-flash reading to the reading without flash and uses the information from both to set the power of the flash setting. E-TTL flashes tend to be a little more accurate, but they all work on the same principle.
A few things to note here… to begin with, you can’t actually see the flash output of the pre-flash. It happens so fast that you can’t perceive it with your naked eye before the main flash fires. But it does happen!
Second, for the camera and flash to work together in harmony, your flash needs to be compatible with your camera. I can’t take a Canon flash, throw it on my Nikon camera and use TTL mode. The two have to be able to work together. When you’re buying a new flash and want to have through-the-lens flash, make sure the flash supports it and it’s compatible with your camera’s metering system.
And finally, know that you can use TTL with off-camera flash. It works, with some limitations. But that’s a subject for another tutorial. So we’ll just talk about how to use TTL on camera for now.
Looking for info on fill flash? Check out our tutorial!
Are you using TTL flash metering system correctly?
A lot of photographers use TTL on their flash and make no other adjustments to their settings. The result? Disappointment and frustration. Some common complaints are dark photos, washed out photos or photos that look too “flashy.”
So why isn’t TTL working?
TTL IS working, but the system is only as good as the information it’s given. To give TTL a chance to succeed and give you the images you desire, you need to give it the correct information.
The problem with using TTL flash metering system
First, you need to understand that the TTL flash metering system will meter off your focal point and respond accordingly. More specifically, TTL meters off the tone under your focal point and tries to make it a middle tone, just like your camera’s onboard light meter.
The TTL flash system doesn’t see color. It only knows to take that tone you metered off of and set exposure for a middle tone. So if you meter a black tuxedo, for example, the TTL flash will adjust its settings to make that black a middle tone. The result can be a washed out, overexposed image.
Likewise, if you meter off a white dress, the flash adjusts to make white a middle tone. This can mean an underexposed image.
Here’s a scene taken using TTL flash, bounced off the white ceiling. As you can see, it’s not a correct exposure. The whites of his fur are blown out, the black in his coat looks almost gray and the whole thing is overexposed.

The system is only as good as the information you give it. That means for a better or more correct exposure, you’ll have to adjust the flash power manually via the flash compensation button.
For an in-depth explanation of tones and zones, see our two tutorials below
- What is the zone system in photography and do I need to learn it?
- What’s a gray card and why should you get one?
How to adjust your flash to improve your photos
TTL does a pretty good job of exposure if you have a good blend of tones in your image. But if you have lots of dark or lots of light tones, TTL may leave you feeling underwhelmed.
Meet Flash Compensation
So then your next step is to improve your photos using flash compensation.
Flash compensation lets you override what your TTL system determines is a correct exposure. Using the flash exposure function n on your camera in conjunction with TTL, you can better control how it exposes your image. Essentially, you are telling the flash system/camera how it should be exposed based on the tone you are metering.
Flash compensation is usually adjusted by pressing the +/- button in conjunction with a flash button (the one that looks like a lightning bolt/arrow). Don’t confuse it with exposure compensation. Exposure compensation will adjust your camera settings for more or less brightness. You want to adjust the FLASH power via flash compesnation.
Let’s look at another image taken with TTL. Again, it’s overexposed. I’ve lost detail in my whites and the blacks look gray.

Flash compensation will change your flash power to make the light the flash emits more or less powerful. If, after using your TTL system your images feel underexposed, use the flash compensation button to increase your exposure to your liking. If your images feel overexposed, use the flash compensation button to decrease exposure to your liking. This tells the flash “Hey, you’re doing a good job but dial it down a bit.”
The next photo was taking adjusting the flash compensation button to -1 1/3. By adjusting the flash compensation, I’m able to tell the camera where my exposure should be. I’ve lost a little detail in the black fur of the panda, but my highlights look okay and my image isn’t overexposed.

Putting a gray card in my scene confirms that my adjusted TTL exposure is now a lot closer to a correct exposure when the flash power is set manually with a gray card.

Remember as your scene changes, the camera may read the scene differently based on the tones in your image, even if the lighting hasn’t changed. That means you need to review your images and adjust flash compensation as needed!
Why is my background so dark when I’m using flash?
Another complaint I hear about through-the-lens flash is that the subject is well lit but the background is dark or underexposed.
To fix this, you need to make the background brighter, or increase your ambient exposure. The flash doesn’t reach far enough to light up the scene, it’s just providing fill light on your subject.
Try lowering your shutter speed, opening up your aperture or raising your ISO to allow more ambient light in your scene. Sometimes it takes a combination of all three. Then take a test shot with the TTL flash enabled and see how that looks. Adjust the flash compensation as needed.
Dealing with flashy photos
One of the other common complaints about TTL I hear is that it results in flashy photos. “Flashy photos” usually means that the photo is either overexposed in general or that the ambient exposure and subject exposure isn’t jiving.
If using the through-the-lens flash results in overexposed images, use flash compensation to turn down the flash power on your subject, as we talked about above.
But what about when the background and subject exposure doesn’t match? What can you do then?
Let’s start by understanding the problem. Usually “flashy” means that there is a lot of contrast between the ambient light and the light hitting your subject. Contrast, or how big of a difference between the lightest and darkest part of your image, comes from a few places: the environment, the size and distance subject of you light source (flash) and the ratio of the background/flash lighting.
So how do I fix the flashy look?
First, consider your ambient light. If your goal is a soft, evenly lit photo but you’re shooting a high contrast scene with hard natural light, you’ll never achieve your goal. Make sure your environment matches the look you want for the photo! Look for open shade or other areas where there is soft diffused lighting for your portraits.
Then, consider your flash itself as a light source. Are you using a bare flash, which tends to be smaller, thus harsher, than say a speedlight in a large shoot-through umbrella? When it comes to lighting an image, the bigger the light source the softer the image. How can you make that light source bigger? Try bouncing your light or adding a nice big modifier like a softbox or octobox. That makes your smaller light source bigger, softening the light.
Close the Gap
Finally, if you want to eliminate the contrast between the background and the ambient light, you need to close the gap, or the ratio between the two. (We call this a lighting ratio but if that term gives you math anxiety, just call it the lighting gap!) To close that gap, you need to either add more ambient light to the scene or reduce your flash exposure. Sometimes, you need to do both.
Try adjusting your camera settings to lighten the background more. Then take a test shot. Adjust the flash compensation to expose your subject to your liking keeping in mind that background to subject gap.
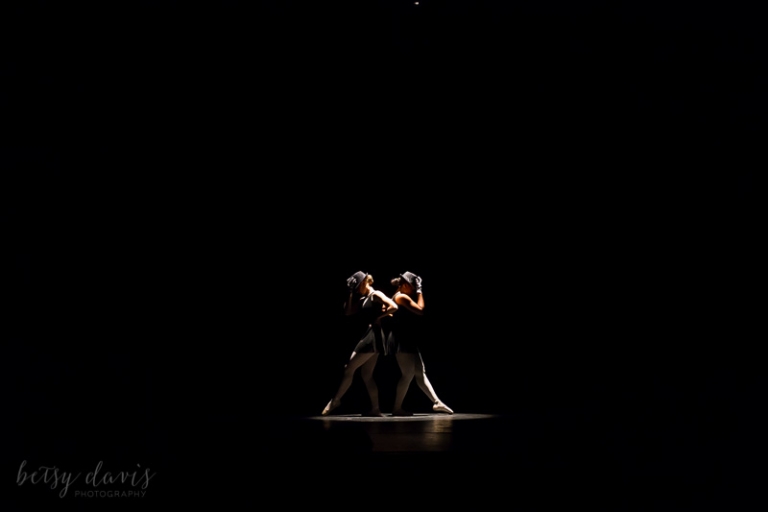
The image below was taken using flash. But because it was in open shade with soft diffused light, I was able to add just a hint of flash to my subject and product a soft, subtle portrait. It doesn’t look “flashy” at all!

TTL vs. Manual Flash
Which is better, TTL or manual flash? Well, it depends on your goals and your mastery of flash.
Through-the-lens flash can be a great tool to use in certain situations. Many wedding and event photographers like to use TTL when they “run and gun” during a reception or event. They like that they can wander around with their TTL flash enabled and don’t have to dial in the flash exposure on every single image. TTL gets even better if you understand how to use flash compensation to tweak it more to your taste.
Manual flash has lots of advantages. You have full control of your light. And you have the ability to replicate the same lighting later down the road.
I always advocate for learning how to shoot flash manually, even if you only plan to use TTL. Why? Because if you understand manual flash first, TTL is much easier to tweak to your liking. Second, you might find yourself in a situation where you can’t use TTL and will need to know how to light a scene manually.
Automatic but not automatically great
Through-the-lens flash can be a great tool, but only if the photographer knows how to use it correctly and how to adjust it to meet their needs. It is automatic flash but it doesn’t automatically make your flash images perfect. Take the time to learn how it works and how to use it correctly. You’ll have one more awesome tool in your photography kit.