Looking to improve your photography? Just enter any questions you have about improving your photography below and hit send and get answers & feedback instantly - for FREE! Submit Questions
All too many photographers, both amateur and professional, are familiar with glare showing up in their images. Glare appears as bright, sometimes blinding spots that can ruin even the best photographs. It distracts from the main subject and may also hide focal points of photos.
Why Does Glare Appear in Photographs?
Glare is caused when light reflects off a surface, both in the foreground and the background of photos. Camera sensors are designed to capture light following a specific path, but reflected light often passes through the lens at a different angle. This causes it to show up as a bright spot in an image rather than reflecting color.
Glare often happens when you try to take a picture that includes glass or windows, mirrors, water, or other shiny surfaces. It’s even more likely to occur when using a flash when taking a photograph.
Glare tends to be more of an issue with wide-angle and zoom lenses as opposed to standard options. These lens styles have multiple interior components designed to alter focal length, which presents more opportunities for light to scatter at an unintended angle.
Figuring Out What’s Causing Glare
You can figure out what’s causing light spots in your photographs by looking around for strong light sources and reflective surfaces, as these are often the culprits.
You can also consider the lens style that you’re using, as some may cause more of a glare than others.
Techniques for Getting Rid of Glare
The best way to get rid of flares is to avoid seeing it in the first place. There are a couple of tried and true ways to avoid flares showing up in your photos.

Try Different Angles
Glare is all about the angle at which light hits your lens. If you’re having trouble avoiding bright spots in your photographs, you may want to try holding your camera at a different angle.
While this may seem simple, just moving the position of your camera lens can cut back on unwanted light entering the lens.
Adjust Exposure Settings
These days, most digital cameras offer users a variety of exposure settings that help determine the brightness of a final image.
You can adjust aperture, ISO, and shutter speed to allow less light into the camera and reduce the risk of flash glare.
SPECIAL OFFER – Discover the secret to adding “wow factor” & retouching your photos, without having to use Photoshop, in only 3 clicks (…even if you’re brand new to editing your photos – guaranteed!)
Join the 54,000 other photographers using our Polished Lightroom Adjustment Brushes Presets Collection and get them here for 80% off!
Try a Polarizing Filter
Many of us are familiar with polarization technology, though we may not necessarily realize it.
Many sunglasses are made with polarized lenses to help block out sunlight from certain angles. You can also find specialized polarized lenses for your camera, which help reduce glare by blocking out horizontal light waves.
Add Shade
You can also try shading photographs to avoid glare, especially in bright areas or out in the sun. You can take advantage of natural shade from trees and buildings, create your own, or even just use your hand to block out your light source.
Many cameras also come with attached or built-in lens hoods that give you an easy, hand-free, and precise way to block incoming light.
Unlock every photography class, video, tutorial and resource.
Using Technology to Remove Flash Glare
It’s not always possible to avoid glare in photographs. Fortunately, you can touch up images in post-editing to get rid of flares after the fact.
Photoshop and Lightroom both have features designed to help photographers digitally eliminate unwanted light from their work.
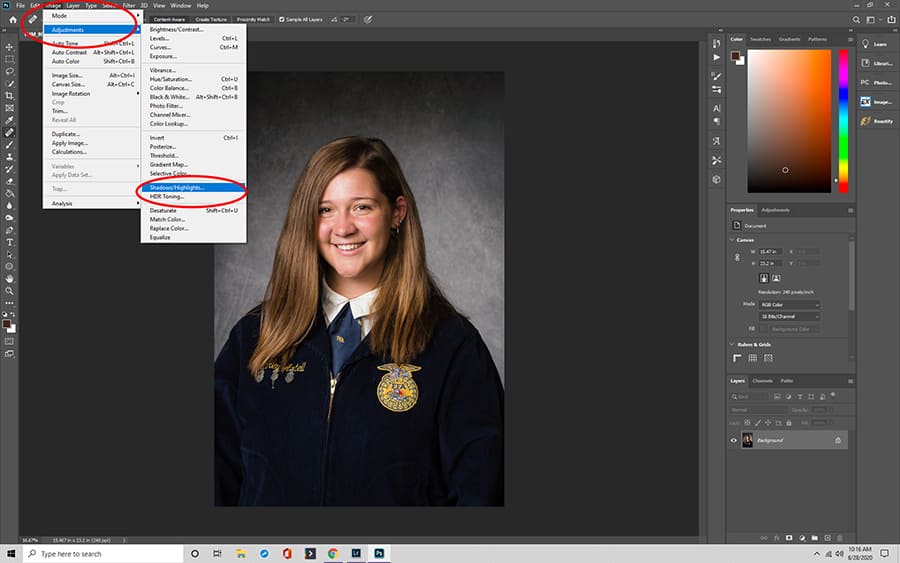
Adjusting Shadows and Highlights
A sharp contrast between the highlights and shadows of a photo can make it appear that there’s more of a glare than is actually present.
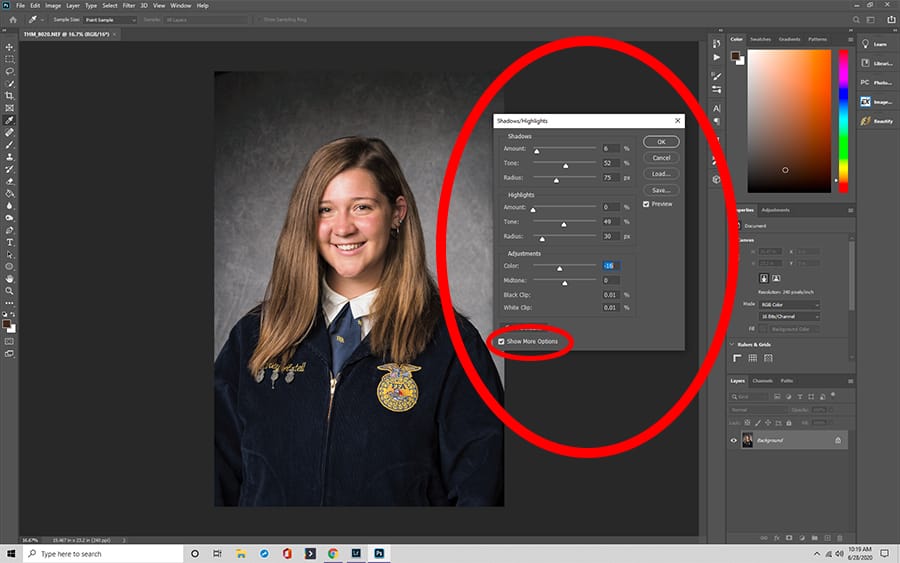
Make sure you can edit both highlights and shadows by navigating to the Image Adjustments box in Photoshop.
By dragging down the Shadows Slider and pushing the Highlights Slider forward, you can determine just how much contrast you want between the two.
Make sure you can make adjustments to the Tone Slider and Radius Slider by clicking the “Show More Options” box to also help reduce the appearance of harsh light.
The Dehaze Option
This tool offers one of the quickest and easiest ways to get rid of haze in a photograph. In Lightroom, you can find the Dehaze Tool at the bottom of the Basic Panel box in Develop Mode.
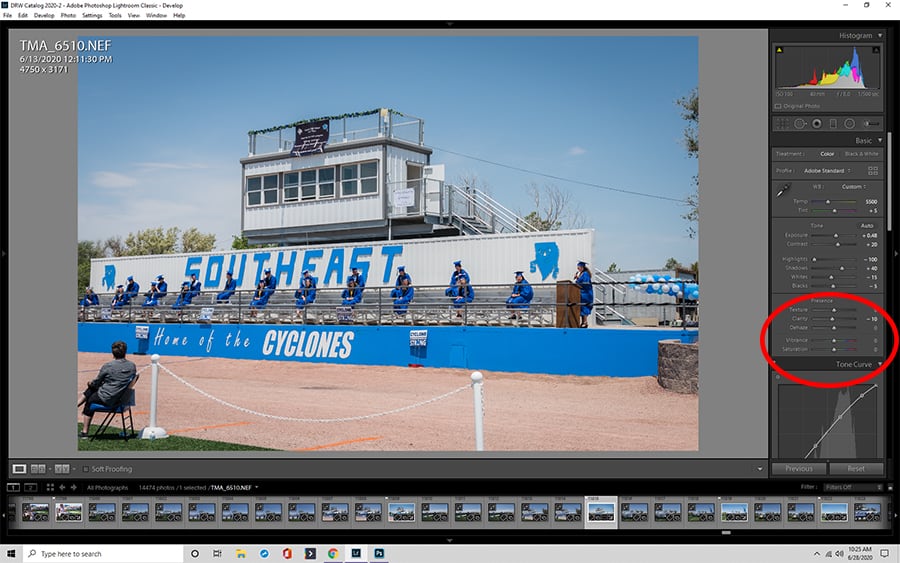
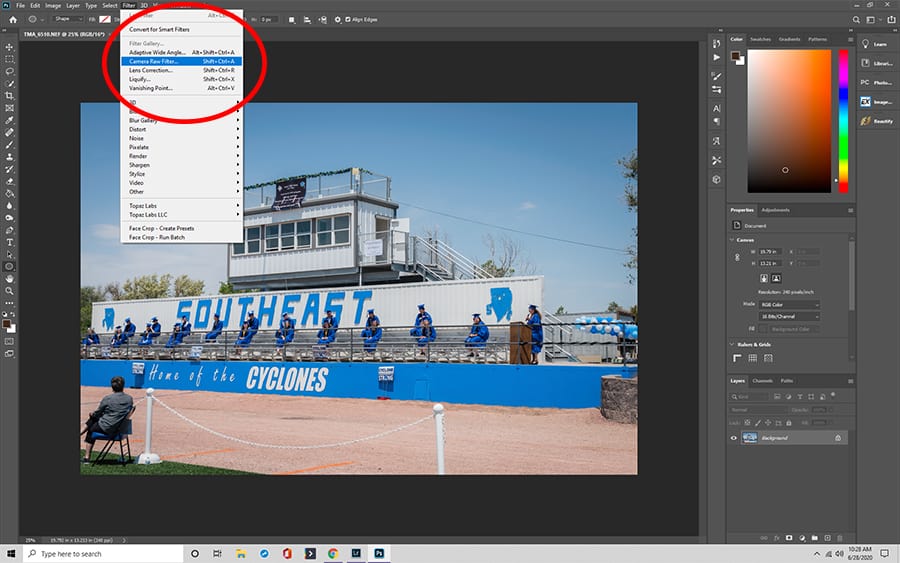
You can find the option in Photoshop by clicking on the Camera Raw window. In the Camera Raw window, you’ll find a Dehaze Slider that allows you to reduce glare with precision.
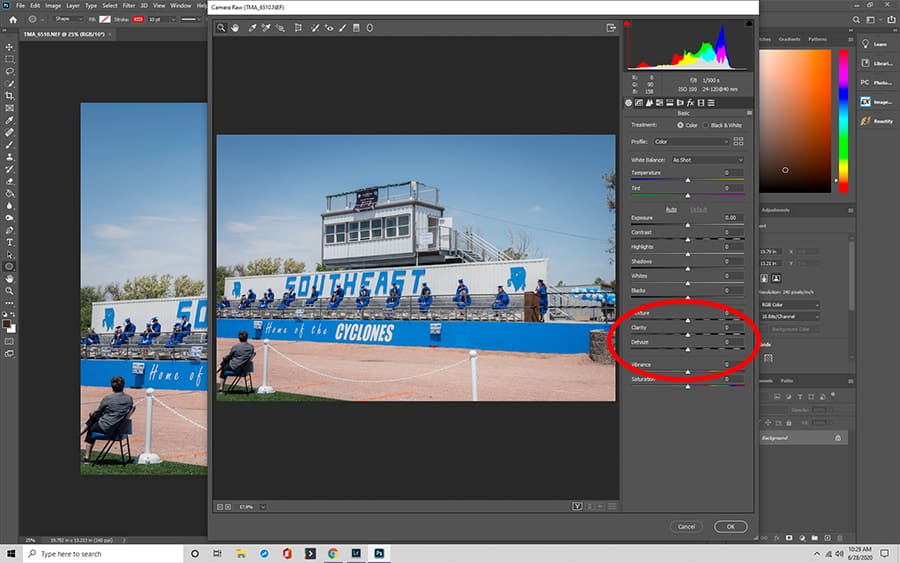
However, doing so doesn’t always eliminate flares in their entirety. If you still see some unwanted haze, you can create a new layer, mask your image, invert the selection, and color over or erase any hazy areas.
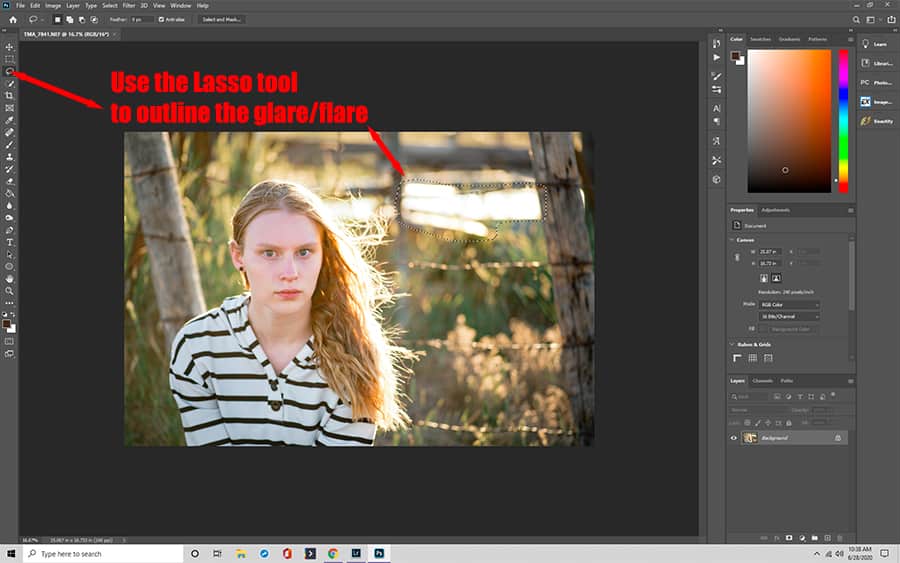
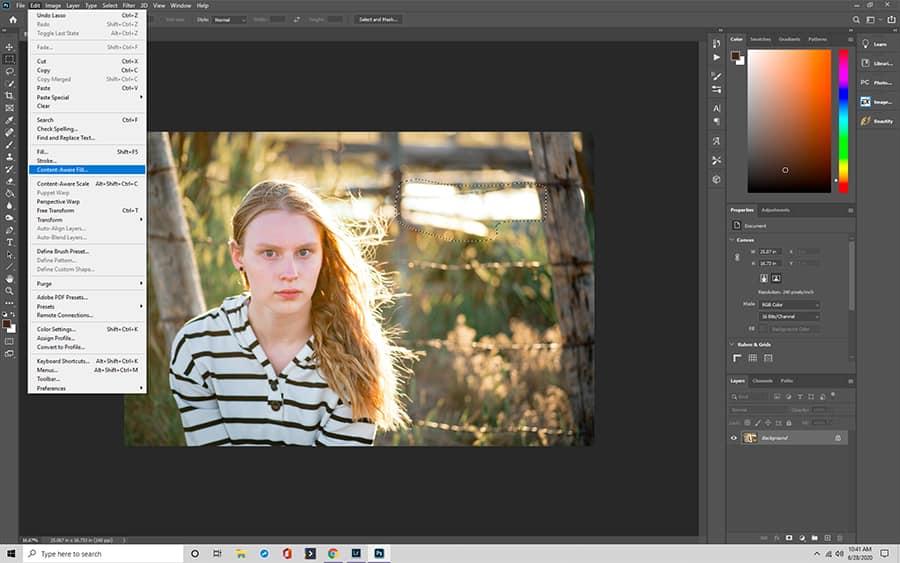
Making a Selection
When flare can easily be separated from the subject of a photo, you may be able to select it and erase the blemish. You can use the Lasso Tool to select the area you want and then right-click to fill in the area. If you select to use a Content Aware fill, Photoshop will analyze colors and patterns to give you a seamless background automatically.
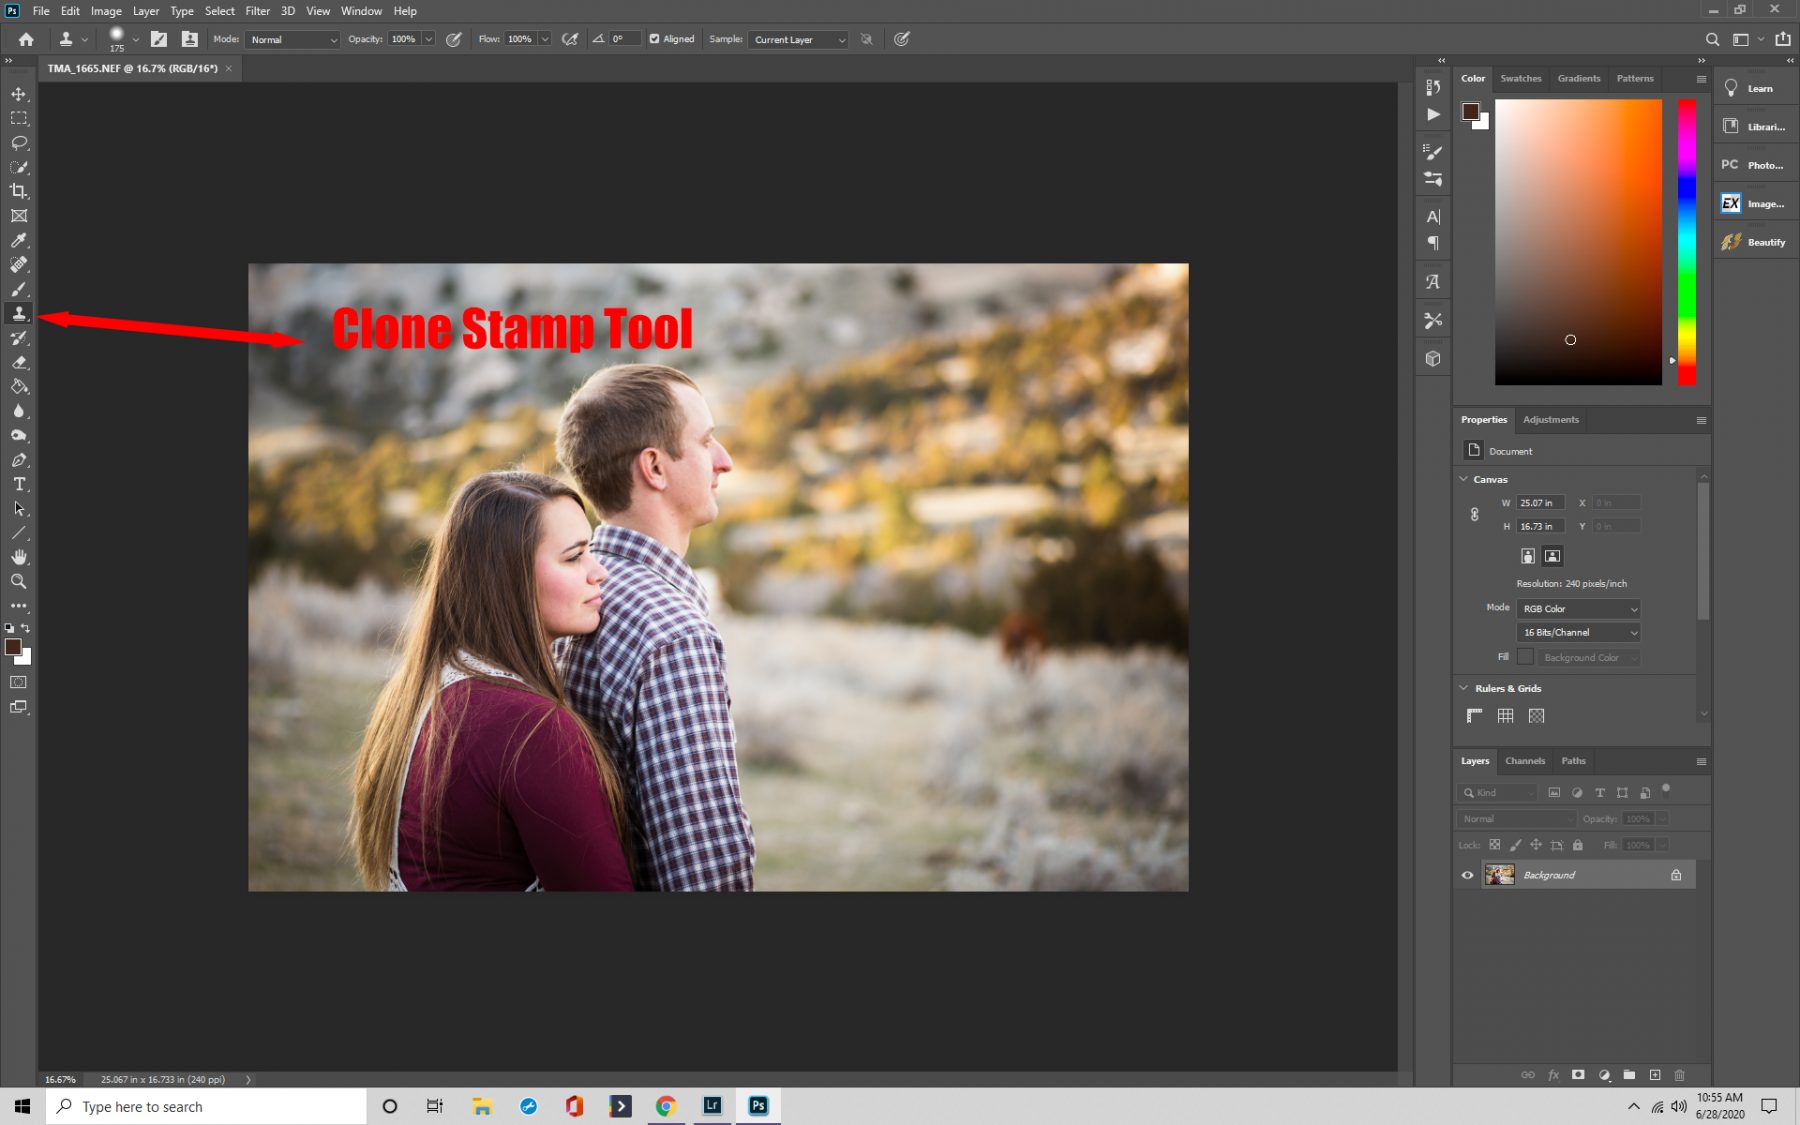
Cloning and Patching
When unwanted light shows up behind the subject of a photo, sometimes repair tools are the best way to get rid of it. Photoshop’s Clone Stamp Tool and Patch Tool are both designed to remove blemishes such as flares from a final piece using a new layer.
When using Clone Stamp Tool, you essentially paint over imperfections using a single source color. You can copy this from a nearby point on the picture so that you get a seamless looking fill. Using the clone stamp tool, it often helps to zoom in and out as you work to ensure that your source colors mesh naturally with the tones around them.
The Patch Tool works similarly to the Clone Stamp tool, allowing you to cover up imperfections. However, instead of using a brush, Patching works when you make a selection. You can move or delete the area, and Photoshop uses the surrounding pixels to replace it with a seamless background.

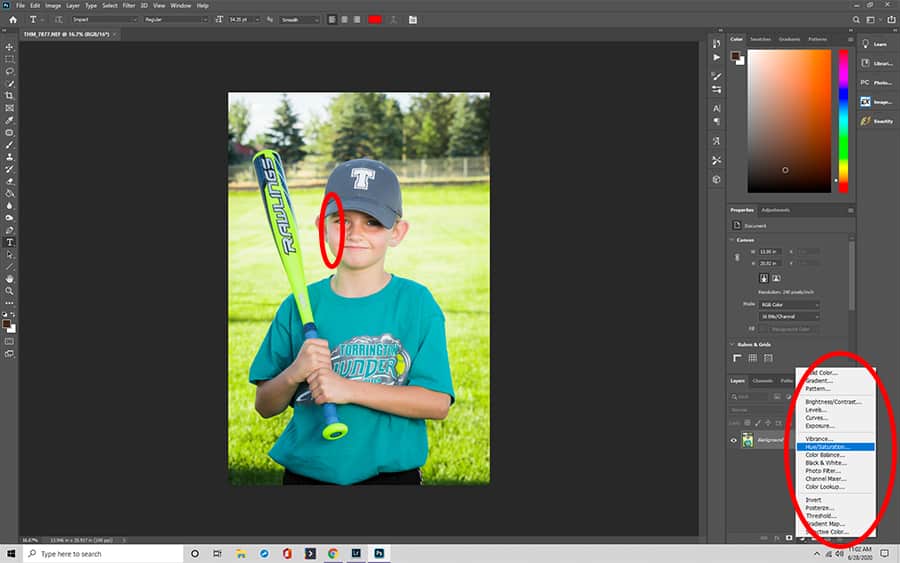
Place an Adjustment Layer on Top
Sometimes, lens flare has a color. Light spots often show up as bright green in photographs and can ruin the overall color scheme. One of the best ways to eliminate tinted spots is by using an Adjustment Layer.
You can find the Adjustment Layer option at the bottom of the Layers Panel. There, navigate to Hue and Saturation and click OK. Select spots of lens flare and drag the Lightedness Slider on the side panel to match the color of the glare to the background tone. You can also use the Black Mask and the Brush Tool to remove an area by hand.
Brush Over Bright Spots
One of the quickest and simplest ways to remove glare in Photoshop is by brushing over it. You can add a new color layer and clone a nearby sample to brush over it, or you can simply click the Brush Tool. It’s best to set the opacity to around 50% to ensure that you have a smooth, seamless transition.
Become the photographer of your dreams with Cole’s Classroom.
Dealing with Glasses Glare in Photoshop CC

Photo by Susan Duran
Glare is a common problem in photography with human subjects wearing glasses, as lights are prone to bouncing off the surface of the glass. With glasses Photoshop is often the best option. You can remove flares by entering the Camera Raw window. From here, you can adjust the brush size to paint over and select an unwanted area, then turn off the Overlay and Mask option.
Using the sliders on the side, you can make adjustments to bright spots until it matches the tone of the skin or eyes underneath. Adjusting the Dehaze Slider is often one of the most effective ways of reducing glass glare. The Spot Healing Brush can help soften sharp edges.
If you still see a flare, you can fine-tune photos using Clone Stamp. Create a new layer to preserve the original, and then use reference points from around the skin and eye to copy colors and get rid of bright spots. To cover up any seams, simply select around the inner rim of the glasses and slightly enlarge the image.
Advantages of Flash Glare

It’s not always necessary to remove glare from photographs. Sometimes, flashes and flares are an artistic choice that can make an image much more unique and memorable. Many nature photographers choose to leave flares in their work, including the sun’s rays. It adds a warm, almost ethereal feel to photographs that often invokes an emotional response.
SPECIAL OFFER – Discover the secret to adding “wow factor” & retouching your photos, without having to use Photoshop, in only 3 clicks (…even if you’re brand new to editing your photos – guaranteed!)
Join the 54,000 other photographers using our Polished Lightroom Adjustment Brushes Presets Collection and get them here for 80% off!

Additional Questions
Here are some additional tips for removing glare from your photos.
- How do you remove glare in Photoshop Elements?
Removing the glare from glasses for Photoshop Elements users is made to be simple. Photoshop Elements is a bare-bones, user-friendly version of Photoshop. While it doesn’t offer all of the same features, Photoshop Elements has many of the tools that you need to eliminate glare. You can use Clone Stamp to color over bright spots, and the Smudge Tool to smooth edges.
- How do you remove glare from glasses without Photoshop?
If you don’t want to have to edit your photos, you can take steps to prevent glare in the first place. You can adjust the position of the camera or the glasses themselves, or you can add shade around the subject’s head. Some glasses also come with anti-reflective coating.
Ready to Learn More?
Join Cole’s Classroom today to unlock everything you need to become a pro photographer.