
Using Photoshop to add borders to your photo is faster and easier than you think. Plus, there are several Photoshop borders to choose from, so you can add custom flair! Read on to learn how to add a border using Photoshop.
How to Create a Solid Border
Sometimes it’s best to choose a solid color border. Whether you want to stick with classic white or choose a color that sets off elements of your image, a border can add a lot to a photo.
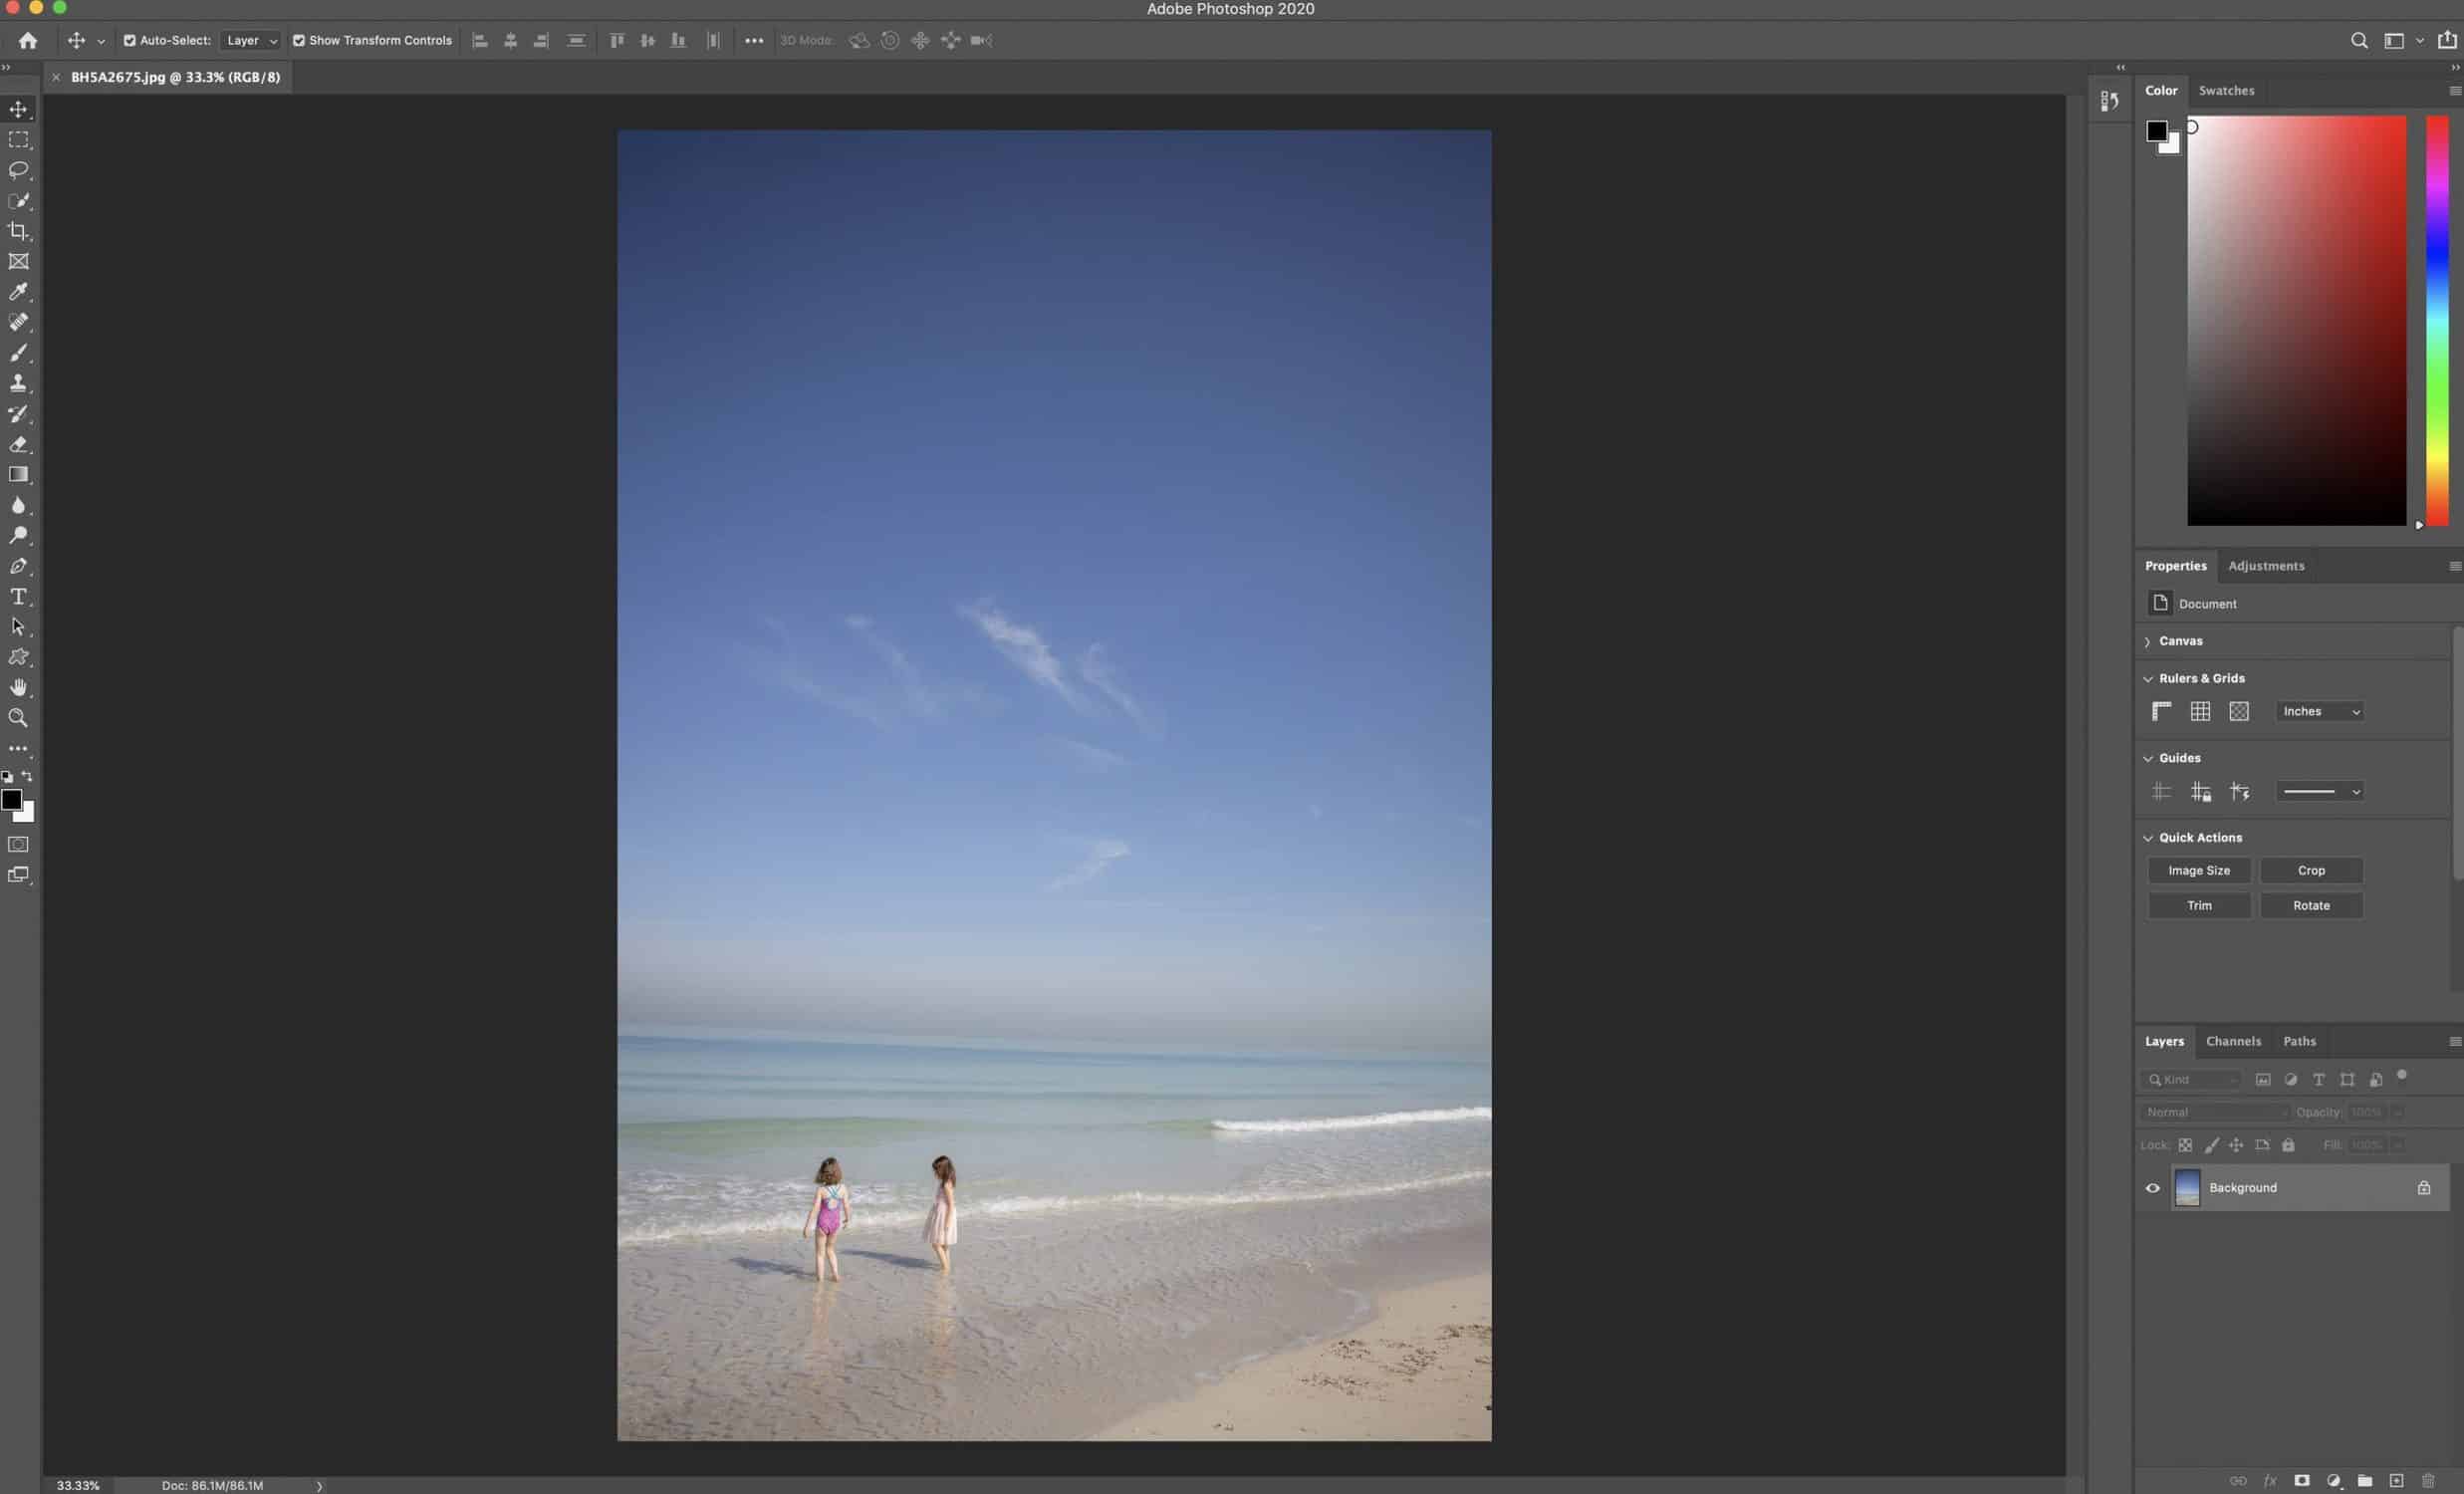
Step 1: Open Your Image in Photoshop
Before adding a border in Photoshop, make sure you do any photo editing you want for your photo. If no editing is necessary, head to step three.
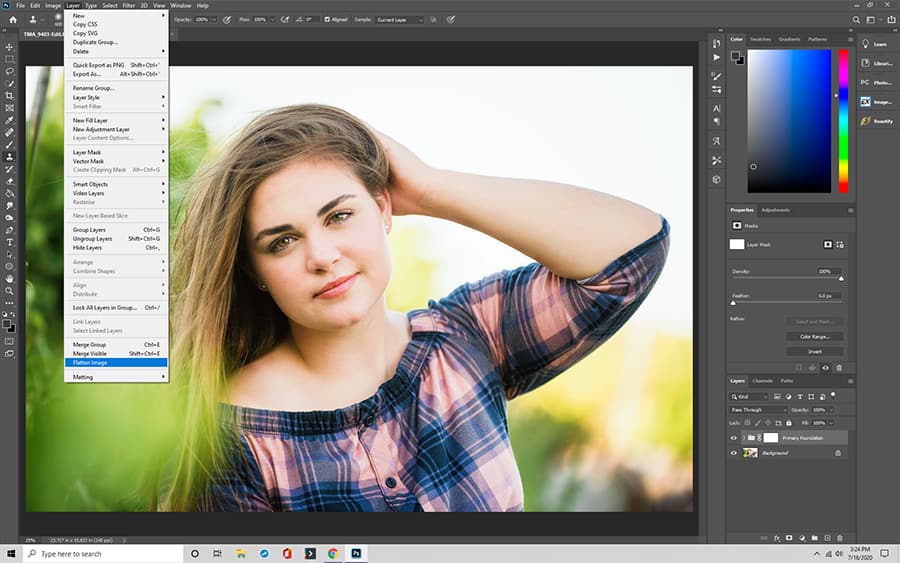
Step 2: Flatten the Edited Image
If you edited your photo, your file has different layers, so you need to merge, or flatten them. Go to the Layers Panel (bottom right side) and click on it. When the menu appears, you want to choose “Flatten Image.”
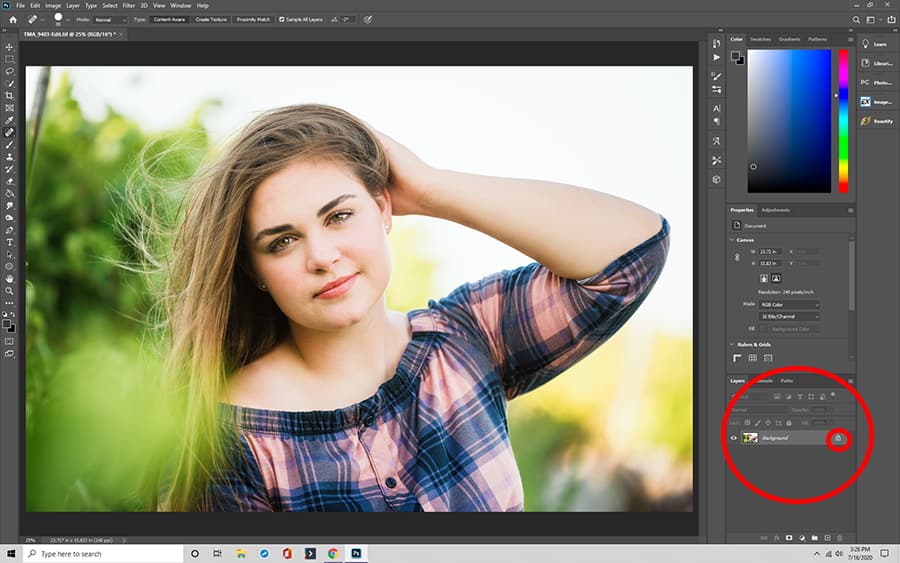
Step 3: Unlock the Image Layer
To add a border, you may need to unlock the layer of your photo. If needed, do this through the Layers Panel.
Click on Layers Panel (bottom right side) and search for your photo. A small padlock should appear next to the photo. Click on the padlock.
Once you select the image layer, it should appear as Layer 0, but you can rename it.
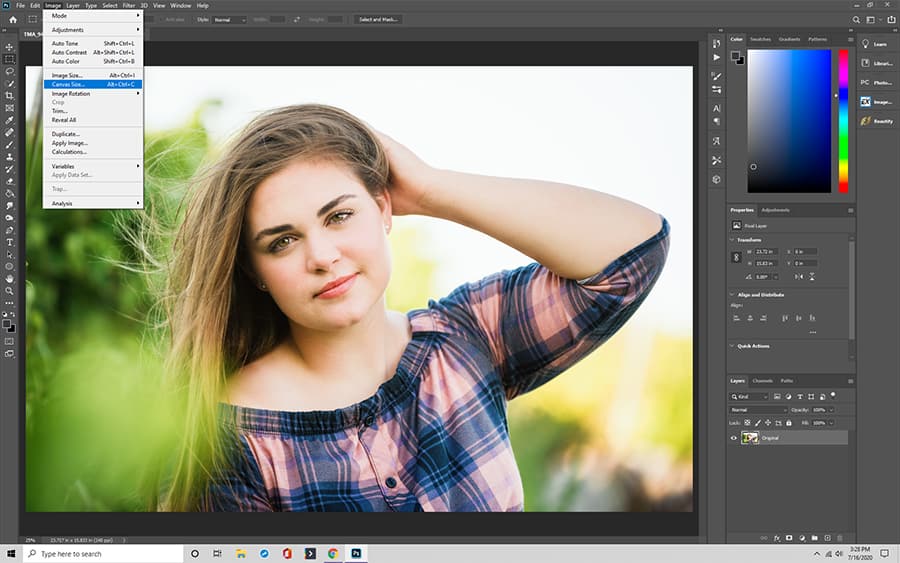
Step 4: Adjust Your Image Canvas Size to Accommodate A Border
Now you need to make room for the border. Go to Image (at the top of the toolbar) and click on Canvas Size in the drop-down menu.
Step 5: Fill Out the Dialog Box Properly
A “Canvas Size” dialog box should appear. There are a few important steps to take here but begin by selecting “Relative.”
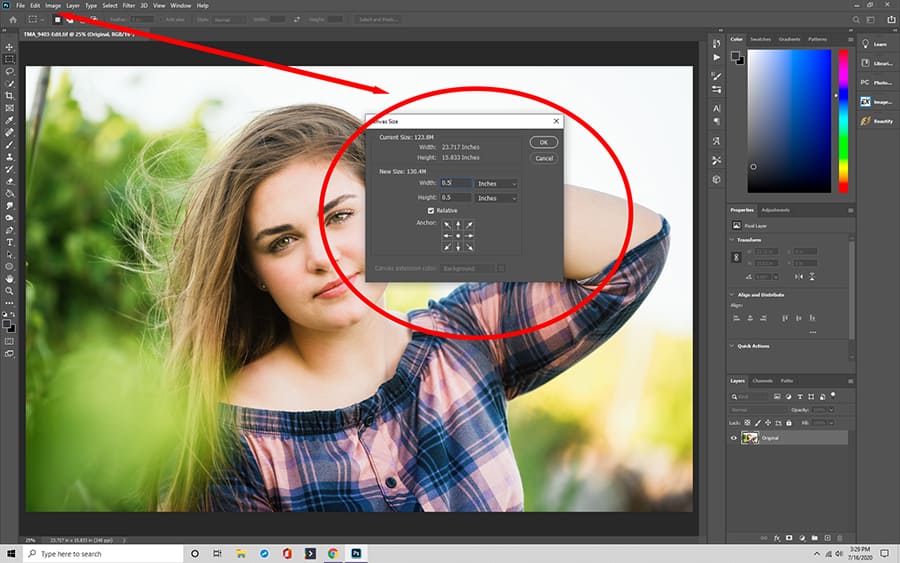
Step 6: Choose Your Border Dimensions
The next thing to set up in the Canvas Size dialog box is the width of your border. Generally, one or two inches works best, but you can adjust your image canvas size to find the best fit.
Step 7: Pick a Border Color
After adjusting the canvas size, you want to choose the border color. At the bottom of the Canvas Size dialog box is “Canvas extension color” beside a drop-down box with color options. Click on your desired color.
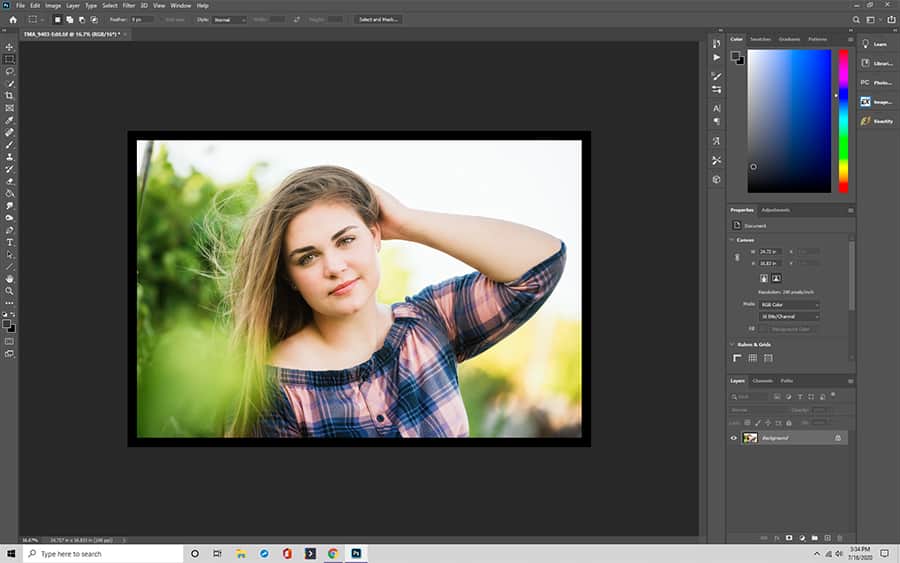
Step 8: Click Ok
Click Ok at the top right of the dialog box to accept the changes and admire your border. Don’t forget to save your image after you click ok!
How to Create a Custom Photoshop Border
Are you bored by a solid-colored border? If you want to step it up a notch, try a custom border in Photoshop.
Step 1: Open the Image in Photoshop
As always, start by opening your photo in Adobe Photoshop. Start with a simple background layer. If you like your image as is, proceed to step two.
Step 1a: Edit Your Photo
Make sure you complete any photo editing you want to do to your image before adding a custom border. Repeat, the custom border should be the very last thing you do to an image!
Step 1b: Flatten the Edited Image
Don’t forget to flatten your layers. If you forgot how to do this, see step two in how to add a plain border.
Step 2: Create a “Solid” Layer
This is where the process of adding a border shifts slightly. You need to create a layer mask for your image to obscure parts of it without manipulating the photo any further.
Double click on the Adjustment Layer icon at the bottom part of the Layers Panel in Photoshop. A menu should appear in the Layers Panel with several choices.
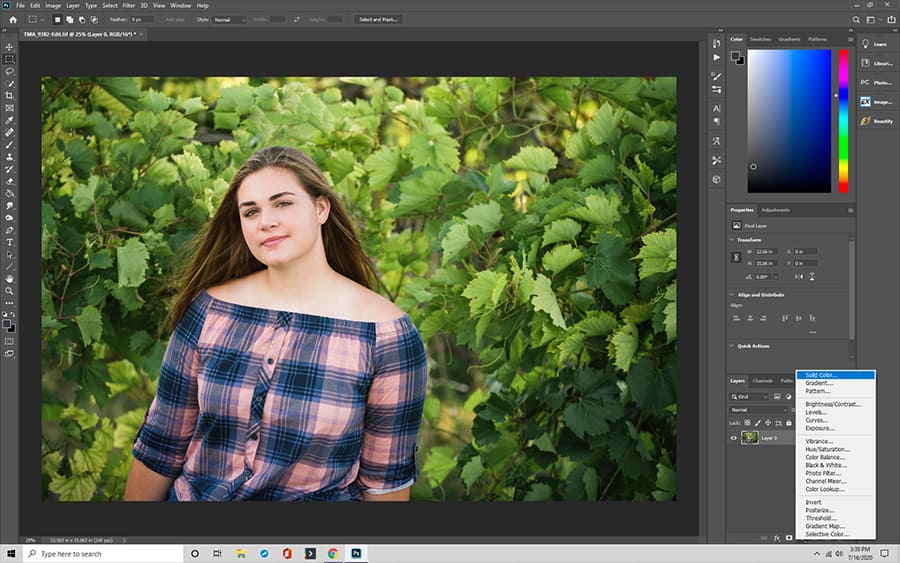
Step 3: Choose Your Border Color
From the Adjustment Layer menu at the Layers Panel, select Solid Color. Pick a color for your border layer. That color should apply to the entire fill layer.
Step 4: Invert the “Layer Mask”
Don’t panic because your entire image is a solid color! It’s just an image layer, and your photo is still there. Just double-click on the mask (color layer) and select Control +I or Command +I. Two things happen: your mask turns black, and you can see your image again.
Step 5: Choose a Brush to Paint Your Border
You’re not done customizing yet! Click on the brush tool via Photoshop’s brush icon. There are several brush choices, but you can always make your own.
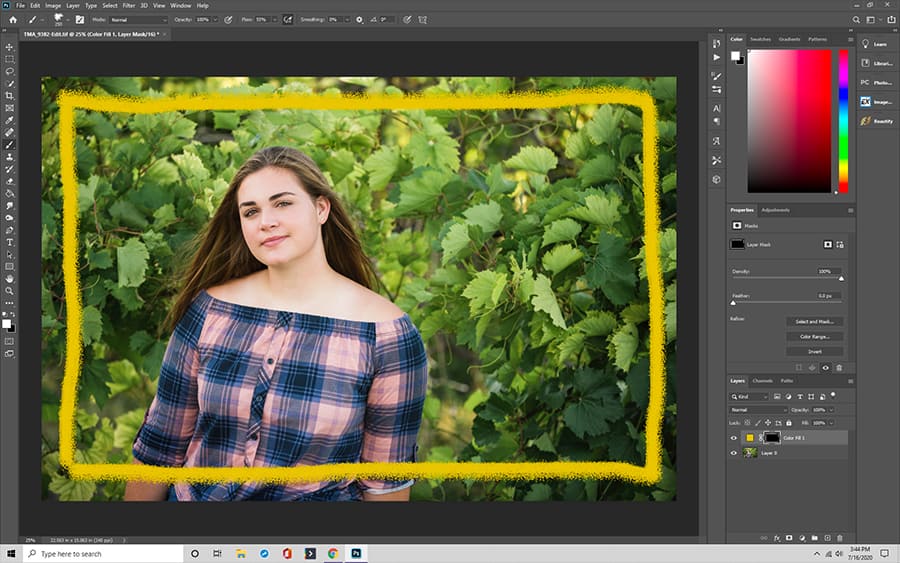
Step 6: Paint Your Border on the Image
Using the brush tool, paint over the image where you want to see a border. The brush stroke layer style initially looks white on the black mask, but when you see your photo, the border will be the solid color you chose.
When you’re satisfied with the look of your border, click save to preserve your changes.
Creating a Grunge Border in Photoshop
Grunge borders add a chic feel to any image. It’s a creative alternative that takes just a few steps to create a grunge border for Photoshop.
Step 1: Choose an Image of a Skyline
It doesn’t matter if the photo is urban or nature-based. Open the file in Photoshop.
Step 2: Prep Your Image to Create the Grunge Border
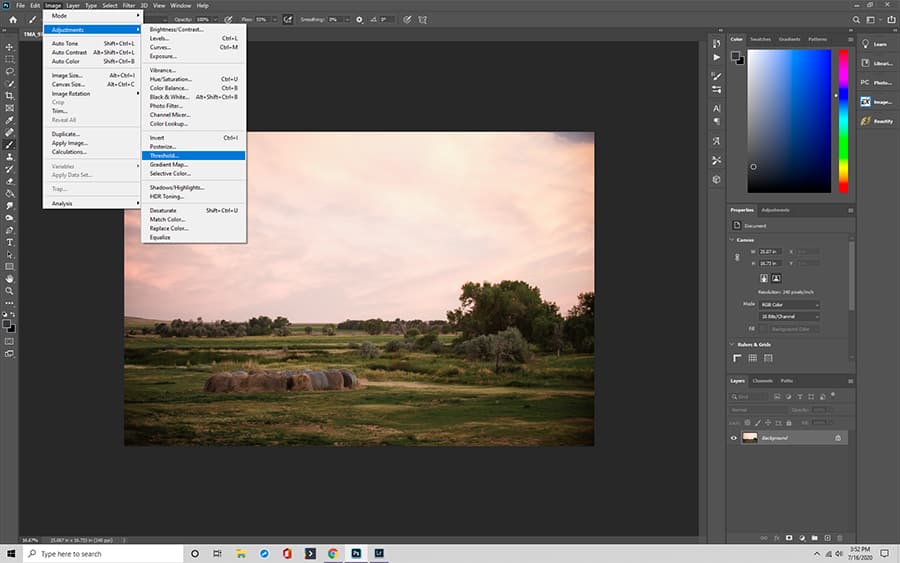
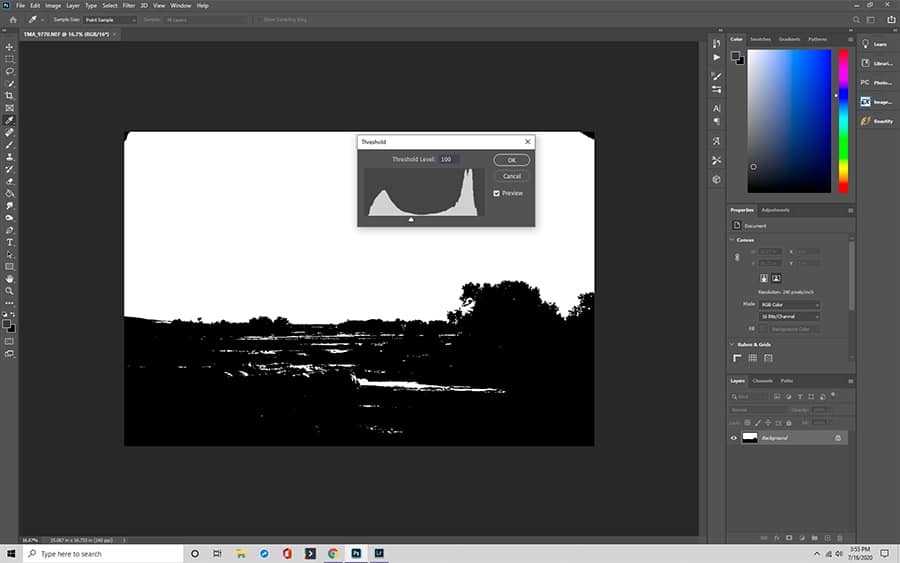
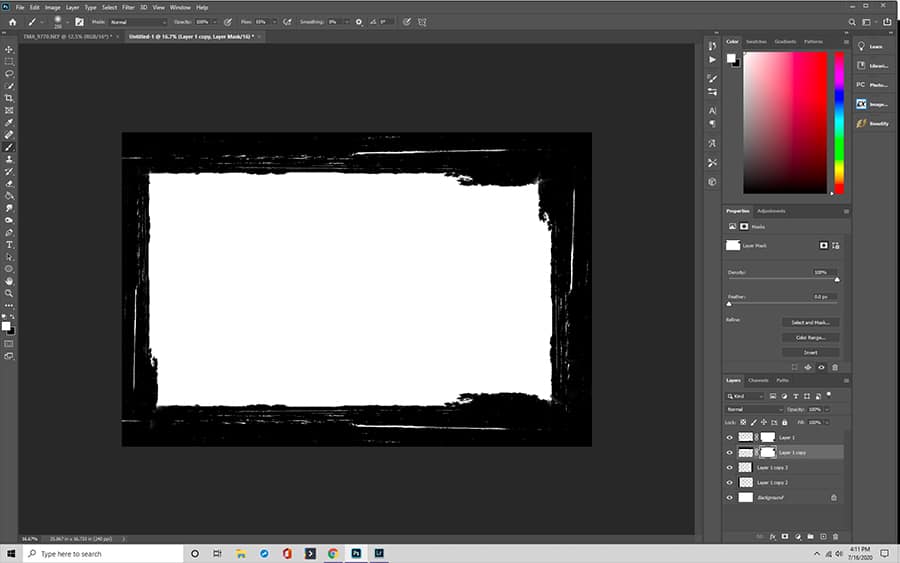
That’s right, you use the Skyline image to create the grunge border. On the top menu, click on Image and select Adjustments then Threshold. Set the threshold to a very high number to create a black and white image.
Step 3: Open a New Blank Canvas
Select the image (use Control/Command + A) and copy it (Control/Command + C). Paste the image (Control/Command + V) in a new blank canvas.
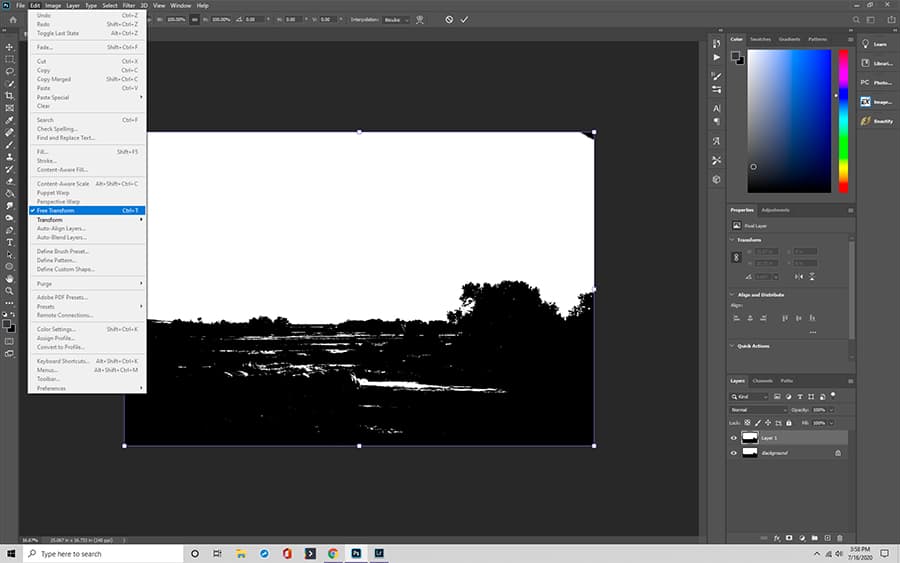
Step 4: Transform the Skyline Image
At the top menu, select Edit. Choose Free Transform from the menu and squeeze the entire black and white image to one of the edges. You have one edge of your Grunge Border.
Step 5: Duplicate the Skyline Image into More Layers
To create the other sides of the border you need to duplicate the layer. Go to the Layer panel and select duplicate layer to create three more sides.
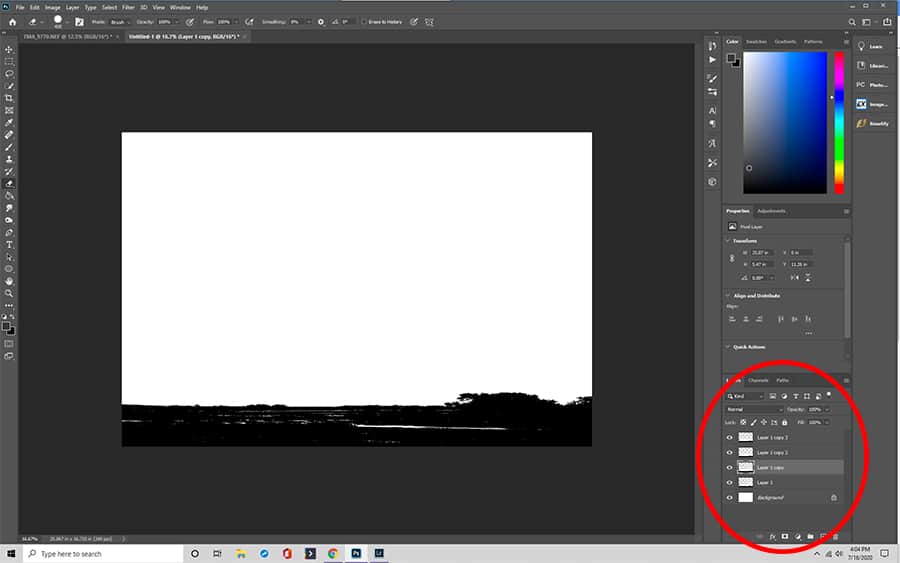
Step 6: Build Your Border
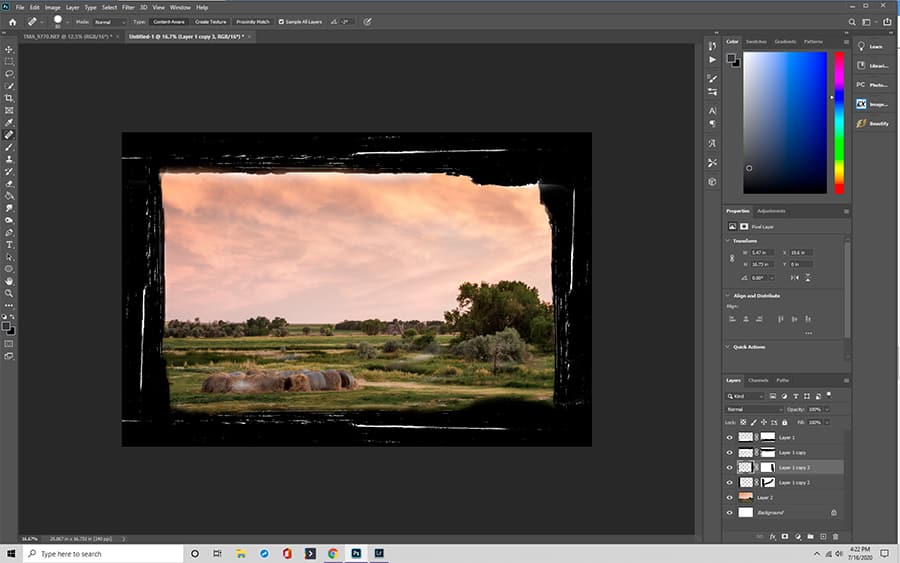
One at a time, select a fill layer and use the Transform menu to rotate and resize it to fit a side of the image. Repeat until you have a rectangular border.

Step 7: Blend the Layers
To create a true Grunge Border, you need to manipulate each side of the rectangle, so it doesn’t look uniform. In the Layer panel, select the Layer Style window and Blending Options after the layer style dialog box. Play around with each layer to create slightly different sides until you achieve the result you love!
Don’t forget to save your work!
How to Use Grunge Borders
Are you wondering how the image fits in with a grunge border? Don’t worry, we can help with that. Once you create grunge borders for Photoshop, you can apply them to any images you choose.
Open the border file. On the top menu, select File, then Place, then select your photo. Photoshop resizes and inserts your photo into the border file. You may have to make some minor manual adjustments by dragging the edges (hold down the shift key while using the Transform tool).
The Blending tools help you add additional effects through the Layer panel. Choose the Layer Style window and Blending Options to play around more.
How to Add a Border Using Photoshop Elements
Photoshop elements makes it easy to add a border to any photo. You can even choose the desired color and thickness for your Photoshop frame.
Step 1: Prepare the Image
Open your image in Photoshop Elements. Use the Select menu to choose “all” or try the keyboard shortcuts (Command-A for Macs and Control-A for PCs). It should select your entire photo with a frame of dashed lines.
Step 2: Open The “Stroke” Dialog Box
Click on the Edit menu. Choose “Stroke (Outline) Selection.” You have three sections in the dialog box, but we only need to worry about two – stroke and location.
Step 3: Set the Desired Stroke and Color
Step 4: Choose the “Location”
You have three location choices – Inside, Center, and Outside. It’s the relationship of your stroke to the selected image. You may want to play around with the options to determine which you prefer.
Step 5: Save the Changes
Once you select your stroke, solid color, and location, click ok.
Step 6: Deselect
You probably don’t want the dotted line around your picture, so you need to deselect the image. Use Command-D on Mac or Control-D on PC to get rid of the dotted line.
Optional Step 7: Alter the Border Size and/or Color
If you don’t love the border, you can still make changes via the “Edit” menu. Click on Revert and repeat steps one through three until you create a border you love.
Final Thoughts on Creating Borders in Photoshop
A Photoshop border allows anybody to add visual interest and a personal touch to any image. Even professional photographers use Photoshop to retouch images. The best part is that it’s not difficult for beginners, and the sky is the limit when it comes to customizing options.