
The warp tool in photoshop is a quick and easy way to make some small adjustments to your image using a simple click and drag method and a few control points. Adobe Photoshop is a powerful piece of software that allows you to transform an image for any use case, including adding rights reserved symbols to images.
Looking to improve your photography? Just enter any questions you have about improving your photography below and hit send and get answers & feedback instantly - for FREE! Submit QuestionsWhat is the Warp Tool in Photoshop?
The Photoshop warp command first appeared in Photoshop CS2 alongside the vanishing point tool. This new feature allows for any part of a picture to be carefully distorted or molded into a unique shape. These shapes include curls, bends, and other transformations that work with both realistic and more abstract images.
When You Should Use the Warp Tool
The warp command is often associated with commercial use and portrait work in some cases. The effect it creates can add emphasis to vital areas, which makes it perfect for marketing materials and general business use that features models or products.
This tool offers realistic looking adjustments without altering the entire photo, and the effect can be subtle or more dramatic to suit the needs of your image.
When to Warp Your Text
Shaping text to fit an image better can give a more cohesive look without requiring much extra time in post-processing. Curved text can also fit nicely on objects for commercial uses, and realistic logos or other slogans are examples of how the warp tool is useful for customizing generic pictures.
You Can Add New Elements to Images
The warp tool is useful when you want to add a shadow to an image that includes multiple stitched together components. Adding these casts or shadows can add to the realism of an image. The ability to soften the shadow in specific areas provides a higher level of detail with only a few steps.
Using Distortion and Duplicating Elements
It’s possible to use the clone feature on Photoshop to replicate a similar object and then apply the warp tool to make the new part look more uniform when compared to other parts of the image.
Portrait Retouching
Simple portrait retouching is another way the warp command is useful in both commercial and portrait applications. It’s possible to reshape necklines on clothing, flatten silhouettes and make other fine adjustments, so a picture looks more refined. While it is best to set up your subject for the best possible shot, many tiny details get overlooked, and the warp tool makes fixing these a quick process.
Is the Warp Tool for Photographers Useful?

Photo by Daisa TJ Licensed Under CC0
The level of usefulness that you gain from the warp tool in Photoshop will depend on the type of photography that you do, and how much you edit your photos after taking them. Post-processing images can take time, and using the warp tool is a quick way to add some style; however, getting the best possible picture without much editing should still be the goal.
Warping Images Using the Enhanced Warp Tool: Photoshop CC 2020
Photoshop CC 2020 has a default set of warp controls, but using the warp tool in Photoshop 2019 is a very similar process and will use a familiar options bar, control points, and layers. Before attempting to use the warp tool, make sure that your version of Adobe Photoshop is up to date as the warp within Photoshop 2019 works slightly differently.

Photo by Sarah Trummer Licensed Under CC0
Locating the Warp Command
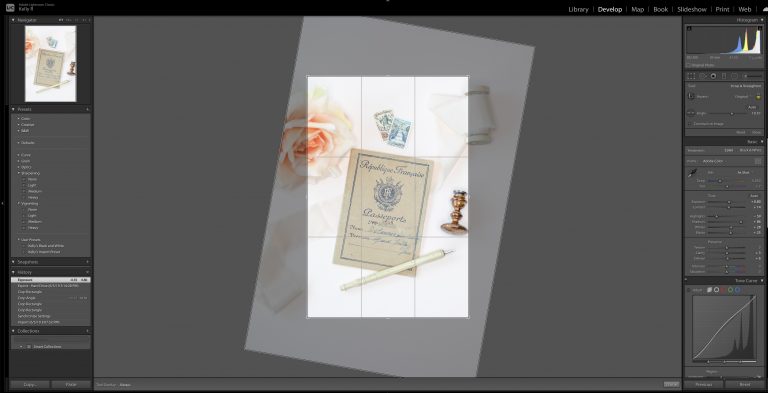
To warp in Photoshop, you’ll want to access the Photoshop warp function by clicking on “Edit” at the top and then select “Transform.” You’ll then choose “Warp,” and a grid will appear over the selected part of your image or the entire image. You can then click and drag to warp the image or use the point at each corner to create a more dramatic warp.
Layers and Smart Objects
Before you work with the warp in photoshop, it’s a good idea to convert your active layer into a smart object using the options bar. If you decide to warp a layer of normal pixels, you can expect the changes to be permanent. Smart objects allow users to transform warp adjustments as needed or undo the entire warp and revert to the first shape without losing image quality.
Photoshop CC 2020 and Default Warp Controls
The warp command in Photoshop CC 2020 has expanded to include grid presets and grid sizes that you can customize for your use. Users also have the option to add a control point where there are needed around a shape and create grid lines within an image layer to help edit, transform, or click and drag in specific ways.

Photo by Silver Works Licensed Under CC0
How to Use the Default Warp Controls
When you utilize the warp function, a default box appears around the contents in the layers. The warp command allows you to:
- Edit, transform and warp this selection to alter the shape within the layer
- When you edit, transform, warp, or otherwise adjust the image, you can select the default controls, utilize a grid as a guideline, or simply move one point around to see what happens.
- Control handles appear that can further enhance the warp
Warp Grid Presets for Increased Control
For more control, you can utilize the free transform tool to option or set up a grid that provides a set number of points to warp your picture in that layer further. To choose the free transform grid, you’ll change the grid option on the options bar from “Default” to one of the numbered options.

Photo by Caio Resende Licensed Under CC0
Using Control Handles
Pulling a control handle further enhances a warp and allows for more subtle changes without impacting other parts of the picture. This feature works on an individual layer in your image, but you can create additional layers as needed.
Warp a Grid Line
Warping a grid line between two control points is another option for intensifying the warp in your image layer. This action will bend the line between two points to create a new shape.
Dragging a Control Point
To drag a control point, you’ll first click and then move the point around as needed. These control points allow you to transform your image a little or more dramatically and are useful with or without the grid.
Rotate Selected Points
Rotating the selected points is easy, and you can move your cursor outside of the box, click on the corner of the box, and move your cursor until a rotate icon appears. You can then move the cursor around to see how the warp changes your subject.
How to Warp Multiple Control Points
In Adobe Photoshop CC 2020, you can also warp more than one point at any given time, and to do this, you’ll press the Shift key and hold it while you click on the points you want to adjust.
If you select a location by mistake, click on it again to deselect without releasing the Shift key. To move these control points, you can click and drag them inside the box that appears when you choose multiple control points at once.

Photo by Designecologist Licensed Under CC0
How to Deselect Multiple Points
When you are ready to deselect multiple points, you click outside of the warp box you have created.
Selected Points Scaling
Scaling the points you have selected requires that you click on the corner of the box and drag it until the warp is the way you like it.
Rotate Control Points
To turn a control point, click and drag the control handle in a clockwise direction or counterclockwise direction to further exaggerate the warp. This action can work on more than one control point.

Photo by Godisable Jacob Licensed Under CC0
Custom Warp Grid Explained
Using the options bar, you can set the grid to “Custom” and then set a specific number of columns and rows for the grid on your active layer.
How to Add Warp Grid Lines
You can add your own grid lines by using the options bar and a selection called “Split,” where three icons offer a different way to organize your grid. Once you have chosen your grid type, you can click on the picture to decide where to place the lines, and a control point shows where you clicked.
Adding Grid Lines Faster
A faster way to add these lines is to press and hold the ALT key on a windows machine, or the “Option” button on a Mac and then click where you want the lines. Photoshop will choose the best split option for you based on the location you clicked.
How to Delete a Customized Grid Line
To delete a grid line you have placed, select it and then right-click or Control-click on “Remove Warp Split’ from the warp menu.
Accepting the Warp
To accept a warp, click on the checkmark located on the options bar. To cancel the warp, you can also click on the cancel button.

Photo by Nathan Salt Licensed Under CC0
The Puppet Tool, or Liquify Filter, and the Warp Command? Are They The Same?
The puppet warp Photoshop tool and liquify filter in photoshop work differently than warp command and will yield different results. The puppet warp Photoshop tool offers natural transformations, and the liquify tool makes an object appear as if it is melting. These alterations are different from the warp tool but may be used to create different effects when the warp command isn’t sufficient when used alone.
Final Thoughts
There aren’t many warp tool shortcuts to know when using the warp tool in photoshop, and you can employ this function in Photoshop Elements as well where it’s useful for cleaning up edges and reshaping specific objects. Keyboard shortcuts may help speed up the process of using these options and will vary between windows and Mac machines.
Perspective warp is a similar function to warp within Photoshop but features options to edit, transform, warp on straight lines and other flat surfaces such as buildings, architectural pictures, and other images even when a rights reserved symbol is present.