Even though you may not have heard of the Brenizer method, you’ve definitely seen it. Just think of the photographs you’ve admired with beautifully expansive backgrounds and clear focused subjects. Most likely, these impossibly panoramic photos are products of the Brenizer method, an advanced and highly technical photographic technique.
Looking to improve your photography? Just enter any questions you have about improving your photography below and hit send and get answers & feedback instantly - for FREE! Submit QuestionsKeep reading to learn more about how you can perfect this method in your next photo series.
Invented By a Wedding Photographer: The Brenizer Method
Developed by wedding photographer Ryan Brenizer, the Brenizer method is the process of taking many photos and stitching the images together during editing to create a sweeping panoramic image. You cannot produce these kinds of photographs with a single wide angle lens alone. Instead, you need several images to sew together into one composition.
Images shot using this method usually have a bokeh background, which isolates the subject and brings it into clearer focus. Other hallmarks of this method are shallow depth of field and a wide angle portrait.
You may also hear this method referred to as bokeh panorama or bokehrama.
The Highlights of the Brenizer Method
Even though it takes more time to shoot an image using this method, the effect on your final images is undoubtedly worth the extra effort. Here are just a few of the advantages you can expect with the Brenizer method:

- High resolution, for excellent detail, clarity, and a large format file size
- Shallow depth of field makes your subject the focus of the photo
- Well-executed bokeh provides a soft and creamy background that is pleasing to the eye
- Wide angle view for greater field of view, context and added foreground interest
- Creates images that are usually only achieved with expensive and complex equipment
- Produces photographs larger than the dimensions of the frame
Now that you know what to look forward to with your Brenizer effect creation check out some advice for nailing the technique.
Planning the Perfect Brenizer Shot
To adequately utilize the Brenizer method, you need the right background, subject, and equipment.
Pay Attention to the Background
Backgrounds that have layers are best suited to the shallow depth of field of this technique because they add visual interest to the image. You should consider the shallow depth of field, the level of detail in the background, and the distance between the background and the subject.
For example, if there is less space present between the subject and the background, there will be less bokeh effect.
Working with Your Subject
The ideal subject will fit into one frame, especially if you are a beginner to the Brenizer method. If you are using a moving subject, they may want to pick a pose that is comfortable to hold for up to 30 seconds.
Ryan Brenizer popularized this method in wedding portraiture, but if you are new to it, you might be better off with a still life, which is much simpler to set up and move around. You may need to experiment with different placements and angles before you hit upon the contrast you want between your subject and background.
Required Equipment
As for equipment, you will need to use a fast aperture lens of at least 50mm. If you use a lens wider than 50mm, you may have trouble stitching the images together in editing due to distorted edges that line up unevenly. A few examples of lenses used in this method are a 50mm prime lens open at f/1.2, f/1.4, or f/1.8, and an 85mm lens at f/1.4.
You can also achieve the Brenizer look with an f/2 lens, and typically a lens with an opening of f/2.8 or wider is considered fast and would work for this method of photography. An f/1 lens is unusual, rare, and challenging to use, so it is best not to go wider than an f/1.2 lens.
For post-production, the Brenizer method requires high-quality editing and photoshop software for putting the final image together.

Step 1: Carefully Selecting Your Settings
Shooting with the Brenizer method takes time, though you can make things easier for yourself with thorough set-up, a crucial component to acing this advanced technique.
Setting Your Aperture
Depending on the lens you are using, you should set the aperture to as wide as it can go. Ideally, it will fall in the f/2.8 to f/1.2 range, though you can always try an aperture like f/3.5, which should be capable. F/1.4 is a popular and suitable lens aperture. Generally, the wider the aperture, the better the effect when using the Brenizer technique.
Avoid Auto White Balance
White balance is color temperature measured in degrees Kelvin. Adjusting white balance will help you get the colors you want in your photos. For this method, ideally, you should choose to manually set the white balance for an image using Kelvin temperature, although any setting other than auto will work fine.
Auto white balance does not fit with this method because it may change the color temperature from frame to frame. Since you are taking several shots of the same area and combining them later, you want the colors to be uniform, making a seamless final image.
Use a Focal Length of 50mm or More
Your focal length should remain the same throughout your shoot because you want the final picture to look like one composition in the end. A prime lens is an excellent choice for the Brenizer method since it maintains a fixed focal length. Usually, a focal length of 50mm or longer lens will achieve the right effect.
If you are not using a prime lens, make sure to keep your lens steady and gently hold it in place if needed.
Focus on Your Subject
It is essential to this method that you focus on your subject and then change that setting to manual. You don’t need to adjust your focus again until you are finished. Your final image would not look seamless if the focus changed in each shot.
Taking Your Series of Pictures
Now, it’s time for the fun to start. While it may seem overwhelming to capture so many shots for one final product, keeping the process organized helps simplify it. Plus, once you get the hang of it, you’ll begin to enjoy taking all of these various pieces and bringing the images together for one beautiful picture.

Step 1: Organize Your Layout Before You Take Many Photos
Shooting in an organized layout helps the individual pictures fit together better in the photoshop software. Moving left to right, so it looks like the way you read a book, is the best option for shooting in this method. Resist the temptation to shoot out of order since doing that may confuse the editing program and result in blank spaces or extra shots.
Step 2: Do a Trial Run with Your Smartphone Camera
Once you have selected your background and have your subject set up, think about what you want your final image to look like. Do you want it to be vertical or horizontal? Or maybe you prefer a vast panorama? After you decide the shape of the stitched-together image, you should be careful you have enough photos to crop to that alignment.
A smart trick is to use your smartphone’s panorama mode to take a trial image. This photo shows you where the edges of your image will be and may even assist you in setting up the picture exactly as you want it.
Once you begin shooting, refer back to the trial photo to make sure you are shooting beyond the edges of the image to prevent gaps in the final product.
Step 3: Take Time to Set Up Your Camera
As described in detail above, make sure you set a wide angle lens aperture as wide as possible, your white balance is not on auto, your focal length is uniform across all of your photos, and your focus is on manual, not autofocus.
Keep in mind while you are setting up your camera that you want to position yourself correctly, as well. You should be stationary for each series of photos that you take. If you move around between shots, your final image will look choppy and uneven. You can use a tripod to stay still, which is helpful if you are new to this method.
Step 4: Learning How To Overlap Your Images
Here comes the tricky part. Now that you have thought about shooting in an organized way and have set everything up, you can start shooting. Start by taking multiple shots of your subject, making sure that you focused correctly. Next, take your first shot in the upper left-hand corner of the first image.
Then, as you move along left to right, try to overlap each shot by one-third. You can even overlap by more than one-third if that suits you better. Some photographers will even overlap by one-half. Overlapping is critical because it allows the software to figure out where each picture belongs when it puts the image together.
As you shoot your series, remember that it’s always better to take more photos than you need. Most photographers will take anywhere from 20 to 50 images when using this method.
You also may want to shoot more than one set of images. You can try a new background, adjust the distance between your subject and background, or move the subject to a different area of the frame. These changes help you learn and show you how the bokeh in the background can change depending on the placement of your subject.
Step 5: Selecting the Best Images for Your Brenizer Shot
Now it is time to begin editing, a lengthy and critical step in the Brenizer technique. Upload your photos into your editing software, Lightroom, Adobe Camera Raw, and Photomerge in Photoshop all work well.
If you shot multiple sets, you can check to see which images came out the best or has the sharpest focus before you begin serious editing and stitch together. Examine the pictures of your subject to determine which set holds the most promise for a seamless Brenizer image.
Step 6: Batch Edit Your Set
Once you have chosen the set you are going to use, you can begin batch editing. Choose a shot of the subject and adjust the light, exposure, contrast, saturation, and whatever other settings you need. After it looks like the image you pictured in your mind while shooting, you need to sync the rest of the photos from that set with those editing settings.
Step 7: Merge or Stitch To Perfect the Method
If the editing software you are using can also stitch together your images, then you can move onto the next step. However, you may need to export the images to photoshop software if your editing software does not stitch.
Depending on the program you are using, the steps to merging your photos will be slightly different. For example, in Photoshop, you can select File, Automate, Photomerge. Then, keep the default settings and click “OK.”
To use Lightroom, select all of the photos you are merging and press Ctrl+M for the Panorama Merge Review window. Check out the three projection options, paying close attention to what your subject looks like. You may need to adjust Boundary Warp and Auto Crop to get the final image you want.
Brenizer method photoshop relies on the software to make a cohesive whole out of a bunch of pieces, almost like a puzzle. Possessing an in-depth knowledge of your computer software can make or break your composition.
Processing Your Images
Computer processing of the image can take up to ten minutes or even longer, depending on file size, resolution, and the number of images. If each image appeared in an organized layout, it should fit together beautifully with only some final cropping left to do.
However, if there were issues with the shoot, you may receive a message informing you that there are not enough photos to merge. There was probably too little overlapping in the images or possibly gaps between one frame and the next.
Common Mistakes When Using the Brenizer Method
Any number of errors can occur during the editing of a Brenizer photograph. One example is a lack of detail or contrast in an area of the photo.
When this issue happens, you may need to utilize other editing tools, such as cloning and stamping, to make sure you create a seamless photo. Sometimes, you may even have to stitch parts of the images together manually.
Perhaps the problem transpired during the shoot. You may have gone out of order or missed the final shot in the corner. In these cases, you can attempt to use editing tools to correct small mistakes, or you may opt to reshoot the series and try again.
There are various types of merging and stitching software available, and each one will most likely give a slightly different result with the same images. It is helpful to experiment with different software to find one you like.
A Look at Some Brenizer Effect Examples
It can be challenging to visualize a Brenizer method photograph when discussing the technical expertise needed to capture one. Let’s take a look at a few examples of the method in action so you can see what a finished image looks like.
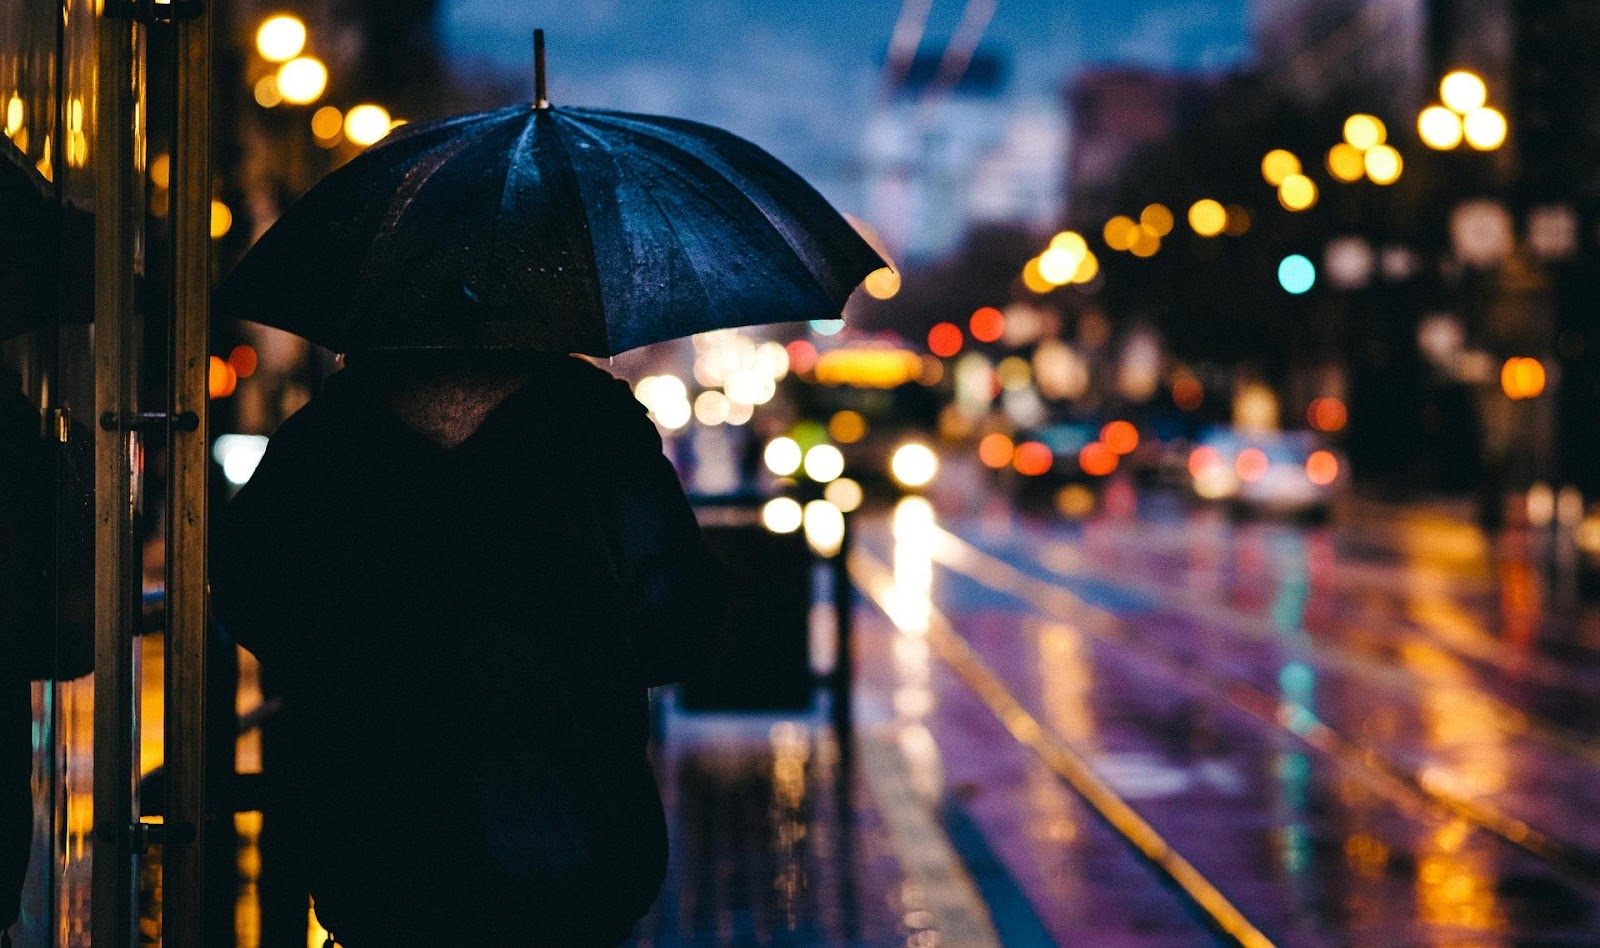
Photo courtesy Pixabay.com
This photo is an excellent example of using the Brenizer method. The subject, the man and his umbrella, is in sharp focus while the background has a high-quality bokeh effect. The streetlights and car lights are particularly well blurred, creating a soft backdrop. This image also has an even look with fine lines and unified stitching.
This photo also has a balanced depth of field between the subject and background, which helps with the blur effect.
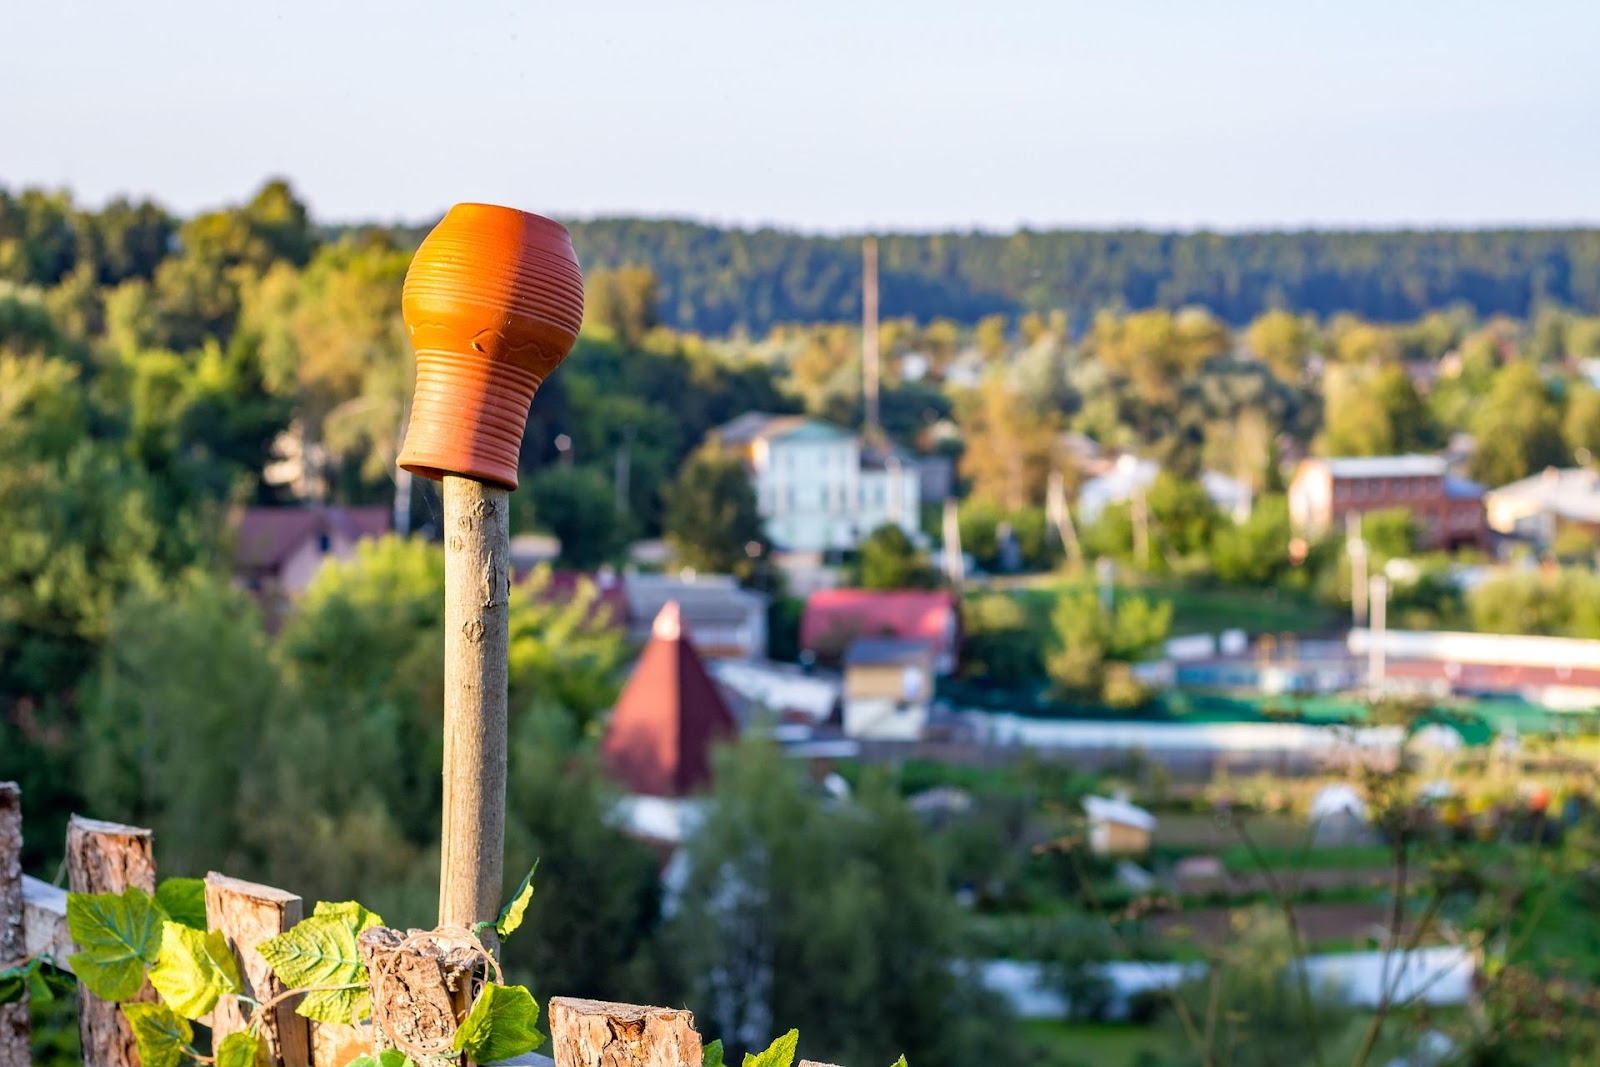
Photo courtesy Pixabay.com
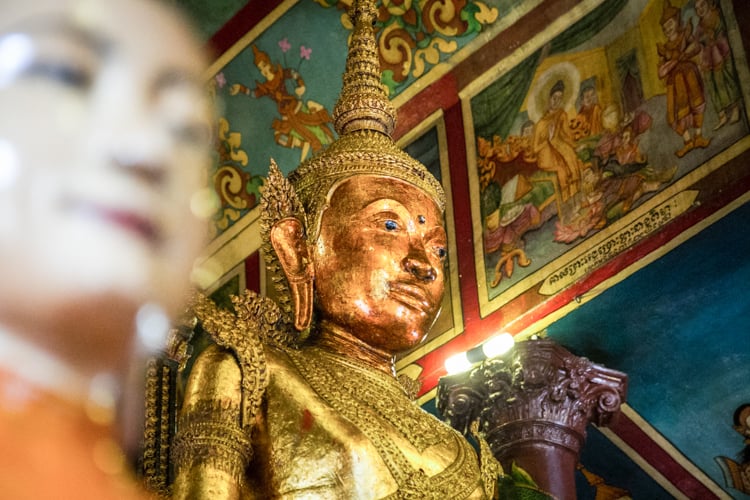
This photo is a neat example of a still life done using the Brenizer method. You can see the panorama with excellent blurred bokeh effect setting off the subject, the wooden stick with the orange vase on top.
This photographer captured a sharp contrast between the foreground and background, which embodies the creaminess of bokeh. The image stitched together seamlessly, and the colors are attractive.