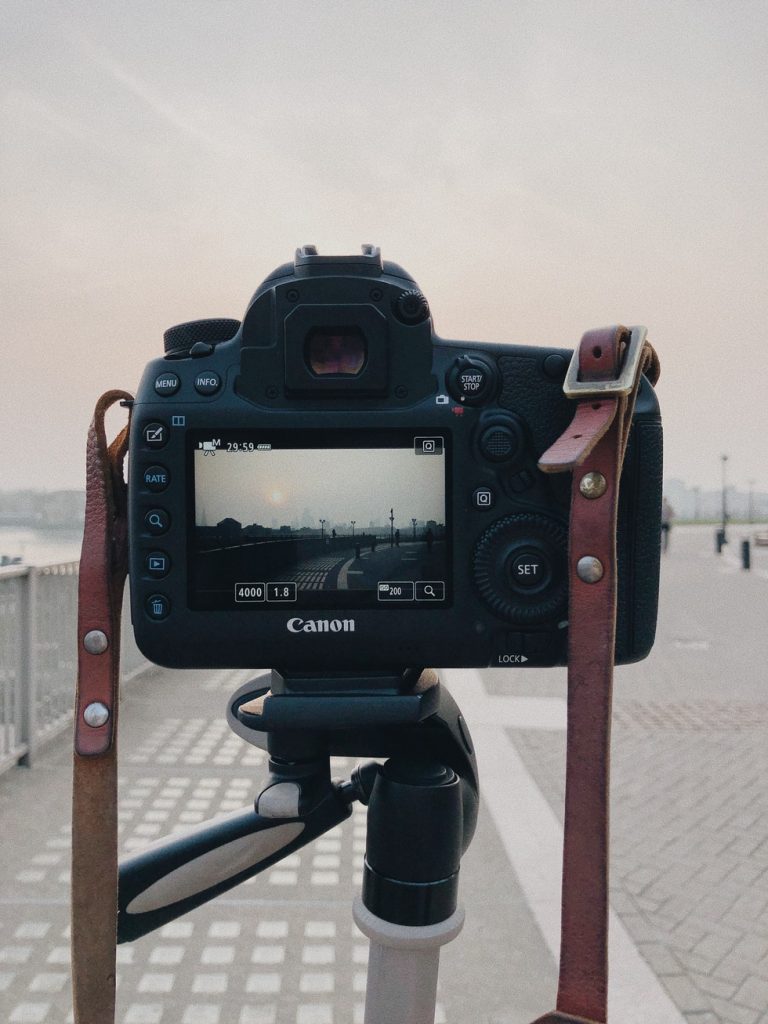

Get to know your camera’s BFF from inside to out with our guide to lens basics!
If you’re new to photography or just have a new lens, you might not know what all the bits and pieces of your lens are there for. We’ll help you identify what this switch does, decode those lens numbers and letters, explain what that ring controls and how to turn on manual focus. Learn your lens basics and start photographing with confidence!

Lens Basics – Exterior Elements
So what do all those numbers your lens mean? Let’s start learning lens basics by identifying the parts of the lens you see on the outside.
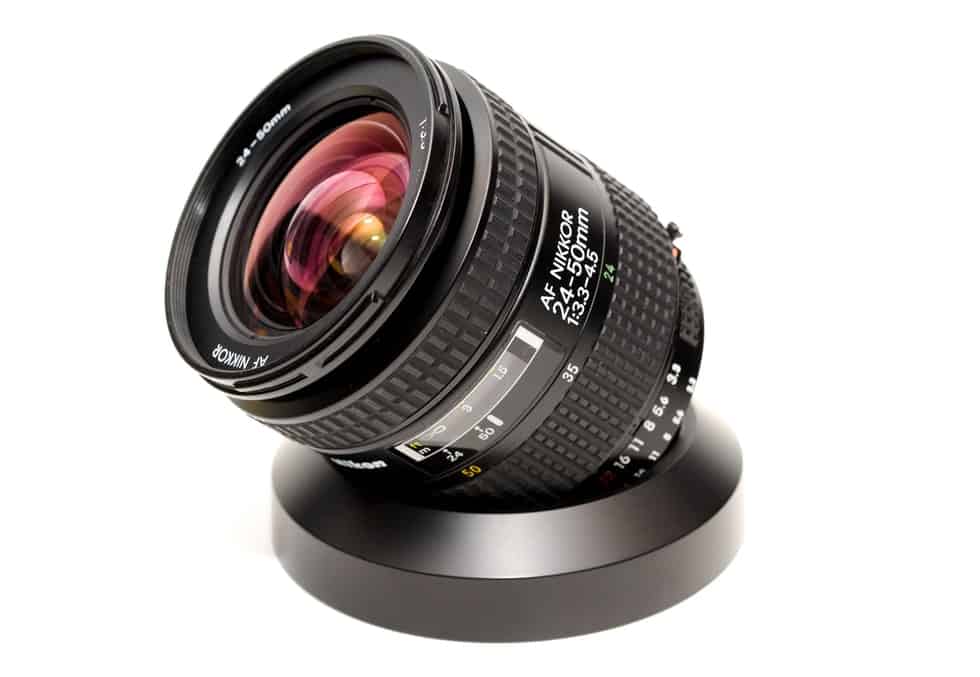
#1 – Filter Thread
At the very front of your lens is the filter thread. That’s where you lens cap snaps into place and where you’ll screw on a lens filter. What’s a lens filter? Filters are pieces of glass that either protect the lens or change the light coming into the lens in some way. Some lens filters block light, while others change the temperature. Read our guide to lens filters here!
The size filter your lens needs is written on the lens itself. It usually looks something like “Ø 77 mm.”
#2 – Front Lens Element
The front lens element is just one of several glass elements of your lens. All the elements work together to focus light, and thus your image, onto your sensor for recording.
Keep the lens elements protected and clean. Smudges, spots or scratches can affect your images and the value of your lens. Keep your lens cap on the lens when the lens isn’t in use.
#3 – Lens hood thread and lens hood.
The lens hood twists and locks onto the front end of your lens, protecting the lens and shading the glass elements. A lens hood can help eliminate glare and flare from entering your lens. It can also help protect the front lens element from dings, rain, snow, sand, and other unsavory substances.
Lens hoods come in metal, plastic and even rubber. Some are a solid ring, while others have a scalloped edge, depending on the focal length and diameter of the lens.
When the lens hood isn’t in use, you can screw it on upside down over the barrel of your lens.
#4 – Zoom Ring
The wider band closest to the front of the ring is the zoom ring. As you rotate it clockwise or counterclockwise, the lens zooms in and out respectively. This makes your subjects appear closer or farther away respectively because it changes the working focal length of the lens.
Some of the less expensive zoom lenses will physically get longer or shorter as you zoom in and out. The more expensive, professional-grade lenses still move, but you don’t see that part because it’s encased within the rest of the lens.
On Nikon and Sigma lenses, the zoom ring is the ring closest to the front of the lens. On Canons, Tamrons and Sony lenses, the zoom ring is toward the back.
Prime lenses, or lenses with a fixed focal length, don’t have a zoom ring.
#5 – Selected focal length
On a zoom lens, this scale shows your current focal length, or how far in or out you are zoomed. Knowing your exact focal length can be important for eliminating blur from #5 – camera shake and in some elements of night and astrophotography.
#6 – Distance Scale and focusing range
This is something you probably won’t use on your lens, at least for a while, while you are still learning lens basics and how to operate your camera. The distance scale indicates the distance from the lens where the objects will appear in focus. The scale goes from the lens’s minimum focusing distance at one end to infinity at the other. These scales show you have much depth-of-field (how much of your image is in focus from front to back) you will have at a given aperture.
Not all lenses have a focusing scale. Some that do only show one or two aperture values.
For a detailed explanation of the distance scale, see the video at the end of this tutorial!
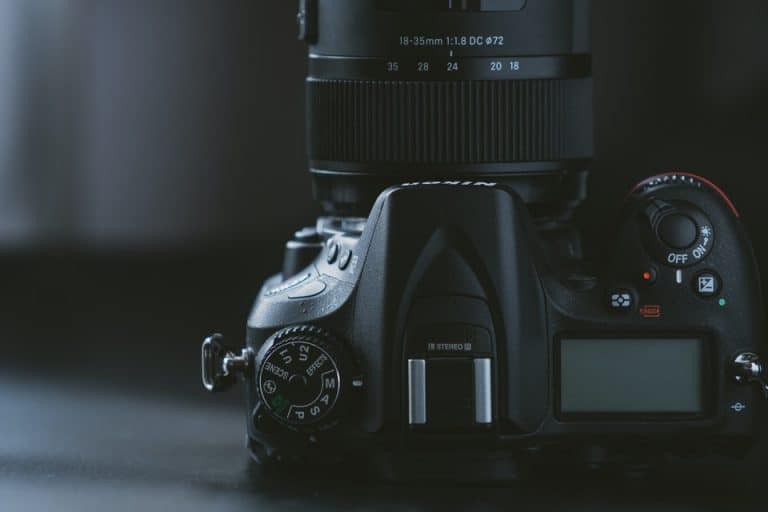
#7 – Lens Information
Lens manufacturers print all the information you’ll need to know about your lens right there on its barrel. You’ll see writing like AF-S Nikkor 24-120mm 1:4 G ED or Canon Zoom Lens EF 24-105 1:4 L IS USM.
But what does all the gobblety gook mean? (Let’s be honest, it’s not that complicated, I just wanted an excuse to use gobblety gook in a tutorial).
Nikon, Canon, etc.
Obviously, Canon or Nikon is the brand of the lens. Other common lens manufacturers are Tamron, Sigma, Rokinon, Tokina, Sony, Leica, Fuji, Pentax, Olympus, Panasonic and Zeiss. Lenses are not interchangeable. You cannot, for example, use a Canon lens on a Nikon body or vice versa. Some manufacturers offer an adaptor allowing you to use a lens that’s a different brand of your camera. But you will need to purchase the adaptor or buy a lens made specifically for your brand of camera. Check to make sure that any lens you buy is compatible with your camera make and model.
1:4
This designation is two-fold. The first number, the 1, indicates the lens’s macro capabilities (magnification of an image to capture small details.) Most lenses will have a designation of 1, unless it’s a macro lens, then you might see numbers like 2:2.8 or even 5:2.8.
The second number, the 4 in 1:4 indicates the maximum aperture of the lens. This is what you’ll be most concerned about when you are just understanding lens basics and photography. Aperture is the opening in your lens that lens it light to your sensor (more on that below). Each lens has a maximum width it can open. The smaller the maximum aperture number, the wider the opening. Wider openings allow more light to travel through the lens into the camera and provide for a very shallow depth of field. An aperture of 1.4 is a wider physical aperture than an aperture of 2.8, even though the number is smaller.
If you have two numbers on your lens, like 3.5-5.6, it means you have a variable aperture lens. The maximum aperture changes with the focal length of the zoom.
For more on macro lenses, click here!
AF-S, ED, etc.
The other letters on the lens description before and after the brand and aperture describe other characteristics of the lens, such as whether it’s a crop or full-frame lens, special coating or vibration reduction. Each manufacturer uses different terms and abbreviations. I’m not going to go through all of them right now, but if you head over to Lens Tests, they cover most of them better than I could.
# 8 – Focus ring
The focus ring allows you to control the camera focus manually. Use it to fine-tune focus as needed when your camera is in manual focus.
Some lenses, such as the one pictured, have instant manual focus override. I can autofocus using my camera’s shutter or back-button-focus function, then adjust focus using the focus ring without flipping the focus lock switch.
Other lenses, such as the 18-55 mm kit lens doesn’t have focus override. You need to flip the switch first. And some lenses, such as my Tokina 100mm f/2.8 lens have a clutch focusing mechanism. I have to pull the clutch forward to focus manually and then push it back to engage the autofocus once more.
This ring is usually narrower than the zoom ring to differentiate the two.
#9 – Alignment dot
Pay attention to the little white or red dot toward the bottom of your lens barrel. It helps you seat the lens on the camera correctly. Match up the dots, seat the lens in the camera and twist the lens clockwise. Voila! A functioning lens. To take the lens off, press and hold the lens release button on your camera and twist the lens counterclockwise.
#10 – Rear Lens Element/Mount
At the end opposite the front glass is the rear lens element and camera mount. This is how the lens snaps into the camera. The little metal nubs are called the contacts. That’s how the camera talks to the lens to adjust aperture, focus, etc.
The lens mount can be made from plastic of metal. Metal mounts are more durable and sturdy. Plastic mounts are more common on less expensive lenses.
#11 – Serial Number
Each lens is marked with a serial number. You’ll need this number for your warranty, tax records and insurance purposes.
#12 – Vibration reduction
If your lens is equipped with vibration reduction or image stabilization, this switch will activate it. What is vibration reduction? It’s a technology built into the lens that helps eliminate blur from camera shake when shooting static subjects at slow shutter speeds. With the technology activated, you can handhold your lens and camera at two to four stops slower (use slower shutter speeds) than you can without vibration reduction.
Vibration reduction is Nikon’s term. Canon calls theirs image stabilization. Each lens manufacturer uses a little bit different term, but the technology works the same.
Additionally, your camera might have different kinds of vibration reduction built into it. This lens has a normal and active mode. Normal mode is for shooting still subjects from a still platform. Active is for shooting still subjects from a moving platform, such as a running vehicle or vibrating ground.
Not all lenses have vibration reduction. It’s more common on higher-end zoom lenses and telephoto lenses.
I leave vibration reduction turned off unless I am in a situation where I know I need it.
Check out our tutorial on vibration reduction and 6 things you might not know about image stabilization.
#13 – Manual/Auto Focus switch
Some lenses have a switch to change from auto-focus to manual only focus. If your lens doesn’t have this switch, don’t worry. Your camera will!
If you all of a sudden can’t get your camera to focus, check to see if you’ve accidentally flipped this switch.
Other Lens Features
Other lenses have special features, such as focus limiting, focus locking buttons and tripod mounts. These aren’t as common as the items described above but still important when discussing lens basics.
Focus limit switch
This switch determines the range of the autofocus. When the focus limit is enabled, the limits the focus of the camera to objects that are further away. Engaging this switch prevents the lens for searching the entire focal length of the lens to achieve focus. It makes finding and locking in focus faster. Not all lenses have this switch. You most commonly see them on telephoto lenses and macro lenses. I leave this switch turned off unless I have a specific reason to turn it on.
Focus lock button
There are a few telephoto zoom lenses out there equipped with a photo lock button on the lens itself. My Nikon 70-200 f/2.8 lens has one, for example. This button, when pressed, locks your focus in on that distance until you change it. You can use this button to focus and recompose or to hold focus on a certain point in the distance to prevent the camera from focusing on something in the foreground. I don’t ever use this button, to be honest, because back-button-focusing does this for me.
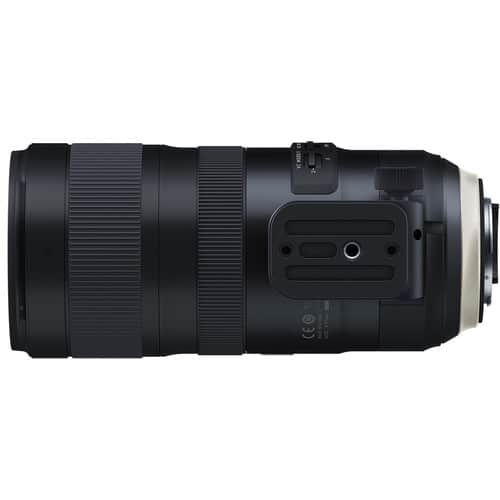

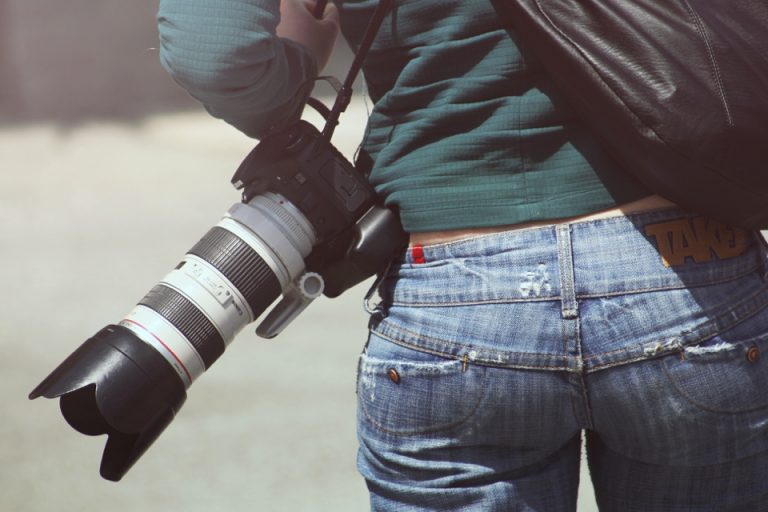
Tripod mount or tripod collar
Heavier lenses are usually mounted on the tripod instead of the camera. This keeps the weight of the heavy lens from placing too much pressure on the contacts between the lens and camera, thus damaging either.
These lenses are equipped with holes or a space on the lens to mount the tripod directly or to attach a tripod collar. The tripod collar is a metal clamp that wraps around the lens and has a foot at the bottom to connect to the tripod.
Weather sealing
Professional grade lenses often come weather sealed. This means it has rubber gaskets and a waterproof exterior that prevents water from entering the inside of the lens and wrecking the optics.
Lens Basics – Interior
There are also a few important parts inside the lens you’ll want to know about.
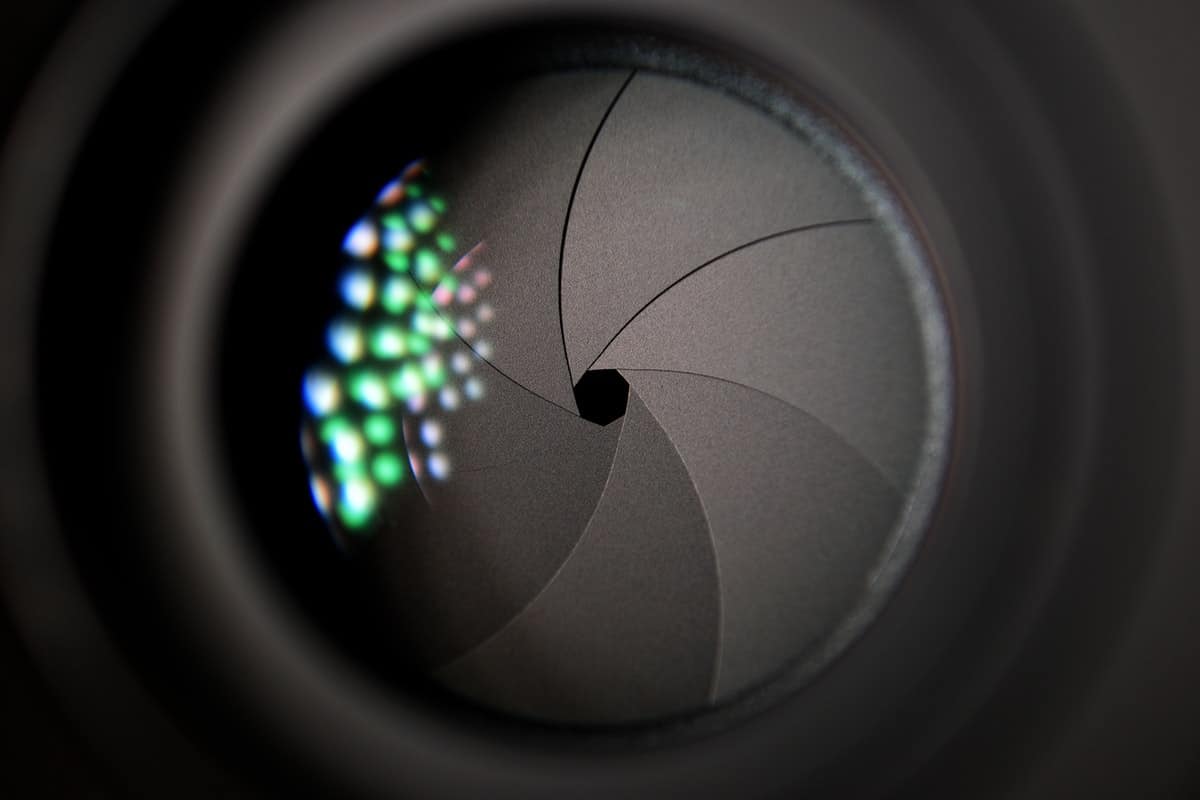
Lens Diaphragm blades
If you look down the barrel of the lens, you’ll see a small hole, made up of overlapping blades. Those are the lens diaphragm blades and they control the size of the aperture opening. The number of blades that make up your aperture ring affect the shape and characteristic of the bokeh in your image. (Bokeh is the orb of out of focus light in an image.)
The more blades, the better the bokeh, generally speaking. The blades also affect the quality and shape of sunstars in your images.
Aperture opening
Those diaphragm blades create the aperture opening. Aperture affects how much light is coming through the lens. It also controls depth-of-field, or how much of your scene is in focus from front to back. The aperture can be changed via the camera. Some lenses also have a dial on the barrel that changes the aperture manually.
Not sure about aperture size and how it affects your images? Read our tutorial!
We talk a lot as photographers about understanding your camera. But part of making great images is understanding lens basics. Take some time to review your lens and learn how it works and what it can do. If you are considering purchasing a new lens, decide what functions you will really need. That way you aren’t paying for a feature you’ll never use. With some practice and reading, you’ll be on your way to mastering lenses, cameras and the world of photography.