Learn why photographers love open shade for soft, flattering portraits!
Find open shade they said. It makes for better portraits they said. At least that’s what photographers will tell you right after they tell you to shoot during golden hour. And open shade does make for better images. But what the heck is “open shade” anyway and why is it so great for portraits?
Looking to improve your photography? Just enter any questions you have about improving your photography below and hit send and get answers & feedback instantly - for FREE! Submit QuestionsIn this tutorial, we’ll talk about what photographers mean when we say find open shade, how it can help your portraits, where to find it and how to shoot it. With some practice, you’ll learn to see your shooting environment in a whole new light. Wow, that was a bad pun. But still, open shade is awesome and you should use it.

What is open shade?
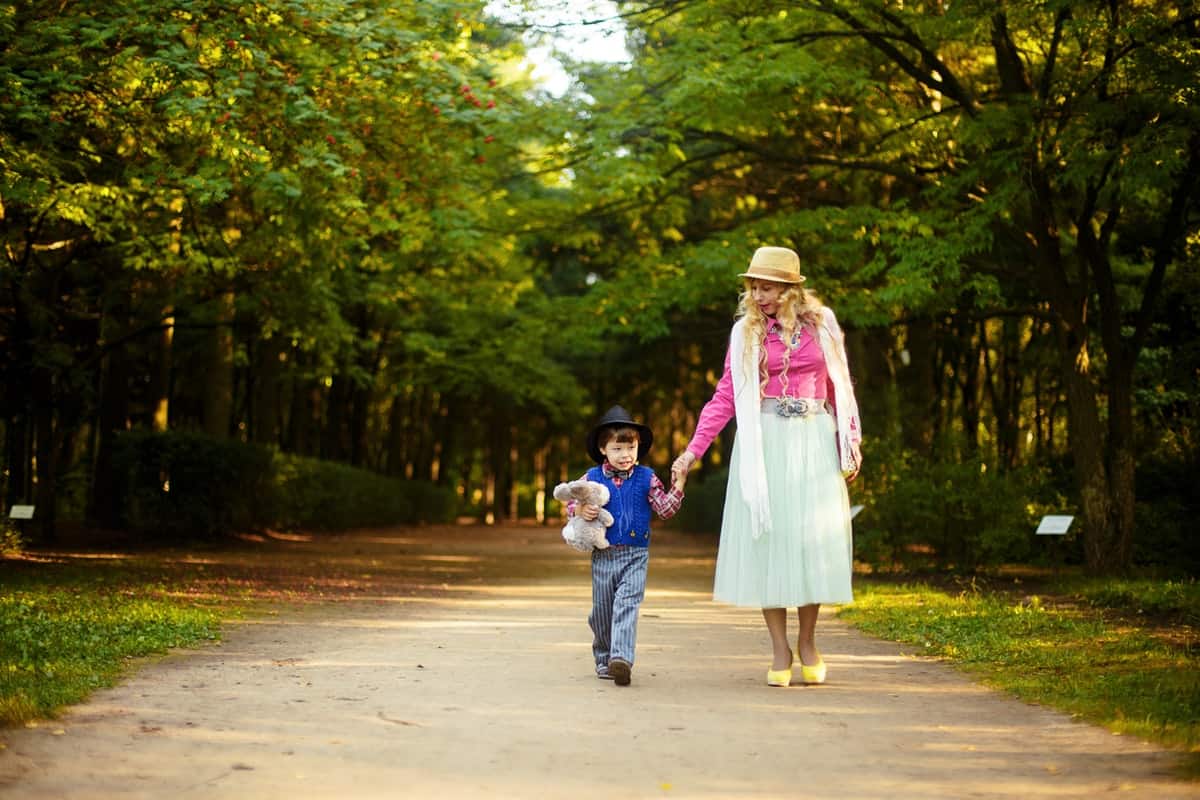
Outdoor photographers are always on the hunt for open shade. Open shade means your subject is standing in the shade looking out toward open sky. Direct sunlight isn’t hitting your subject but instead is being reflected back toward her.
Why is open shade so great?
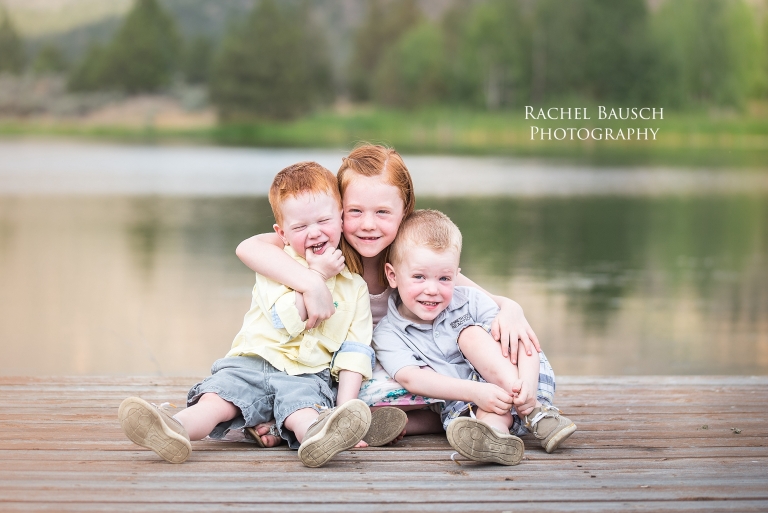
Photography is many things, but at its heart is light. For portraits, such as family portraits or senior portraits, we want soft, flattering light. Direct sunlight is what photographers call harsh. It’s too overpowering, it makes your subjects squint, there isn’t much gradient between your shadows and your lit portions and what shadow are there aren’t flattering.
Open shade, by contrast, gives us more even, softer lighting. When done correctly, it also puts great catchlights (those small white specks that makes ‘em twinkle) in your subjects’ eyes.
Open shade also helps us avoid hotspots, or really bright areas of an image where we lose all color. Hot spots can be distracting and take away from the beauty of your subject.
Photographers call it “open shade” to differentiate it from what might be called deep shade, where there’s very little ambient light. Open shade would be
 Where can you find open shade?
The best way to find open shade is to look down! See the areas of the ground where the light meets the shadow? That’s open shade.
Anything that comes between you and the sun can create open shade. Clouds, trees, buildings, bridges, and other structures can all create open shade. My favorite open shade is created by a thin cloud layer because it turns the whole sky into one big softbox!
The best open shade is bright and solid, with little or no dappled light. Dappled light is spotty light, where little pockets of light come through, making the ground or your subjects look spotted. The image below is an example of dappled light creating pockets of light on your subjects.
How to Shoot Portraits Using Open Shade
First, only shoot in open shade when necessary! If you’ve got an overcast day or are shooting in golden hour where the sun is low and soft, open shade might not even be needed.
Second, look for solid open shade with little or no dappled light.
Then place your subjects toward the edge of the shade, fairly close to where the shade meets the light. This allows you to keep your subjects in shade while lighting them with reflected directional light. It also helps create some separation between your subject and the background, which can help if you’re trying to create a creamy, non-distinct background or use bits of light to create bokeh orbs.
Use a reflector
Look for natural reflectors to bounce some of that light back toward your subject. The sides of buildings, light-colored sidewalks, even water can all reflect a bit of extra light back toward your subjects. Just be sure the light coming off a building isn’t throwing a color cast on your subjects. Redbrick walls can reflect light, for example, but will give your subject’s skin tone a reddish or pink hue that you don’t want. Grass can also reflect light back toward your subjects but often throws a green tint on skin.
You can also use an actual reflector, like this one, to bounce light back toward your subject. You can put the reflector on the ground flat in front of your subjects, or leaned up against your legs or camera bag. For the best results, I like to have an assistant hold the reflector up high and reflect the light back down toward my subjects. That puts the catchlight toward the top of the eyes, which is more natural-looking to me. You can use a reflector like this purchased from a camera store or sight. I’ve also used a white sheet and white foam board on occasion!
That extra bit of light bounced back into your scene is what helps give your images a bit of pop. It keeps them from being flat by creating a hint of contrast between your subject and the background and can reflect enough light to put a catchlight in the eye.
Once you have an area that looks favorable, position your subject and look through the viewfinder of your camera. Make sure that there aren’t any hotspots in the background or foreground that will distract the viewer’s eye from your subjects. Try to compose your image so that there is even lighting throughout the frame.
What about white balance?
I prefer to set a custom white balance for all of my images using a gray card. You can also use your camera’s “Shade” preset. I find that auto-white balance can add in too much magenta if I’m shooting in the shade of trees and will change slightly from frame to frame if I’m moving around or adding different subjects to the image.
For more on auto-white balance and why it can hinder your images, click here!

Using shade and sun!
For me, some of the most dynamic portraits combine shade and a bit of directional light. I’ll often look for areas of shade where, depending on where I position myself, I can leak a bit of light into my portraits. Allowing light to peek through and hit your subjects from behind creates what we call backlighting. Standing where the sun actually hits your lens and reflects back toward the subject can create a lovely haze. Allowing a bit of sun to leak through into your scene so that you see its’ rays can create a lovely sun flare.
Experiment with shooting your subjects in full shade and in a combination of shade and sun. See which look you prefer and use that technique to create depth and interest in your images.
Check out our tips for how to shoot in shade and sun at golden hour!

What if there’s no shade to be found?
Sometimes, there is simply no shade to be found. What should you do if you simply can’t find open shade?
Create your own by putting the sun at the back of your subject. This keeps human and animal subjects from squinting into the sun and keeps the harsh sun off their faces. If the sun feels like it’s directly overhead, look at the shadows on the ground. Point your subject’s face in the same direction his shadow is cast to help keep harsh sun off his face.
Play with the subject’s position slightly and see if you can use the sun to create some rim lighting along the hairline. In the position above, the photographer placed the light to the left and back of the subjects. It’s creating some pretty lighting on mom’s hair and keeps the subject from squinting into the sun.
Don’t forget to make use of those natural reflectors! Again, sidewalks, buildings and water can all bounce light back toward your subject to make them pop!
Click here for more tips on shooting in direct sunlight!
Open shade is just one of many different types of lighting photographers use to make the environment work for them. It helps create soft, even lighting on your subjects and can give you lovely images even if you’re shooting in the harsh daytime sun. The next time you find yourself wanting to take some daytime photos and the light is less than idea, look for those areas of open shade and make it work for you!