What’s the best camera to take to Disney World? What lens should I take to Disney World? We have some ideas to make the most of your time at the Happiest Place on Earth
About three years ago, my family started planning our vacation to Florida, including stops at Walt Disney World, central Flordia and the ocean. I spent a lot of time planning our trip, including choosing hotels and strategizing how to ride as many roller coasters as possible. But as the time for us to leave drew closer, I started thinking about our vacation in terms of photographs. As a professional photographer, I struggled wondering what’s the best camera to take to Disney World?
The truth is, there’s no one-size-fits-all answer for this question. But after frockling my way through a few theme parks and other awesome places in Central Florida, I have some thoughts that I’m happy to share with you. The best camera to take to Disney World is going to depend on your priorities!
I’ll help you decide just what those priorities are and give you a strategy to help accomplish those goals. These pointers are written from the perspective of a professional photographer, but they also hold true for any mom or dad who’s considering how to make the most out of their camera and time!
[amazon table=”635182″]
Can I take my camera to Disney World?
Disney World and Disneyland both allow cameras and photography equipment (within reason) in their parks. You are free to take pictures just about anywhere in the park, including most rides. For some of the rides, the Disney Cast Members will require you to store your camera in a pouch. Why? Some of it is because flashes popping constantly would be disruptive to the ride experience itself. Some regulations are to prevent injury to you or other guests. And some is for licensing reasons. Most of the shows prohibit filming and flash photography. A Cast Member will announce the rules as the show or ride begins.
You can use your camera at your Disney Resorts.
Drones and selfie-sticks are prohibited. You’re also limited to a tripod/monopod that fits into a standard backpack or is smaller than 6 feet when fully extended. The guards checking your bag probably won’t measure it when you enter the park but if you’re causing a traffic jam or disrupting the flow of traffic in the park, you’ll be asked to put it away immediately. Gimbals and other stabilizers are also allowed.
And know that while you are allowed to take pictures for your own personal uses, commercial photography of any kind is prohibited at Disney parks and resorts.
See all the Disney World Rules, Policies and regulations here.
So what’s the best camera to take to Disney World (or Disneyland?)
Your trip, your priorities!
Each of us has different priorities for our family vacation. Before deciding on the best camera to take to Disney World, you need to think about what are your overall priorities for the trip and how much time, effort and expense you are willing to go through for perfect photos.
If you want to create professional-caliber images that are magazine worthy, for example, your choices will be different than someone who just wants fun memories of an amazing vacation. But you’ll need to decide that for yourself. If you are traveling with a family or group, you should also run your priorities and plan past them, too. Make sure everyone is on the same page when it comes to what kind of photos you want out of your Disney trip and how much time and effort it’s going to take to make those happen.
Priority Type #1 – Pro Level Pictures
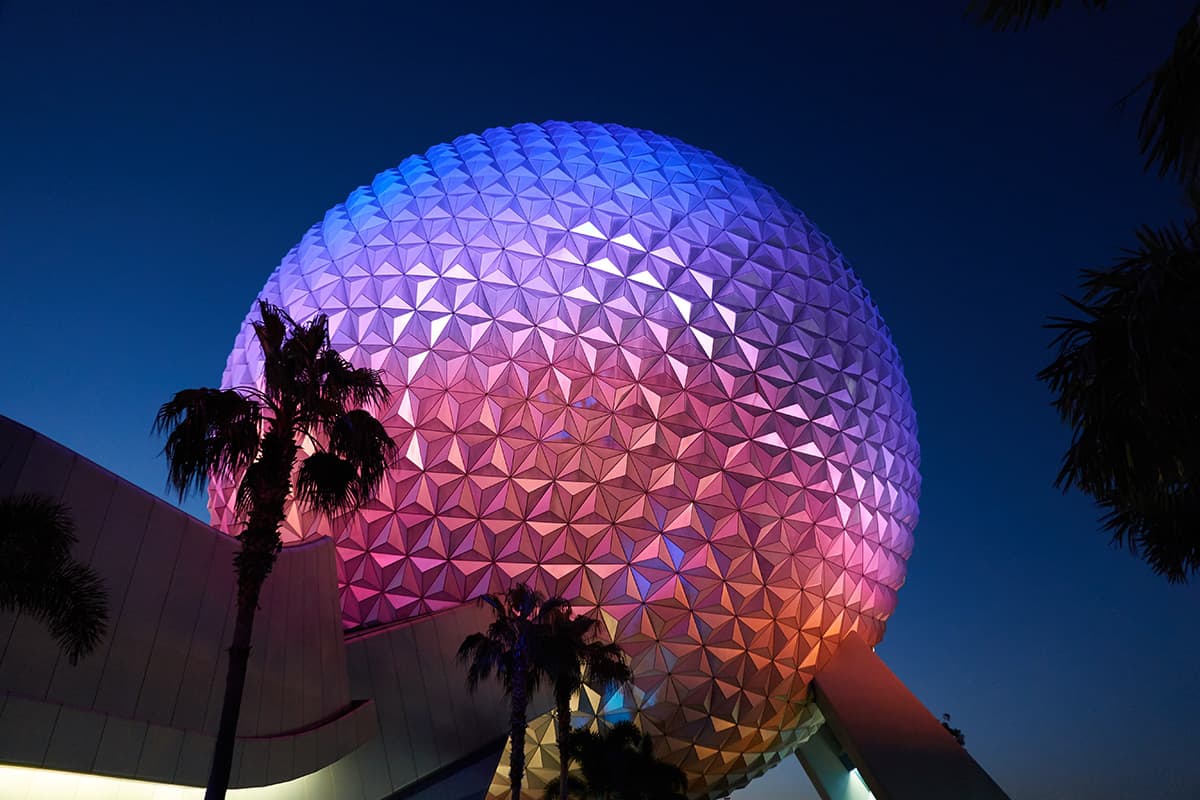
If you want the best pictures you can possibly get of your Walt Disney World Experience, the best camera to take to Disney World is your best camera. For a professional photographer, that probably means your full-frame camera and a high-quality lens or two. For an amateur photographer, it means your best DSLR camera and lenses. You’ll probably also want a small-tripod to capture night shots.
Camera suggestions would be something like the [amazon link=”B0060MVJ1Q” title=”Nikon D750″ /], [amazon link=”B0101RW3QK” title=”Canon Rebel T7″ /] or [amazon link=”B07NK1F7N4″ title=”Sony A7iii” /].
[amazon box=”B0060MVJ1Q” template=”horizontal”]
[amazon box=”B0101RW3QK” template=”horizontal”]
[amazon box=”B07NK1F7N4″ template=”horizontal”]
For lenses, I’d recommend a fast wide-angle and a compact portrait lens, like a [amazon link=”B00A35X6NU” title=”35 mm f/1.4″ /] and a [amazon link=”B006TAP096″ title=”85 mm f/1.8″ /]. A fast zoom that meets both of these requirements would also work, like the [amazon link=”B0076BNK30″ title=”24-70 f/2.8″ /].
[amazon box=”B00A35X6NU” template=”horizontal”]
[amazon box=”B006TAP096″ template=”horizontal”]
[amazon box=”B0076BNK30″ template=”horizontal”]
This is also a great strategy if you’re not a big fan of park rides or have experienced Disney World several times before…you can take pictures while the other people in your party ride the rides.
The advantages:
Bringing your best gear lets you nail the best images. True, it’s not the gear that makes the image, it’s the professional running it. But all other things being equal, a full-frame camera and your best, fastest lenses will net you the best photos. A fast lens will also let you shoot in low light situations, such as some of the restaurants or at night.
The disadvantages:
Pro-level gear is heavy and bulky. And any of the Disney World Parks (and Disney Land) are pretty darn larger. Like we logged 20,000 steps in a single day sort of big. It can be exhausting carrying around all that gear. You are risking your gear getting damaged or stolen. And Disney World is often crowded. You might not have the room you want to maneuver to get the shot you want.
Your bags will be searched when you enter the Disney Parks. If you have a big, bulky bag with lots of items, be prepared to wait while your bag is inspected. Then be prepared to put everything back in its proper place.
The other downside is that if you’re constantly messing with your equipment or focusing on your images, you might just miss out on some great times with your family. Don’t be so busy documenting your vacation that you aren’t participating in your vacation!
Pro tips
Disney touts amazing wildlife encounters at its Animal Kingdom. It can be tempting to take a big lens, like a [amazon link=”B077VZN3Z6″ title=”70-200 mm” /] or something bigger to capture wildlife that’s far away. And there are lots of really cool animals on rides like the Kilamanjaro Safaris. But the ride is really crowded , bumpy and moves along quickly. Your opportunity for safari like photos isn’t worth the extra weight and hassle of taking a big lens. If great wildlife photos is something you’re after, you’re better off researching some of the zoos or animal preserves in the area.
[amazon box=”B077VZN3Z6″ template=”horizontal”]
I’d also advise you to use a backpack type bag for your day at Disney. That should distribute the weight more evenly and make you more comfortable. I got annoyed with the pull of my super lightweight purse after a single day, let alone my camera bag!
And if you’re taking pictures with a big camera, be prepared to tell approximately 40 people that no, you aren’t a Disney photographer and no you can’t take their picture in front of Cinderella’s castle. People see the big camera and assume you’re a Disney employee.
Want tips on flying with your gear? We have you covered!

Priority Type #2 – Better than cell phone pictures
If you want your pictures to be better than average but don’t want to lug around a ton of gear, consider limiting yourself to a small kit. Choose your smallest DSLR or mirrorless camera and a lightweight lens. A [amazon link=”B07GW23M7T” title=”Nikon D3500″ /] and a [amazon link=”B085PGXDVY” title=”50mm f/1.8 lens” /] or a18-55 mm kit lens would fit the bill well! You’ll have the ability to set aperture, shutter speed and ISO and otherwise control your images. But you will have less gear to deal with and you won’t be risking $4000 in camera equipment to the Disney Gods.
[amazon box=”B07GW23M7T” template=”horizontal”]
[amazon box=”B085PGXDVY” template=”horizontal”]
For a super small footprint, consider an action camera like the [amazon link=”B01M14ATO0″ title=”GoPro Hero 5″ /]. You’ll have some really cool photo and video features in a super small package!
[amazon box=”B01M14ATO0″ template=”horizontal”]
The advantages:
You’ll have DSLR capabilities, photos that print well in large format and maximum editing ability if you shoot in RAW. But you’ll also have a smaller kit that fits in a purse or small camera bag and you aren’t risking damage or theft to your pro kit.
The disadvantages:
If you’re using a lightweight kit lens or crop-sensor body, you might find yourself in situations where you don’t have the low-light abilities that you might be used to with your full kit. And some crop-sensor bodies don’t offer the ability to change settings on the fly as easily as your full-frame camera.
And even a small DSLR is still sort of bulky. You’ll find yourself struggling to tuck even a small camera bag in the safe pockets on the rides.
Pro Tips:
Ditch your big camera bag for something smaller. It will protect your gear but not add bulk to your day. It doesn’t even need to be an actual camera bag. Any small bag that holds your camera/lens will work!
What’s a mirrorless camera, exactly? Read our tutorial!
Priority #3 – Enjoy the making the memories, not stress a camera
For our family, our trip to Disney World was an important family memory. It was my daughter’s first time on a plane, her first roller coaster and my husband’s first trip to Disney World. I decided it was more important to be present in the moment than to document it in pro-level fashion. For me, the best camera to take to Disney World, then, was my [amazon link=”B08BJCYKB4″ title=”cell phone camera” /]. If that’s your mentality, leave your camera at home and just rely on your cell phone for the pictures you want.
[amazon box=”B08BJCYKB4″ template=”horizontal”]
The advantages:
Just using a cell phone lets you travel fast and light. You won’t have to worry about having an extra bag searched, finding a place to store a huge camera when you’re riding Space Mountain or give yourself a backage lugging around extra weight. You can also be much more discreet when taking photos because you look like all the other tourists! You’re also free to actually enjoy the moments, take in small details and simply be part of your vacation instead of hiding behind a camera the entire time.
The disadvantages:
As far as cell phone cameras have come, they still aren’t the same as having your [amazon link=”B07H484HLT” title=”full-frame” /] or even a crop-sensor with a good lens. Your pictures won’t be the same as if you took them with your best gear. They just won’t. You won’t have the same low-light capabilities or zoom capabilities.
[amazon box=”B07H484HLT” template=”horizontal”]
There will be moments where you think “Oh, I wish I had my big camera.” But for me, those moments weren’t worth missing just simply enjoying being with my family.
Priority #4 – Prioritize special Disney moments with your better gear
Is there only part of your Disney experience that you really want to document? In that case, the best camera to take to Disney World might be both a full-frame and a cell phone.
For example, maybe you’ve booked lunch with Cinderella or Belle at her castle and want your best camera for that experience. You could take a bigger kit for that experience, and rely on your cell phone the rest of the time. Or maybe your dying to capture the fireworks at Park Closing. Leave your camera at home during the day, but take it with you when you return for the park closing ceremony.
You get the best pictures of the most important moments but aren’t lugging heavy gear around for days and days.
Disney Photo Pass
No discussion on the best camera to take to Disney World would be complete without discussing the Disney Photopass option. These are images taken by Disney Cast Members of you and your party and available to you for purchase as a whole package or individually.
Disney offers a professional photography service at it’s parks. Disney photographers will take your picture, then link them to your Disney account using your Magic Band wristband or your photo card.
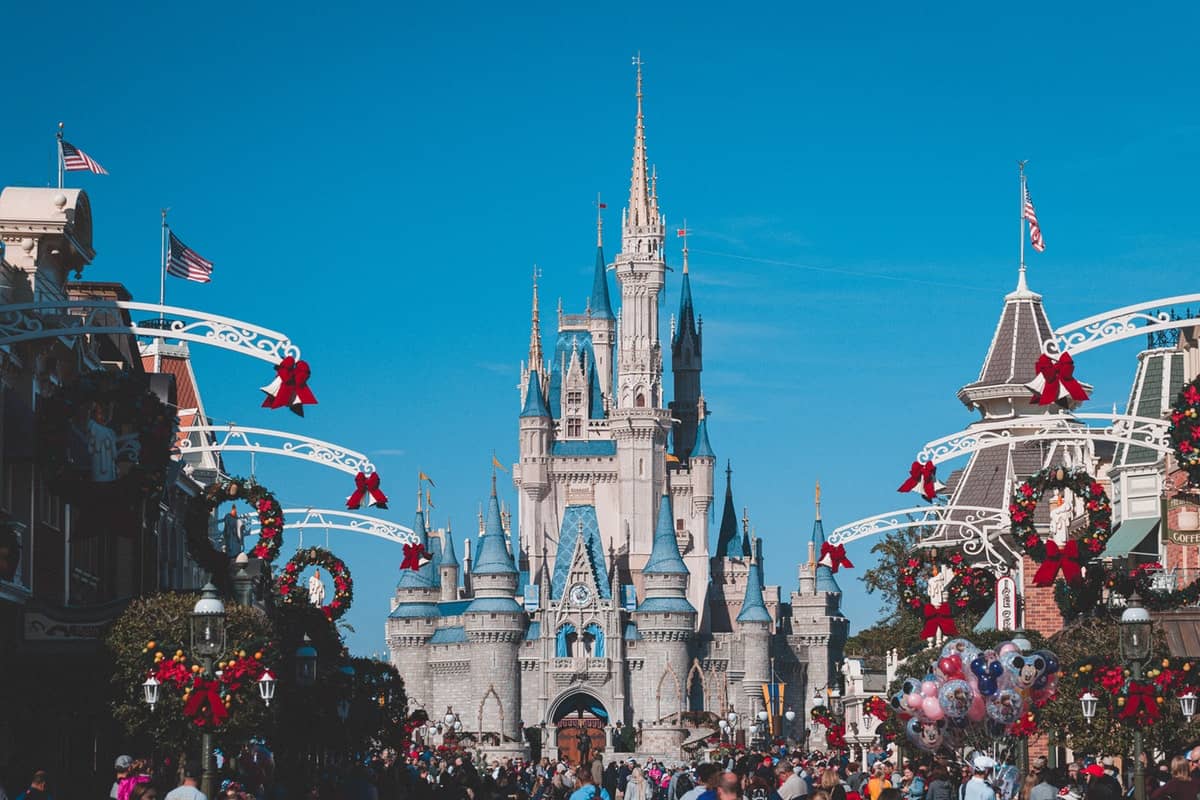
Photographers are stationed throughout the parks at iconic locations, such as in front of Cinderella’s castle, at character meet-and-greets, restaurants, resorts, etc. There are also automatic cameras that capture you on the rides themselves, like Seven Dwarves Mine Trains or Haunted Mansion. Some ride-based cameras automatically sync the photos to your account. For others, you visit a kiosk immediately after you get off the ride and link your pictures manually.
It’s free to have all of these pictures taken. But buying the photos isn’t cheap. At Disney World, the Photopass costs around $170 for all the photos from your trip. At Disney World, it’s slightly cheaper at around $70. Single images start at around $15 for ride photos and $40 for other photos. You can save some money by pre-ordering the Photopass when you first make your reservations with Disney, but it will still cost you $120 for photos of your Disney Florida experience.
What camera do Disney Cast Members use?
The photographers shooting for the Photopass use exclusively Nikon cameras. If you’re a Canon user and want to talk shop, you’re out of luck.
Beyond that, I saw lots of different Nikon camera bodies and lenses being used. I’m sure ach photographer has their favorite, just like we pro photographers do.
[ad id=’3′]
Is the Disney Photopass Worth It?
I can’t tell you if Photopass is worth the expense to you or not. For some, $170 seems like a huge expense. But then again, how much do you charge for a package that includes all-inclusive digital images? Probably more than $170!
I chose not to purchase the Disney Photopass. That’s not to say it isn’t a good value or worth it. It just wasn’t something I felt we needed. The pictures were fun to look at, but I don’t need 50 pictures of our five trips on the Seven Dwarves Mine Train. And honestly, we had similar pictures we took ourselves on our cell phones.
I found the quality of the Disney Photopass images to be highly varied. If you’re a pro photographer, you’ll recognize the other pros working in the park for Disney. Our pictures from Bippity-Boppity-Boutique were amazing. The photographer there worked angles, used the mirrors for some framing and did a great job of really telling a story. Other photos, like our picture on Mainstreet USA, are washed out and really pretty awful. I’m not gonna lie, it took everything in my power not to tell the photographer to turn off her flash because she didn’t need it!
Smile, you’re on camera!
The ride-based photos are fun because you get to be in the photo. You’re also getting images you yourself probably couldn’t capture. And if you’re the designated photographer of your group but your group splits up, there will still be photos of the rest of your group!
But the Cast Members can’t be everywhere. If you have your heart set on a photo at a certain location, you should definitely have a Plan B. Because there might not be a Cast Member available when you want them.
And keep in mind that just like your equipment, Disney equipment can and does fail. Photographers can have equipment malfunctions just like you and I as pro-photographers. The linking system can go haywire. Or they might simply miss focus and deliver a really crappy image. If the moment is really meaningful to you, I’d suggest taking a photo yourself as well.
Pro Tip:
- If you want to be in your photo but aren’t planning on purchasing the PhotoPass, just hand your own phone or camera to the Disney cast member. They are happy to take a photo for you with your device!
- We skipped the Photopass but picked our 40 favorite images and made a Disney-themed photo book after our trip for $40. We were able to combine our favorite photos taken by Disney photographers with our own images into one book. It’s a great way to snag your favorite Photopass images for a little less and get them in printed form!
Other Disney World Photography Tips
Here are a few other photography tips based on our Disney World Experience!
- While Disney Parks allow monopods and tripods in their theme parks, you might find you don’t have room to use them. We stayed to enjoy the closing fireworks and performance (which I HIGHLY recommend) at Disney World’s Magic Kingdom. We couldn’t hardly find room to stand on Main Street USA, let alone set up a tripod. Disney security asked several photographers to put their tripods away because they were a safety issue.
- Have your settings ready to go before you get on the rides or meet a character. Things move pretty quickly and you want to be ready to shoot, not tweaking your ISO.
- The best time to get a relatively unobstructed view of elements of the theme parks is the hour before the parks open. We were allowed into Magic Kingdom and Animal Kingdom about an hour before the official park opening. We couldn’t access every area of the parks, but the main spaces (Main Street USA, Tree of Life Area, etc.) were open and not too crowded!
- If you’re planning on buying tickets for a character meal anyway, make it breakfast. That way you get into the parks even earlier and can beat the crowds for some great shots in low light.
- The theme parks all have lockers for guest use. If you want to take your camera for part of your Disney experience, use the lockers to store your gear in a safe place while you enjoy rides!
- Don’t forget about using your camera while you are resort hopping or enjoying time outside the theme parks. All the Disney resorts we visited were amazing!

Why I loved my Disney World Photo strategy
Initially, I planned on taking my [amazon link=”B01A7Q0J3Y” title=”D500″ /] and [amazon link=”B01BPH5HK4″ title=”24-120mm lens” /] with us on Day 2 of our trip to Disney World’s Magic Kingdom and using it to capture images of Cinderella’s castle and the fireworks and rely on my cell phone the rest of the time. After an entire day at Disney, I decided to stick with just the camera phone for the duration of our visit.
[amazon box=”B01A7Q0J3Y” template=”horizontal”]
[amazon box=”B01BPH5HK4″ template=”horizontal”]
Were there times I wanted my big camera? Yes.
Do I regret not having it? Absolutely not.
It was actually liberating not having my gear hanging around my neck or constantly worrying about keeping it safe. My family also loved that I was present in the moment with them, instead of lost behind my lens taking macro shots or messing with settings. My daughter actually said “It’s nice to just have you here, not “mom the photographer.”
Gah.
For me and my family, living the moments was more important than documenting them. I don’t regret not taking a DSLR or GoPro with me. But you have to do what’s right for you, your family and your priorities.
Regardless of what camera you take, I hope your journey to the most magical place on earth is as magical and amazing as it can possibly be.
