
Once the sun sets, many photographers pack up their gear and retire for the evening. However, for the sky photographer, their job has just become far more interesting.
Looking to improve your photography? Just enter any questions you have about improving your photography below and hit send and get answers & feedback instantly - for FREE! Submit QuestionsOur eyes see many beautiful features in the night sky. Between the majesty of the Milky Way and the lone stars twinkling brightly, the dark provides a visual feast.
Nevertheless, DSLR cameras can capture far more than we can comprehend, digitizing the heavens right in our fingertips.
What is Night Landscape Photography?
Night landscape photography is photographing a natural setting past dark.
Modern DSLR cameras employ high ISO capabilities, long exposure, and quick aperture lenses to take detailed photos.
Nighttime photography can be a challenge initially, particularly with annoying noise and field depth issues that lower the imagery’s quality.
Since daytime photography comes with a guaranteed light source, you do not have to worry as much about exposure settings to get a high-quality photo. By understanding your camera, you can master photographing landscapes at night every time.
Night Landscape vs. Astrophotography
Night photography refers to shooting nighttime scenery with a starry sky. Astrophotography only includes the stars for astronomy purposes.
You do not have to worry about exposure settings with astrophotography because you will solely be focusing on the stars. Focusing on the stars defocuses the landscape, so long exposure times are needed for nighttime photography, so both are clear.
Short exposure times will designate the stars as fixed points instead of concentric circles.

Where Is the Best Spot to Shoot a Nighttime Landscape?
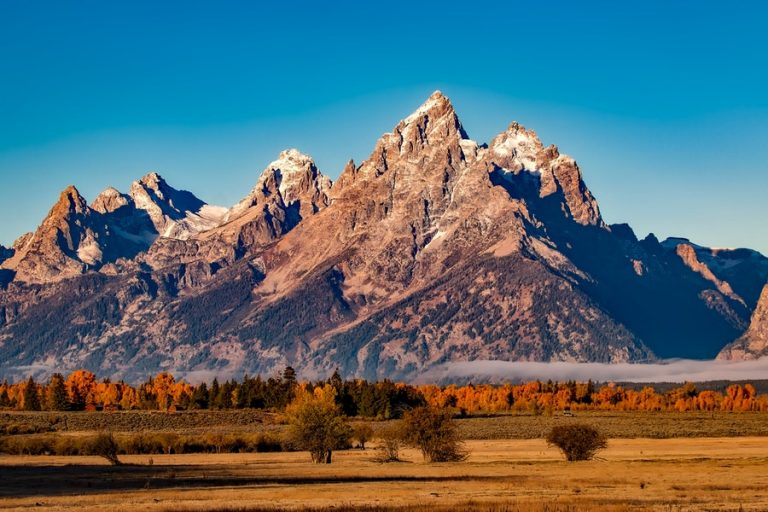
The best spot for shooting a nighttime landscape has little light or air pollution, gorgeous natural views, and plenty of space. Unfortunately, this location depends on where you live.
You can view the galactic core between April and September in the Northern Hemisphere. The closer to the equator you live, the better your view will be.
One app that can help you find the right time and place for an excellent view of the moon and stars is PhotoPills. This app lets you plan your next photoshoot.
Ensure this spot has a worthwhile natural scenery as well for a fantastic total image.
Preferable Conditions for Shooting At Night
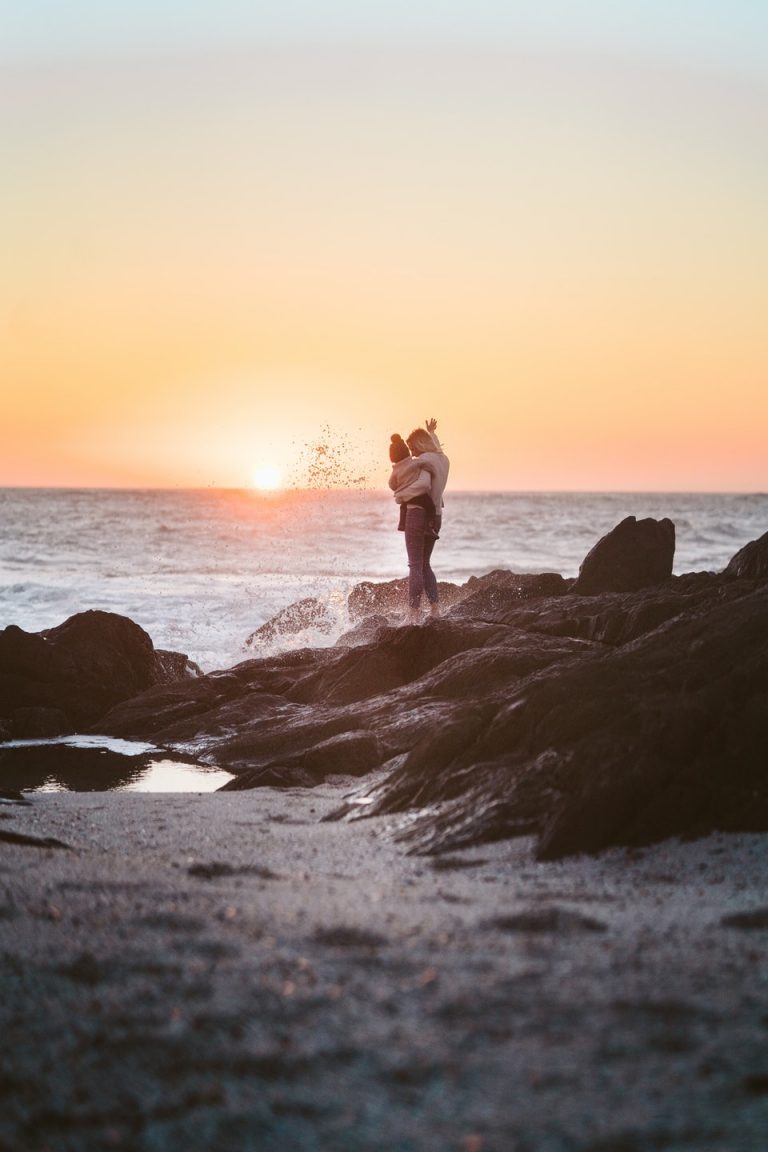
When shooting at night, look for a time when the moon will be high and bright in the sky. With full lunar visibility, the moon will act like the sun to illuminate your photos.
Shooting photos when the moon is rising or setting allows you to see stars bathing in the soft, warm, moonlit landscape.
If you cannot wait for high lunar visibility, consider utilizing an artificial light source. A headlamp or strobe can illuminate the image. Make sure to light up the landscape from an angle for better depth and shadows.
Choose a day with minimal light and air pollution and cloudless skies. Try to go for a spot at a high altitude to get a closer look at the stars.
Recommended Equipment
Even if money is tight, there is plenty of gear to complement the perfect night photography sky.
Night sky photography requires more equipment than daytime, but don’t fear. Gear is only one part of the equation. Planning, composition, and editing skills contribute significantly to the excellence of a photograph.
Camera
The best camera for a nighttime landscape is full-frame because it has little noise, even at high ISO. However, any recent APS-C, 4/3, micro-4/3, or even compact cameras can work.
As long as it has a fast shutter speed, wide lens, and manual focus, you can’t go wrong.
Other essential factors to consider are
- The ability to photograph in the raw file format
- Quality SD cards
- Long exposure noise reduction
- High performance at varying ISO
- Bulb mode
- Remote shutter trigger
- Intervalometer
- Strong battery life
A 1-inch sensor will help, but the above capabilities are more vital to the performance.
Lenses
Speed is the most crucial feature of the lens. The aperture should be between f/1.4 and f/3.5 and have manual focus.
Optical properties like vignette, sharpness, astigmatism, and chroma improve the photo as well.
As mentioned before, wider lenses are better. Try not to exceed 50 mm, and look for one that can have filters mounted on it.
Lens Filters
Filters help to remove the unwanted wavelengths of light to optimize the dark sky.
They are especially crucial if you cannot escape light-polluted areas because they will block out the orange glow you cannot edit.
All filters reduce exposure by one stop, allowing for long exposures and increased ISO.
Other filters block out the moonlight if that is what you want.
Be careful to avoid interference filters because they produce color bands on wide angles lenses.

Tripod
Unless you are a statue, you need a sturdy tripod. Look for one that allows for shooting from below to high above your head.
One that lets you attach a weight will help with stabilization in windy weather.
Exposure Settings
Altering the exposure settings will help reduce the noise and field of depth of your photo. Many are out of your control in night photography, but optimizing them can drastically improve your image.
ISO
Nighttime photography requires high ISO settings. You will need to use ISOs of 800 or higher for good results on most cameras.
This number varies depending on your lens and the amount of ambient light, but you typically won’t be able to go lower.
High ISO improves the camera’s light sensitivity, but it generates noise that distorts colors and adds a grainy effect.
Full-frame cameras will reduce the noise with these ISO settings, but you will have to clean the noise with editing software if you do not have one.
Aperture
Night landscapes need wide apertures as you will need to capture all the available light to illuminate the scenery.
Unfortunately, wide apertures lower the field depth, so you will need to compensate with hyperfocal distance. Hyperfocal distance is the closest you can focus while maintaining a depth of field of infinity.
Shutter Speed
Slow shutter speed will increase the light that gets to your camera, but these long exposures may generate noise. Even with an advanced camera that eliminates noise, the Earth’s movement during a long exposure can smear the stars into lines rather than dots.
To create star points, limit the exposure time. The wider the focal length, the longer the exposure time, so a wide lens comes in handy here. A good rule of thumb is to make the time no longer than 600 divided by the focal length.
Easy Night Photography Rules
We’ve talked a little math so far, but here are a few more simple mathematical rules to keep in mind when completing a shooting at night.
Exposure Time = Detail / (Crop Factor * Focal Length)
Your detail value can be either 400, 500, or 600. At 400, you will have no star trails and be able to print in large format. At 600, you see short circular trails with dot-like stars. This resolution is low. 500 is a compromise between the two.
Your camera predetermines the crop factor, and the focal length is the length of your lens. Wide lenses allow you to have long exposures, especially compared to telephoto lenses.
ISO = (6000 * (f-number)^2) / (Exposure Time)
The f-number is the aperture value of your lens. It appears after the “f/” term.
In the case of digital sensors, you might want to overexpose the image slightly to get lots of data. You can correct the appearance with editing software without losing detail.
Exposing to the right, or overexposing, also decreases the noise of high ISO. Underexposing an overexposed photo can reduce the noise even further.
Overall, do not be afraid of enormous ISO values. You can always edit the noise out.

How to Capture a Great Night Shot
When trying to get a great night sky shooting, there are a few things to do to ensure you won’t be wasting your time.
Before Leaving
Before you go out for your shoot, make sure you complete a few tasks to maximize your night photography experience.
Create a checklist to ensure you have all the gear you need. Batteries, lenses, memory cards, tripods, headlamps, and your camera should all make it on the list.
Know your equipment well. Is your camera full-frame or not? What are its maximum ISO capabilities? Do you have a wide-angle lens? How fast is your aperture? What angle does your tripod shoot? Can you rotate your camera? Do you know your lens’s field of view?
Find the photography site. Check pollution maps and galactic core apps to find the regions with the best Milky Way visibility near you. Also, check the weather forecast for a comfortable photoshoot.
Find your lens’ infinite by manually focusing on the infinite in daylight. Mark this spot on the barrel so you can easily find it in the dark.
Always scout during the day to see how accessible the site is and whether the scenery is suitable for a starry background. The PhotoPills app will show you how that spot will look in the dark to further scout.
Clean all of your lenses at home and arrive early to explore potential photo spots in daylight.
Composing the Image
Composing a night photography image is quite similar to the daytime. The biggest challenge is the constricted focal lengths that hinder lighting the landscape to preserve exposure time.
It would be best if you waited for the right time of year to frame the Milky Way in your photo perfectly.
If you want stair trails, which appear as concentric circles around a focal point, keep Polaris in the frame.
Start Shooting Before It Gets Dark
To compose the perfect photograph, find the right spot during the day. The sun will set suddenly, and you may be able to get a few sunset shots in.
Shooting the same spot as the sun begins to set will provide a similar image but in tons of brilliant colors.
It will also be much easier to get an idea of what your photo will look like if you find the spot in broad daylight.
Consider Using a Cable Release
The slow shutter speeds and long evening exposures mean you will need a tripod for a steady photo.
However, if you do not have a tripod or cannot set one up in the location you are shooting, use a cable release while using slow shutter speeds. You will not have to use an auto timer and can still avoid shaking because the cable release will stabilize the camera.
If you use bulb mode, a cable release will help you keep the shutter open for as long as necessary.
Use Manual Focus
In the darkness, autofocus may prove to be utterly useless. Before embarking on a nighttime photography journey, brush up on your manual focusing skills.
You should try to focus on or just before infinity. We mentioned how to find it above.

Pack a Headlamp
A headlamp has many purposes. It will help you navigate your equipment, set up your camera and tripod, and light up the immediate region.
Headlamps can free up a hand and provide some selective lighting for your photo.
Bracket Exposures
Bracketing exposures help blend multiple exposures and processing HDRs. The bracketing will give a more dynamic range during photography in the night.
Bracketing prevents over or underexposing as you will be able to choose your favorite in editing.
Many cameras have exposure bracketing built-in.
Have a Stopwatch On Hand
In manual mode, many DSLRs will cap out at 30 seconds long exposures. You may need to switch into bulb mode for longer times, as bulb mode will keep the shutter open. Bulb mode is where the cable release comes in handy unless you don’t mind holding the button the whole time.
A stopwatch comes in handy to track how long the shutter is open. Most smartphones have the capability of acting as a stopwatch so you can time your exposure correctly.
Use Larger Aperture Settings
Due to the lack of usable light, you will need to use large aperture settings to illuminate your scenery as much as possible.
It would help if you found the balance between field depth and available brightness. Start with an aperture of around f/5.6 and go wider from there, depending on how it looks.
Since wide apertures don’t always focus everything you want in the photograph, snap multiple focusing on the different parts, and blend them while editing.
Be Weary of the LCD
The LCD view screen can’t always be trusted. Its brightness contrasting with the dark of night may distort your perception of the image.
Instead, use the histogram to determine how effectively you exposed your pictures.
Shoot in Raw
Shooting at night in the raw file format will enhance the quality of your photo and preserve the image data. You will have more options when editing and be able to return the picture to its original form.
JPEG can distort the photo’s coloring and reduce the quality, so using raw will present the image more as it looked in nature.
Locate Your Focus
Use a flashlight, spotlight, or headlamp to illuminate a spot so the camera can focus.
A distant street lamp may provide a background focus.
Once you have locked in on a scene, your best bet is to use manual focus to avoid losing your spot.
Include Foreground Element
Foreground elements add interest to your composition. Depending on the lighting, it may act as a silhouette against the starry sky or the center of attention.
Using a light source, you can “paint” the foreground element to focus. This added interest will make your photos more dramatic and eye-catching while also showing off the stars’ beauty.
Try Painting With Light
When the shutter is open, use a headlamp to brighten your foreground element. Check to see if you like the result.
You can also set up artificial light sources on both sides of the object to illuminate it in the photo. Check that the artificial light looks somewhat natural.
It may take several tries to paint your picture correctly.

Make Sure to Take Test Shots
Take tons of test shots at various ISO levels to see where the noise level gets out of control. Use fast shutter speeds and overexpose so you can see everything going on inside the image before committing to prolonged exposure.
Experiment with foreground elements, apertures, locations, lenses, tripods, angles, and anything else you can think of to perfect the composition.
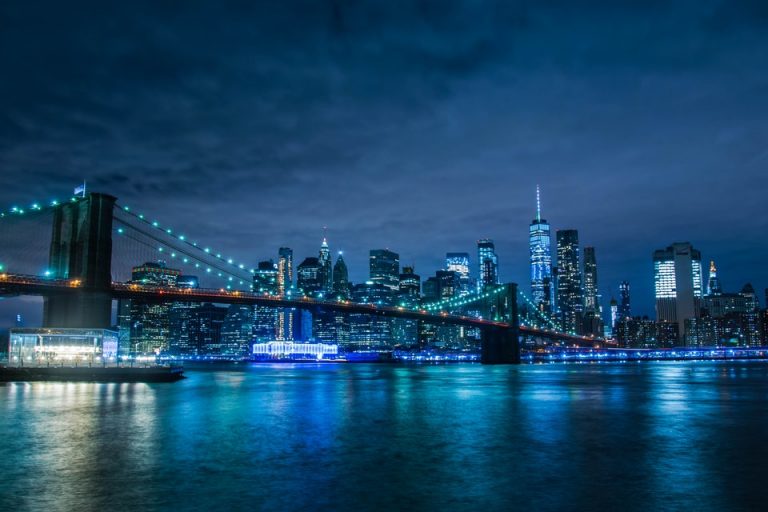
Ways to Avoid Other Lights aka Light Pollution
In the United States and the Western world, light pollution plagues most towns and cities, preventing you from getting a clear view of the stars without retreating to the country.
All the streetlamps, skyscrapers, and cars produce light that blocks your view of the sky. Going to the countryside will distance yourself from these over-industrialized regions and better see stars.
Check the Light Pollution Map to find a nearby region with little light blockage.
How to Shoot Different Nighttime Landscapes
When shooting different nighttime landscapes, you may need to alter your technique to capture star trails, the glorious Milky Way, and panoramas.
How to Photograph Amazing Star Trails
When shooting pictures of star trails, begin with a test shot with long shutter speeds. This image may look overexposed and grainy, but it will approximate the star trails.
Turn off noise-reducing settings, empty the memory card, and fully charge your battery. Use an intervalometer to take a massive number of short exposures. Then, stack the images together while editing to give trails.
Give your camera several seconds to cool between each shot. Once you have finished your sequence, put on the lens cap, and snap a photo to have a dark frame. Subtracting the dark frame during the edit will conceal hot pixels.
It takes around 30 minutes of sky recording for decent star trails. Generally, longer recording times further define your circular trails.
To preserve the battery, turn off the LCD and use the viewfinder if you can.
If you are shooting at night on film, star trails are perhaps the only night scenery you can take.
Capturing the Milky Way and Point Stars
Evaluate your maximum exposure limit to shoot point stars rather than trails. Adjust the ISO settings to overexpose your image.
Try to prevent blowing out the horizon and highlights, and don’t be scared to raise your ISO outside of your comfort level.
Reduce the noise with camera settings and edit the rest out.
When to Shoot Panoramas
When shooting panoramas, allow a 30%-40% superposition between shots. Learn the angular view field of your lens and turn your camera by half of this number to capture the panorama.
You can use a calculator to find the Angle of View.
Consider using the vertical view angle to speed up the panorama shooting process.
No matter what kind of night photography you plan to use, take multiple photos of each scene.
How to Make Your Night Sky Photos Pop
First, choose a white balance that suits your image best. Adjust black and white points to fix the exposure. You can follow this with basic color correction, like editing the saturation and contrast.
Experiment with sharpening and clarifying the sky to make the stars pop. Consider using a multi-frame noise reduction (MFNR) technique to clean up the photo further.
Using Noise Reduction
MFNR removes noise and clarifies details, optimizing your image quality. Using this technique, you take multiple photos of the same site, average them, and smooth the random noise.
This technique works best with still scenery while you are shooting. If your scenery is moving, adjust your camera between shots, or align them in Photoshop.
If you put a landscape in the photo, you will need to capture two sets of photographs, one focusing on the foreground and the other on the stars. Blend them separately for the best results.